Dream Home Roofers
1-855-610-9720
Get Free Estimate 1-855-610-9720
Free Estimate 1-855-610-9720
  • About us
    • Reviews
    • Careers
    • Financing
    • Blogs
    • FAQS
  • Services
    • Roofing
      • Replacement
      • Inspection
    • Gutters
      • Gutter Protection
  • Service Area
    • Turnersville, NJ
    • Voorhees, NJ
    • West Caldwell, NJ
    • King of Prussia, PA
    • Scranton, PA
    • Wilkes-Barre, PA
    • Laurel, MD
    • Fairfax, VA
    • Glen Allen, VA
    • Wilmington, DE
  • Current Specials
  • Contact Us
  • Menu Menu
Act Now to Get Our Current Offers. Click here for details.
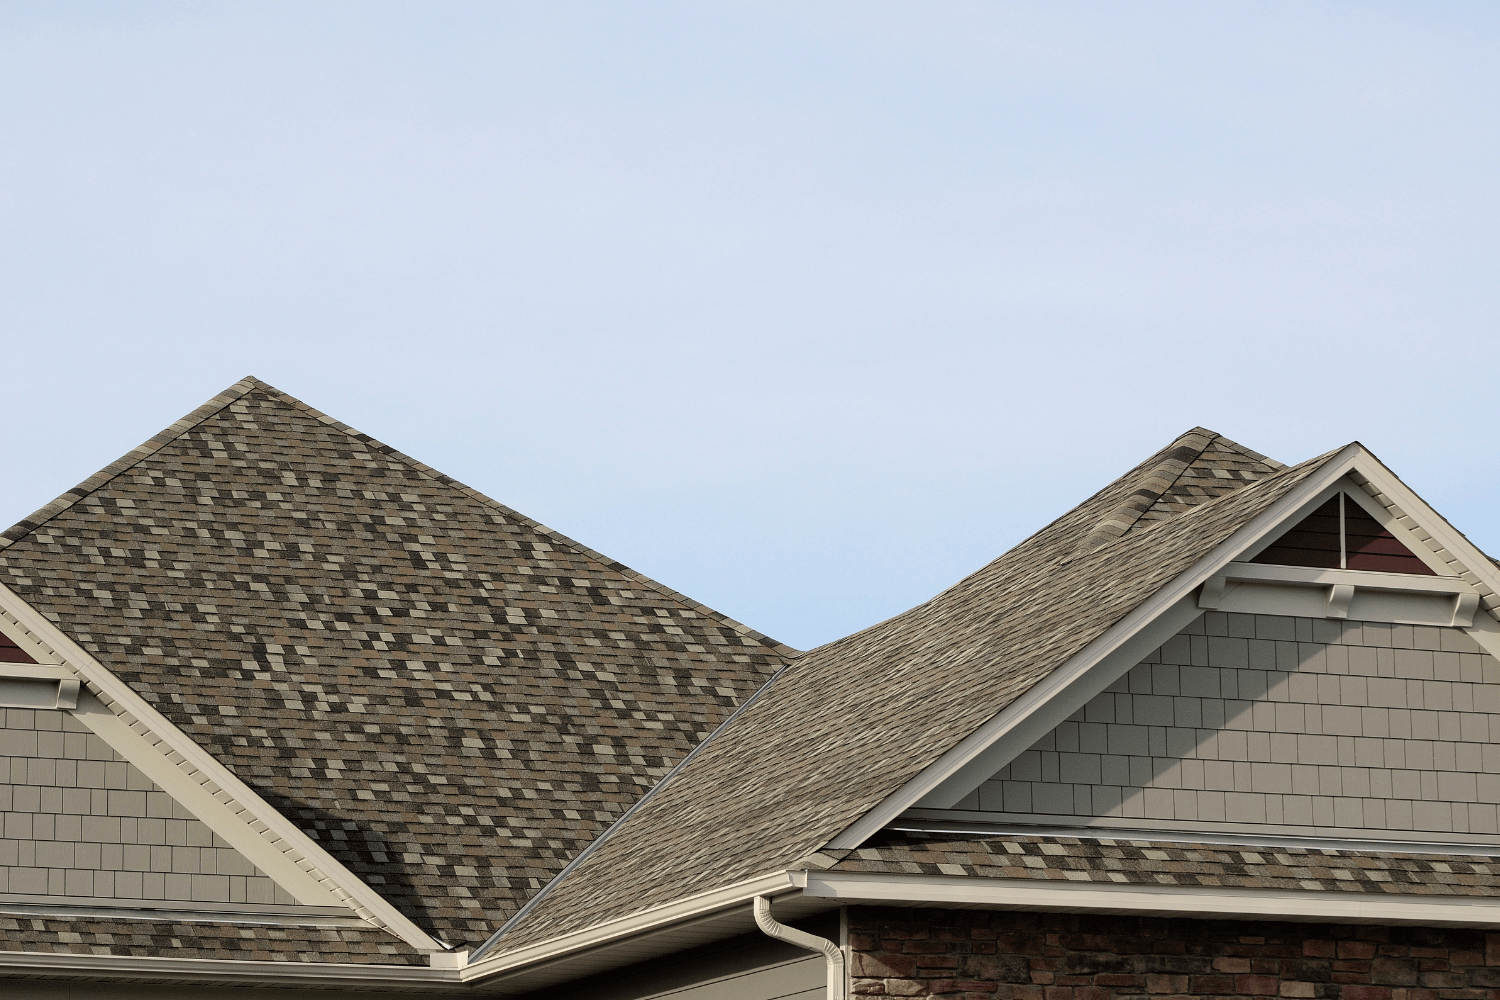
A detailed view of shingle roof components including underlayment and drip edge.

Shingle Roof Detail: A Comprehensive Guide to Roofing Essentials

in Roofing/by Dream Home Roofers

Need shingle roof detail? This guide covers essential components, installation steps, and maintenance tips for a durable shingle roof. Perfect for homeowners and professionals, it provides the detailed insights you need.

Key Takeaways

  • A shingle roof consists of several essential components including the roof deck, underlayment, and drip edge, each crucial for performance and longevity.

  • Asphalt shingles come in three main types: three-tab, dimensional, and luxury, each offering distinct benefits and aesthetic options for homeowners.

  • Regular maintenance, including inspections and debris cleaning, is vital for extending the life of asphalt shingle roofs and preventing costly repairs.

Understanding Shingle Roof Components
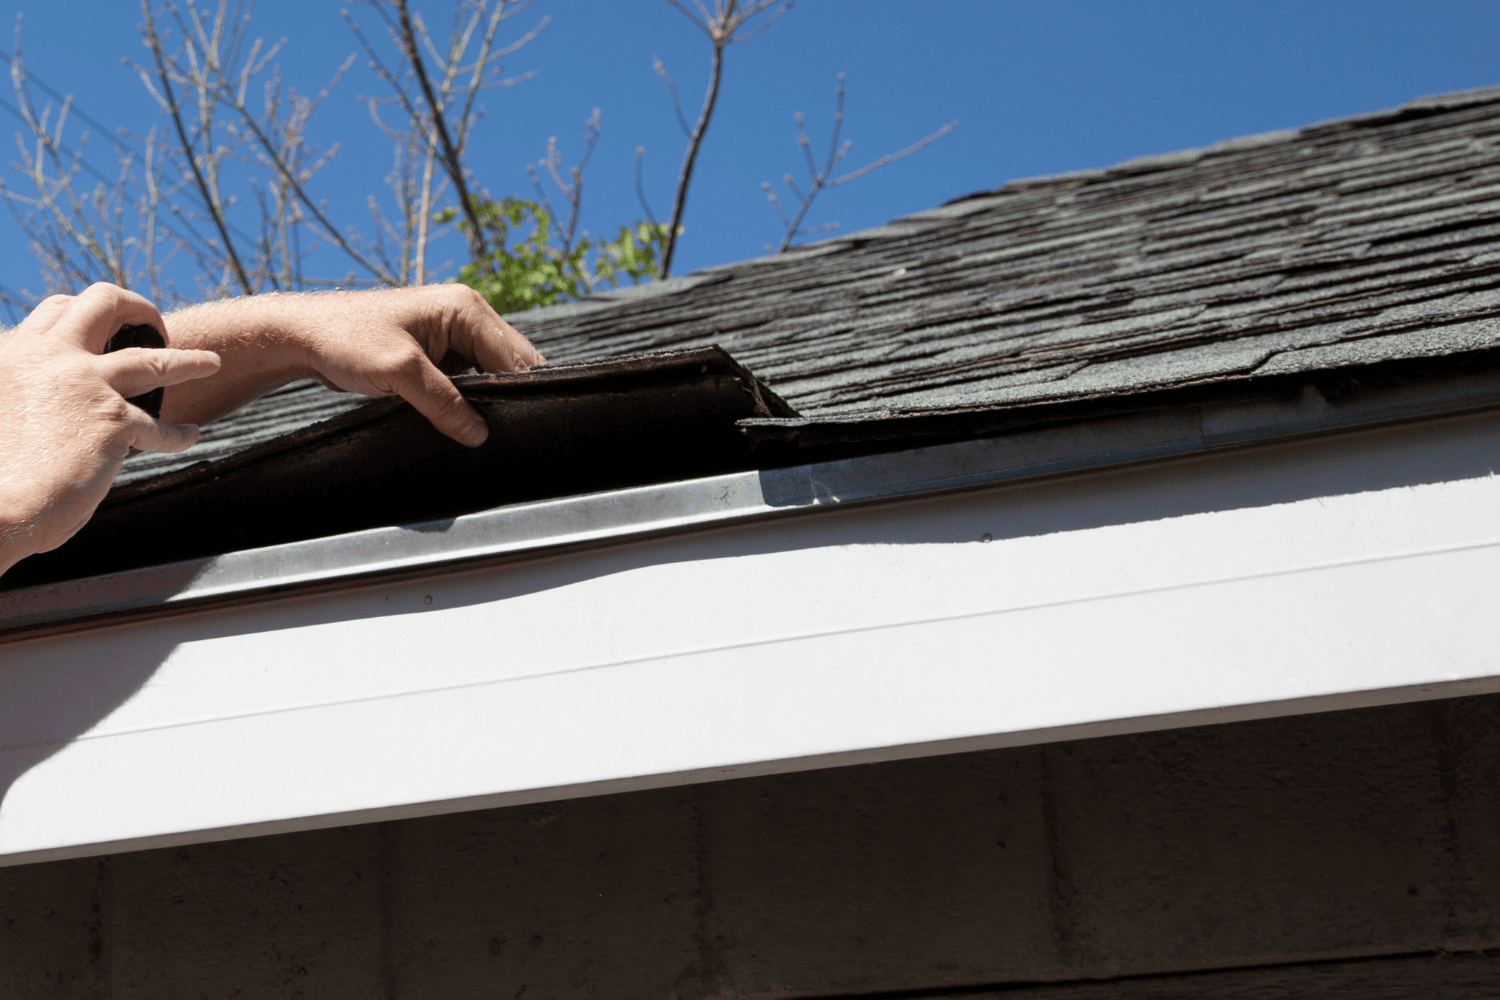
A detailed view of shingle roof components including underlayment and drip edge.

A shingle roof is more than just the visible layer of roof shingles; it’s a complex system made up of several key components. These include the roof deck, underlayment, and drip edge, each playing a crucial role in the overall performance and longevity of the roof.

Understanding these components will help you appreciate the intricacies of asphalt shingle roofing systems and the importance of each element in protecting your home.

Roof Deck

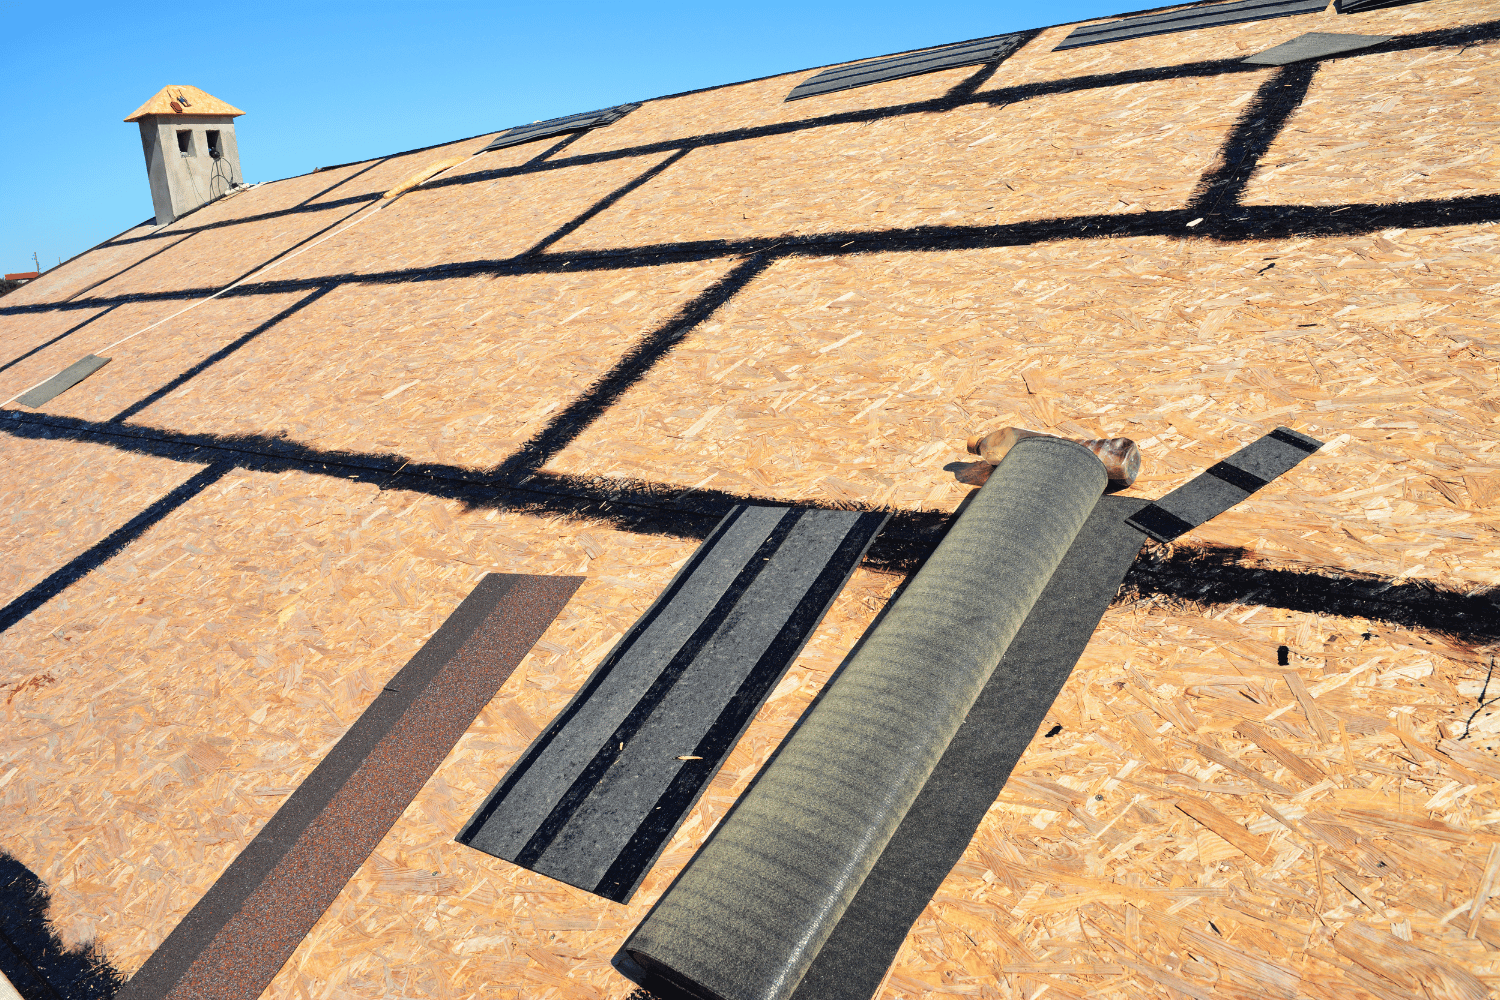
The roof deck serves as the foundation for your shingle roof, providing the structural integrity necessary to support the roofing system. Typically made from plywood or oriented strand board (OSB), the roof deck is crucial for evenly distributing the weight of the roof, thereby reducing the risk of structural damage.

A smooth, properly fastened, and gap-free roof deck is crucial for the effective application of roofing shingles. Quality roof decking not only supports the roof system but also contributes significantly to the overall performance and longevity of your asphalt shingle roof.

Underlayment

Underlayment acts as a secondary layer of protection beneath the asphalt shingles, safeguarding your home against water infiltration. Typically made from materials such as asphalt-saturated felt or synthetic options like IKO’s RoofGard-Cool Grey Synthetic Roof Underlayment, this layer is vital for preventing moisture damage to the roof deck.

Installation begins at the eaves, ensuring overlap over the drip edge, and continues in horizontal courses to provide comprehensive coverage. The underlayment’s primary role is to offer an additional barrier against water, enhancing the overall durability and resilience of the roofing system.

Drip Edge

The drip edge is an essential component that protects the lower edge of the roof deck from water damage. Installed along the eaves and rakes, drip edges guide water away from the roof’s edge, preventing it from seeping into the fascia and causing rot or other structural issues.

Drip edges efficiently direct water runoff, maintaining the roofing system’s integrity, preventing leaks, and prolonging the roof’s lifespan.

Types of Asphalt Shingles
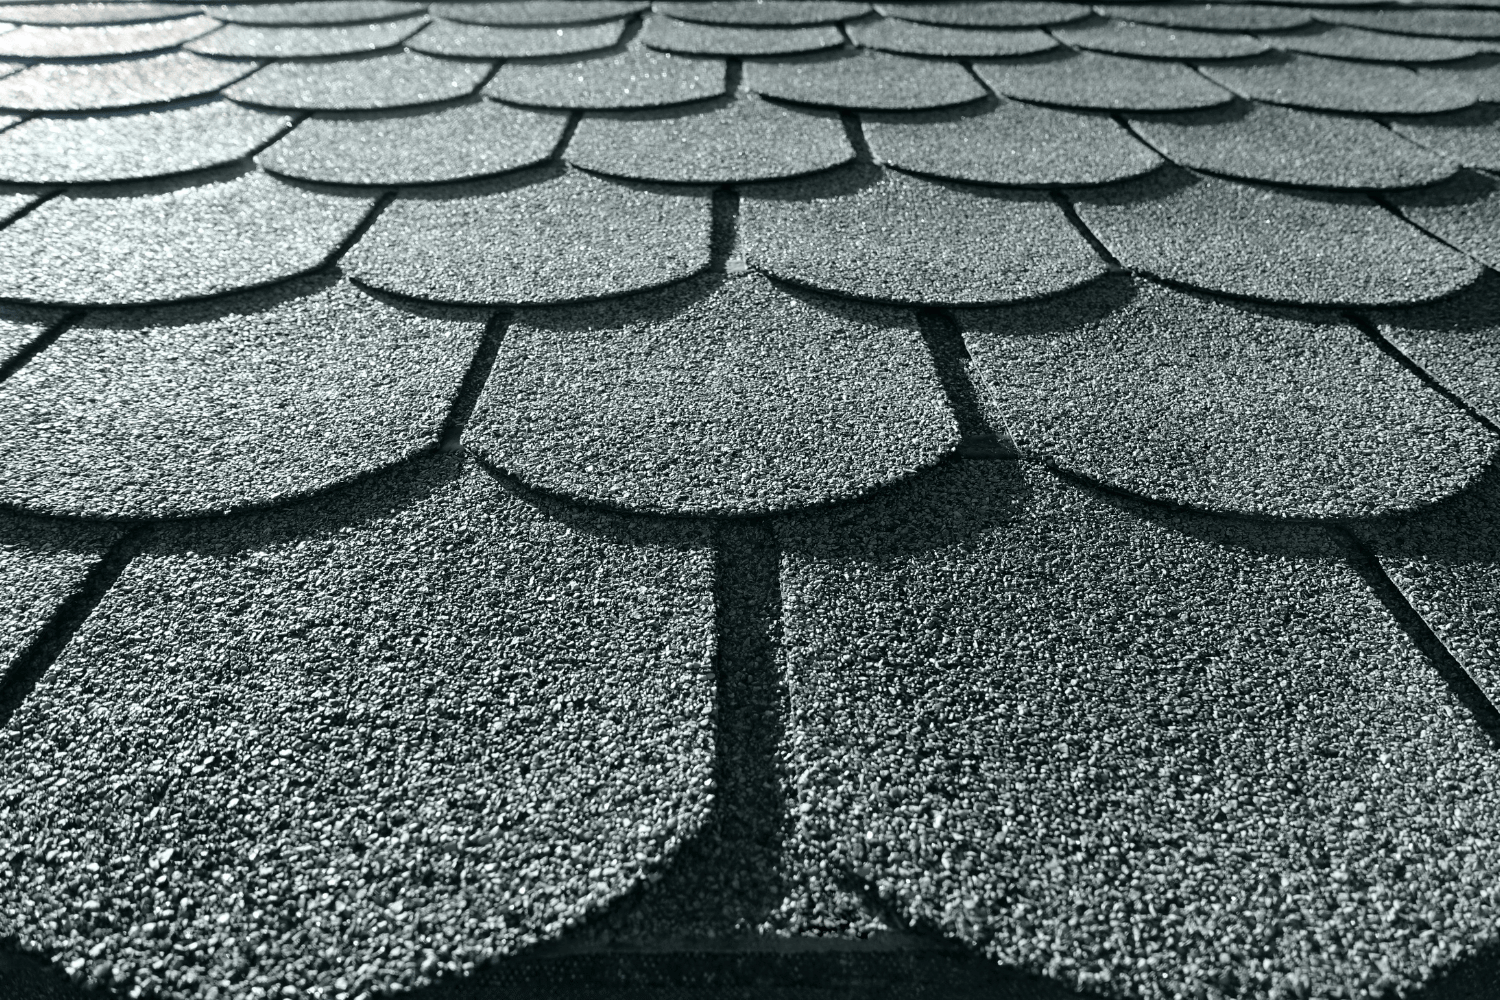
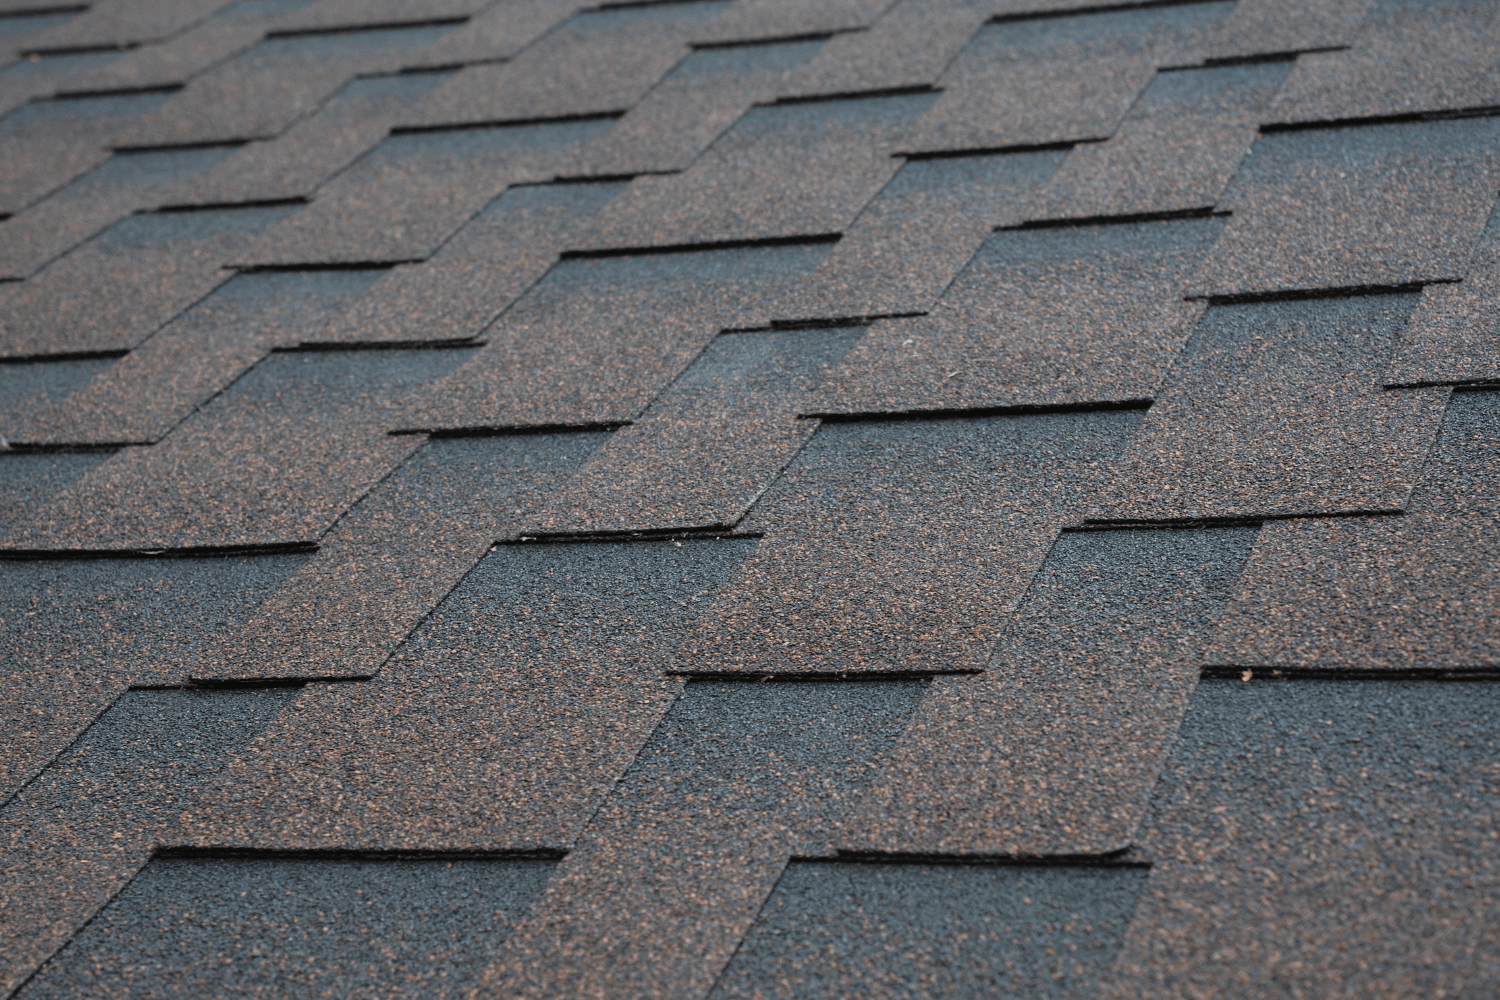
Various types of asphalt shingles displayed together.

Asphalt shingles are the preferred roofing material in North America, prized for their versatility, cost-effectiveness, and weather resilience. These shingles come in several types, each offering distinct advantages. The three main categories are three-tab shingles, dimensional shingles, and luxury shingles.

Knowing the differences between these types enables you to choose the right shingle for your specific needs and aesthetic preferences.

Three-Tab Shingles

Three-tab shingles are a popular choice for many homeowners due to their affordability and straightforward design. Characterized by their flat appearance and single-layer construction, three-tab shingles offer a uniform look that suits a variety of roofing projects.

Their cost-effectiveness and ease of installation make them an excellent option for budget-conscious homeowners looking for a reliable roofing solution.

Dimensional Shingles

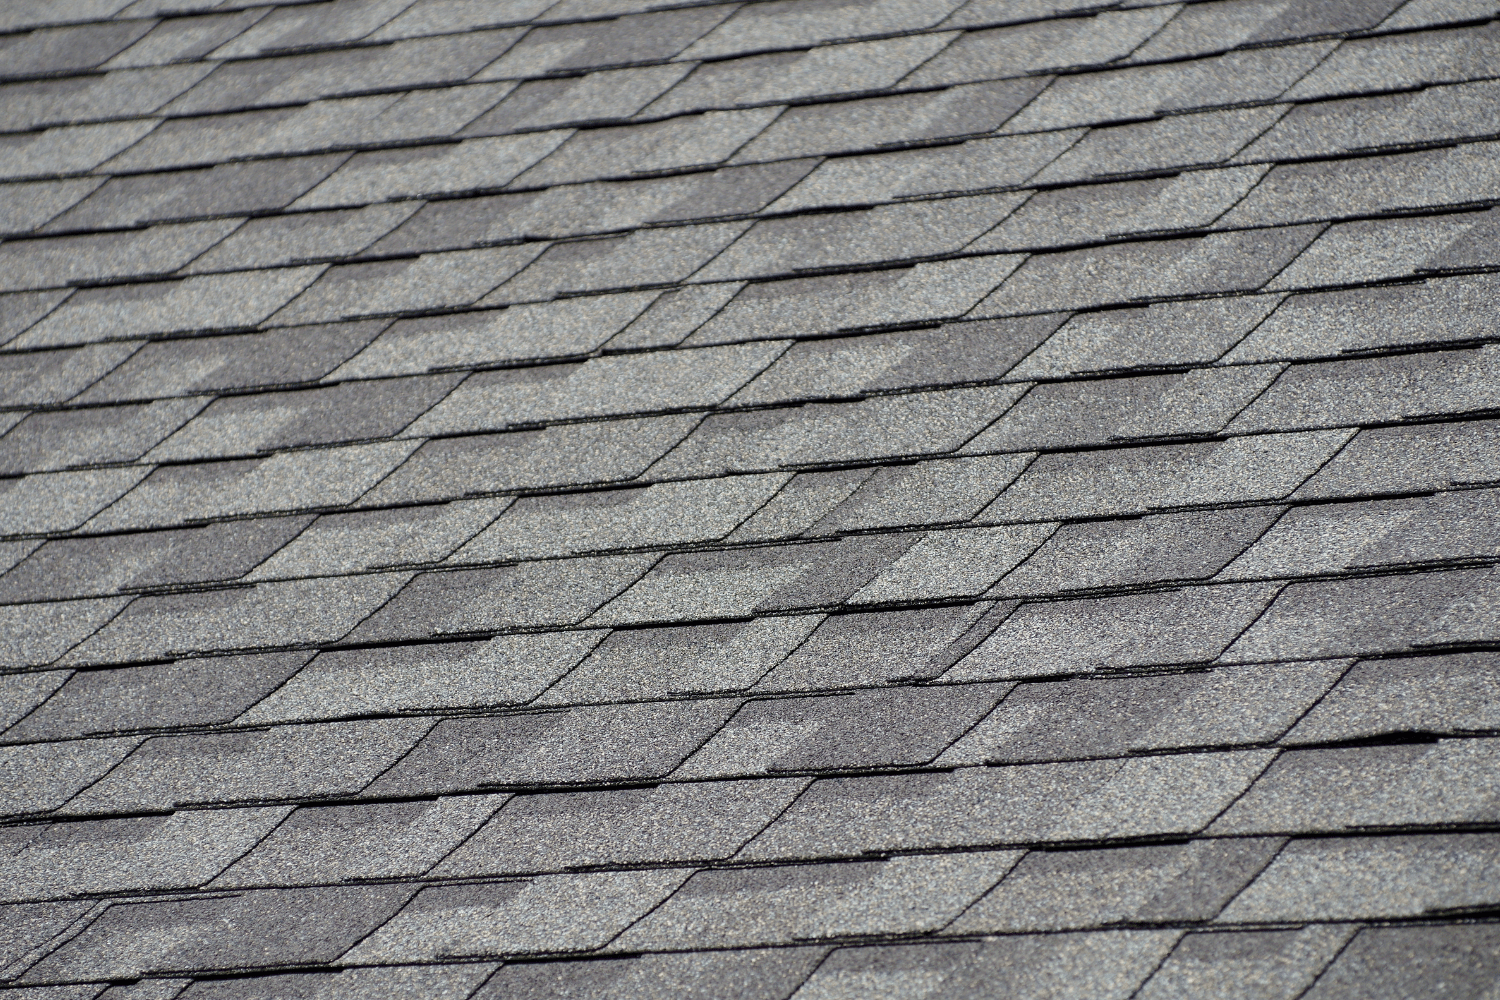
Dimensional shingles, also known as architectural shingles and laminated shingles, offer enhanced aesthetic appeal and performance. These shingles feature a multi-layered design that provides added depth and texture, mimicking the look of more expensive materials like wood and slate.

The additional layers not only improve the visual appeal but also enhance the weather resistance of the roof, making dimensional shingles a favored choice for homeowners seeking a balance of beauty and durability.

Luxury Shingles

Luxury shingles are designed to replicate the appearance of high-end roofing materials such as wood shake shingles, cedar shakes, and slate tiles. These premium shingles offer an upscale look without the associated cost, providing homeowners with a sophisticated and elegant roofing option.

Beyond their aesthetic appeal, luxury shingles offer superior durability and performance, making them an excellent investment for enhancing home curb appeal and longevity.

Installation Process of Asphalt Shingles

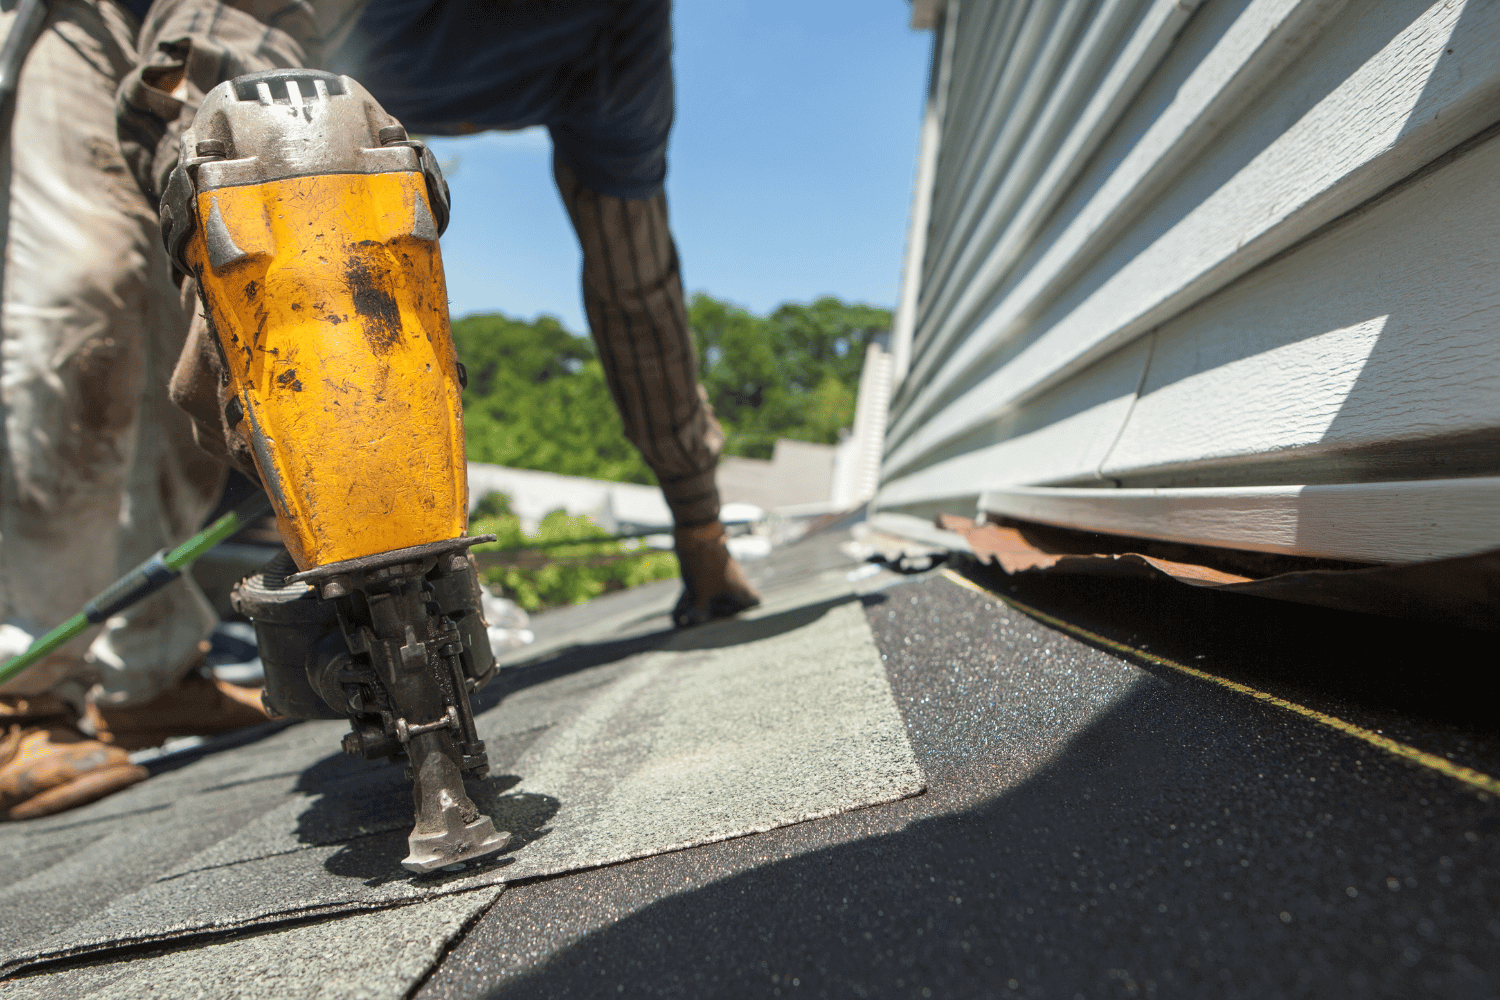
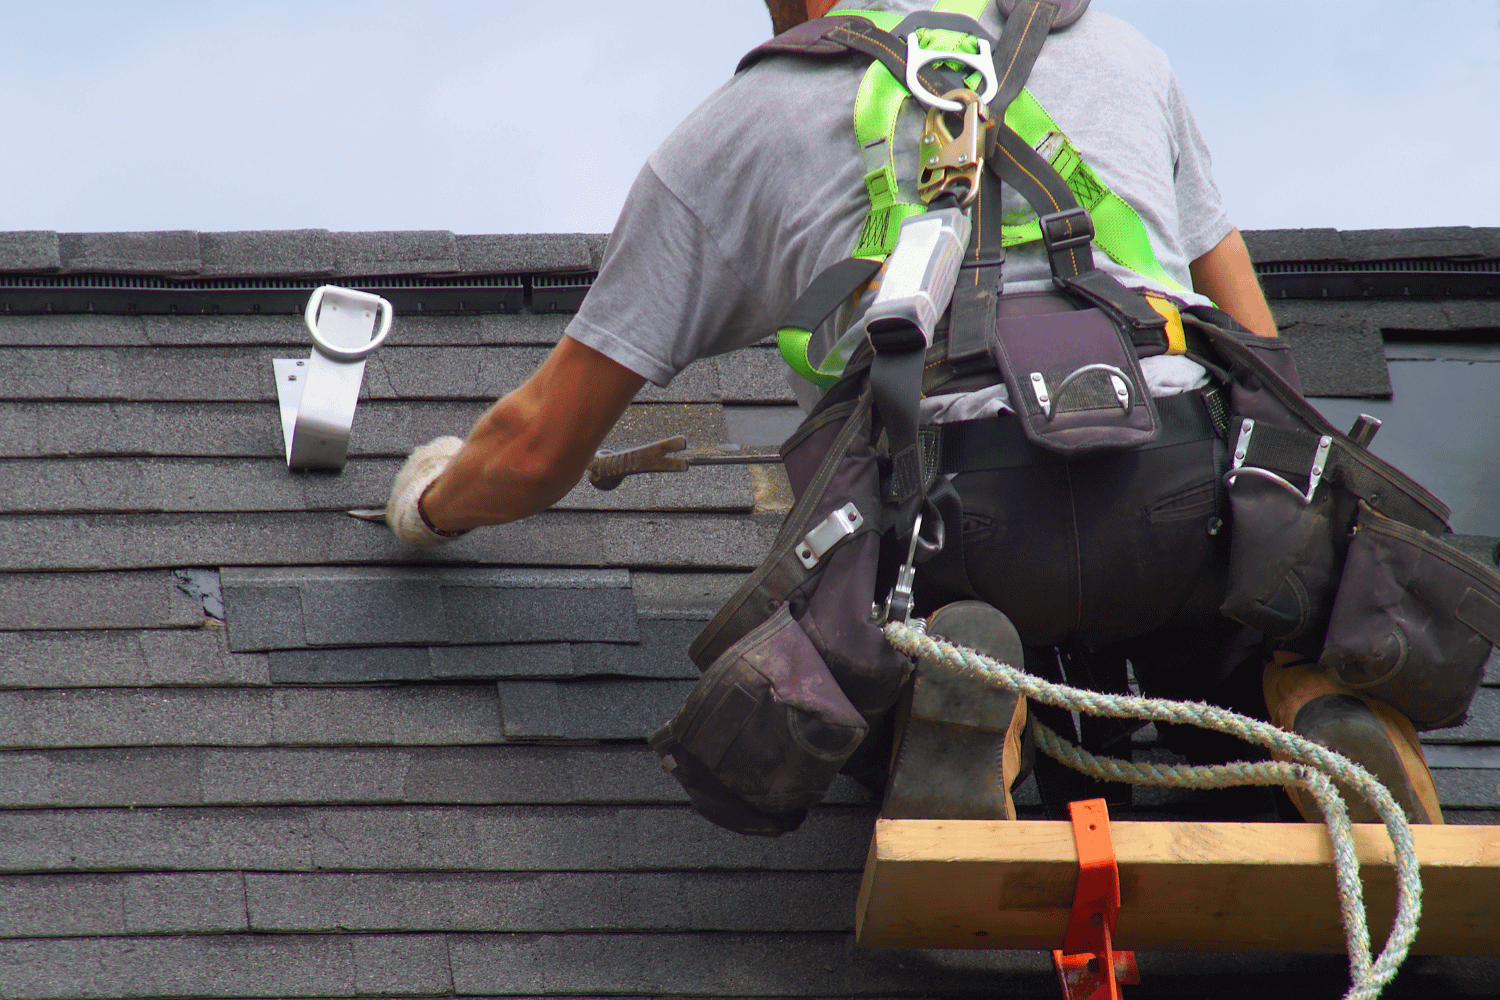
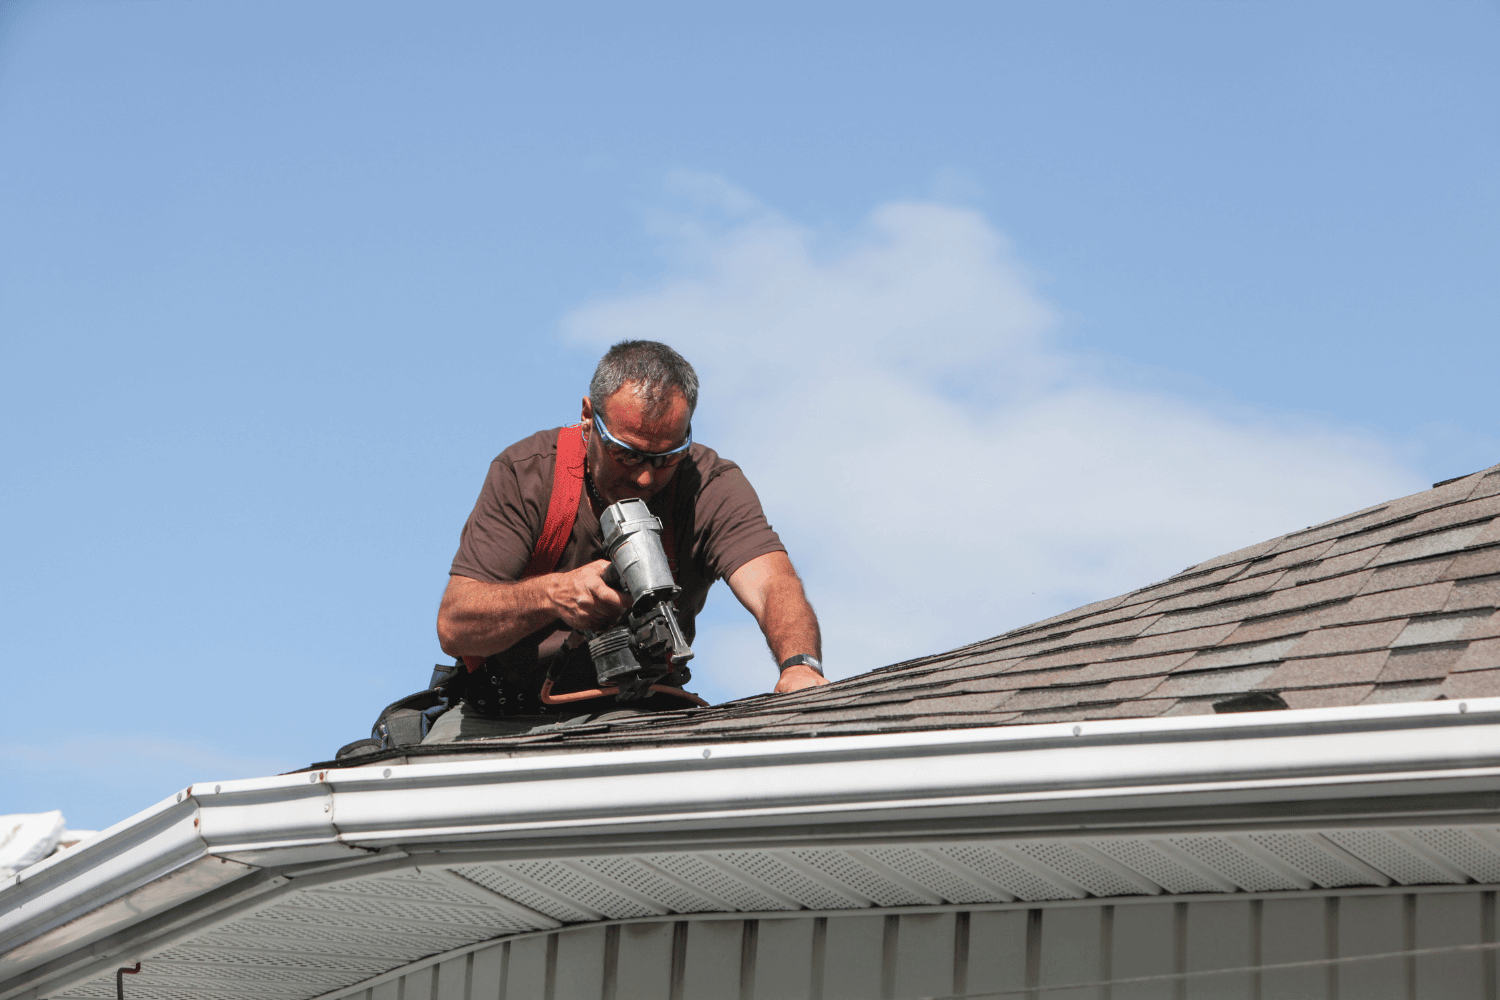
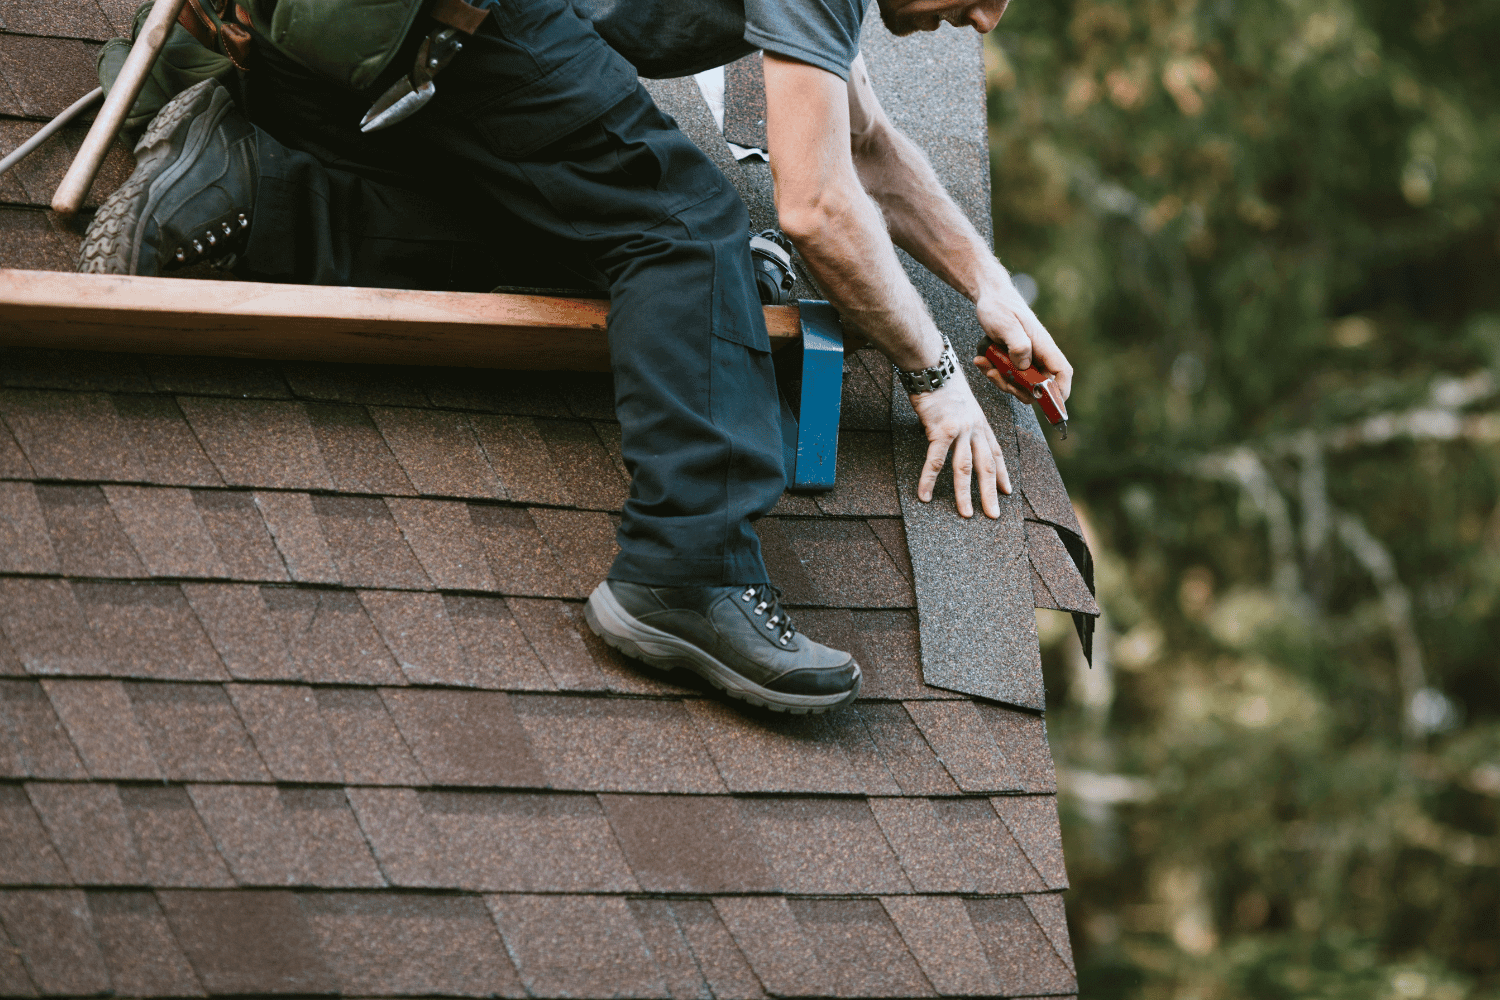
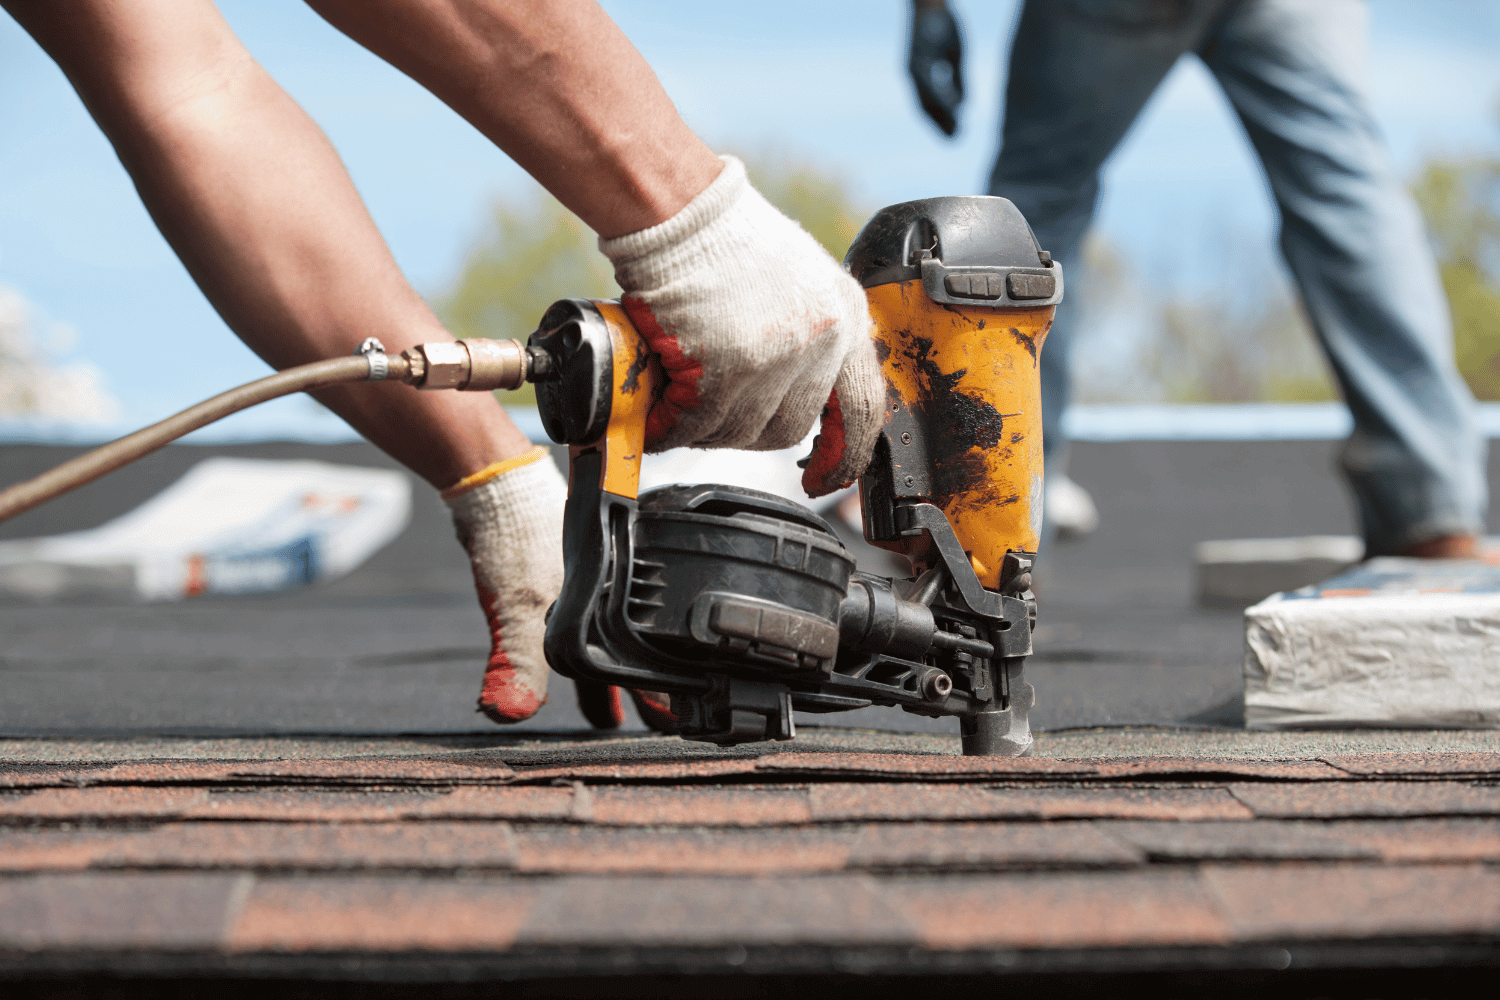
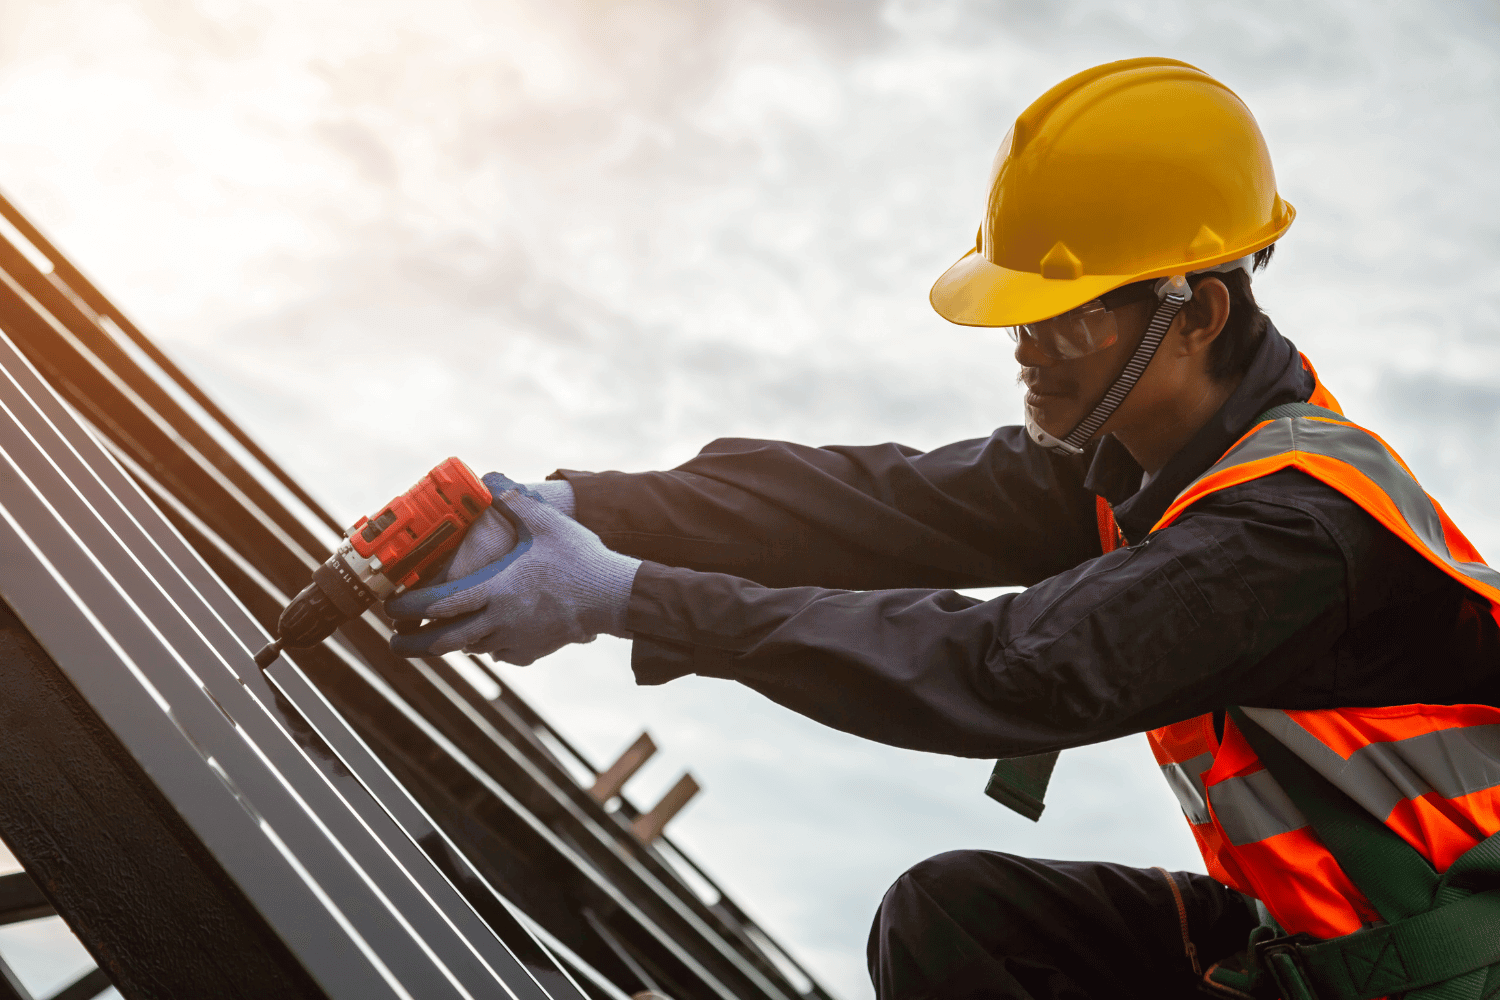
A roofing contractor installing asphalt shingles on a roof.

The installation process of asphalt shingles involves several critical steps, each essential for ensuring a durable and effective roofing system. Each phase, from preparing the roof deck to laying the underlayment and installing the shingles, must be meticulously executed for optimal results.

Appreciating this process helps ensure that your roofing project meets the highest standards.

Preparing the Roof Deck

Preparing the roof deck is the first step in the installation process and involves ensuring the deck is smooth, properly fastened, dry, and free of gaps or holes. This preparation is crucial for the effective application of shingles, as any imperfections can affect the roof’s performance and longevity.

A clean and secure roof deck provides a solid foundation for the entire roofing system, ensuring that the shingles adhere properly and perform as intended.

Laying the Underlayment

The underlayment is typically applied in horizontal courses, starting at the eaves and overlapping the drip edge for enhanced protection. Special attention is given to valleys and areas prone to water infiltration, where ice and water shields are often installed to prevent leaks.

This layer acts as a secondary barrier against moisture, ensuring that the roof deck remains dry and protected from potential damage.

Installing Shingles

Shingle installation begins at the bottom of the roof and progresses upward, with each row overlapping the one below to ensure proper water shedding. Starter shingles are crucial for providing an initial layer of adhesion and facilitating water runoff.

Proper nail placement and the strategic installation of ridge cap shingles enhance wind resistance and overall roof durability, ensuring your asphalt shingle roof performs optimally in various weather conditions.

Enhancing Roof Durability
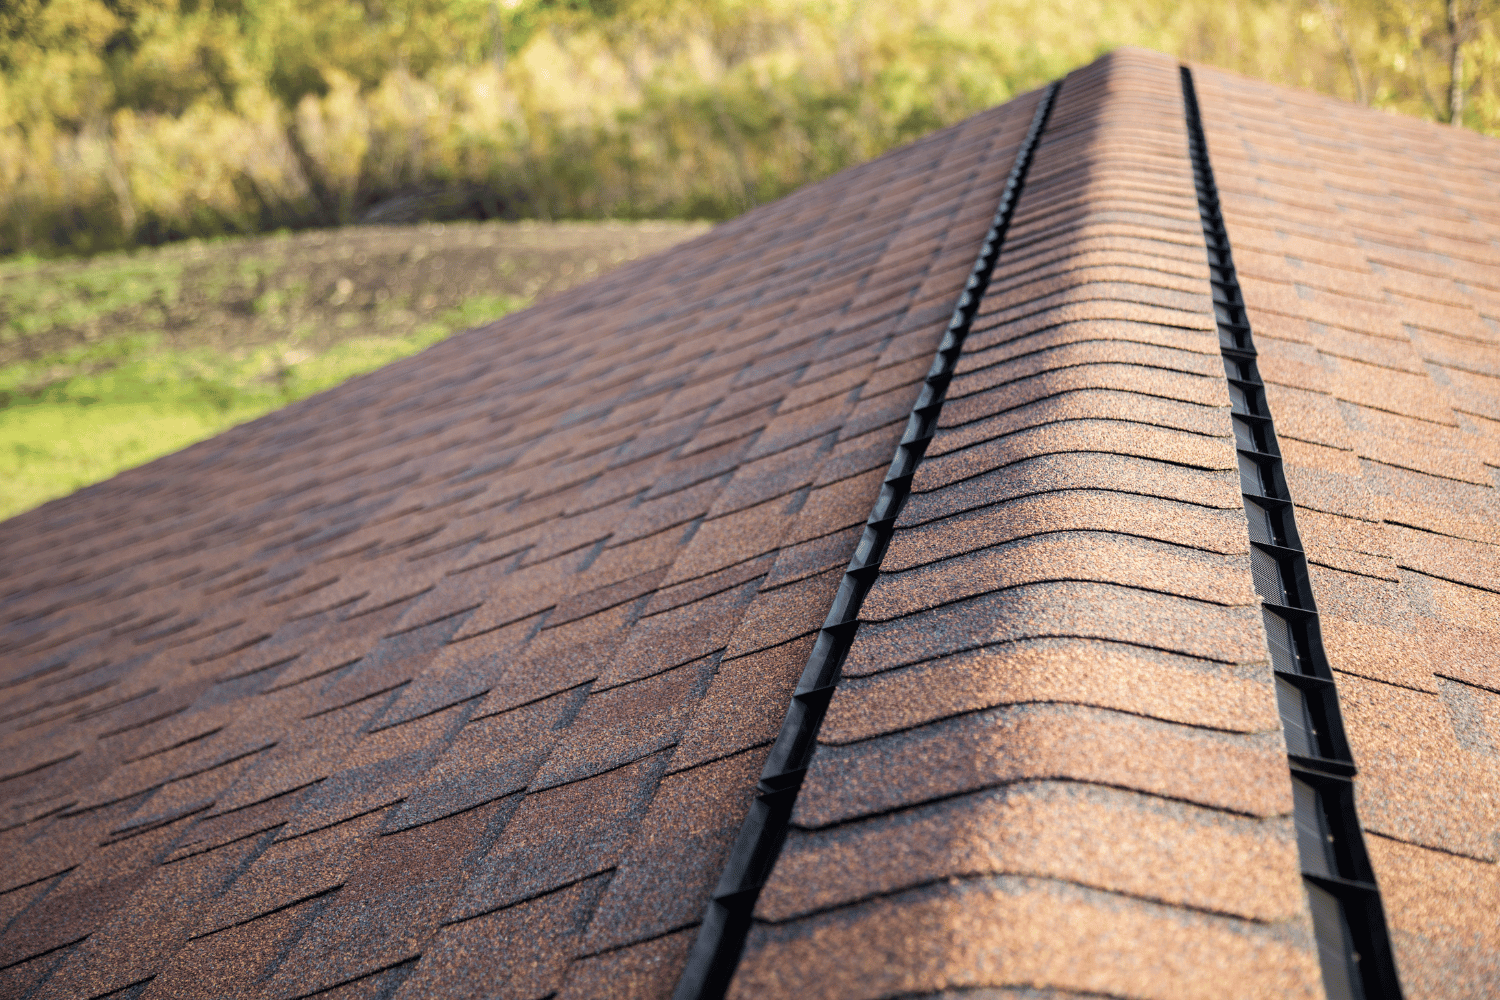
A close-up of a shingle roof with an ice and water shield.

Enhancing the durability of your asphalt shingle roof involves implementing measures such as using protective membranes, ensuring proper ventilation, and opting for algae-resistant shingles. These strategies help extend the life of the roof, maintain its aesthetic appeal, and protect your home from potential damage.

Maintaining your roof regularly and making proactive enhancements are vital for keeping it in top condition.

Ice and Water Shield

Ice and Water Shield is a critical component for preventing leaks and ice dams, particularly in regions prone to severe weather. This waterproof barrier is installed at the eaves, valleys, and other vulnerable areas to protect against water infiltration from ice dams and wind-driven rain.

By preventing moisture damage, Ice and Water Shield significantly enhances the durability and longevity of the roofing system.

Ventilation

Proper attic ventilation is essential for extending the life of your shingles and maintaining the overall health of your roof system. Effective ventilation helps regulate attic temperature, reducing heat buildup that can damage shingles and cause premature aging.

Additionally, it minimizes moisture accumulation, crucial for preventing shingle deterioration and maintaining the roof’s integrity.

Algae-Resistant Shingles

Algae-resistant shingles are treated with compounds that inhibit algae growth, helping maintain the roof’s aesthetic appeal and structural integrity over time. These shingles prevent unsightly stains and deterioration caused by microbial growth, ensuring that your roof remains clean and attractive.

Homeowners opting for algae-resistant shingles benefit from a longer-lasting and visually appealing roof.

Maintenance Tips for Asphalt Shingle Roofs

Regular maintenance is essential for maximizing the lifespan of your asphalt shingle roof. Simple practices like routine inspections, cleaning debris, and repairing minor damage can prevent more significant issues and costly repairs.

A proactive approach to maintenance ensures your roof continues to protect your home effectively.

Regular Inspections

Periodic roof inspections are crucial for identifying potential issues before they escalate. It’s recommended to inspect the roof twice a year, ideally in spring and autumn, to catch wear and potential leaks early. Regular inspections help maintain the roof’s integrity and prevent minor problems from becoming major concerns.

Cleaning Debris

Keeping the roof clear of leaves, branches, and other debris is vital for preventing water accumulation and potential damage. Regular roof and gutter cleaning ensures free water flow, reducing leak risks and prolonging shingle life.

This simple maintenance step can significantly enhance the durability of your asphalt shingle roof.

Repairing Damage

Addressing minor repairs promptly can prevent more extensive damage and costly repairs. Replacing damaged shingles and fixing small leaks are relatively simple tasks that can be performed to maintain the roof’s integrity.

Addressing these minor issues early protects your roof from more severe damage and extends its lifespan.

Choosing the Right Roofing Contractor

Selecting a reliable roofing contractor is crucial for the success of your roofing project. Verifying their qualifications, including required licenses and insurance coverage, is the first step. A reputable contractor with the right credentials ensures your roof is installed correctly and meets industry standards, providing peace of mind and a high-quality roofing system.

Certification and Experience

Hiring roofing contractors with proper certification ensures quality work and adherence to industry standards. Certified contractors, such as Owens Corning Platinum Preferred Contractors, have undergone specialized training and adhere to best practices, ensuring skilled execution of roofing projects.

These certifications indicate a contractor’s expertise and reliability, giving homeowners confidence in their new roof’s quality.

Reviews and References

Checking online reviews and requesting references from past clients is essential for gauging a contractor’s reputation and reliability. Online reviews provide insights into the contractor’s quality of work and customer satisfaction, while personal references offer a more detailed account of their performance on specific projects.

This information helps you choose a contractor with a proven track record of delivering high-quality results.

Detailed Estimates

Detailed estimates from multiple contractors are crucial for understanding your roofing project’s overall costs. A comprehensive estimate should include the costs of materials, labor, permits, and any additional fees that may arise.

Comparing these estimates allows homeowners to manage budgets effectively, avoid unexpected costs, and ensure transparency and value for their investment.

The Benefits of Asphalt Shingle Roofing

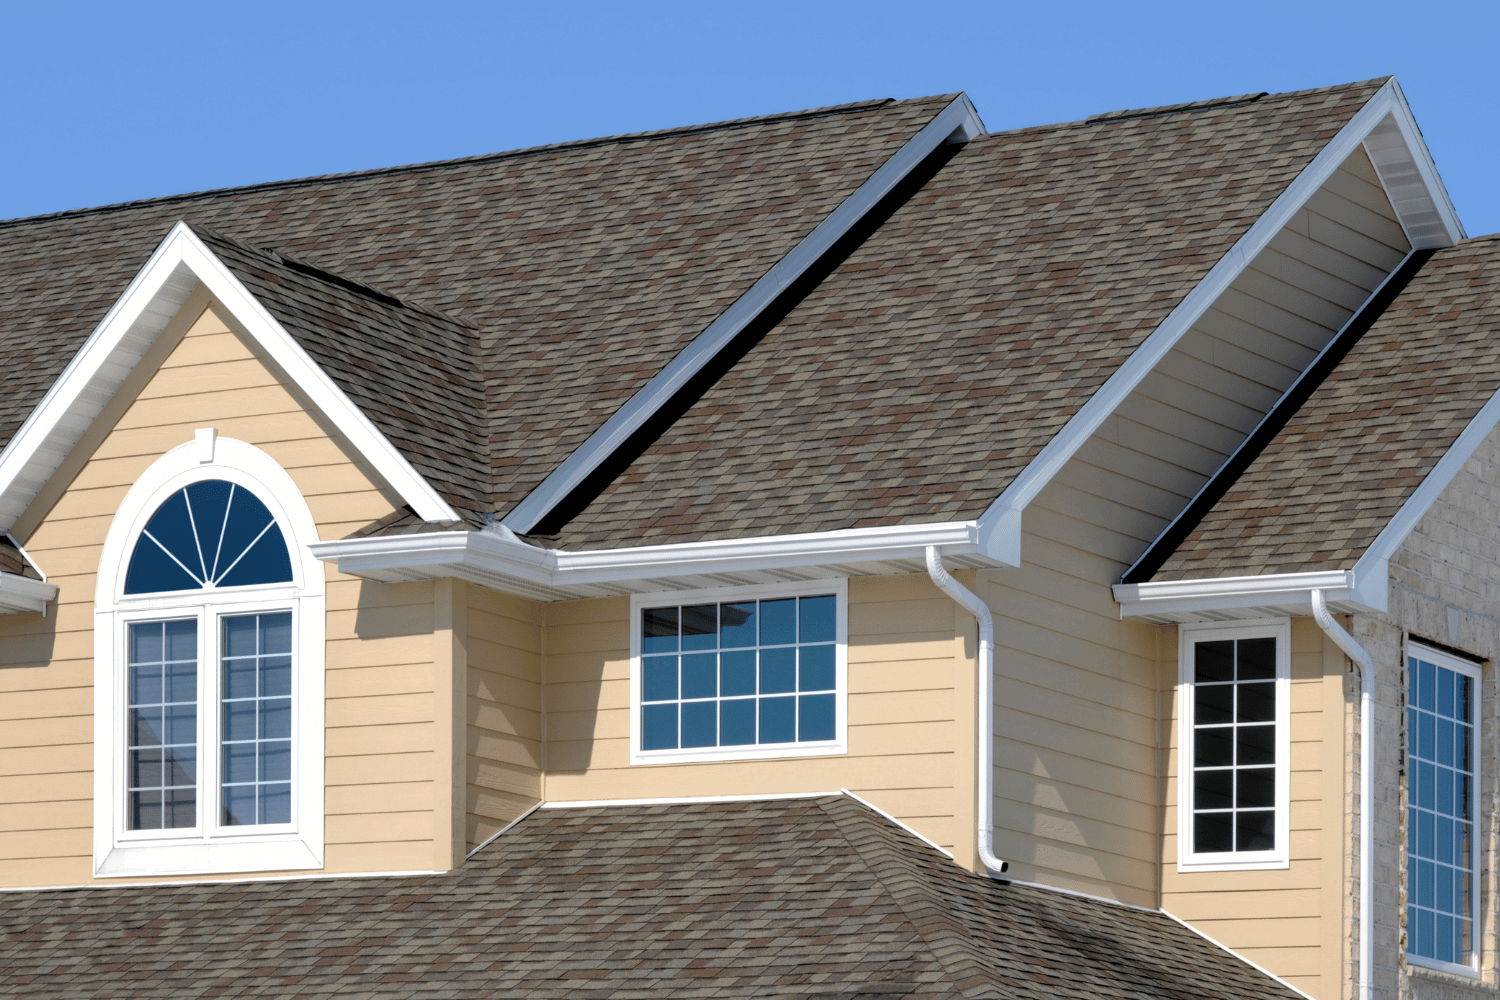
A family standing in front of their home with an asphalt shingle roof.

Asphalt shingle roofing offers numerous benefits, making it a popular choice among homeowners. From its cost-effectiveness to its versatility and durability, asphalt shingles provide a reliable and aesthetically pleasing asphalt roofing shingles solution.

Understanding these benefits will help you appreciate why asphalt shingle roofs are a favored option for residential properties.

Affordability

Asphalt shingles are one of the most affordable roofing options available, providing high-quality roofing at a lower upfront cost compared to other materials. The installation cost typically ranges from $3.50 to $9.50 per square foot, making it a financially sensible choice for budget-conscious homeowners.

This cost-effectiveness, combined with the durability and aesthetic appeal of asphalt shingles, makes them an excellent value for homeowners looking to replace their roofs.

Versatility

Asphalt shingles come in a wide array of colors and styles, allowing homeowners to customize their roofs to match their personal taste and home design. Whether you prefer the classic look of three-tab shingles or the sophisticated appeal of dimensional shingles, there is an asphalt shingle option to suit your aesthetic needs.

This versatility makes asphalt shingles a popular choice for various architectural styles and personal preferences.

Durability

Modern asphalt shingles are engineered to withstand high winds and various weather conditions, with some able to resist gusts of up to 130 mph. Their durability and resilience make them a suitable choice for homeowners looking for reliable protection against the elements, as well as from asphalt shingle manufacturers.

Regular maintenance and inspections further enhance the performance and longevity of asphalt shingle roofs, ensuring they continue to protect your home effectively over time.

Summary

In conclusion, asphalt shingle roofing offers a combination of affordability, versatility, and durability that makes it an ideal choice for homeowners. Understanding the components of a shingle roof, the different types of asphalt shingles, and the installation process can help you make informed decisions about your roofing project. Regular maintenance and choosing a reputable roofing contractor are crucial for ensuring the longevity and performance of your new roof. By following the insights provided in this guide, you can enjoy a beautiful, durable, and reliable asphalt shingle roof that enhances the protection and aesthetic appeal of your home.

Frequently Asked Questions

Is an asphalt roof expensive?

An asphalt roof can be considered moderately expensive, with costs typically ranging from $3.50 to $9.50 per square foot, depending on materials and labor. For a standard home, total replacement costs can fall between $6,000 and $16,500, based on the size and complexity of the roof.

What types of roofing materials does Dream Home Roofers work with for residential roof replacement?

Dream Home Roofers specializes in premium Owens Corning roofing materials for residential roof replacements. Their diverse product offerings ensure quality and durability for your roofing needs.

What certification do Dream Home Roofers hold?

Dream Home Roofers hold the certification of Owens Corning Platinum Preferred Contractors, ensuring high standards in roofing services.

What are architectural shingles also known as?

Architectural shingles are also known as dimensional shingles.

How do architectural shingles differ from traditional three-tab shingles?

Architectural shingles feature multiple layers that provide a more textured appearance compared to traditional three-tab shingles. This enhanced design not only improves aesthetics but also increases durability and longevity.
 

https://dreamhomeroofers.com/wp-content/uploads/2025/02/A-detailed-view-of-shingle-roof-components-including-underlayment-and-drip-edge.-1.png 1000 1500 Dream Home Roofers https://dreamhomeroofers.com/wp-content/uploads/2024/09/dhr-logo.png Dream Home Roofers2025-02-07 08:00:122025-08-25 09:59:57Shingle Roof Detail: A Comprehensive Guide to Roofing Essentials
An illustration showing chimney flashing on a roof.

Chimney Flashing Repair and Sealing | Fix Leaks the Right Way

in Roof Repair, Roofing/by Dream Home Roofers

A chimney flashing leak is one of the more deceptive problems a homeowner can deal with. The water doesn’t always show up right away, and where it shows up on your ceiling or wall is rarely where the roof is actually compromised. Dream Home Roofers diagnoses and repairs chimney flashing across New Jersey, Pennsylvania, and Maryland. If you have water coming in near your chimney, this is what we look for and how we fix it.

What Chimney Flashing Is and Why It Fails.

Flashing is the metal system that seals the joint where your chimney meets the roof surface. It has two components: step flashing, which is a series of L-shaped metal pieces woven into the shingle courses along the chimney sides, and counter-flashing, which is cut into the chimney mortar joints and laps over the step flashing to create a double seal. In the Mid-Atlantic climate, flashing fails for a few specific reasons. Thermal expansion and contraction from cold winters and hot summers loosens mortar joints and lifts metal edges over time. Ice dams form along the chimney base and force water under the flashing when they melt. And in older homes, the original lead or aluminum flashing simply reaches the end of its lifespan.

Resealing vs Full Flashing Replacement

Not every chimney flashing problem requires full replacement. Here is how we decide which approach makes sense.

When Resealing Is Enough

If the flashing metal itself is in good shape but the sealant has cracked or pulled away from the chimney, a reseal with a high-quality polyurethane or rubber flashing sealant can stop the leak. This works when the metal hasn’t lifted significantly and when the underlying mortar joints are still sound. Resealing is not a permanent fix on flashing that has already started to separate from the chimney or buckle from thermal stress.

When Full Replacement Is Required

Full replacement is needed when the flashing has corroded through, when the counter-flashing has pulled out of the mortar joints, when the step flashing pieces have lifted away from the shingle courses, or when the chimney itself has lost mortar at the flashing line. In these cases, resealing over a failed system is a temporary patch that will fail again within a season or two.

The Right Way to Replace Chimney Flashing

Remove and Inspect

We remove the existing step flashing and counter-flashing fully, rather than layering new material on top of old. Once the old flashing is out we inspect the underlying decking and sheathing for moisture damage. In NJ and PA homes with older construction, we regularly find soft spots in the decking at the chimney base that need to be replaced before new flashing goes on.

Step Flashing Installation

New step flashing pieces are woven into the shingle courses along both sides of the chimney. Each piece overlaps the one below it, creating a continuous water shedding surface up the chimney face. We use galvanized steel step flashing on most installations unless the homeowner requests copper, which lasts longer but comes at a higher material cost.

Counter-Flashing and Mortar

Counter-flashing is cut into the chimney mortar joints and bent down over the step flashing. We repack the mortar joints with new material and seal the top edge of the counter-flashing with polyurethane sealant. The result is a mechanical seal plus a chemical seal, which is what holds up in freeze-thaw conditions.

If sealant keeps failing, a roofer near Voorhees Township can rebuild the flashing.

How Much Chimney Flashing Repair Costs.

• Resealing existing flashing at a single chimney: $200 to $500.
• Full step and counter-flashing replacement on a single chimney: $800 to $1,500 depending on chimney size and number of courses.
• Homes requiring decking repair at the chimney base will run higher. We provide a written estimate before any work begins.
• Dream Home Roofers provides free inspections to diagnose the leak source before recommending repair vs replacement.

Frequently Asked Questions: Chimney Flashing Repair

What is the best sealant for chimney flashing?

A polyurethane or rubberized flashing sealant outperforms standard caulk because it stays flexible through freeze-thaw cycles rather than cracking. However, sealant alone is only appropriate when the flashing metal is still sound and the mortar joints are intact. If the flashing has lifted or corroded, sealing over it will fail quickly. Dream Home Roofers inspects the full condition of the flashing before recommending the right repair approach.

How do I know if my chimney flashing is causing my roof leak?

Water stains on the ceiling directly around or below the chimney are the most common sign. You may also see peeling paint, damp drywall, or visible daylight or rust at the flashing line on a sunny day. Because water travels before it drips, the stain may show up several feet from the chimney even when the flashing is the source. A licensed roofer can diagnose the leak origin accurately.

How much does chimney flashing repair cost in NJ?

Resealing existing flashing at a single chimney runs $200 to $500. A full step and counter-flashing replacement is typically $800 to $1,500 depending on chimney size and accessibility. If the decking at the chimney base has moisture damage it will add to that cost. Dream Home Roofers provides a written estimate after a free on-site inspection.

How long does chimney flashing last?

Galvanized steel flashing typically lasts 20 to 30 years with proper installation. Copper flashing can last 50 years or more. Flashing sealant, even the best products, should be inspected every 5 to 10 years in NJ and PA climates because freeze-thaw stress degrades it faster than in warmer climates.

https://dreamhomeroofers.com/wp-content/uploads/2025/01/An-illustration-showing-chimney-flashing-on-a-roof.-1.png 1000 1500 Dream Home Roofers https://dreamhomeroofers.com/wp-content/uploads/2024/09/dhr-logo.png Dream Home Roofers2025-01-31 11:09:452026-11-10 17:00:32Chimney Flashing Repair and Sealing | Fix Leaks the Right Way
An assortment of essential roofing tools including a putty knife and roofing nails.

Best Ways to Fix a Loose Shingle on Roof: A Step-by-Step Guide

in Roof Repair, Roofing/by Dream Home Roofers

Noticed a loose shingle on your roof? Ignoring it could lead to serious damage. This guide will show you how to identify, fix, and prevent loose shingles, ensuring your roof stays in top shape.

Key Takeaways

  • Promptly addressing loose shingles can prevent water damage and extend the roof’s lifespan.

  • Essential tools for shingle repair include roofing cement, utility knives, and safety gear, ensuring an efficient and safe repair process.

  • Regular inspections and preventative maintenance are key to maintaining roof integrity and preventing future issues.

Best Ways to Fix a Loose Shingle on Roof: A Step-by-Step Guide

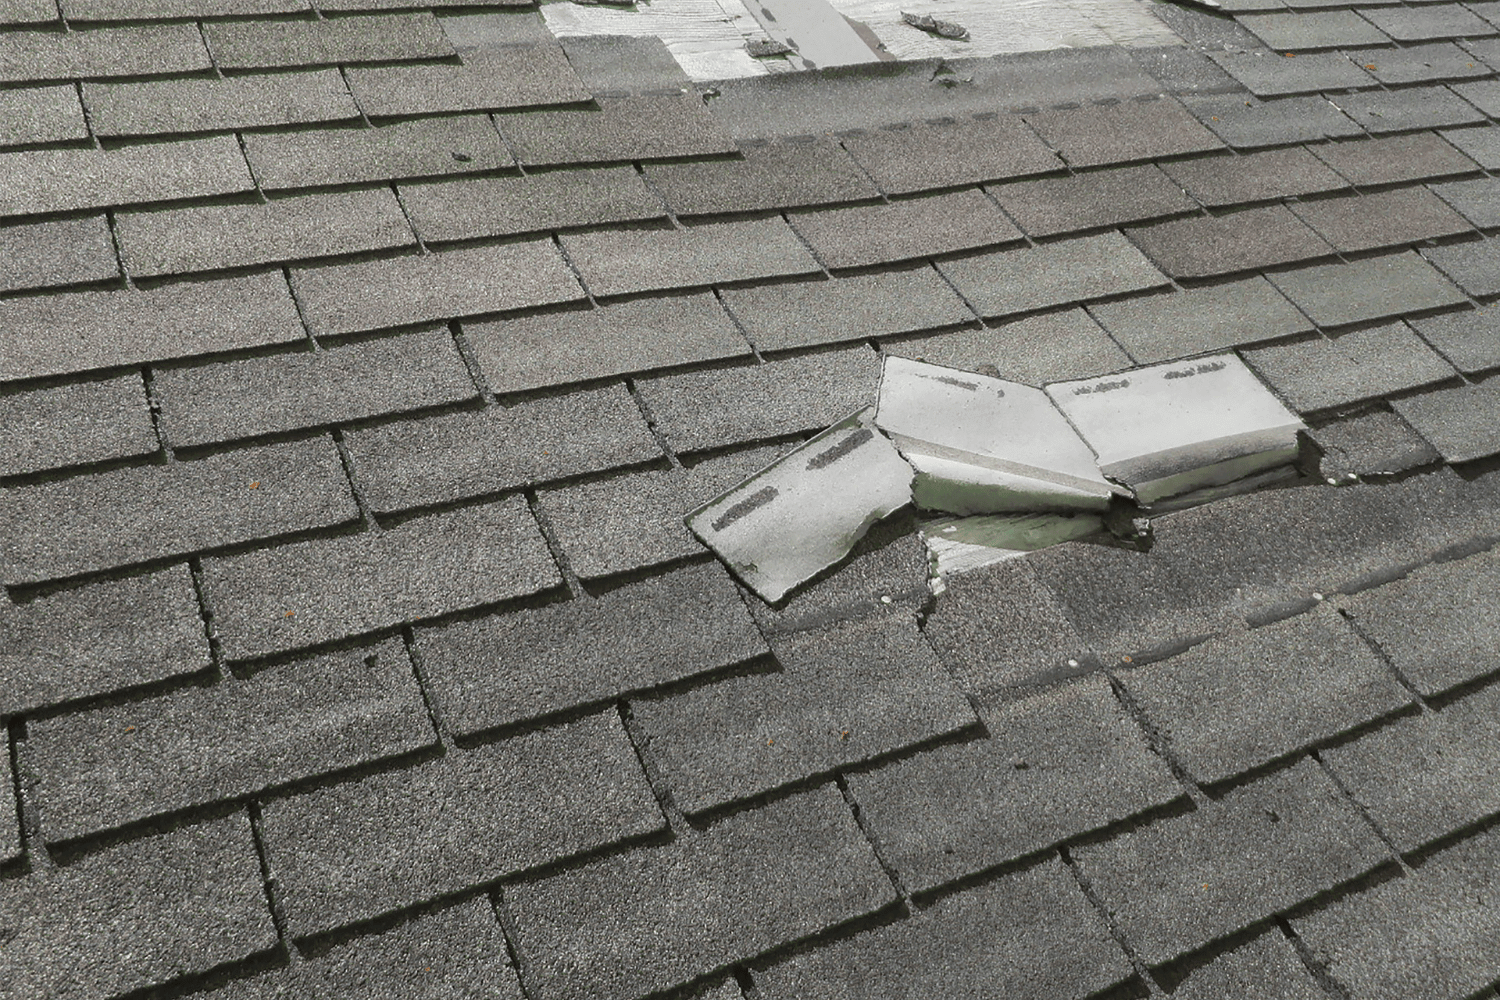
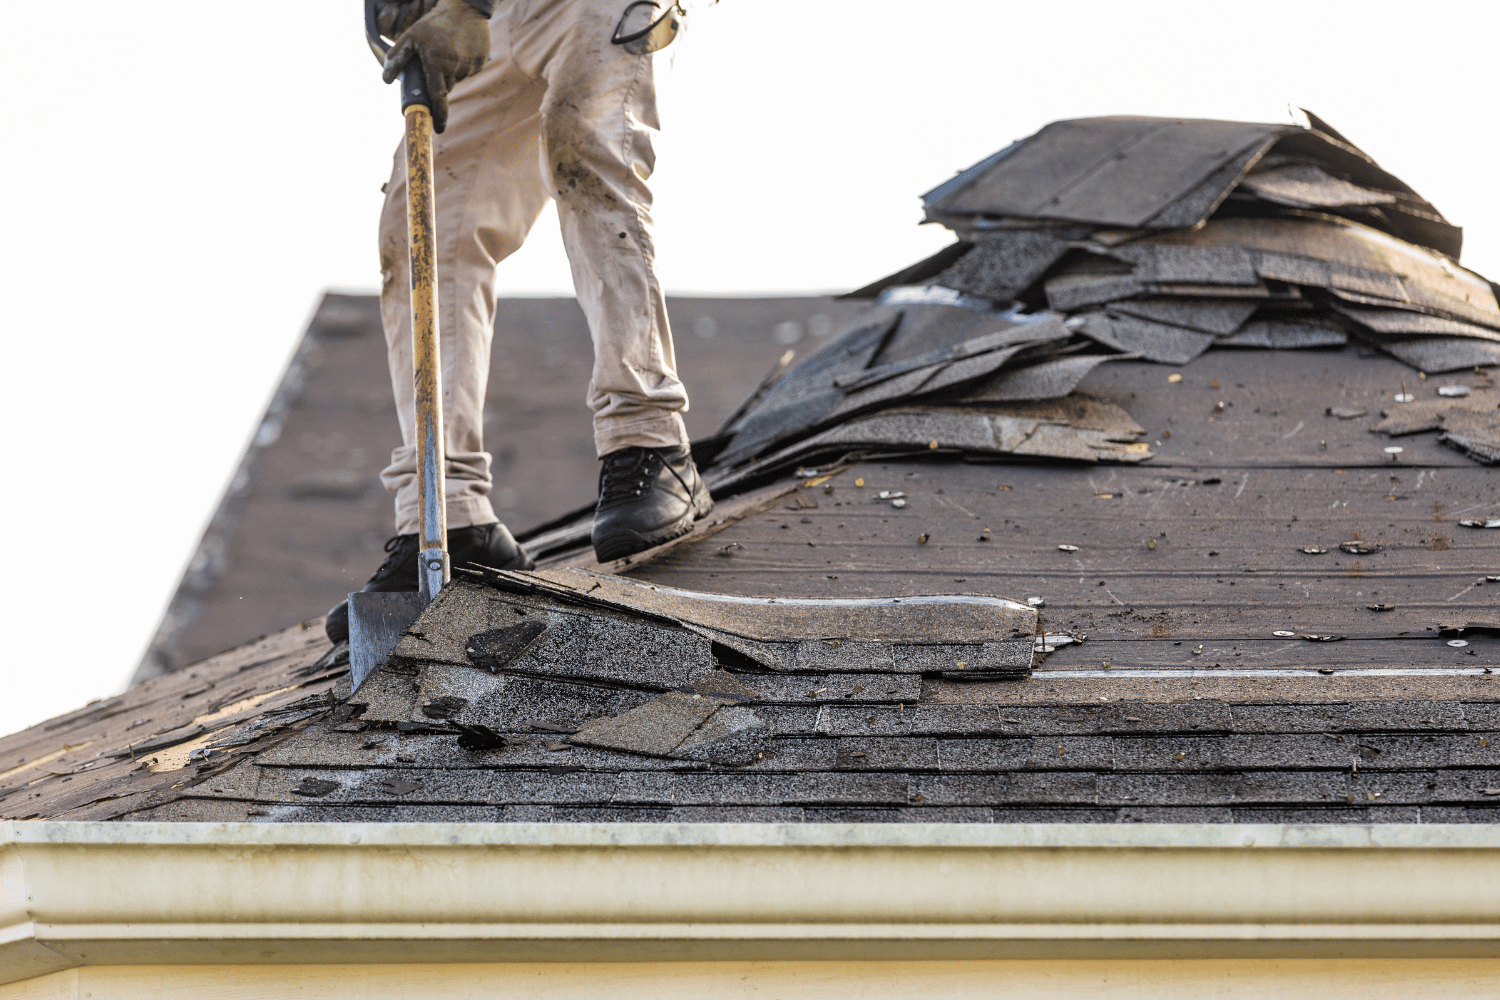
A close-up view of a loose shingle on a roof, highlighting the potential for water infiltration.

Addressing shingle repairs promptly can prevent further damage and extend your roof’s lifespan. This step-by-step guide will help you identify loose shingles, gather the necessary tools, assess the damage, and perform the repairs confidently.

Introduction

When it comes to roof maintenance, time is of the essence. A single loose shingle might not seem like a big deal, but it can lead to significant issues if left unattended. Water infiltration is one of the most common problems associated with loose shingles, potentially causing severe damage to your home’s interior.

Learning to repair roof shingles isn’t as daunting as it might seem. With a bit of patience and the right guidance, you can master the basics in about an hour or two. Plus, tackling minor issues yourself can save you money and give you a sense of accomplishment.

At Dream Home Roofers, we believe in empowering homeowners with the knowledge and skills needed to maintain their roofs. In this guide, we’ll cover everything from identifying loose shingles to performing the repair process and taking preventative measures to keep your roof in top shape.

Identify Loose Shingles

The first step in any roof shingle repair is identifying the problem areas. Loose shingles can often be spotted by their lifted edges or gaps between the shingles and the roof surface. Look for these signs, especially after high winds or storms, which can cause shingles to become loose or go missing.

Certain areas of your roof are more prone to shingle lifting, such as around chimneys and vents. Inspect these areas carefully, as well as any spots where you notice missing nails, which can be a clear indicator of loose shingles.

Additionally, visible curling or cracking of shingles often signals that they need immediate attention. Regular inspections, at least twice a year, can help you catch these issues early and prevent further damage to your roof.

Essential Tools and Materials

An assortment of essential roofing tools including a putty knife and roofing nails.

Before you begin any roof shingle repair, it’s essential to have the right tools and materials on hand. A utility knife is indispensable for cutting shingles and other materials during repairs. Roofing cement is another must-have, used to seal and secure shingles, especially in areas exposed to high winds.

You’ll also need a flat pry bar to lift shingles and remove nails, a hammer for driving roofing nails, and a ladder to safely access your roof. Don’t forget safety gear, including gloves, safety glasses, and non-slip shoes, to protect yourself while working on the roof.

Having all these tools and materials ready before you start will make the repair process smoother and more efficient. Ensuring you’re well-prepared is key to successfully completing minor shingle repairs and maintaining your existing roof.

Assessing the Extent of Damage

Once you’ve identified the loose shingles, the next step is to assess the extent of the damage. This involves checking for signs of water damage in your attic, which could indicate loose or damaged shingles. Granule loss on shingles is another sign of deterioration that requires immediate attention.

Inspecting your roof from the ground using binoculars can help you identify obvious damage without risking a climb up. Look for curling shingles, visible rotting, or algae growth, as these issues may indicate the need for professional roof repairs.

If you notice extensive damage, such as a sagging roof deck or multiple missing shingles around your property, it might be time to call in a professional roofer for a more thorough inspection and repair.

Preparing for Repair

Preparation is key to a successful roof shingle repair. Ideally, you should perform repairs on a warm, dry day to ensure the shingles are more pliable and easier to work with. Ensure your ladder extends beyond the roof edge for additional safety and stability while working.

Safety measures cannot be overstated. Use a stable ladder placed on even ground and wear protective gear, such as goggles and gloves, to protect yourself from debris and sharp objects. Avoid working on the roof during bad weather conditions to minimize the risk of accidents.

Before starting the repair process, inspect the interior of your home for leaks or water stains, which might reveal roof problems not visible from the outside. This thorough preparation will help ensure a smooth and safe repair process.

How to Secure a Loose Shingle

A professional roofer applying roofing cement to secure a loose shingle.

Securing a loose shingle involves a few straightforward steps. First, ensure the area around the loose shingle is clean and dry. Apply roofing cement under the shingle and press it firmly in place, holding it down for several minutes to allow the adhesive to bond effectively.

Use roofing nails or screws to support the shingle after applying the adhesive for added security. This extra step helps ensure the shingle stays in place, even during high winds or heavy rain.

By following these steps, you can address loose shingles promptly and prevent further roof damage, saving you from more extensive repairs down the line to replace roof shingles.

Replacing Damaged Shingles

A demonstration of replacing a damaged shingle on a roof.

Sometimes, a damaged shingle needs to be replaced rather than repaired with replacement shingles. Start by sliding your utility knife under the shingle to break the adhesive. Carefully lift the damaged shingle without affecting the surrounding shingles or underlayment.

Next, slide the new shingle under the tab of the shingle above it to ensure proper alignment. Apply roofing cement under the tabs of the new shingle and secure it with roofing nails, making sure the nails are covered by overlapping shingles.

Finally, fill any unused holes with roofing cement to prevent leaks and ensure a watertight seal. This thorough approach ensures that your roof remains intact and leak-free after replacing any damaged shingles.

Preventative Measures for Future Shingle Issues

A well-maintained roof demonstrating preventative measures against shingle issues.

Preventative maintenance is crucial for extending the life of your roof. Here are some key practices to follow:

  1. Conduct regular inspections at least twice a year to help identify issues early, such as loose or damaged shingles, preventing leaks and costly damage.

  2. Ensure proper installation of shingles to prevent future lifting and damage.

  3. Trim overhanging tree branches to avoid damage from falling debris.

  4. During winter, prevent excessive accumulation of snow and ice to avoid stress on the roof.

By following these practices, you can help maintain the integrity of your roof and extend its lifespan.

Consider applying algae-resistant shingles and protective coatings to enhance the durability of your roofing materials and reduce the growth of moss and algae. These preventative measures can significantly extend the lifespan of your roof and keep it in optimal condition.

When to Call a Professional Roofer

While DIY repairs can be effective for minor issues, there are times when calling a professional roofer is necessary. If your roof has multiple loose shingles or the damage seems extensive, a professional’s expertise is crucial.

Professional roofers can conduct a thorough inspection and address any underlying issues that might not be apparent to the untrained eye. They typically follow a consultation process before starting any professional roof repair, ensuring all problems are properly identified and resolved.

Hiring expert roofers also provides peace of mind, as most professional roof repairs come with warranties, ensuring the job is done right and protecting your investment.

Summary

Timely and effective shingle repairs are crucial for maintaining the integrity of your roof and preventing costly damage. By identifying loose shingles, using the right tools and materials, and following a systematic repair process, you can address minor issues before they escalate.

Remember, preventative measures and regular inspections are key to extending the life of your roof. And when in doubt, don’t hesitate to call in the professionals at Dream Home Roofers for their expert services and peace of mind.

Frequently Asked Questions

What is the first step in Dream Home Roofers’ process for roof repair?

The first step in Dream Home Roofers’ process for roof repair is a thorough consultation to assess the damage and determine the best course of action.

Does Dream Home Roofers offer financing options for roof repairs?

Yes, Dream Home Roofers offers flexible financing options to assist homeowners with roof repair costs. This can make managing expenses more accessible and convenient for you.

How long do most roof repairs take to complete?

Most roof repairs typically take a few hours to a full day to complete, depending on the extent of the damage. It’s important to assess the situation early to ensure timely resolution.

Can roof repairs be done in any weather?

Roof repairs are ideally done in good weather for optimal results; however, urgent repairs can be executed in challenging conditions if absolutely necessary.

What is the purpose of timely roof repairs according to Dream Home Roofers?

Timely roof repairs are essential as they extend the roof’s lifespan and prevent expensive replacements, ensuring your home remains well-protected.


https://dreamhomeroofers.com/wp-content/uploads/2025/01/An-assortment-of-essential-roofing-tools-including-a-putty-knife-and-roofing-nails.-1.png 1000 1500 Dream Home Roofers https://dreamhomeroofers.com/wp-content/uploads/2024/09/dhr-logo.png Dream Home Roofers2025-01-28 08:00:292026-02-01 18:18:25Best Ways to Fix a Loose Shingle on Roof: A Step-by-Step Guide
Installing underlayment and starter shingles on a roof.

Best Methods for Architectural Shingles: How to Install in Simple Steps

in Roof Installation, Roofing/by Dream Home Roofers

Installing architectural shingles involves several key steps: preparing the roof deck, laying the underlayment, applying starter shingles, aligning and nailing shingles correctly, and finalizing with ridge cap shingles. This guide provides a straightforward approach on “architectural shingles how to install” effectively.

Key Takeaways

  • A well-prepared roof deck is crucial for successful architectural shingle installation, requiring thorough inspection and repair prior to installation.

  • Proper techniques, including correct nailing, aligning shingles, and overlapping courses, are essential to prevent leaks and ensure durability.

  • Architectural shingles offer enhanced durability, improved aesthetics, and energy efficiency compared to traditional roofing materials.

Preparing Your Roof Deck for Installation

Preparing your roof deck for installation of architectural shingles.

A well-prepared entire roof deck is the foundation of a successful architectural shingle installation. Start by removing old roofing material and repairing any damage to the underlying structure. A clean and solid deck helps new shingles adhere better and prevents future issues.

A thoroughly clean and dry roof surface enhances the adhesion of new shingles and helps prevent leaks and water damage. Gather all required roofing materials beforehand to streamline the process and avoid delays.

Inspecting the Roof Deck

Inspect the roof deck for structural integrity before installing shingles. Look for damage such as warping, wood rot, or signs of water infiltration, and address these issues to ensure a successful installation.

Make sure the deck is clean, dry, and free of debris to create a suitable surface for the new shingles.

Gathering Roofing Materials

Gathering all necessary materials before starting makes the install architectural shingles process smoother. Essential items include architectural shingles, starter shingles, roofing nails, safety gear, a roofing hammer, utility knife, chalk line, harnesses, and ladders. Having everything ready helps avoid mid-project shortages and ensures smooth progress.

Installing Underlayment and Starter Shingles

Installing underlayment and starter shingles on a roof.

Underlayment protects the roof deck from moisture and provides stability before laying shingles. It acts as a secondary barrier against water infiltration. Begin by laying the underlayment at the roof’s edge, overhanging the drip edge by 1/4′′ to 3/4′′.

Then, apply the starter shingles at the roof’s eaves to create a strong base that prevents wind uplift and ensures proper alignment with the drip edge. Correct installation of starter strips is vital for both functionality and aesthetics.

Laying the Underlayment

Roll out the underlayment horizontally, ensuring it overlaps the ice and water protector by 4 inches and valley membrane flashing by 6 inches. Each course should overlap by about 4 inches to guard against water penetration.

Install the drip edge over the underlayment to create a clean roof edge and enhance resistance to wind uplift.

Applying Starter Shingles

Align the starter shingles with the drip edge to establish a secure foundation that prevents water infiltration and wind damage. Correct application of the starter strip is essential to avoid future issues.

The starter shingles also improve the overall aesthetic appeal of the roof.

Step-by-Step Guide to Installing Architectural Shingles

Step-by-step guide to installing architectural shingles.

Precision and attention to detail are key to successful architectural shingle installation. Start at the bottom edge of the roof and work upward, ensuring each shingle is correctly aligned and overlapped.

Important aspects of the installation include careful placement, correct nailing, and proper overlapping. Misalignment can compromise the roof’s aesthetics and protection, allowing water to penetrate.

Starting at the Bottom Edge

Lay architectural shingles from the bottom edge of the roof, using a chalk line to ensure straight rows. Position the shingles with a 1/2 to 3/4-inch overhang for proper drainage.

This initial course sets the foundation for the rest of the roof, so ensure it’s done correctly.

Nailing Techniques

Proper nailing techniques ensure the stability and wind resistance of the shingles. Position nails in a specific line to maximize stability and prevent curling or detachment.

Incorrect nailing can cause leaks, wind damage, and void warranties.

Overlapping Shingle Courses

Overlapping shingle courses effectively shed water and prevent leaks. Lay the shingles in overlapping rows from bottom to top, staggering them to avoid alignment issues.

This method enhances the roof’s appearance and ensures its functionality.

Trimming and Fitting Around Roof Features

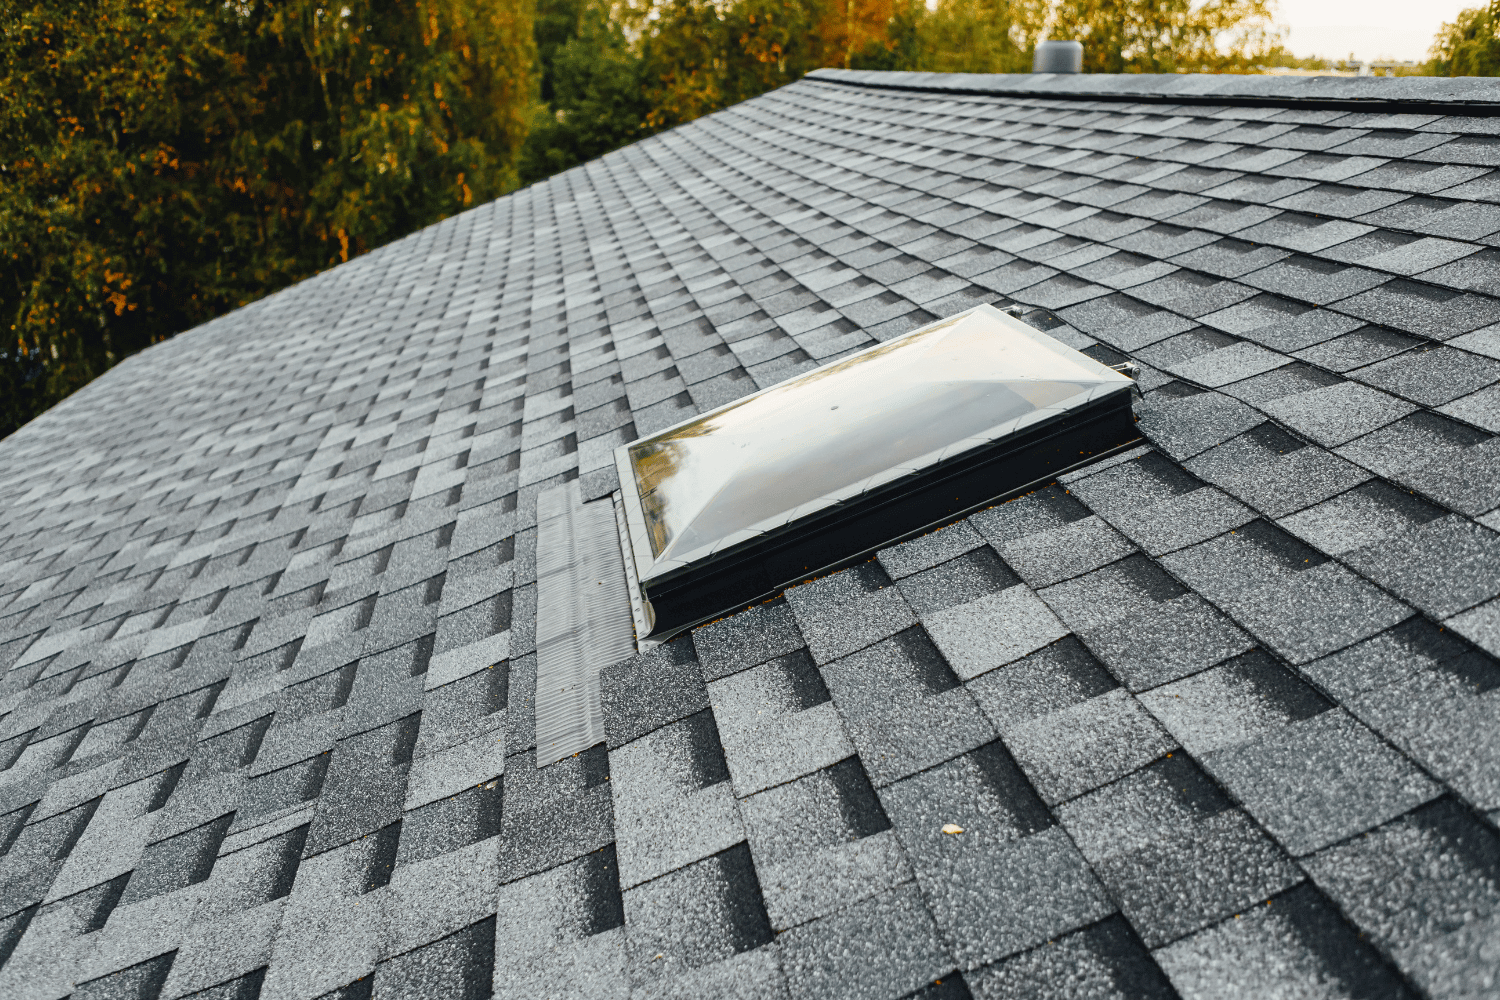
Trimming and fitting shingles around roof features.

Precision is required when cutting and fitting shingles around features like chimneys, vents, and skylights. Accurate cutting ensures a polished look and prevents leaks.

This section will guide you through the process of trimming and fitting for a professional finish.

Cutting Shingles to Size

Use a straight edge and utility knife to measure and cut the shingles to size. Precision is essential to ensure a proper fit and prevent leaks. Smooth, controlled cuts help avoid jagged edges and ensure a neat fit around roof features.

Working Around Roof Penetrations

When fitting shingles around vents and chimneys, use roofing cement to prevent leaks. Leave a small gap between the shingles and chimneys to allow for expansion and contraction.

Proper flashing around chimneys creates a watertight seal, ensuring proper water drainage and compliance with local building codes.

Finishing Touches for a Professional Look

Finishing touches for a professional look in roofing.

The final steps of your roofing project are crucial for a professional look and long-lasting roof. Installing ridge cap shingles and conducting a thorough inspection and clean-up will ensure your roof is both functional and aesthetically pleasing.

Installing Ridge Cap Shingles

Ridge cap shingles protect against moisture at the roof’s peak and enhance its appearance. Start by listing some forbidden forms of the keyword “install ridge cap shingles” according to the rule 5. Start at the end of the ridge opposite the prevailing wind direction, overlapping each roof shingles and securing them with longer nails to install ridge cap shingles.

Seal the nail heads with asphalt roof cement on the last piece to prevent leaks.

Final Inspection and Clean-Up

Conduct a final inspection to identify any damaged or missing shingles and ensure proper alignment and nail placement. Clean the site to remove loose materials or potential hazards.

Thorough inspection and clean-up prevent future roofing issues and ensure a neat finish.

Common Mistakes to Avoid

Common shingle installation mistakes include improper nailing, misalignment, and reusing old flashing. These errors can cause leaks, wind damage, and void warranties.

Correct techniques and thorough inspections prevent these issues and ensure a successful installation.

Benefits of Choosing Architectural Shingles

Architectural shingles and architectural asphalt shingles, along with laminated or dimensional shingles, offer several advantages over traditional ones. Their multi-layered design provides superior protection, and their variety of styles enhances the aesthetic appeal of any home.

Their reflective properties also improve energy efficiency.

Enhanced Durability

Architectural shingles have a multi-layered structure that enhances durability, providing better resistance to wind, impacts, and the elements. Many come with extended warranties, reflecting their durability and the manufacturer’s confidence.

Improved Aesthetics

Available in various colors and textures, architectural shingles can be customized to match any home style, significantly enhancing curb appeal and making homes more visually appealing.

Energy Efficiency

Architectural shingles with reflective coatings can lower cooling costs by reducing heat absorption, maintaining comfortable indoor temperatures, and cutting household cooling expenses.

Why Hire Dream Home Roofers

Hiring Dream Home Roofers ensures a professional, quality installation. Their expert consultations provide thorough assessments, and their supplier relationships lead to material cost savings.

Most roofing projects are completed within 3-7 days, and installations can be done in any season.

Summary

Proper installation of architectural shingles is essential for a durable and aesthetically pleasing roof. From preparing the roof deck to finishing touches, following these steps ensures a successful project. Hiring professionals like Dream Home Roofers can further enhance the quality and longevity of your roof.

Frequently Asked Questions

How do I start my first row of architectural shingles?

To begin installing roof shingles, start at the bottom edge of the roof with a chalk line to ensure a straight row. Use starter shingles to create a solid foundation, ensuring a 1/2 to 3/4-inch overhang for proper water drainage.

What is the proper nailing pattern for architectural shingles?

The proper nailing pattern for architectural shingles involves placing roofing nails on the designated nailing line, typically four to six nails per shingle, depending on the manufacturer’s instructions and local building codes. This ensures stability and resistance to wind uplift.

Do architectural shingles need to be staggered?

Yes, architectural shingles should be staggered to prevent the alignment of shingle joints, which ensures proper water drainage and enhances the roof’s aesthetic appeal. Staggering also contributes to the overall durability of the roofing system.

Where should I nail shingles architecturally?

When installing architectural shingles, nails should be placed just below the adhesive strip, ensuring they penetrate the roof deck. This placement secures the shingles effectively and helps prevent water infiltration.

How do I use snapping lines for architectural shingles?

Snapping chalk lines helps maintain proper alignment during shingle installation. Begin by marking a straight edge along the roof deck, then snap lines horizontally across the roof to guide the placement of each shingle course, ensuring a smooth installation process.


https://dreamhomeroofers.com/wp-content/uploads/2025/01/Installing-underlayment-and-starter-shingles-on-a-roof.-1.png 1000 1500 Dream Home Roofers https://dreamhomeroofers.com/wp-content/uploads/2024/09/dhr-logo.png Dream Home Roofers2025-01-23 08:00:532026-03-27 11:26:25Best Methods for Architectural Shingles: How to Install in Simple Steps
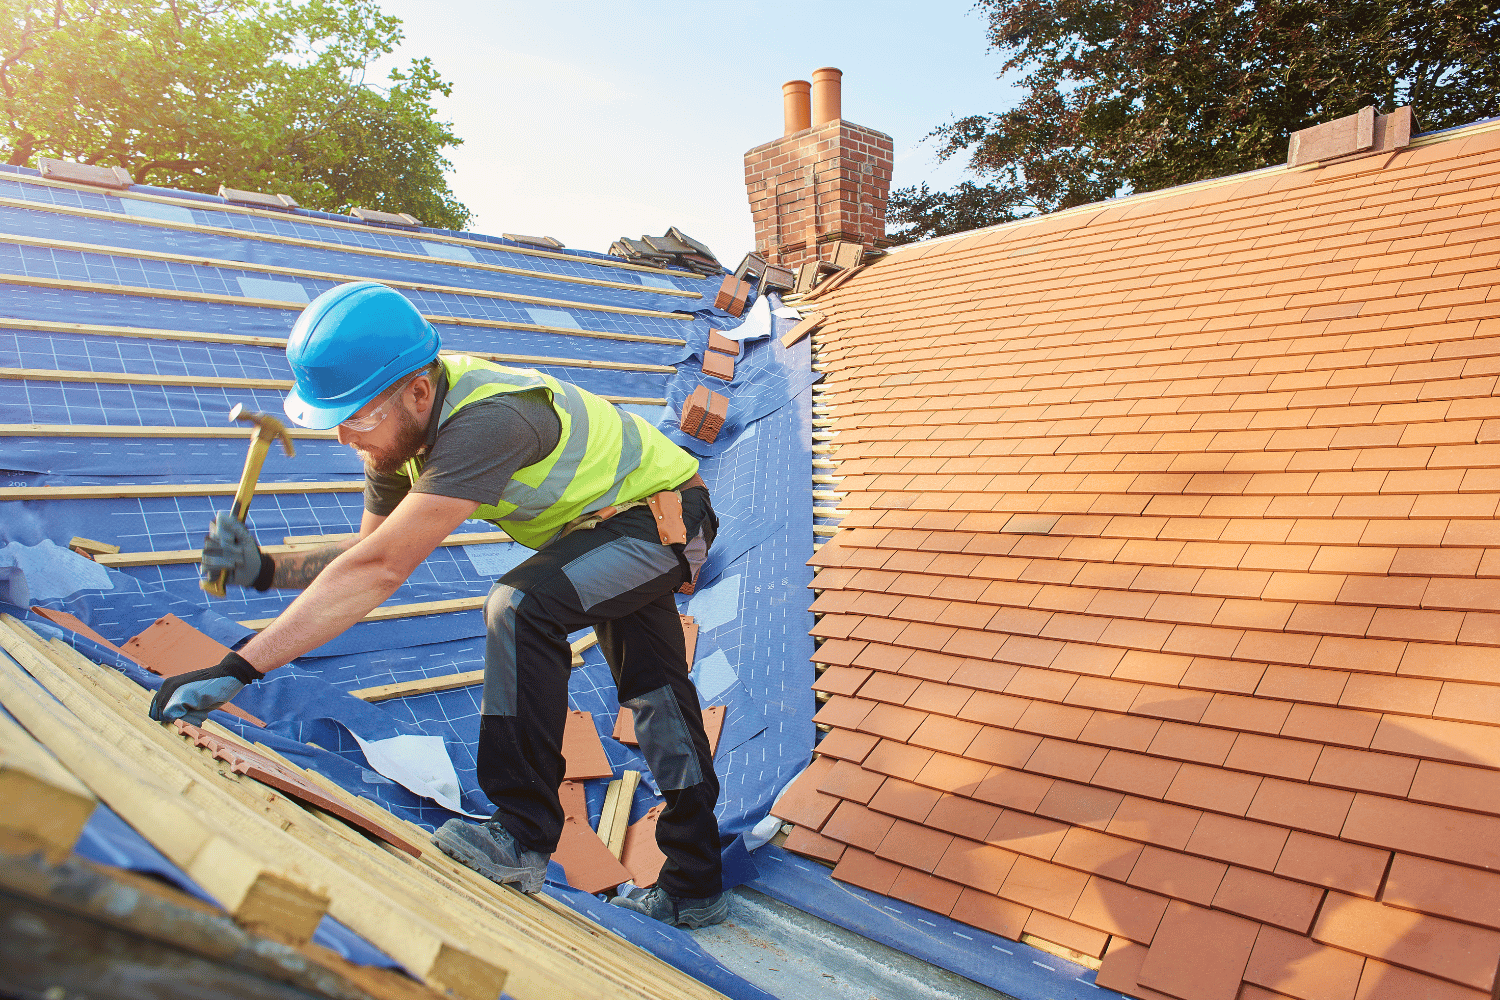
A roofing contractor installing 30-year shingles on a home.

30 Year Shingle: Durability and Value for Your Home Roof

in Roof Installation, Roofing/by Dream Home Roofers

What makes a 30-year shingle a great roofing choice? These durable shingles are built to last up to 30 years. This article covers their composition, benefits, and installation steps to help you decide if they’re right for your roof.

Key Takeaways

  • 30-year architectural shingles are more durable and aesthetically appealing than traditional options, offering an expected lifespan of up to 30 years with proper maintenance.

  • These shingles provide excellent weather resistance, able to withstand high winds and heavy snow, making them a reliable choice for varied climates.

  • Regular maintenance, including inspections and timely repairs, is crucial for maximizing the lifespan and performance of 30-year shingles.

Understanding 30-Year Shingles

An illustration of a 30-year shingle roof highlighting its durability.

30-year architectural shingle, also known as architectural or dimensional shingles, are a type of asphalt shingle designed to last longer and perform better than traditional 3-tab shingles. These shingles are typically thicker and more durable, providing enhanced protection and a more appealing appearance for your roof. Additionally, there are various types of asphalt shingles available in the market.

The lifespan ratings for these shingles indicate that, with proper maintenance, they can last up to 30 years, making them a popular choice for homeowners looking for long-term solutions.

Composition and Design

The robust composition of 30-year architectural shingles includes a fiberglass base layered with ceramic-coated granules embedded in water-resistant asphalt roof. This construction not only enhances their durability but also allows them to mimic the appearance of more expensive roofing materials, such as cedar shakes or slate.

The added thickness, which contributes to their weight, makes them significantly more durable than standard 3-tab shingles, providing extra protection against the elements.

Longevity and Performance

The performance of 30-year shingles is notable, with an expected lifespan of around 25 years under typical conditions. In ideal environments, they can last up to their full 30-year rating, though factors like weather exposure, regular maintenance, and the quality of installation play crucial roles in determining their actual lifespan.

These shingles are designed to withstand harsh weather conditions, including high winds and heavy snow, making them a durable choice for various climates that can experience wind damage.

Benefits of 30-Year Shingles

A visual comparison of the benefits of 30-year shingles.

The benefits of 30-year shingles extend beyond their longevity. They offer superior durability and weather resistance, an array of aesthetic options, and are a cost-effective investment in the long run. These shingles are thicker and more robust than traditional options, providing better protection and enhancing the overall value of your home.

Durability and Weather Resistance

One of the standout features of 30-year architectural shingles is their ability to endure harsh weather conditions. These shingles can withstand wind speeds of up to 130 miles per hour thanks to their adhesive strips and tight seals. Their added thickness and high-quality materials provide excellent protection against heavy snow loads and other severe weather scenarios.

This durability makes them a reliable choice for homeowners in regions with extreme weather conditions.

Aesthetic Appeal and Design Options

30-year architectural shingles are not only functional but also aesthetically pleasing. They come in a wide array of styles, colors, and designs, allowing homeowners to customize their roofs to match their personal tastes and enhance curb appeal. Additionally, the architectural shingle option provides durability and style.

Unlike 3-tab shingles, these shingles offer a three-dimensional look and can emulate the appearance of more expensive roofing materials, providing a sophisticated and elegant finish to your home.

Cost-Effectiveness

While the initial cost of 30-year shingles may be higher than standard options, their longevity and durability make them a cost-effective choice in the long run. Homeowners can save significantly on maintenance and replacement costs over time, as these shingles require fewer repairs and replacements.

Investing in 30-year shingles ultimately pays off by reducing the need for frequent roof replacements and providing long-term savings.

Installation Process for 30-Year Shingles

A roofing contractor installing 30-year shingles on a home.

Installing 30-year shingles involves several critical steps to ensure proper performance and longevity. The process starts with a comprehensive consultation, followed by thorough preparation and removal of old materials, and concludes with meticulous installation and finishing touches.
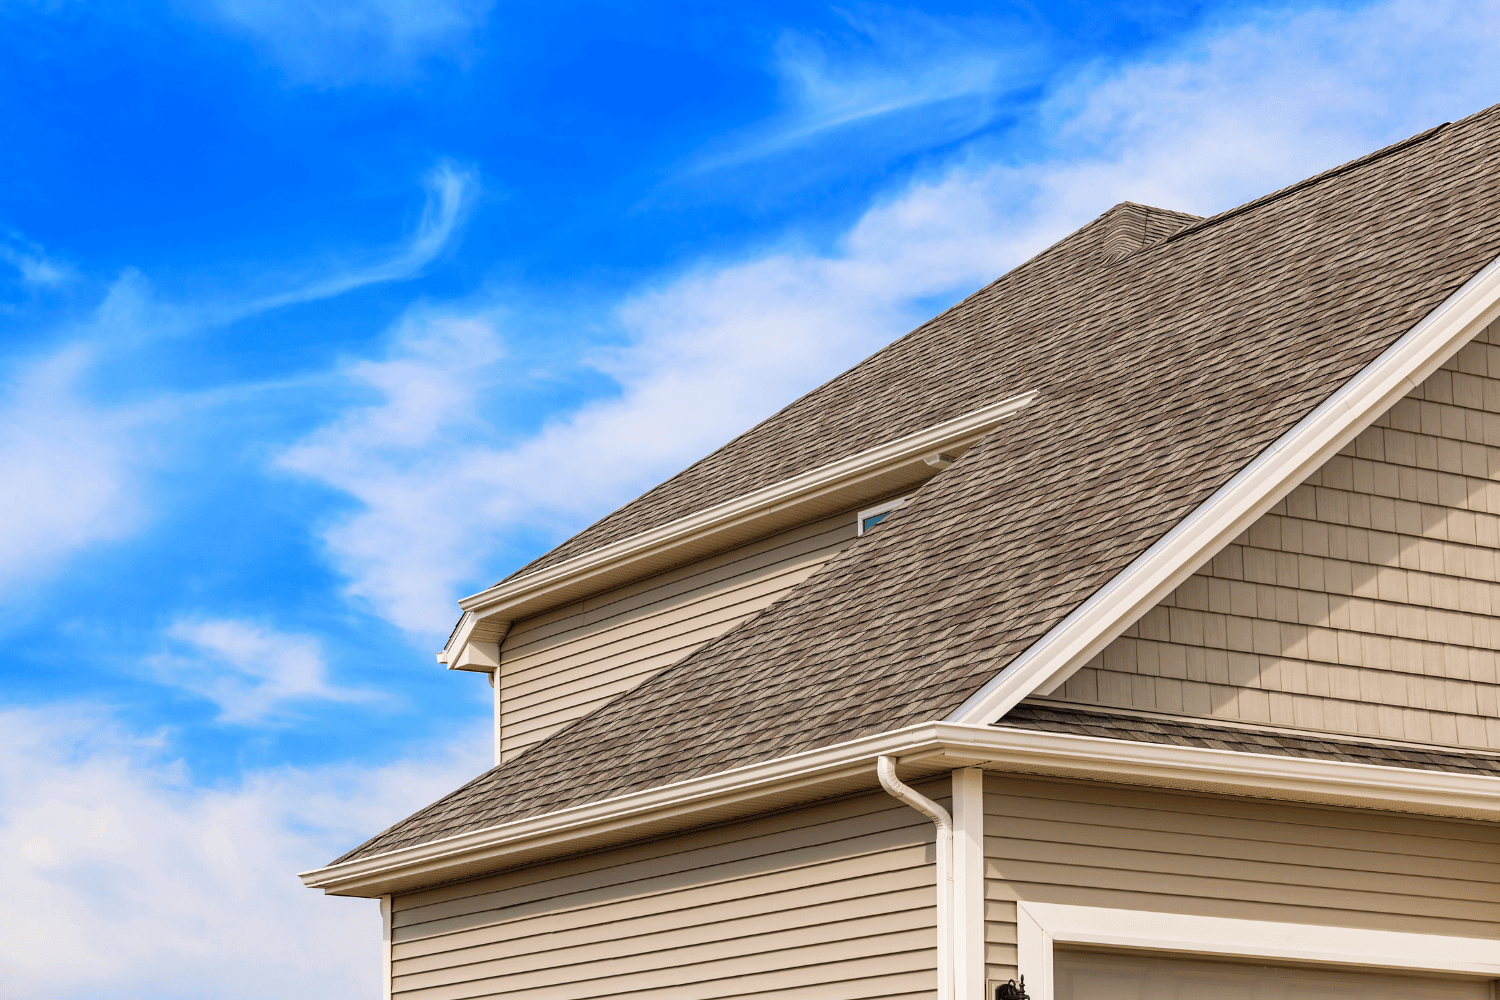
Proper installation by experienced roofing contractors is essential to maximize the benefits and lifespan of these shingles.

Initial Consultation

The first step in the installation process is the initial consultation. During this phase, a roofing contractor visits your home to assess your roofing needs and provide expert guidance. Homeowners should discuss their budget and preferences, and the contractor will offer tailored recommendations for the types of shingles suitable for their specific requirements.

Dream Home Roofers provide a no-obligation estimate and discuss financing options to ensure the project fits within your budget.

Preparation and Removal

Preparation and removal are crucial steps in the installation process. This involves removing the old roofing materials and inspecting the roof deck for any damage that needs to be addressed before installing the new shingles. Proper preparation ensures a smooth installation process and helps prevent future issues.

Roof replacement can be done in any season, though extra precautions may be needed during extreme weather conditions for a new roof.

Installation and Finishing Touches

The installation of 30-year shingles begins with laying a high-quality underlayment for added protection. The shingles are then installed carefully to ensure optimal performance and longevity. An on-site supervisor ensures the installation process is executed correctly, maintaining focus and professionalism throughout.
Once the installation is complete, a thorough cleanup is performed to remove any discarded materials, leaving your property clean and safe.

Maintenance Tips for Maximizing Lifespan

Regular maintenance is key to maximizing the maximum lifespan of 30-year shingles. With proper installation and routine upkeep, these shingles can achieve up to 80-85% of their estimated lifespan.

This involves conducting regular inspections, cleaning the roof, and promptly addressing minor repairs to prevent major issues from developing.

Routine Inspections

Regular inspections are vital for maintaining your roof’s health. Visual inspections from the ground can help spot early signs of damage, especially after severe weather. Keeping gutters clear of debris and trimming overhanging vegetation also helps maintain shingle integrity.

Professional inspections are recommended to catch potential problems before they escalate.

Cleaning and Debris Removal

Maintaining a clean roof is crucial for preserving its appearance and functionality. The StainGuard® feature on some shingles helps prevent algae and mold growth. Regular cleaning and removing debris, moss, and algae are necessary to maintain the roof’s integrity and curb appeal.

This practice ensures that your shingles stay in good condition throughout their lifespan.

Addressing Minor Repairs Promptly

Addressing minor repairs promptly can significantly extend the lifespan of your shingles. Small issues, if left unattended, can escalate into major problems, leading to costly repairs.

Timely repairs save money and prevent extensive damage, ensuring your roof remains in good condition for years to come.

Comparing 30-Year Shingles to Other Roofing Materials

A side-by-side comparison of 30-year shingles and other roofing materials.

Choosing a roofing material requires considering factors such as cost, durability, and aesthetics. 30-year shingles offer a balanced combination of these attributes, making them a popular choice among homeowners.

However, comparing them to other common roofing materials like metal, wood shakes, and slate can be beneficial.

Metal vs. 30-Year Shingles

Metal roofs are known for their longevity, lasting 40 to 70 years, and their superior resistance to harsh weather conditions. Although they come with a higher upfront cost, their durability and lower maintenance needs can save homeowners money in the long run, ultimately extending the roof’s life.

On the other hand, 30-year shingles are more affordable initially and offer a traditional aesthetic that complements various home designs.

Wood Shakes vs. 30-Year Shingles

Wood shakes provide a natural and rustic look, with a lifespan comparable to that of 30-year shingles, lasting around 30 to 50 years. However, wood shakes require more maintenance and are less resistant to fire and severe weather than asphalt shingles.

30-year shingles offer a more durable and low-maintenance alternative while still providing a pleasing appearance.

Slate vs. 30-Year Shingles

Slate roofing is renowned for its extreme longevity, lasting up to 175 years or more. However, the high cost, often associated with a hefty price tag, and significant weight make it less practical for many homeowners.

30-year shingles provide a more affordable and lightweight option while still delivering excellent durability and aesthetic appeal, making them a versatile choice for modern homes.

Warranty and Insurance Considerations

An overview of warranty types for roofing materials.

Understanding the warranties and insurance considerations for 30-year shingles is crucial for protecting your investment. Manufacturer’s warranties typically cover defects but not installation costs, while workmanship warranties ensure installation quality.

Proper maintenance and timely repairs keep these warranties valid and simplify insurance claims in case of damage.

Manufacturer’s Warranty

Most manufacturers offer a lifetime limited warranty for 30-year shingles, covering defects for a specified period. However, these warranties usually exclude labor costs for removal and installation of replacement shingles.

Understanding the exclusions and limitations of the manufacturer’s warranty ensures you are fully covered in case of defects.

Workmanship Warranty

A workmanship warranty, provided by the roofing contractor, covers installation errors that may lead to issues like leaks. This warranty ensures the installation is done correctly, keeping the manufacturer’s warranty valid.

Experienced roofing contractors help avoid installation mistakes and potential warranty claims.

Insurance Claims

Filing an insurance claim for roof damage can be complex, but understanding the process helps. Insurance coverage may vary based on the roof’s age and the extent of damage. If shingles are discontinued, insurance companies might need to replace the entire roof rather than just the damaged sections.

Regular roof inspections can uncover hidden damage, aiding in successful insurance claims.

Summary

In conclusion, 30-year shingles offer a compelling combination of durability, aesthetic appeal, and cost-effectiveness. They provide excellent protection against harsh weather, require less maintenance, and enhance the value of your home. With proper installation and regular upkeep, these shingles can serve you well for decades. Consider investing in 30-year shingles for a reliable and attractive roofing solution.

Frequently Asked Questions

What is the first step in the roofing process with Dream Home?

The first step with Dream Home is a consultation where experts assess your roofing needs and offer helpful guidance. It’s a great way to get started on your roofing project!

How long does a typical roofing job take?

A typical roofing job usually takes about 3 to 7 days, depending on the weather and how complex the roof is. So, it’s good to plan accordingly!

Can roofs be replaced during winter or summer?

Absolutely, roofs can be replaced in both winter and summer! Just keep in mind that you’ll need to take extra precautions depending on the temperature.

What factors should be considered when choosing roofing material?

When choosing roofing material, you should consider cost, durability, climate suitability, and design. Each of these factors will help ensure you make the right choice for your home.

How can a homeowner determine if their roof needs repairs or a full replacement?

A thorough inspection is key to understanding if your roof needs repairs or a full replacement. Look for signs like leaks, missing shingles, or sagging areas to help make the right decision.


https://dreamhomeroofers.com/wp-content/uploads/2025/01/A-roofing-contractor-installing-30-year-shingles-on-a-home.-1.png 1000 1500 Dream Home Roofers https://dreamhomeroofers.com/wp-content/uploads/2024/09/dhr-logo.png Dream Home Roofers2025-01-21 08:00:162026-03-27 11:27:3230 Year Shingle: Durability and Value for Your Home Roof
A side-by-side comparison of architectural shingles and other roofing materials.

Architectural Shingle Cost in King of Prussia, PA: What to Expect in 2025

in Roof Installation, Roofing/by Dream Home Roofers

If you’re budgeting for a roof replacement in King of Prussia and wondering what architectural shingles actually cost right now, this is the breakdown. We’ve included material costs, installed prices, what drives costs up or down, and how different shingle tiers compare, based on what we’re actually seeing in the Montgomery County market in 2025. Dream Home Roofers is an Owens Corning Preferred Contractor serving King of Prussia and the surrounding area.

What Architectural Shingles Cost Per Square in 2025

Roofing is measured in squares. One square equals 100 square feet of roof surface. The number of squares on your roof is larger than your home’s footprint because of pitch, overhangs, and multiple facets.
• Entry-level architectural shingles (Owens Corning Oakridge, GAF Timberline HDZ): $100 to $130 per square for materials. Installed price on a full replacement including tear-off, underlayment,
and labor: $8,000 to $12,000 for a typical KOP home.
• Mid-tier architectural shingles (Owens Corning Duration, GAF Timberline CS): $120 to $155 per square for materials. Full replacement installed: $10,000 to $14,000.
• Designer and impact-resistant shingles (Owens Corning Duration Flex, TruDefinition): $140 to $175 per square for materials. Full replacement installed: $12,000 to $18,000.
• Second-story homes, steep pitches above 9:12, and homes requiring decking repair will fall at the higher end or above these ranges.

What Drives the Cost of an Architectural Shingle Roof

Roof Size and Complexity

A straightforward gable or hip roof on a single-story ranch is faster and cheaper to work on than a multi-faceted roof with dormers, valleys, and multiple penetrations. Every valley, hip, and penetration requires additional flashing and detail work.

Pitch

Roofs steeper than 7:12 require additional safety equipment and slow down installation significantly. Most KOP homes fall in the 4:12 to 8:12 range. Anything above that carries a steep-pitch surcharge.

Decking Condition

We inspect all decking during a replacement. If we find damaged or rotted sheathing it needs to be replaced before new shingles go on. In King of Prussia, homes built in the 1960s through 1980s
frequently have board decking that may need to be overlaid with new plywood. This adds to the project cost but needs to be done.

Shingle Tier

The difference between entry-level and designer shingles on the same roof is typically $1,500 to $3,500 in installed cost. Whether that’s worth it depends on how long you plan to stay in the home and what the neighborhood comps look like. On a home in a higher-value area of KOP, the premium shingles often add more than they cost in perceived value.

Architectural vs 3-Tab: Is the Upgrade Worth It in PA?

For most King of Prussia homeowners, yes. Architectural shingles carry a 30-year warranty compared to 20 years for 3-tab. They have a dimensional, textured appearance that looks substantially better from the street. They also perform better in wind events, which matters in Pennsylvania’s late-season storm season. The installed cost premium is typically $500 to $1,500 on a residential roof, and they hold value better at resale.

Shingle Brands We Install in King of Prussia

Owens Corning

Dream Home Roofers is an Owens Corning Preferred Contractor. This designation means our installations qualify for the Owens Corning Preferred Protection warranty program, which covers both materials and workmanship. The Duration series is our most commonly installed line in the KOP area, with the TruDefinition Duration as the step-up option for homeowners who want enhanced color depth.

GAF

GAF’s Timberline line is one of the best-selling shingle products in the country for good reason. The HDZ and CS versions carry a StainGuard Plus algae resistance coating that’s worth having in Pennsylvania’s humid summers. The Timberline CS (Cool Series) also qualifies for energy efficiency credits in some situations.

CertainTeed

CertainTeed’s Landmark and Landmark Premium lines are popular with homeowners looking for specific color options that GAF and Owens Corning don’t offer. The Landmark Premium carries a StreakFighter algae resistance that performs well. We install CertainTeed on request and can source the full line for KOP projects.

Frequently Asked Questions: Architectural Shingles Cost

How much do architectural shingles cost per square in King of Prussia, PA?

In the King of Prussia, PA area, architectural shingles run $100 to $175 per square for materials depending on tier. Installed prices for a full roof replacement range from $8,000 to $18,000 for a typical single-family home, depending on size, pitch, and the shingle line chosen.

Are architectural shingles worth the extra cost over 3-tab?

For most King of Prussia homes, yes. Architectural shingles carry a 30-year warranty vs 20 years for 3-tab, perform better in wind, and look better from the street. The installed premium is typically $500 to $1,500 for a residential roof, and the product holds up better over time in Pennsylvania’s climate.

What architectural shingle brands does Dream Home Roofers install?

We install Owens Corning, GAF, and CertainTeed architectural shingles in King of Prussia and throughout Montgomery County, PA. As an Owens Corning Preferred Contractor, our installations qualify for the manufacturer’s extended warranty, which covers both materials and workmanship.

How do I know how many squares my King of Prussia roof is?

The easiest way is to get a free estimate. Dream Home Roofers will measure your roof accurately during the estimate visit. As a rough guide, divide your home’s footprint square footage by 100 and then multiply by a pitch factor (roughly 1.15 for a standard 5:12 pitch) to get an approximation. Most single-story KOP homes are 18 to 28 squares.

https://dreamhomeroofers.com/wp-content/uploads/2025/01/A-side-by-side-comparison-of-architectural-shingles-and-other-roofing-materials.-1.png 1000 1500 Dream Home Roofers https://dreamhomeroofers.com/wp-content/uploads/2024/09/dhr-logo.png Dream Home Roofers2025-01-09 08:00:582026-04-07 05:10:15Architectural Shingle Cost in King of Prussia, PA: What to Expect in 2025

Do Roofers Install Gutters When Replacing Your Roof?

in Roofing/by Dream Home Roofers

Do roofers install gutters? The answer is yes, many roofing contractors can install gutters when replacing your roof. This combined service offers convenience, cost savings, and a streamlined process. In this article, we’ll explore how roofers manage gutter installations, why it’s beneficial, and what you should know when considering this option.

Key Takeaways

  • Many roofing contractors can handle both roof and gutter installations, streamlining the process and often saving costs for homeowners.
  • Replacing gutters alongside a roof is advisable to ensure optimal functionality and prevent water damage, as old gutters can negatively impact new roofs.
  • Choosing a qualified contractor for both jobs is essential, with attention to their experience, credentials, and transparency concerning project timelines and costs.

Can Roofing Contractors Install Gutters?

A roofing contractor working on a roof while discussing the installation of gutters.

The short answer is yes, many roofing contractors are well-equipped to install gutters. This dual capability brings a significant convenience to homeowners. Imagine managing two separate contractors for your roof and gutters – coordinating schedules, ensuring quality from both ends, and potentially dealing with misalignment issues. Hiring a single roofing contractor for both tasks streamlines the process, reduces potential headaches, and often saves on overall costs.

At Dream Home Roofers, this approach not only simplifies the project but also enhances the overall quality of the work. Having one team handle both the roof replacement and new gutter installation, supported by our in house gutter division, ensures that both systems are perfectly aligned, crucial for effective water drainage and long-term durability.

Many roofing contractors offer bundled services that can lead to cost savings, making this a financially wise decision.

Benefits of Combining Roof and Gutter Installation

Combining roof and gutter installations under a single contractor can change the game. One of the primary benefits is the efficiency in project coordination. A single team managing both roof and gutter work streamlines scheduling, ensuring each phase of the project transitions smoothly.

Moreover, this approach enhances the cohesiveness of the work. The same contractor overseeing both installations ensures the gutter system aligns perfectly with the new roof, preventing potential water damage and ensuring optimal function. This coordination reduces the risk of miscommunication and errors typical of dealing with multiple contractors.

Another significant advantage is the potential cost savings. Bundling roof and gutter installations often allows homeowners to negotiate better rates on labor and materials. This reduces overall costs and ensures both systems are installed using compatible materials and techniques, enhancing the durability and effectiveness of the installation.

Combining these projects can also shorten the project timeline. One contractor handling the entire job completes the project faster, minimizing disruption to your daily life and ensuring your home is protected sooner.

Expertise in Gutter Systems

Roofing contractors have the expertise to ensure gutters are correctly installed and integrated with new roofs. This prevents potential water damage from improperly aligned gutters. Our team at Dream Home Roofers, for example, understands the intricacies of how gutters should interact with the roof to manage rainwater effectively.

Proper gutter installation requires perfect alignment with the roof’s edge and the installation of features like a drip edge. A drip edge is a metal flashing that manages water flow, preventing leaks under roof shingles. This small but essential component can make a significant difference in protecting your roof deck and the overall structure of your home.

Roofing contractors are skilled in addressing the unique challenges posed by different roofing materials and designs. Whether you have a metal roof, asphalt shingles, or another type of roofing, these professionals from a roofing company integrate the gutter system seamlessly to ensure optimal performance and longevity.
Why Should You Replace Your Gutters When Replacing Your Roof?

Old gutters being replaced with new ones during a roof replacement.

Assessing the condition of your gutters during a roof replacement is essential. Old or failing gutters can compromise the functionality and integrity of a new roof, so addressing both systems simultaneously is advisable. If a roof inspection reveals issues like sagging, clogs, or water damage, it’s often best to replace your gutters along with your roof.

Replacing both your roof and gutters at the same time streamlines scheduling and can lead to reduced costs. This approach allows coordination of one project timeline, reducing labor costs and minimizing disruption to your daily life. It also ensures that both systems work together, enhancing the overall durability and effectiveness of your home’s exterior.

If your existing gutters are in good condition and compatible with the new roof, they might be retained. This decision depends on factors such as materials used and the type of roof being installed. Consulting with your roofing contractor can help in making an informed decision about whether to replace your gutters during the roof replacement.

Signs Your Gutters Need Replacement

Determining if your gutters need replacement involves looking for several key signs. One obvious indicator is sagging gutters or gutters pulling away from the house. This can indicate that the gutters are overloaded with debris or that the fasteners are failing.

Water stains on siding or walls and pooling water around the foundation are also red flags. These issues suggest that the gutters are not effectively channeling water away from your home, leading to serious structural damage over time.

If you notice nails and fasteners on the ground around your home, it might be time for a gutter replacement. These elements are critical for keeping the gutters securely attached to your home, and their failure can lead to further damage.

Addressing these issues promptly is essential. Ignoring them can result in more extensive damage to your home’s structure and foundation, leading to costly repairs later.

The Impact of Old Gutters on New Roofs

Old or clogged gutters can significantly impact a new roof negatively. Clogged gutters can cause shingles to curl or buckle, eventually leading to a roof leak in the roof decking and the interior of your home.

Poorly functioning gutters can contribute to water-related issues such as mold growth and foundation cracks. These problems compromise the structural integrity of your home and pose health risks to its occupants.

Investing in a new gutter system during a roof replacement can prevent these issues. Ensuring that your gutters function correctly protects both your roof and the exterior structures of your home, safeguarding your investment.

Types of Gutters Installed by Roofing Contractors

Different types of gutters installed on a house, showcasing seamless and traditional styles.

Roofing contractors install various gutter types, each with its own benefits. Common materials include aluminum and copper gutters. Aluminum gutters generally last about 20 years, while copper gutters can last 50 years or more, making them a more durable but expensive option.

Standard residential gutters typically come in a 5-inch size, suitable for most homes. For homes with steep roofs, oversized gutters are often recommended to enhance water handling capacity. This ensures that even during heavy rainfall, the gutters efficiently channel water away from the home.

Seamless gutters are another popular option. These gutters are produced using a gutter extruding machine, creating a continuous piece of gutter tailored to the specific dimensions of your home. Seamless gutters are preferred for reducing the potential for leaks, providing a more reliable water drainage system.

Seamless Gutters

Seamless gutters are crafted from a single piece of material, eliminating joints that can cause leaks. This design enhances the gutter’s functionality and aesthetic appeal, making it popular among homeowners.

These gutters can be custom-fabricated from materials like aluminum, copper, or steel to fit the specific dimensions of a home. This customization ensures a perfect fit and optimal performance, as the gutters are tailored to handle the specific water drainage needs of the property.

The absence of joints in seamless gutters reduces the likelihood of leaks, providing a more reliable and durable water drainage system. This makes them an excellent investment for homeowners looking to protect their home from water damage.

Gutter Guards

Gutter guards are a valuable addition to any gutter system, blocking leaves and debris from entering the gutters. This significantly reduces the frequency of maintenance needed, making them a convenient option for homeowners.

Preventing clogs, gutter guards ensure better water flow and minimize the risk of overflow during heavy rain. This helps protect the foundation of your home and prevents water damage to the exterior walls.

Installing gutter guards reduces the need for regular cleaning, as they prevent debris accumulation. This saves time and effort and extends the lifespan of the gutters by reducing wear and tear.

The Roof Replacement Process and Gutter Installation

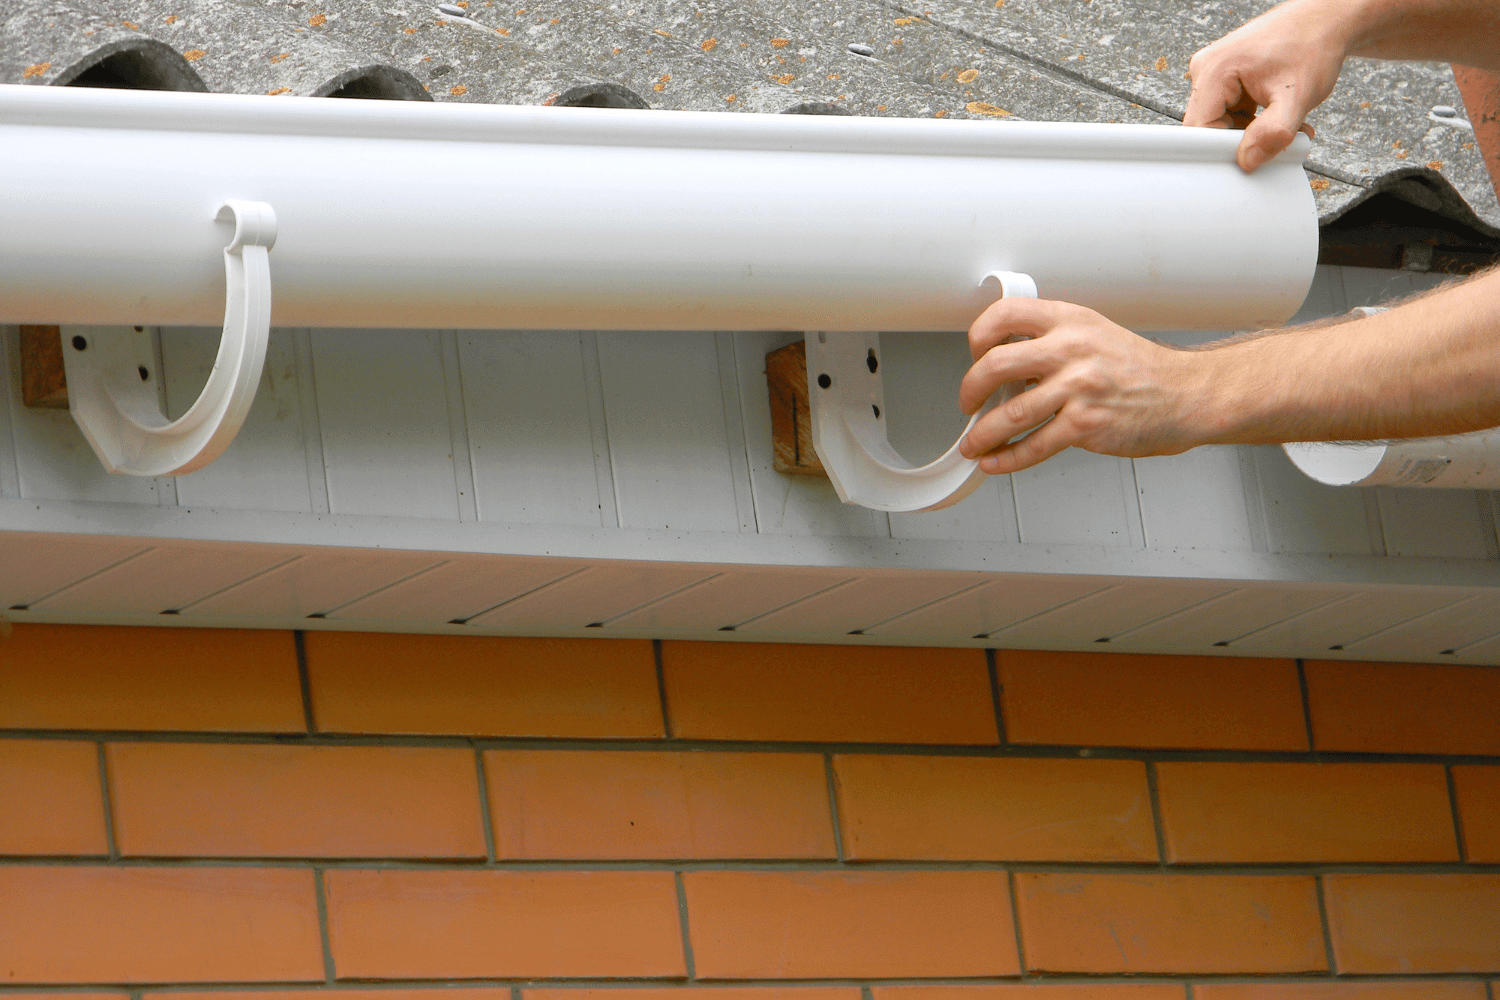
A roofing contractor installing new gutters after completing a roof replacement.

Replacing gutters during roof installation allows for a more efficient and integrated installation process. At Dream Home Roofers, removing gutters simultaneously with old shingles facilitates the roof replacement process. This ensures that the entire roof system, including the drip edge and other critical components, is installed correctly.

During roof replacement, existing gutters are typically covered and protected to prevent damage from falling debris. Roofing contractors avoid leaning ladders against the gutters and use tarps to shield them from excess weight and materials. This handling preserves the integrity of the existing gutters, ensuring they remain in good condition throughout the roofing process.

Once the new roof is installed, the next step is installing the new gutters. This is usually done after ensuring the roof deck and all roofing materials are properly in place. The average time to install gutters after replacing a roof is about one day, making it a quick and efficient process to complete your home’s exterior upgrade.

Protecting Existing Gutters During Roof Replacement

Roofing contractors work around existing gutters by using tarps to cover them and handling materials with care to avoid excess weight and damage. This is particularly important when the existing gutters are still in good condition and do not need replacement.

Sometimes, gutters might need to be removed to provide better access for roofers. This is often necessary to improve the installation of a drip edge or ensure the proper alignment of roofing materials. In such cases, the gutters can be reinstalled or new gutters can be put in place once the roofing work is completed.

If the existing gutters are older or damaged, it is generally advisable to replace them during the roof replacement process. This ensures that the new roof has a reliable gutter system that can effectively manage water drainage and protect the structural integrity of the home.

Installing New Gutters Post-Roof Replacement

After the roof replacement, professional roofing teams assess the roof pitch and local rainfall patterns to create effective gutter solutions tailored to your home. This ensures that the new gutters installed are capable of handling the specific water drainage needs of the property after the roof replaced.

Old gutters might be incompatible with the new roof type, which is why it’s important to install new gutters that are designed to work with the new roofing materials. This compatibility is crucial for preventing water damage and ensuring the longevity of both the roof and the gutter system.

To ensure proper functionality, contractors often clear the gutters of debris after the roof installation using a powerful blower. This step is essential for maintaining the effectiveness of the gutters and preventing any potential blockages that could compromise the new roof.

Financing Options for Roof and Gutter Replacements

A family discussing financing options for roof and gutter replacements with a contractor.

Financing a roof replacement and gutter installation can be a significant investment, but there are various options available to help homeowners manage the costs. Roof loans can cover expenses for roof or gutter replacements, typically ranging between $1,000 and $100,000. These loans provide the necessary funds to complete the project without having to pay the entire cost upfront.

Personal loans are another option, though they often come with higher interest rates compared to home equity loans due to the lack of collateral. Home equity loans and home equity lines of credit (HELOCs) allow homeowners to draw funds as needed, usually with lower interest rates, making them a more affordable financing option.

Government-insured loans can also provide favorable terms for home repairs, including options that require lower credit scores, making them accessible to a broader range of homeowners. Additionally, some roofing companies, including Dream Home Roofers, may offer financing directly or through partnering financial institutions, providing convenient payment plans tailored to your needs.

Using a credit card for roof repairs can be beneficial if the balance can be paid off within a promotional 0% interest period. This option allows homeowners to spread the cost over several months without incurring interest charges, provided they adhere to the promotional terms.

How to Choose the Right Roofing Contractor for Both Jobs

Choosing the right roofing contractor for both roof and gutter installations is crucial for ensuring quality workmanship and reliability. Start by discussing the contractor’s credentials, ensuring they are registered, bonded, and insured. This provides peace of mind that they meet industry standards and are protected against liability.

Experience is another critical factor. A contractor with more experience indicates tested workmanship and reliability, which is essential for such significant home improvement projects. At Dream Home Roofers, our extensive experience ensures that we deliver high-quality results every time.

Transparency about budget and timelines is also important. Make sure the contractor provides a clear estimate and timeline for the project, setting realistic expectations and ensuring accountability. This openness helps prevent misunderstandings and keeps the project on track.

Professionalism and reliability are essential traits to look for in a contractor. Check online reviews and ask for references to gauge their reputation. Contractors who resolve negative reviews and address customer concerns demonstrate a commitment to professionalism and customer satisfaction.

Finally, use a checklist to find contractors specializing in both roofing and gutter installation. This ensures they have the necessary skills and knowledge to handle both aspects of the project, providing a seamless and integrated service.

Summary

Combining roof and gutter installations under a single contractor offers numerous benefits, including efficient project coordination, enhanced cohesiveness, potential cost savings, and a shorter project timeline. This approach ensures that both systems are perfectly aligned and functioning optimally, protecting your home from water damage and other issues.

Seamless gutters and gutter guards are excellent investments for homeowners looking to enhance their home’s water drainage system. Seamless gutters provide a more reliable and aesthetically pleasing solution, while gutter guards reduce maintenance and prevent clogs, ensuring better water flow.

Choosing the right roofing contractor, such as Dream Home Roofers, is essential for achieving high-quality results. By considering credentials, experience, transparency, and professionalism, homeowners can make an informed decision and ensure their home improvement projects are completed to the highest standards.

Frequently Asked Questions

Can roofing contractors install gutters?

Yes, roofing contractors can install gutters, offering convenience and cost savings by managing both roofing and gutter installation together.

Why should I replace my gutters when replacing my roof?

Replacing your gutters when you replace your roof enhances functionality and ensures both systems work cohesively, ultimately reducing long-term maintenance costs. This cohesive approach promotes the overall efficiency of your home’s drainage system.

What are seamless gutters, and why should I consider them?

Seamless gutters are made from a single piece of material, which minimizes joints and the risk of leaks, ensuring a more reliable and visually appealing drainage system. Consider them for enhanced durability and improved aesthetics for your property.

What financing options are available for roof and gutter replacements?

For roof and gutter replacements, available financing options include roof loans, personal loans, home equity loans, HELOCs, government-insured loans, and credit card promotions, in addition to financing plans offered by some roofing companies. Consider your financial situation to determine the best choice for your needs.

How do I choose the right roofing contractor for both roof and gutter installations?

Choosing the right roofing contractor involves ensuring they have the necessary credentials, relevant experience, and a reputation for professionalism. Additionally, transparency regarding budget and timelines is crucial for a successful installation.

https://dreamhomeroofers.com/wp-content/uploads/2024/09/dhr-logo.png 0 0 Dream Home Roofers https://dreamhomeroofers.com/wp-content/uploads/2024/09/dhr-logo.png Dream Home Roofers2024-12-17 08:00:592025-08-26 03:34:46Do Roofers Install Gutters When Replacing Your Roof?

Top Tips for Roofing for New Construction Projects

in Roof Installation, Roofing/by Dream Home Roofers

Roofing for new construction involves unique considerations and steps that differ from roof replacements. This guide explains the essentials, including material choices, planning, and benefits, to help you make informed decisions for your new home.

Key Takeaways

  • New construction roofing allows for customization, enhancing both aesthetics and energy efficiency, which can increase property value.
  • Choosing the right materials and skilled contractors is essential for successful roofing projects, impacting costs, durability, and overall satisfaction.
  • Routine maintenance and inspections are crucial for extending the lifespan of a roof, preventing small issues from escalating into significant problems.

Understanding New Construction Roofing

A construction site showcasing new construction roofing materials.

New construction roofing involves the installation of a roof on newly built houses or additions. Unlike roof replacements, which involve removing and replacing an existing roof, new construction roofing starts from scratch, allowing for more customization and integration with the building’s design and specifications. This process is tailored to meet the specific needs of the new structure and the homeowner’s vision for their property.

One of the major benefits of new construction roofing is the wide range of styles, designs, and materials available. Whether you prefer the traditional look of wood shingles or the modern appeal of metal roofs, there’s a solution to match your aesthetic and functional requirements. These comprehensive solutions ensure that every aspect of your new roof, from material to color, complements the architectural style of your home, enhancing both its appearance and functionality.

Additionally, investing in a new roof can significantly boost your home’s energy efficiency, potentially lowering energy costs by reducing the workload on heating and cooling systems. A well-designed and properly installed roof can also increase your property’s value, making it more appealing to potential buyers and ensuring a higher return on investment.

This transformation turns your house into a dream home, aligning perfectly with your vision and providing long-term benefits.

Key Differences from Roof Replacement

New construction roofing and roof replacement might seem similar at first glance, but they have distinct differences in their processes. New construction roofing involves installing a roof on a newly built structure, which means that there is no need to remove an existing roof. This allows for a seamless integration of the roofing system with the building’s design and requirements, ensuring optimal performance and aesthetics from the start.

On the other hand, roof replacement involves removing the existing roofing materials, addressing any underlying issues, and then installing new materials as part of the roof replacement project. This process can be more complex and time-consuming, as it often includes dealing with potential damage or structural issues that may have developed over time.

Understanding these differences is crucial when planning your roofing project, as it impacts the overall approach, timeline, and costs involved.

Benefits of New Construction Roofing

New construction roofing offers numerous benefits that go beyond just providing a protective cover for your home. One of the most significant advantages is the improvement in energy efficiency. New roofing systems are designed to enhance overall energy performance, which can lead to substantial savings on utility bills. Energy-efficient roofs reduce the workload on your heating and cooling systems, making your home more comfortable and environmentally friendly.

Moreover, a new roof can significantly increase your property’s value. Potential buyers are often willing to pay a premium for homes with new, high-quality roofs, as it means they won’t have to worry about roof repairs or replacements for many years. This investment not only makes your home more appealing in the market but also ensures long-term protection and aesthetic appeal.

Essential Steps in New Construction Roofing

Workers engaged in the installation process of a new roof.

Embarking on a new construction roofing project involves several crucial steps that ensure the success and longevity of your new roof. From the initial planning and design to the final installation, each phase plays a vital role in achieving a roof that is both functional and aesthetically pleasing.

The process begins with meticulous planning and design, where the specific needs of the project are assessed and the best roofing system is chosen. Material selection follows, with options tailored to the homeowner’s preferences and the local climate.

Finally, the installation process brings everything together, with skilled roofers ensuring that every detail meets the highest standards of craftsmanship and quality.

Planning and Design

The planning and design phase is critical for the success of any new construction roofing project. This phase starts with a detailed inspection of the building envelope to determine the most suitable roofing type based on the climate, architectural style, and specific needs of the home. During this phase, a thorough consultation takes place where homeowners can discuss their preferences, including the optimal roofing material choices and color schemes that best complement the home’s overall design.

Choosing the right roofing material and color can greatly enhance the visual harmony and curb appeal of the home. Coordinating the roof color with the home’s siding and architectural style creates a cohesive and attractive exterior that reflects the homeowner’s personal style. This careful planning ensures that the new roof not only protects the home but also adds significant aesthetic value.

Material Selection

Selecting the right roofing materials is a crucial step in ensuring the durability and appearance of your new roof. Common materials for new roofs include asphalt shingles, metal roofs, and dimensional shingles, each offering distinct benefits and characteristics. An asphalt shingle roof is the most commonly used roofing material in American homes due to its affordability, ease of maintenance, and variety of colors and finishes.

Metal roofing is known for its strength, durability, and longevity, often lasting over 50 years. Its reflective properties also contribute to energy efficiency by keeping the house cooler in the summer.

Dimensional shingles, also known as architectural shingles, provide a textured appearance and add depth and sophistication to the roof. The choice of material should consider factors like durability, aesthetics, maintenance requirements, and local climate conditions.

Installation Process

The installation process for new construction roofing begins once the planning and material selection phases are complete and the contract is approved and signed. This phase involves the actual roof installation, where skilled roofers meticulously follow the planned design and specifications to ensure top-quality workmanship and long-lasting results.

After the installation is complete, a detailed inspection is conducted to verify that all roofing system requirements have been met and that the roof is installed correctly. This final inspection ensures that the new roof not only meets but exceeds the homeowner’s expectations, providing peace of mind and long-term protection.

Choosing the Right Roofing Contractor

Selecting the right roofing contractor is a critical decision that can significantly impact the success of your new construction roofing project. A trusted roofing contractor guarantees reliable service and expertise, ensuring that your roof is installed correctly and efficiently.

Key qualities to look for in a trusted local roofing contractor include solid credentials, extensive experience, positive customer reviews, and comprehensive warranties and guarantees.

Credentials and Experience

When choosing a roofing contractor, it’s essential to consider their credentials and experience. Contractors like Owens Corning Platinum Preferred Contractors meet high standards in workmanship and customer service, making them a reliable choice for your roofing needs.

Reviewing a contractor’s portfolio of past projects and customer reviews can provide valuable insights into their quality of work and reliability. A reputable contractor with over a decade of industry experience and a proven track record of quality workmanship is more likely to deliver superior results and ensure your satisfaction.

Customer Reviews and Referrals

Customer reviews and referrals are invaluable resources when selecting a roofing contractor. Reviews provide firsthand insights into a contractor’s professionalism, communication skills, and quality of work, helping you make an informed decision. Referrals from friends, family, neighbors, and past customers are also incredibly valuable, as they come from trusted sources who have experienced the contractor’s services firsthand.

A stable company with extensive experience in the roofing industry is often a safer choice, as their longevity indicates a track record of delivering quality work and maintaining customer satisfaction.

Warranty and Guarantees

Warranties and guarantees are essential aspects of choosing a roofing contractor, as they provide long-term protection and peace of mind for homeowners. A strong warranty reflects the contractor’s confidence in their workmanship. It also showcases the quality of materials used. Reputable roofing contractors should offer warranties that cover both materials and labor, ensuring comprehensive protection.

Dream Home Roofers, for example, offers a Lifetime Workmanship Warranty, guaranteeing high-quality materials and customer satisfaction. This commitment to excellence ensures that homeowners can trust in the longevity and durability of their new roof.

Cost Considerations for New Construction Roofing

A visual representation of various roofing materials and their costs.

Understanding the cost considerations for new construction roofing is crucial for planning and budgeting your project. Several factors contribute to the cost of a new roof. These include the roof’s size, the chosen materials, accessibility, and any necessary additional repairs.

Finalizing the design and material selection helps determine the appropriate roofing materials and ensures compliance with local building regulations.

Material Costs

The choice of roofing materials directly affects the total cost of your new construction roofing project. Among the various options, asphalt shingles are the most affordable, with costs ranging between $4,500 and $8,000 per 1,000 square feet. Composite shingles, made from recycled materials, are a pricier variant of asphalt shingles. Other materials, like slate tiles, can be significantly more expensive, ranging from $4 to $40 per square foot, depending on the quality and type.

Additional material costs may include the installation of ice and water barriers, which are essential in areas prone to heavy rainfall to prevent moisture damage. When planning your budget, it’s important to consider these add-ons and components beyond the new shingles themselves.

Labor Costs

Labor costs are a significant component of the overall expenses in roofing projects. Factors such as project complexity, intricate designs, and special warranties can substantially increase labor costs. For example, high-pitch roofs often require additional safety measures and equipment, which can drive up labor expenses.

Certain roofing materials, like slate and metal, require more expertise and longer installation times, further increasing labor costs. It’s essential to account for these variations when estimating the total cost of your new construction roofing project to avoid any surprises.

Additional Expenses

In addition to material and labor costs, there are other expenses to consider in a new construction roofing project. Permits and fees for debris removal can add unforeseen costs. These expenses might seem minor, but they accumulate quickly, impacting the overall budget.

Other potential expenses include the cost of roof trusses and any structural reinforcements needed to support the new roof. Being aware of these additional costs will help you plan more accurately and ensure that your project stays within budget.

Financing Options for New Construction Roofing

A homeowner reviewing financing options for roofing services.

Financing options are a crucial consideration for many homeowners undertaking a new construction roofing project. Various options are available, including credit cards, personal loans, home equity loans, and contractor financing. Each method has its pros and cons, and choosing the right one depends on your financial situation and long-term plans.

Flexible Financing Plans

Dream Home Roofers offers flexible payment plans that allow homeowners to start their roofing projects without upfront costs. These plans come with convenient terms and no prepayment penalties, making it easier for homeowners to manage their finances while achieving their home improvement goals.

Clients benefit from affordable monthly payments, ensuring that financial constraints do not hinder the completion of their roofing projects. Free, no-obligation estimates help homeowners understand their financial options better, allowing them to plan accordingly.

Insurance Coverage

Homeowners insurance can sometimes cover roofing costs, particularly if the damage results from severe weather or fallen trees. If the damage is due to qualifying events, insurance may reimburse costs associated with roofing repairs or replacements.

After filing a claim, insurance companies typically send an adjuster to assess the extent of the damage. Contractors can provide thorough assessments and support throughout the claims process, simplifying it for homeowners and ensuring they receive the coverage they’re entitled to.

Importance of Routine Maintenance

Regular maintenance is essential to extend the lifespan of your roof and ensure its optimal performance over time. Routine maintenance helps detect roof damage early, preventing minor issues from developing into major structural problems that are more costly and time-consuming to repair.

Scheduled Inspections

Scheduling routine inspections is vital to maintaining the integrity of your roof. These inspections can reveal damage that isn’t visible from the ground, allowing you to address potential issues before they escalate.

It’s generally recommended to conduct roof maintenance inspections at least once a year to ensure long-term protection and catch any problems early. Regular inspections can save you significant amounts on major repairs by identifying and fixing issues promptly.

Preventative Measures

Implementing preventative measures, such as regularly cleaning gutters and addressing minor repairs promptly, can significantly extend the lifespan of your roof. Common issues like missing shingles or small leaks should be repaired immediately to prevent more significant damage.

These minor repairs are key factors in maintaining your roof’s integrity and avoiding costly mistakes in the future. Regular maintenance and preventative measures are essential for protecting your investment and ensuring your roof remains in top condition.

Enhancing Curb Appeal with New Roofing

A beautifully designed house showcasing enhanced curb appeal with new roofing.

A new roof can significantly refresh a home’s exterior and boost its curb appeal. The visual impact of a well-designed roof can make your home stand out in the neighborhood, creating a polished and cohesive exterior.

Design Choices

The initial planning and design phase are crucial to ensure that the roofing complements the overall architecture of your home. Choosing from various roofing materials like asphalt shingles, metal roofs, or dimensional shingles allows homeowners to express their style and enhance the property’s aesthetic.

A new roof can dramatically enhance the curb appeal of a home, elevating its overall visual appeal and creating a positive impression.

Long-Term Value

Quality roofing materials provide long-lasting protection while also improving property value. High-quality materials contribute to a roof’s longevity, positively impacting the home’s value and buyer interest.

Professional installation of quality roofing materials ensures proper performance over time, ultimately maximizing long-term value for homeowners.

Contact Dream Home Roofers

Dream Home Roofers provides comprehensive roofing services, including installation, replacement, and repairs. Our team is committed to delivering exceptional customer service and support throughout your roofing project.

Whether you need a new roof installation or a simple roof repair, we are here to help.

Schedule a Consultation

Scheduling a consultation with Dream Home Roofers is simple and convenient. You can call us at 1-855-610-9720 or visit our website to fill out an online form. During the consultation, Sandra will discuss the details of your roofing project, helping you make informed decisions about your roofing needs.

Potential clients can easily set up a consultation by calling or using the online form, ensuring that all your questions and concerns are addressed before starting the project.

Customer Support

At Dream Home Roofers, we prioritize customer satisfaction and are dedicated to providing efficient service throughout the roofing process. Our team is committed to ensuring that every project meets the highest standards of quality workmanship and customer service.

Whether it’s a minor repair or a complete roof replacement, our dedicated team is here to support you every step of the way, ensuring that your roofing needs are met with professionalism and care.

Summary

Understanding the nuances of new construction roofing can make a significant difference in the success of your project. From selecting the right materials and planning the design to choosing a trusted contractor and considering financing options, each step plays a crucial role in achieving a durable, aesthetically pleasing roof.

Investing in a quality roof is a long-term commitment that enhances your home’s value, energy efficiency, and curb appeal. By following the tips and insights provided in this blog post, you can make informed decisions that will benefit your home for years to come. Reach out to Dream Home Roofers today to start your roofing journey with confidence.

Frequently Asked Questions

What services does Dream Home Roofers provide?

Dream Home Roofers provides roof installation and replacement. These services ensure your home is protected and well-maintained.

What are some signs that indicate a new roof may be needed?

A new roof may be needed if you notice persistent leaks, missing or damaged shingles, visible sagging, granules in the gutters, bald spots, or if the roof is over 20 years old. Addressing these signs promptly can prevent further damage.

What distinguishes Dream Home Roofers as a roofing contractor?

Dream Home Roofers stands out for its expertise, high-quality materials, exceptional customer service, and recognition as Owens Corning Platinum Preferred Contractors. These factors ensure reliable and top-tier roofing solutions for clients.

What financing options does Dream Home Roofers offer?

Dream Home Roofers provides flexible financing options that allow homeowners to upgrade their roofs without any upfront costs. This makes it easier for you to manage your home improvement budget effectively.

How can customers get in touch with Dream Home Roofers?

Customers can easily get in touch with Dream Home Roofers online to schedule a consultation for their roofing needs. This ensures a convenient and efficient way to address any installation, replacement, or repair inquiries.

https://dreamhomeroofers.com/wp-content/uploads/2024/09/dhr-logo.png 0 0 Dream Home Roofers https://dreamhomeroofers.com/wp-content/uploads/2024/09/dhr-logo.png Dream Home Roofers2024-12-12 08:00:422025-08-25 09:40:21Top Tips for Roofing for New Construction Projects
An array of Owens Corning roofing shingles displayed in various colors and styles.

Owens Corning Shingles in King of Prussia, PA | Preferred Contractor

in Roof Installation, Roofing/by Dream Home Roofers

If you’re replacing a roof in King of Prussia and you want to use Owens Corning products, the contractor you hire matters as much as the shingles themselves. Owens Corning’s best warranty options are only available through Preferred Contractors. Dream Home Roofers holds Owens Corning Preferred Contractor status and installs the full Owens Corning residential shingle line throughout King of Prussia and Montgomery County, PA.

What the Owens Corning Preferred Contractor Designation Means

Owens Corning divides its contractor network into tiers based on training, installation volume, and customer satisfaction standards. As a Preferred Contractor, Dream Home Roofers can offer customers access to the Owens Corning Preferred Protection warranty, which covers both the shingle materials and our workmanship in a single contract. This warranty is not available when working with non-Preferred installers, regardless of what shingle products they purchase.

Owens Corning Shingle Lines We Install in King of Prussia

Oakridge

The Oakridge is Owens Corning’s entry-level dimensional shingle. It carries a Lifetime limited warranty (prorated after 10 years), 130 mph wind resistance, and StainGuard algae resistance. It looks like an architectural shingle from the street at a price point that’s 10 to 15 percent lower than the Duration series. For homeowners prioritizing budget over maximum performance, this is a solid starting point.

Duration Series

The Duration is the most commonly installed Owens Corning shingle in the King of Prussia market and for good reason. It uses SureNail technology, which improves fastener holding strength significantly over standard shingle nailing. It carries a 50-year limited warranty, 130 mph wind resistance, and StainGuard Plus algae resistance. For most homeowners in KOP, the Duration hits the best balance of cost, performance, and warranty coverage.

Duration Flex

The Duration Flex uses a polymer-modified asphalt formulation that gives the shingle additional flexibility in cold temperatures. This is specifically worth considering in the King of Prussia area where winters produce significant freeze-thaw cycling. Standard asphalt shingles become brittle in very cold conditions, which makes them more susceptible to cracking during installation or after hail impact. The Flex formulation holds up better through Pennsylvania winters.

TruDefinition Duration and Designer Collections

The TruDefinition line uses a dual-layer granule application that creates deeper color contrast and a more textured appearance than standard Duration shingles. If you’re on a higher-value property in KOP or simply want the roof to stand out from the street, the TruDefinition Designer options give you that dimension without going to a completely different material. These carry the same performance specs as the standard Duration but at a 15 to 25 percent material cost premium.

How Owens Corning Shingle Lines Compare in Price (King of Prussia, PA)

• Oakridge: $8,000 to $11,000 installed on a typical single-story KOP home.
• Duration: $9,500 to $13,500 installed.
• Duration Flex: $10,500 to $14,500 installed.
• TruDefinition Duration Designer: $12,000 to $17,000 installed.
• Prices include Fairfax County permit, tear-off of existing roof, and standard underlayment. Homes with steep pitch, decking damage, or complex geometry will fall at the higher end.

Frequently Asked Questions: Owens Corning Shingles

What is the best Owens Corning shingle for a home in King of Prussia, PA?

For most KOP homes, the Owens Corning Duration series gives the best combination of cost, warranty, and performance. The SureNail technology provides stronger wind resistance and the 50-year limited warranty is the best in the standard Owens Corning lineup. For homeowners who want enhanced curb appeal, the TruDefinition Duration Designer collections are the next step up.

Is Dream Home Roofers an Owens Corning Preferred Contractor?

Yes. Dream Home Roofers is an Owens Corning Preferred Contractor. This means our installations qualify for the Owens Corning Preferred Protection warranty, which covers both materials and
workmanship under a single contractor-backed warranty. This level of coverage is not available through non-Preferred installers.

How do Owens Corning shingle lines compare in price?

The Oakridge runs roughly 10 to 15 percent less per installed square than the Duration series. The Duration Flex and TruDefinition Designer collections add a further 15 to 25 percent premium over standard Duration. Dream Home Roofers provides itemized written estimates for any Owens Corning product so you can compare full installed costs side by side before making a decision.

What warranty comes with Owens Corning shingles installed by Dream Home Roofers?

As an Owens Corning Preferred Contractor, Dream Home Roofers can offer the Owens Corning Preferred Protection warranty on qualifying installations. This covers the shingle materials under the standard Owens Corning limited warranty and backs the installation workmanship separately. The specific terms depend on the shingle line chosen. We will walk you through the warranty options during your free estimate.

https://dreamhomeroofers.com/wp-content/uploads/2024/12/An-array-of-Owens-Corning-roofing-shingles-displayed-in-various-colors-and-styles.-1.png 1000 1500 Dream Home Roofers https://dreamhomeroofers.com/wp-content/uploads/2024/09/dhr-logo.png Dream Home Roofers2024-12-10 08:00:452026-04-07 07:46:58Owens Corning Shingles in King of Prussia, PA | Preferred Contractor
Different roof styles that enhance aesthetic appeal.

Achieving an Aesthetic Roof: Top Design Tips for Modern Homes

in Roof Installation, Roofing/by Dream Home Roofers

Looking to improve your home’s curb appeal? An aesthetic roof can make all the difference. Discover tips on materials, colors, and styles to create a visually appealing roof.

Key Takeaways

  • A well-designed roof significantly enhances a home’s aesthetic appeal and contributes to its market value.
  • Choosing appropriate roofing materials and architectural details is essential for creating visual harmony with your home’s overall design.
  • Regular maintenance and professional guidance are key to preserving the aesthetic integrity and functionality of your roof.

Achieving an Aesthetic Roof: Top Design Tips for Modern Homes

A modern home showcasing an aesthetic roof design.

A well-designed roof can elevate the entire appearance of your home, making a lasting impression on visitors and potential buyers. The choice of roofing materials and designs you select can reflect your personality and enhance the home’s character. Whether you prefer the timeless elegance of slate roofs or the modern appeal of metal roofs, harmonizing form with function is essential to achieving an attractive roof.

The shape, color, and condition of your roof play a pivotal role in its aesthetic appeal. A well-maintained roof not only enhances curb appeal but also creates a visual harmony with other elements of your home, such as siding and landscaping. Improving roof aesthetics through thoughtful design choices can create a memorable visual impact that sets your property apart.

Moreover, enhancing a roof’s aesthetic is crucial for maintaining the historical integrity of a structure. Considering the overall design and style of your building ensures that your roof complements and enhances your home’s architectural beauty.

Introduction

Dream Home Roofers is dedicated to providing expert roofing solutions that not only protect your home but also enhance its beauty. This guide offers essential design tips and considerations to achieve an aesthetically pleasing roof that aligns with your home’s overall appearance.

Discover how the right roofing choices can transform your living space.

The Importance of Roof Aesthetics

The importance of roof aesthetics highlighted by a visually appealing roof.

The roof is undoubtedly a defining feature of any home, significantly influencing its overall visual appeal. With the roof accounting for up to 40% of a home’s visible exterior, its condition and style play a crucial role in creating a positive first impression. A well-designed roof enhances your home’s aesthetic appeal and functionality, turning it into your dream home.

Investing in a quality roof not only improves the visual harmony with other elements of your home but also boosts its resale value. Potential buyers often form their initial opinions based on the roof’s aesthetic condition and style. Thoughtful roof design choices can create a memorable visual impact that sets your property apart.

Furthermore, a well-maintained and attractive roof can significantly enhance a property’s marketability. Whether it’s through distinctive roofing materials, unique designs, or complementary color schemes, improving your roof’s aesthetics is a key factor in enhancing the overall appearance and value of your home.

Choosing the Right Roofing Materials and Colors

Choosing the right roofing materials is a critical step in transforming your house into a visually striking structure. The materials and colors you select should not only suit your aesthetic preferences but also align with your home’s architectural style. Popular materials like asphalt shingles, metal roofs, and slate roofs each offer distinct aesthetic and functional benefits that contribute to the overall visual appeal of your home.

Asphalt shingles are the most widely used roofing material in North America due to their affordability and versatility. They come in various colors and styles, making it easy to find an option that complements your home’s exterior. Metal roofs, on the other hand, are highly resilient and can last up to 70 years, providing a modern and sleek appearance.

Slate roofs are known for their durability and timeless elegance, capable of lasting over a century. While their installation can be costly, their fire-resistant and recyclable nature makes them an excellent choice for those seeking a long-term investment. Additionally, clay and concrete tiles offer a unique aesthetic and are also durable and fire-resistant, though they may require additional roof support due to their weight.

Local climate conditions should be considered when selecting roofing materials, as some perform better in specific environments. For example, light-colored roofs are preferred in warmer climates to reflect sunlight and maintain cooler indoor temperatures. Taking these factors into account helps in choosing roofing materials and colors that enhance your home’s exterior and ensure its longevity.
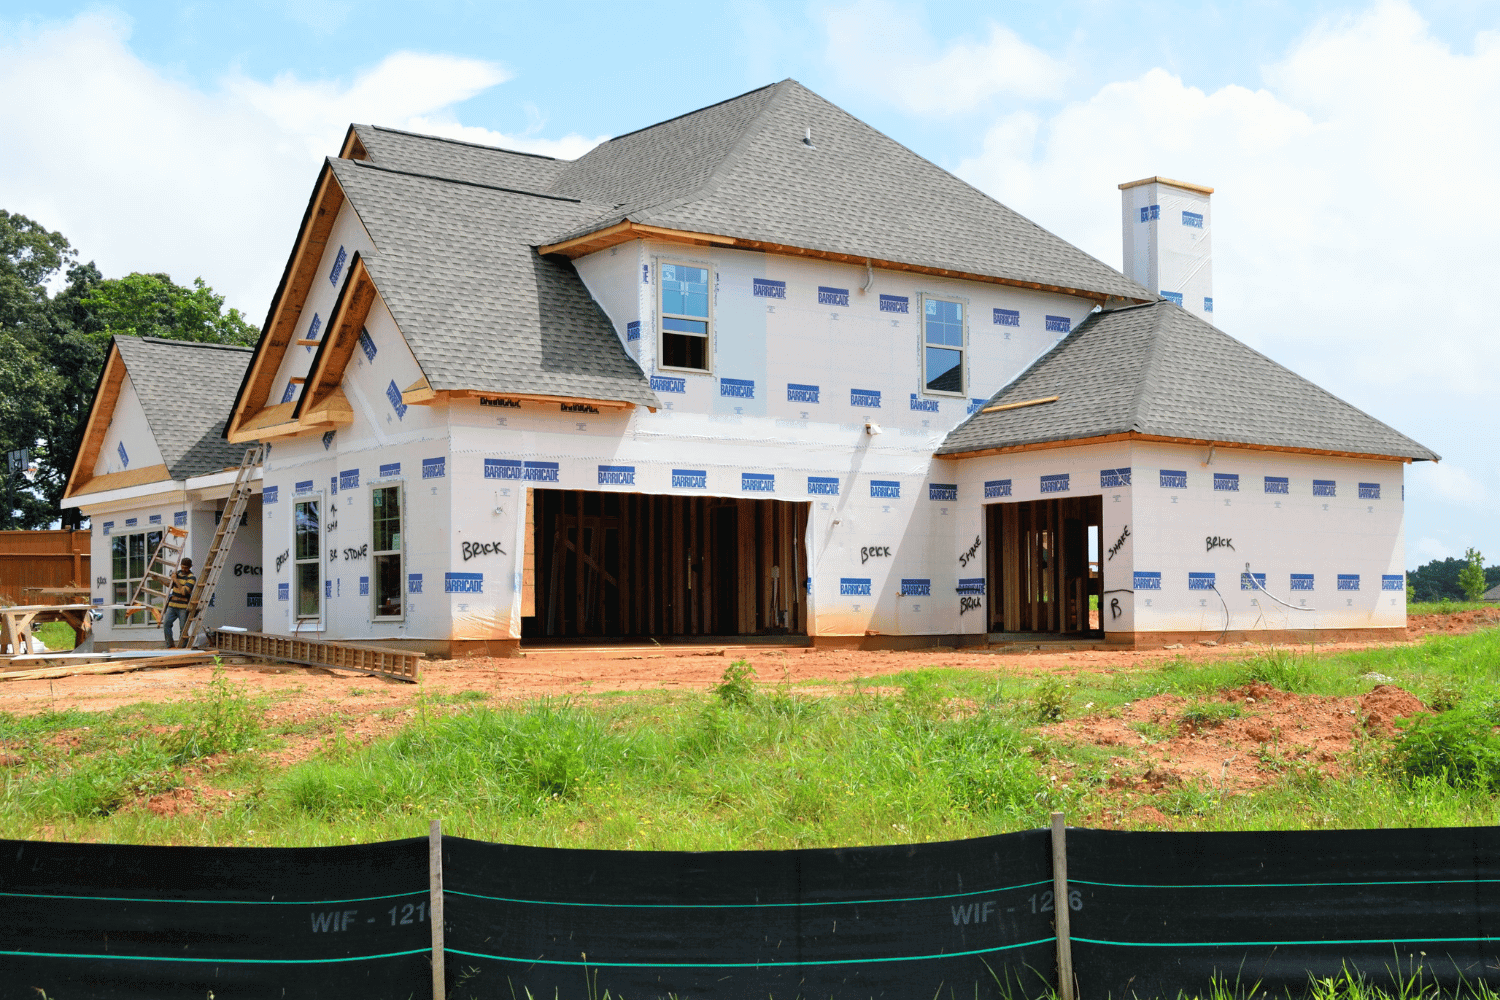
Architectural Details that Enhance Roof Design

Incorporating architectural details like dormers and gables can add significant character and interest to your roof, enhancing its overall visual appeal. Dormers, such as shed and hipped types, introduce distinct visual characteristics to your roof, providing extra space and natural light while contributing to both aesthetics and functionality.
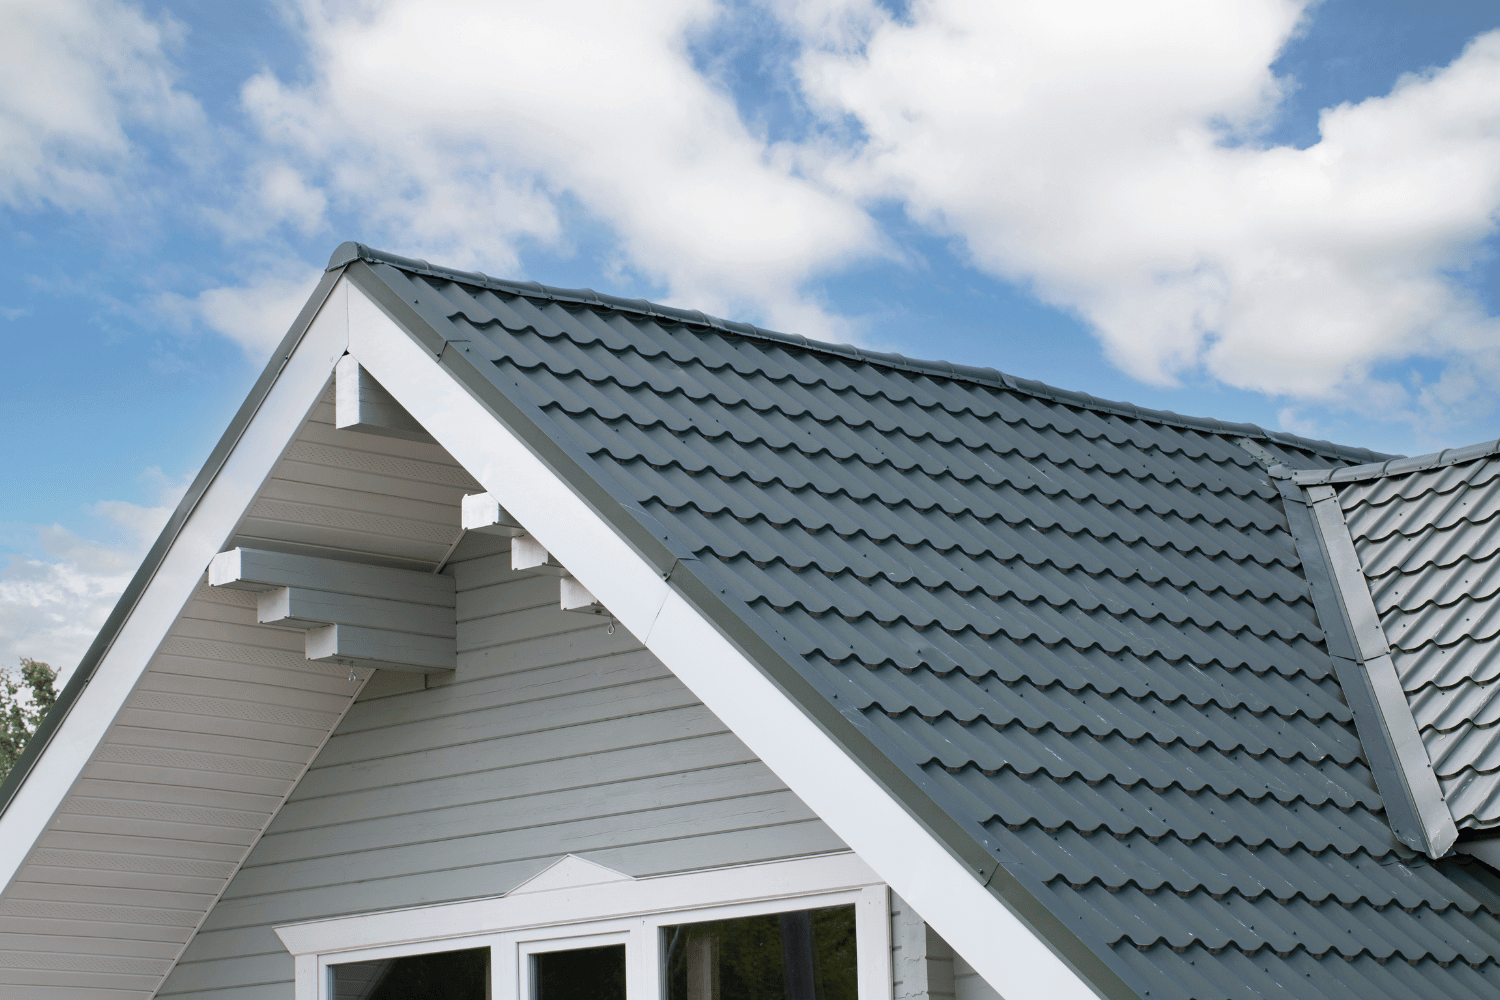
Gable roofs, with their triangular shape, are highly valued for their visual appeal and effective drainage. This classic design not only enhances the roof’s appearance but also ensures practical benefits. Unique designs like butterfly roofs, recognized for their distinctive V-shape, further enhance the natural lighting and ventilation in the interior.

Other architectural details like jerkinhead roofs and A-frame roofs can also contribute to the roof’s aesthetic appeal. Jerkinhead roofs blend elements of gable and hip designs, creating an eye-catching appearance while effectively shedding rain and snow. Meanwhile, A-frame roofs provide a striking triangular shape that adds aesthetic value and helps with snow and rain runoff.

Popular Roof Styles for Aesthetic Appeal

Different roof styles that enhance aesthetic appeal.

Roof styles play a crucial role in defining the aesthetic appeal of your home. Flat roofs are often utilized in modern designs, offering a sleek profile and the potential for rooftop gardens. The aesthetic benefits of flat roofs include allowing for gardens and solar panel installations, making them a versatile choice for contemporary homes.

Hip roofs are known for their symmetrical design that adds stability and elegance to various architectural styles. The slopes on a hip roof create a balanced and aesthetically pleasing appearance, making them a popular choice for modern home designs.

Mansard roofs, with their steep lower pitch and almost flat roof upper section, provide increased living space and a distinctive silhouette that creates a romantic ambiance.

Butterfly roofs, characterized by their striking V-shape, channel rainwater effectively and add a dramatic visual element to the home. Choosing the right roof style significantly enhances your home’s overall aesthetic, ensuring it stands out in the neighborhood.

Incorporating Sustainable and Eco-Friendly Options

Sustainable roofing materials not only contribute to a home’s durability and aesthetic value but also help reduce its environmental impact. Metal roofing, often made from recycled materials, minimizes energy consumption and carbon emissions associated with production. This makes metal roofs a sustainable choice that combines longevity with eco-friendliness.

Green roofs or rooftop gardens offer both environmental advantages and aesthetic appeal. They manage stormwater, enhance air quality, and foster urban biodiversity. Additionally, green roofs can transform an otherwise standard roof into a vibrant green space, contributing to energy efficiency and biodiversity. The benefits of green roofs include reducing heat, improving air quality, and catching rainwater to prevent runoff.
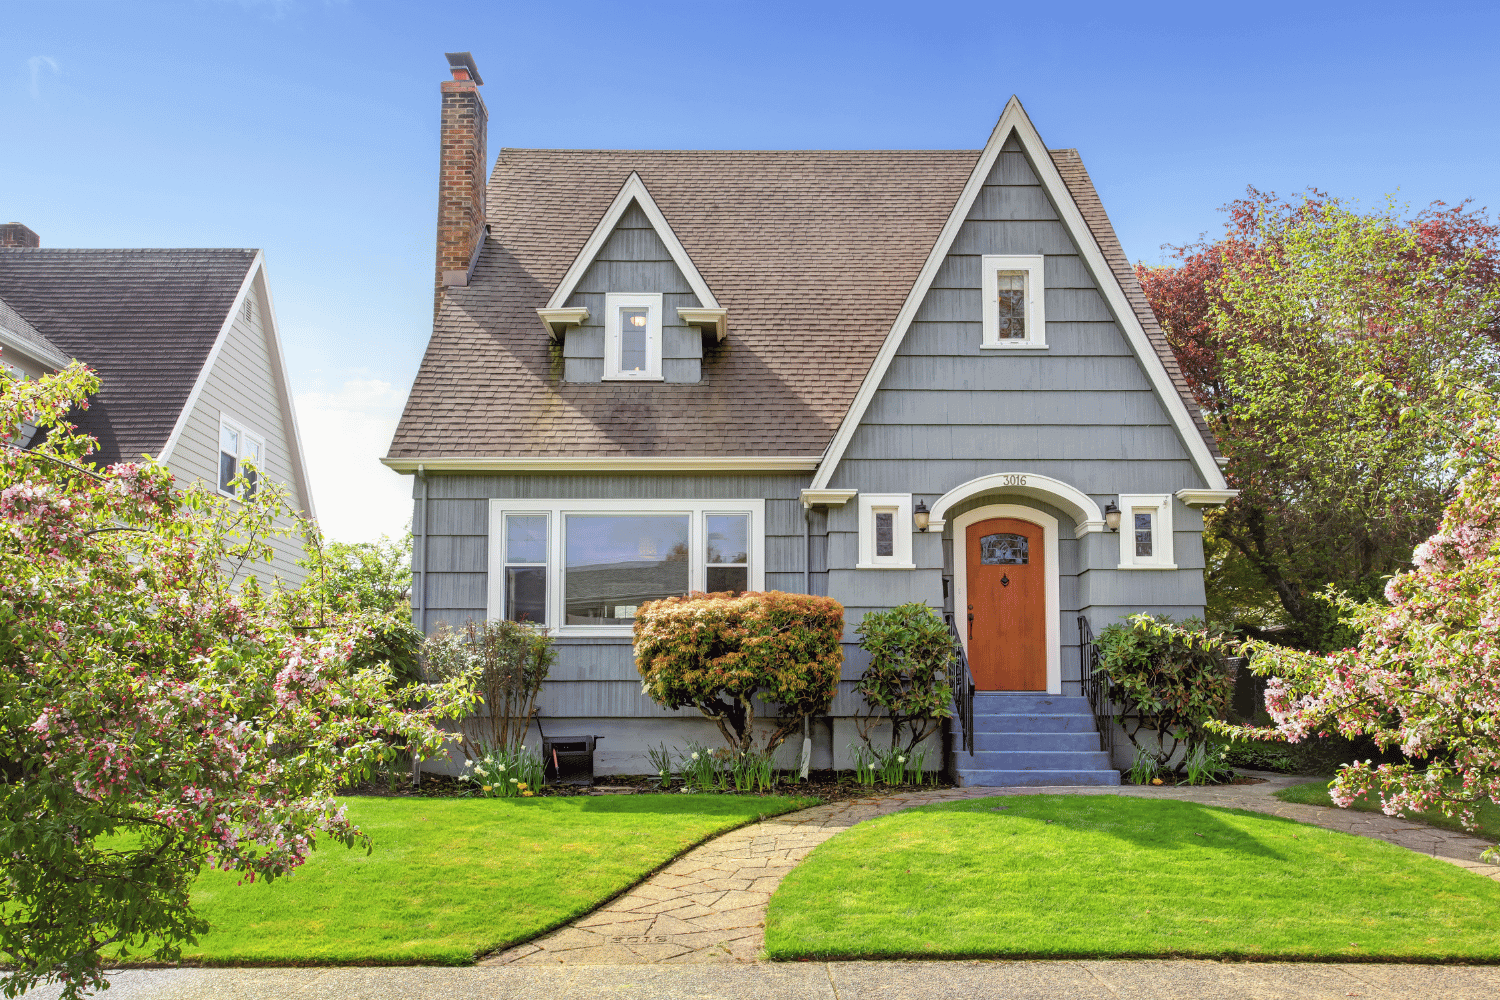
Modern roofing options like solar tiles and cool roofs can significantly enhance a home’s energy efficiency. Solar tiles integrate seamlessly with roofing structures, offering an aesthetic appeal while generating renewable energy. Cool roofs utilize reflective coatings to decrease heat absorption, leading to lower cooling costs and improved energy efficiency.

Enhancing Roof Aesthetics with Accessories

Accessories that enhance roof aesthetics.

Roof accessories like cupolas and weathervanes can significantly enhance the visual appeal of your home. Cupolas serve as decorative structures that add charm and character, while weathervanes provide both functional and ornamental benefits by indicating wind direction. These accessories not only contribute to the roof’s aesthetics but also add a personal touch to your home’s exterior.

Proper installation of roof accessories is crucial to ensure they remain functional and do not compromise the roof’s integrity. Choosing and installing accessories wisely augments the aesthetic charm of modern homes and creates a unique, visually appealing roof.

The Role of Professional Roofing Contractors

Professional roofing contractors play a vital role in ensuring both the aesthetic appeal and structural integrity of your roof. They provide valuable guidance on matching roofing materials with local climate conditions and architectural styles, ensuring that your roof not only looks good but also performs well in the roofing industry.

At Dream Home Roofers, we pride ourselves on using quality materials, offering exceptional customer service, and providing flexible financing options. These commitments enable homeowners to achieve their desired upgrades without the burden of upfront costs, ensuring a seamless experience from start to finish.

Maintenance Tips for Long-Lasting Beauty

Regular maintenance is key to preserving the aesthetics and long-term value of your roof. Annual inspections help identify potential issues before they escalate, ensuring that your roof remains in top condition. Clearing debris, regularly cleaning gutters, and trimming overhanging tree branches can prevent moisture buildup and associated damage.

Addressing issues promptly, such as fixing leaks and replacing loose or damaged shingles, is vital to maintaining the roof’s integrity. Regular checks for flashing and seals are necessary to avoid water intrusion, and proper water flow management can prevent accumulation and damage.

Following these maintenance tips ensures that your roof remains aesthetically pleasing and functional for years to come.

Aligning Roof Design with Home’s Exterior

Roof design aligned with the home's exterior for aesthetic appeal.

The roof’s design should complement other exterior elements to create a cohesive and visually appealing look. Choosing roofing materials and colors that enhance your home’s architectural style is crucial for achieving aesthetic coherence. For example, a modern metal roof pairs well with a minimalist garden, while a wooden shingle roof suits a more colorful landscape.

Transitional elements between the roof and the walls should be seamless to achieve a cohesive look. Accessories like weathervanes and cupolas should align with the overall architectural style of the home, enhancing both its beauty and character. By thoughtfully aligning your roof design with your home’s exterior, you can create a harmonious and visually striking appearance.

High-Tech Roofing Solutions for Modern Homes

Modern roofing technologies offer innovative solutions that enhance both aesthetic appeal and functionality. Cool roofing materials, for example, can improve energy efficiency by reflecting more sunlight and reducing cooling costs, which can complement air conditioning systems. These materials are especially beneficial in hot climates, where managing heat absorption is crucial.

Smart roofs equipped with WiFi sensors can detect potential issues like leaks before they escalate into major problems. Advanced solar shingles provide a visually appealing alternative to traditional solar panels while generating electricity.

By incorporating these high-tech solutions, homeowners can enjoy a modern and efficient roofing system that complements their home’s design.

Common Mistakes to Avoid in Roof Design

Avoiding common mistakes in roof design is essential to ensure both aesthetic appeal and functionality. Mismatched styles, neglecting material quality, and skipping professional advice can lead to costly repairs and unsatisfactory results.

Selecting the right materials and styles that can withstand local weather conditions is crucial for a durable and visually pleasing roof.

Summary

In summary, achieving an aesthetic roof requires thoughtful consideration of materials, colors, architectural details, and maintenance. By aligning your roof design with your home’s exterior and incorporating sustainable options, you can enhance both the visual appeal and functionality of your roof. With the expertise of professional roofing contractors like Dream Home Roofers, you can transform your home into a stunning, durable masterpiece that stands the test of time.

Frequently Asked Questions

Why is the aesthetic appeal of a roof important?

The aesthetic appeal of a roof is crucial as it constitutes up to 40% of a home’s visible exterior, greatly impacting the property’s overall appearance and marketability. Therefore, a visually appealing roof enhances both the charm and value of the residence.

What are some popular roofing materials and their benefits?

Asphalt shingles are favored for their affordability and versatility, while metal roofs offer durability and a modern aesthetic. Slate roofs are appreciated for their timeless elegance and exceptional longevity, making them a popular choice as well.

How can I incorporate sustainable options into my roof design?

Incorporating sustainable options into your roof design can be effectively achieved by using recycled metal roofing, installing solar tiles, and creating green roofs. These choices not only improve energy efficiency but also minimize environmental impact and provide distinctive aesthetic advantages.

What role do professional roofing contractors play in roof design?

Professional roofing contractors play a crucial role in roof design by offering expert advice on material selection, ensuring proper installation, and maintaining the roof’s aesthetic appeal and structural integrity. Their expertise is essential for achieving a durable and visually pleasing outcome.

What are common mistakes to avoid in roof design?

Avoid mismatched styles, neglecting material quality, and bypassing professional advice in roof design, as these can result in expensive repairs and unsatisfactory outcomes. Prioritizing cohesive design and expert guidance is essential for a successful project.

https://dreamhomeroofers.com/wp-content/uploads/2024/12/Different-roof-styles-that-enhance-aesthetic-appeal.-1.png 1000 1500 Dream Home Roofers https://dreamhomeroofers.com/wp-content/uploads/2024/09/dhr-logo.png Dream Home Roofers2024-12-03 08:00:082025-08-26 03:54:32Achieving an Aesthetic Roof: Top Design Tips for Modern Homes
Page 5 of 7«‹34567›»

Pages

  • About us
  • Blogs
  • Careers
  • Contact Us
  • Current Specials at Dream Home Roofers
  • FAQS
  • Feedbacks
  • Financing
  • Gutter Guards in the Delaware Valley
  • Gutters in Delaware Valley
  • Home
  • new form test
  • Opt-out preferences
  • Privacy Policy
  • Rate
  • Review Feedback Form
  • Reviews
  • Roof Inspection in Delaware Valley
  • Roof Inspection in Turnersville, NJ
  • Roof Inspection in West Caldwell, NJ
  • Roof Inspections in Laurel, MD
  • Roof Replacement in Cherry Hill, NJ
  • Roof Replacement in Columbia, MD
  • Roof Replacement in Delaware Valley
  • Roof Replacement in Harrisburg, PA
  • Roof Replacement in King of Prussia, PA
  • Roof Replacement in Lancaster, PA
  • Roof Replacement in Laurel, MD
  • Roof Replacement in Philadelphia, PA
  • Roof Replacement in Turnersville, NJ
  • Roof Replacement in Vineland, NJ
  • Roof Replacement in West Caldwell, NJ
  • Roofing Company in Fairfax, VA
  • Roofing Company in King of Prussia, PA
  • Roofing Company in Laurel, MD
  • Roofing Company in Maryland
  • Roofing Company in New Jersey
  • Roofing Company in Pennsylvania
  • Roofing Company in Scranton, PA
  • Roofing Company in Turnersville, NJ
  • Roofing Company in West Caldwell, NJ
  • Roofing Company in Wilmington, DE
  • Roofing in Allentown, PA
  • Roofing in Atlantic City, NJ
  • Roofing in Bethesda, MD
  • Roofing in Bethlehem, PA
  • Roofing in Blairstown, NJ
  • Roofing in Boonsboro, MD
  • Roofing in Bowie, MD
  • Roofing in Burlington, NJ
  • Roofing in Camden, NJ
  • Roofing in Cherry Hill, NJ
  • Roofing in Chester, PA
  • Roofing in Clifton, NJ
  • Roofing in Columbia, MD
  • Roofing in Delaware Valley
  • Roofing in Delaware Valley
  • Roofing in Delaware Valley
  • Roofing in Dundalk, MD
  • Roofing in Egg Harbor, NJ
  • Roofing in Ellicott City, MD
  • Roofing in Elm, PA
  • Roofing in Fairfax, VA
  • Roofing in Frankford, NJ
  • Roofing in Freehold, NJ
  • Roofing in Gaithersburg, MD
  • Roofing in Germantown, MD
  • Roofing in Glen Allen, VA
  • Roofing in Glen Burnie, MD
  • Roofing in Gloucester Township, NJ
  • Roofing in Hamilton, NJ
  • Roofing in Harrisburg, PA
  • Roofing in King of Prussia, PA
  • Roofing in King Of Prussia, PA
  • Roofing in Lancaster, PA
  • Roofing in Laurel, MD
  • Roofing in Laurel, MD
  • Roofing in Lebanon, PA
  • Roofing in Lehigh Valley
  • Roofing in Levittown, PA
  • Roofing in Mahwah, NJ
  • Roofing in Maryland
  • Roofing in Monroe, NJ
  • Roofing in Mount Laurel, NJ
  • Roofing in New Jersey
  • Roofing in Norristown, PA
  • Roofing in Pennsylvania
  • Roofing in Philadelphia, PA
  • Roofing in Potomac, MD
  • Roofing in Reading, PA
  • Roofing in Rockville, MD
  • Roofing in Severn, MD
  • Roofing in Silver Spring, MD
  • Roofing in Smithsburg, MD
  • Roofing in Somerset, NJ
  • Roofing in South Jersey
  • Roofing in Tinton Falls, NJ
  • Roofing in Towson, MD
  • Roofing in Turnersville NJ
  • Roofing in Turnersville, NJ
  • Roofing in Union, NJ
  • Roofing in Vineland, NJ
  • Roofing in Voorhees, NJ
  • Roofing in Waldorf, MD
  • Roofing in Washington Township, NJ
  • Roofing in West Caldwell, NJ
  • Roofing in West Caldwell, NJ
  • Roofing in Weston, PA
  • Roofing in Wilkes-Barre, PA
  • Service Area
  • Services
  • SMS Terms and Conditions
  • Template – Labor day banner
  • Template All Brands Logos
  • Template All Brands Logos New
  • Template Blogs
  • Template Certification
  • Template Financing Banner
  • Template Financing Banner – Location
  • Template Gutter Brands
  • Template our Process
  • Template our Process – Locations
  • Template Our Work
  • Template Our Work – Locations
  • Template Project Block
  • Template Review Banner
  • Template Review Banner (King of Prussia, PA)
  • Template Review Banner (Laurel, MD)
  • Template Review Banner (Turnersville, NJ)
  • Template Review Banner (West Caldwell, NJ)
  • Template Roofing Brands
  • Template Service Blocks (All)
  • Template Service Blocks (Glen Allen)
  • Template Service Blocks (King of Prussia, PA)
  • Template Service Blocks (Laurel, MD)
  • Template Service Blocks (Turnersville, NJ)
  • Template Service Blocks (West Caldwell, NJ)
  • Terms and Conditions

Categories

  • Blog
  • Roof Installation
  • Roof Repair
  • Roof Replacement
  • Roofing
  • Uncategorized

Archive

  • October 2026
  • September 2026
  • August 2026
  • July 2026
  • June 2026
  • May 2026
  • April 2026
  • March 2026
  • February 2026
  • January 2026
  • November 2025
  • October 2025
  • September 2025
  • August 2025
  • July 2025
  • June 2025
  • May 2025
  • March 2025
  • February 2025
  • January 2025
  • December 2024
  • November 2024
  • October 2024
  • August 2024
  • July 2024
  • June 2024
  • May 2024
  • April 2024
  • March 2024
  • February 2024
  • November 2023
  • October 2023
  • July 202

Service Areas

  • Turnersville, NJ
  • Voorhees, NJ
  • West Caldwell, NJ
  • King of Prussia, PA

  • Scranton, PA
  • Wilkes-Barre, PA
  • Laurel, MD

  • Fairfax, VA
  • Glen Allen, VA
  • Wilmington, DE
dhr-logo

Dream Home Roofers provides expert residential roofing, attic insulation, gutter, and window services across Maryland, New Jersey, Pennsylvania, Virginia, and Delaware. As an Owens Corning Platinum Preferred Contractor, our factory-trained crews deliver quality installations backed by lifetime warranties. Whether you need a full roof replacement or storm damage repair, homeowners across the Mid-Atlantic trust us for reliable protection and straightforward service.

Our Office Locations

Map icon 501 NJ‑168, Turnersville, NJ 08012

Map icon 175 Fairfield Ave, Suite 2B, West Caldwell, NJ 07006

Map icon 144 E. Dekalb Pike, Suite 200, King of Prussia, PA 19406

Map icon 8920 Stephens Rd, #104, Laurel, MD 20723

Map icon 613 Baltimore Dr, Wilkes-Barre, PA 18702

Map icon 4461 Cox Rd, Glen Allen, VA 23060

Map icon 4085 Chain Bridge Rd, Suite 302, Fairfax, VA 22030

NJ Lic. #13VH11352200 | PA Lic. #PA161658 | MD Lic. #157465 | DE HIC# 2025-000012170 | VA HIC# 2705196076

Privacy Policy | Service Area

Follow Us

Check out our social pages and let us know how we’re doing See the latest from Dream Home Roofers and let us know what we can do for you.

BBB Accredited

blue seal

BBB Accredited

Local Roofing Contractors
Financing
Careers
Contact

© 2026 Dream Home Roofers

Scroll to top