Dream Home Roofers
1-855-610-9720
Get Free Estimate 1-855-610-9720
Free Estimate 1-855-610-9720
  • About us
    • Reviews
    • Careers
    • Financing
    • Blogs
    • FAQS
  • Services
    • Roofing
      • Replacement
      • Inspection
    • Gutters
      • Gutter Protection
  • Service Area
    • Turnersville, NJ
    • Voorhees, NJ
    • West Caldwell, NJ
    • King of Prussia, PA
    • Scranton, PA
    • Wilkes-Barre, PA
    • Laurel, MD
    • Fairfax, VA
    • Glen Allen, VA
    • Wilmington, DE
  • Current Specials
  • Contact Us
  • Menu Menu
Act Now to Get Our Current Offers. Click here for details.
Roofing

Fall Roof Prep Checklist for Homes in Turnersville, NJ

in Roofing/by Dream Home Roofers

As leaves begin to change and the air cools in Turnersville, fall signals more than just seasonal decor—it’s the ideal time to get your roof ready for fall. Fall roof prep ensures your home stays dry, warm, and protected through heavy rain, high winds, and even early snow.

In this guide, you’ll learn how to inspect your roof, spot signs of damage, and prevent costly repairs. Whether you’re a longtime homeowner or settling into your first property in South Jersey, these fall roof maintenance tips are made for you.

Key Takeaways

  • Cleaning gutters and downspouts prevents water buildup and ice dams
  • Fall is the best time for roof inspections and repairs
  • Early detection of issues like missing shingles or damp insulation saves money
  • A professional inspection adds peace of mind and protects your property

Fall Roof Prep: Clear Debris from the Roof and Gutters

Fall in Turnersville, NJ, means more than just leaf piles in your yard. Those same leaves and falling debris can collect on your roof and in your gutters, creating blockages that lead to serious water issues. If gutters overflow or downspouts clog, water can back up under shingles or pool at your foundation, increasing the risk of leaks and structural damage.

How to Clean Gutters Safely

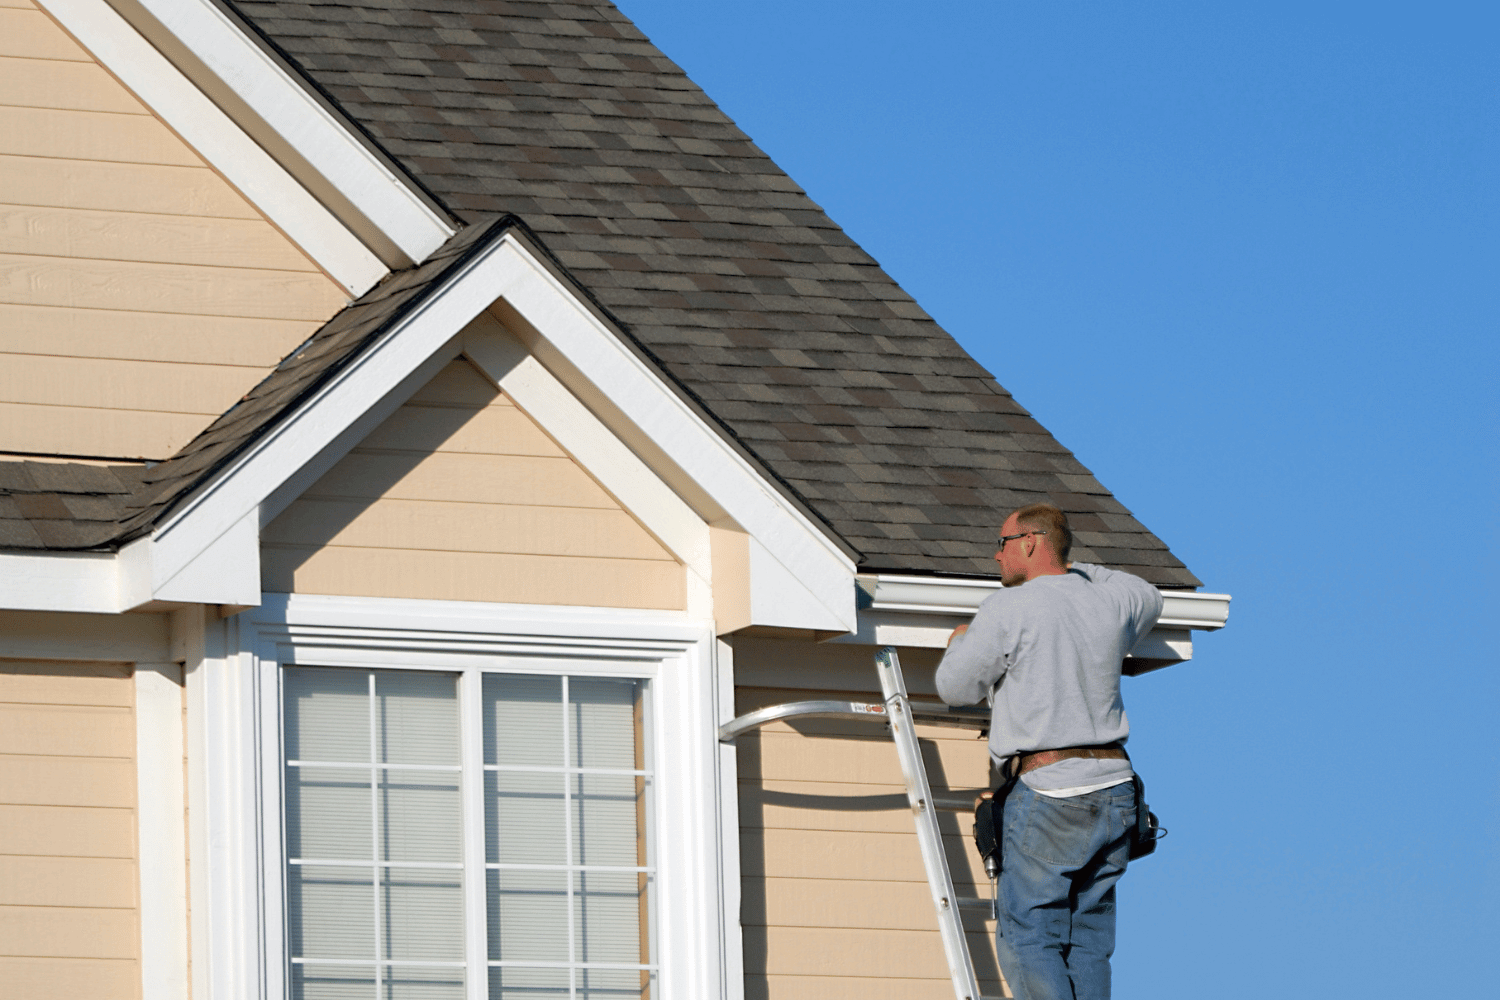
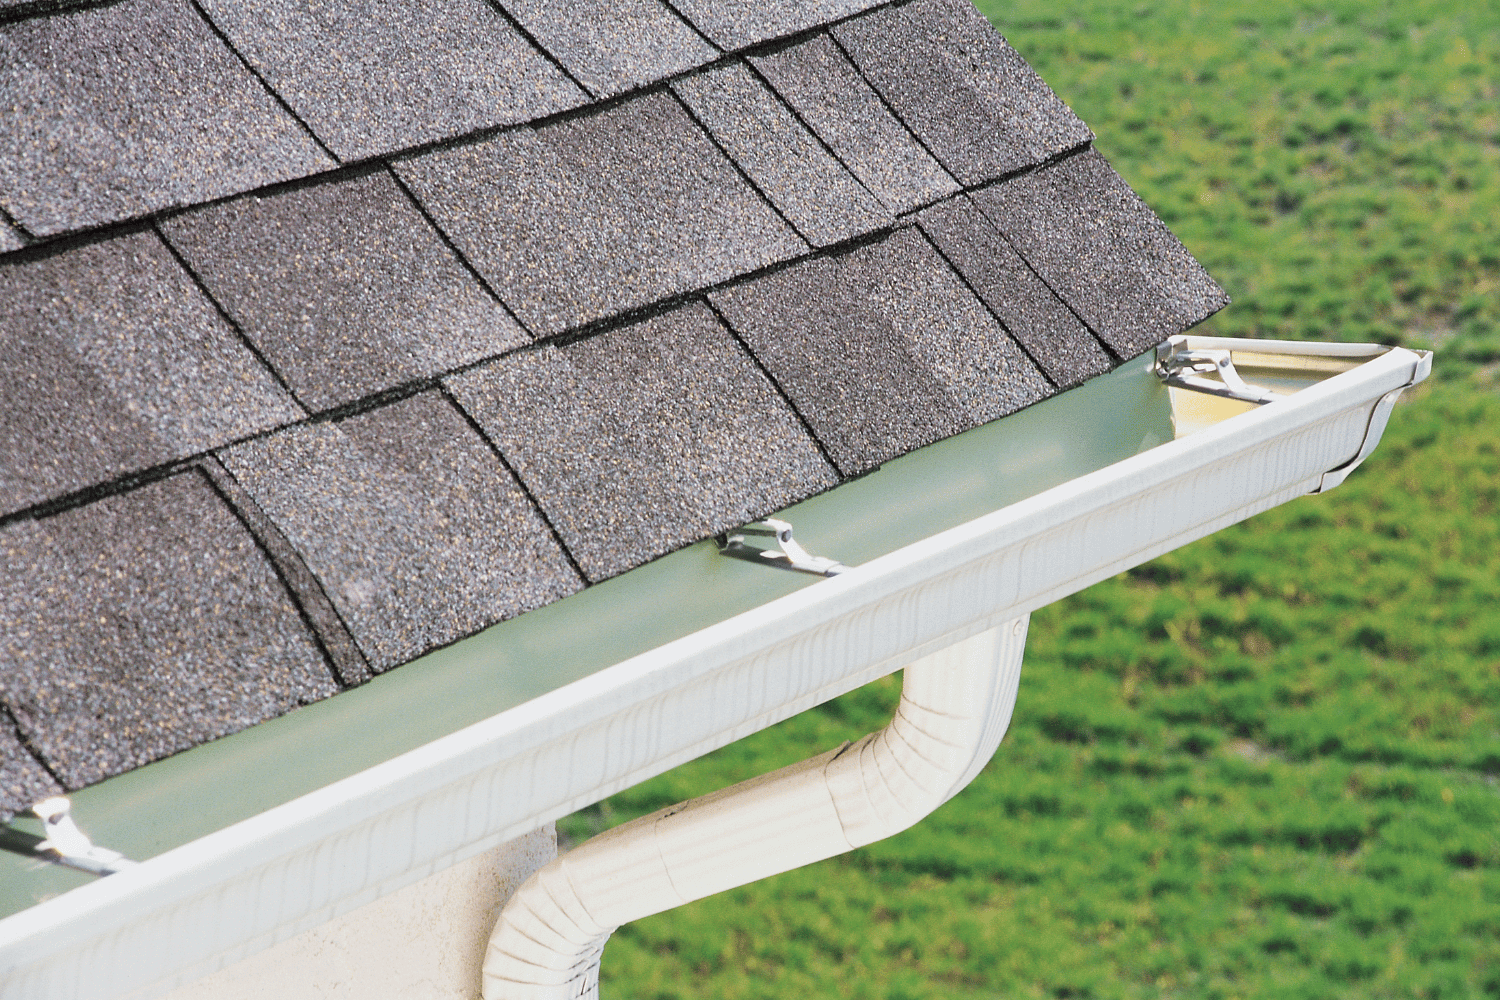
In Turnersville, autumn brings falling leaves and debris that can clog your gutters and cause water to pool on your roof. Clogged gutters are a leading cause of roof damage and can lead to foundation issues if water overflows.

Checking for Granule Loss and Downspout Blockages

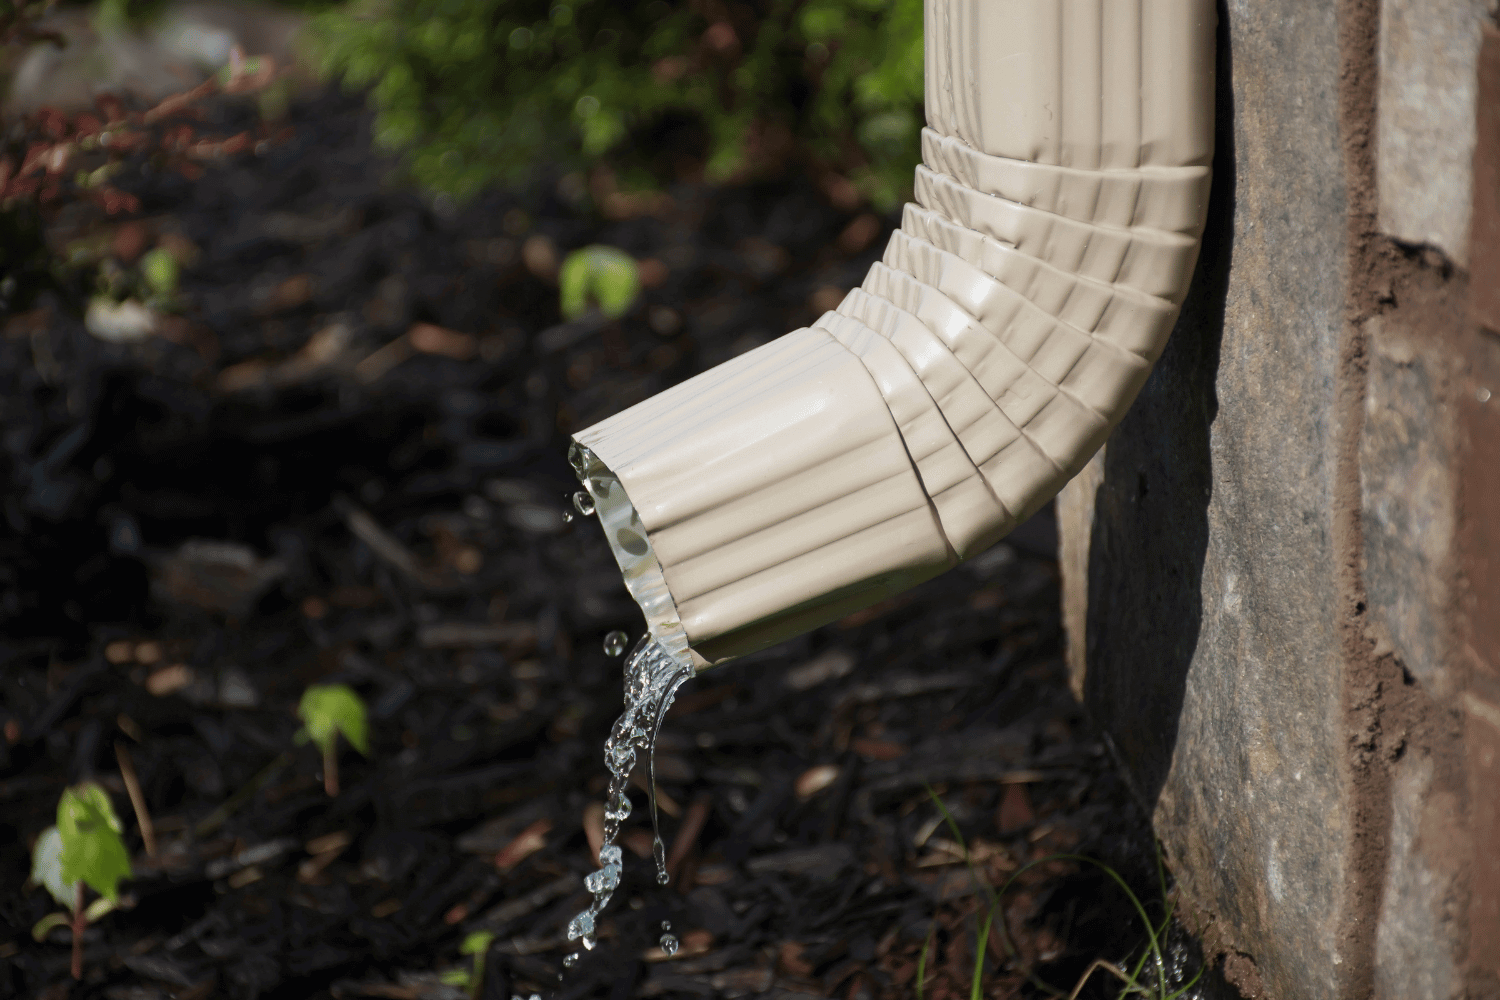
From the ground level, you can often spot leaves, twigs, or granule loss spilling over the gutter edges. Schedule time to safely remove these blockages or hire a professional service for thorough gutter cleaning. Be sure to check downspouts for blockages and use a hose to confirm proper water flow.

Professional gutter protection services can help ensure your drainage system is ready for fall rains and leaf buildup.

Roof Inspection Tips for Turnersville Homeowners

Scheduling a fall roof inspection in Turnersville allows homeowners to catch issues early—before snow and ice cause further damage. Weather shifts and past summer storms may have loosened shingles, cracked flashing, or worn down sealants around vulnerable areas like chimneys and vents.

Signs Your Flashing Needs Repair

Turnersville homes are no strangers to heavy rain and strong fall winds. That makes now the right time to check for missing shingles, cracked flashing, or granule loss during fall storms.

What to Look for Around Chimneys and Vents

Look for visible gaps, curled shingles, or exposed roofing nails—all signs of potential leaks. Also, inspect around chimneys, skylights, and roof vents. If you’re noticing musty odors indoors or damp insulation in your attic, your flashing might be failing.

When to Call a Professional Roofer

If you’re unsure about roof safety or damage, don’t climb. Call a professional for a safe and detailed roof inspection. If you’re due for a seasonal checkup, certified roof inspection services can provide peace of mind this fall.

Fall Roof Repair: Fix Small Problems Early

Fall is the most cost-effective time to make roof repairs in Turnersville. Crews can work faster in cooler weather, and you’ll avoid the added expense of late-season emergency fixes. Plus, catching issues now helps extend the life of your shingles and decking.

Spot Early Signs of Roof Damage

The best season for catching small problems is fall, when the weather is mild and repair timelines are faster. A missing shingle today can become a full roof leak during a January freeze.

Prevent Mold and Rot in Attics

Turnersville homeowners should especially look for early signs of water damage, like staining near ceiling vents or unusual odors in the attic. Fixing these early prevents rot, mold, and expensive insulation replacement.

Schedule Common Repairs This Fall

If you notice cracked flashing or granule loss, these can be repaired or replaced quickly—before storms and snow make the job more complex and costly.

Addressing roof issues early with professional roof repair services can help prevent costly issues later in the season.

Roof Ventilation and Attic Health Checks

Your attic plays a major role in roof performance. Without proper ventilation, heat and moisture can build up, damaging shingles from underneath and contributing to ice dams along the eaves.

Why Fall is the Right Time for Attic Inspections

Proper attic ventilation extends your roof’s life and prevents ice damming during the fall. As part of your fall roof prep checklist, inspect your attic for trapped moisture, visible mold, or unusually warm air. These signs point to poor ventilation.

Preventing Moisture and Insulation Damage

Late fall in Turnersville brings cold snaps and thaw cycles that can cause warm air to condense in your attic, soaking your insulation. Make sure soffit and ridge vents are clear of debris, and consider an evaluation of your entire ventilation system.

Improving airflow with attic ventilation solutions can help protect your insulation and support better roof performance through the colder months.

Schedule a Roof Inspection in Turnersville This Fall

Booking an inspection before January allows for minor repairs while weather conditions are still manageable. It’s a smart move to prevent more serious damage from storms, snow, or ice dams that commonly hit Turnersville homes.

Why Annual Inspections Matter

Even if your roof looks fine from the ground, hidden issues can still lead to big headaches. A certified roof inspection ensures you’re not missing early signs of leaks, wear, or weather damage.

Owens Corning Platinum Contractor Advantage

Dream Home Roofers, an Owens Corning Platinum Preferred Contractor, serves homeowners throughout Turnersville and Gloucester County.

Our certified inspectors provide a clear breakdown of your roof’s condition and recommend any needed work, while fall conditions are ideal.

Learn more about Owens Corning and the quality materials we use.

Great for First-Time Homeowners

This is especially helpful for first-time homeowners or anyone unsure about the history of their roofing system.

Ready to Protect Your Turnersville Home This Season?

Fall is your chance to stay ahead of winter weather and save money by tackling small roof issues before they grow. From clogged gutters to missing shingles, now is the time to get your roof in shape.

With a full range of inspection, repair, and maintenance services, Dream Home Roofers helps Turnersville homeowners prepare their roofs for everything fall may bring. For expert support and certified workmanship, you can schedule your fall roof inspection in Turnersville today.

Frequently Asked Questions

How do I know if my roof has Fall damage?

Look for signs like missing shingles, damp attic insulation, clogged gutters, or water stains near ceilings. These may indicate weather-related roof issues.

Is fall really the best season for roof repairs?

Yes. The mild weather in fall makes it safer and easier for roofers to inspect and complete repairs before the weather turns more severe.

Can clogged gutters damage my roof?

Absolutely. When gutters are clogged, water can back up under shingles or freeze during winter, causing leaks and structural damage.

How often should I schedule a professional roof inspection?

At least once a year, ideally in the fall. Regular inspections help catch small issues early, extending your roof’s life and preventing costly repairs.

What if I notice granules in my gutters?

Granule loss may signal aging shingles. If you’re noticing excessive granules in your gutters, it may be time for a roof evaluation or partial replacement.

https://dreamhomeroofers.com/wp-content/uploads/2025/03/new-roof-siding-replacement.jpg 1008 1920 Dream Home Roofers https://dreamhomeroofers.com/wp-content/uploads/2024/09/dhr-logo.png Dream Home Roofers2025-10-17 03:36:392026-04-27 23:30:01Fall Roof Prep Checklist for Homes in Turnersville, NJ
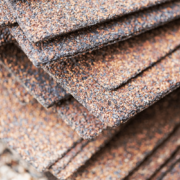
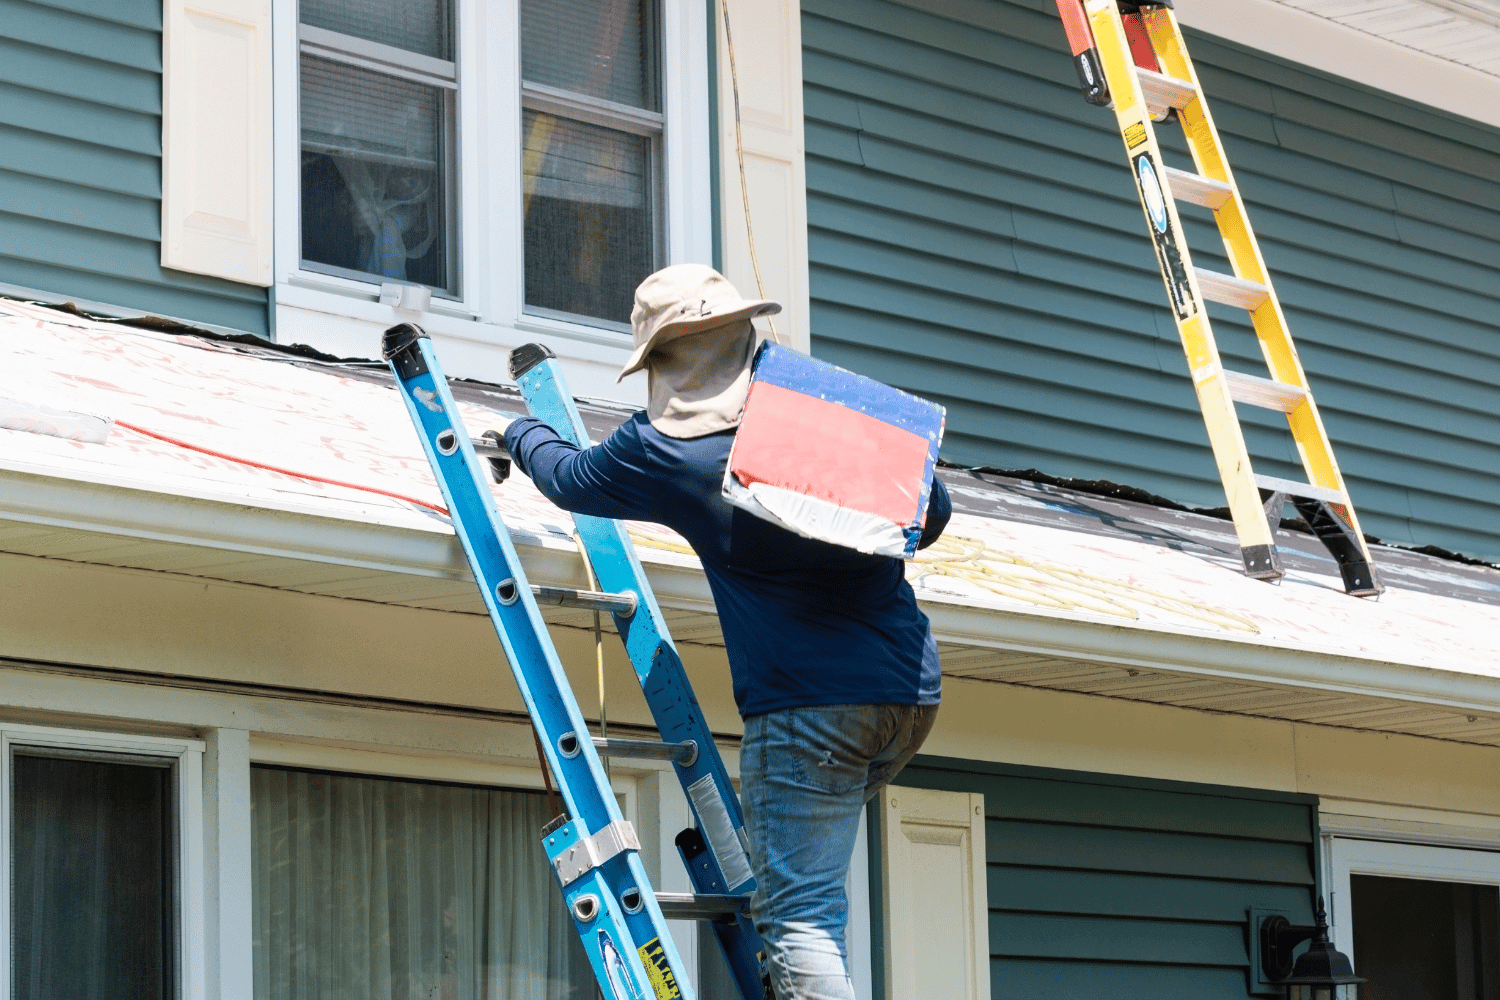
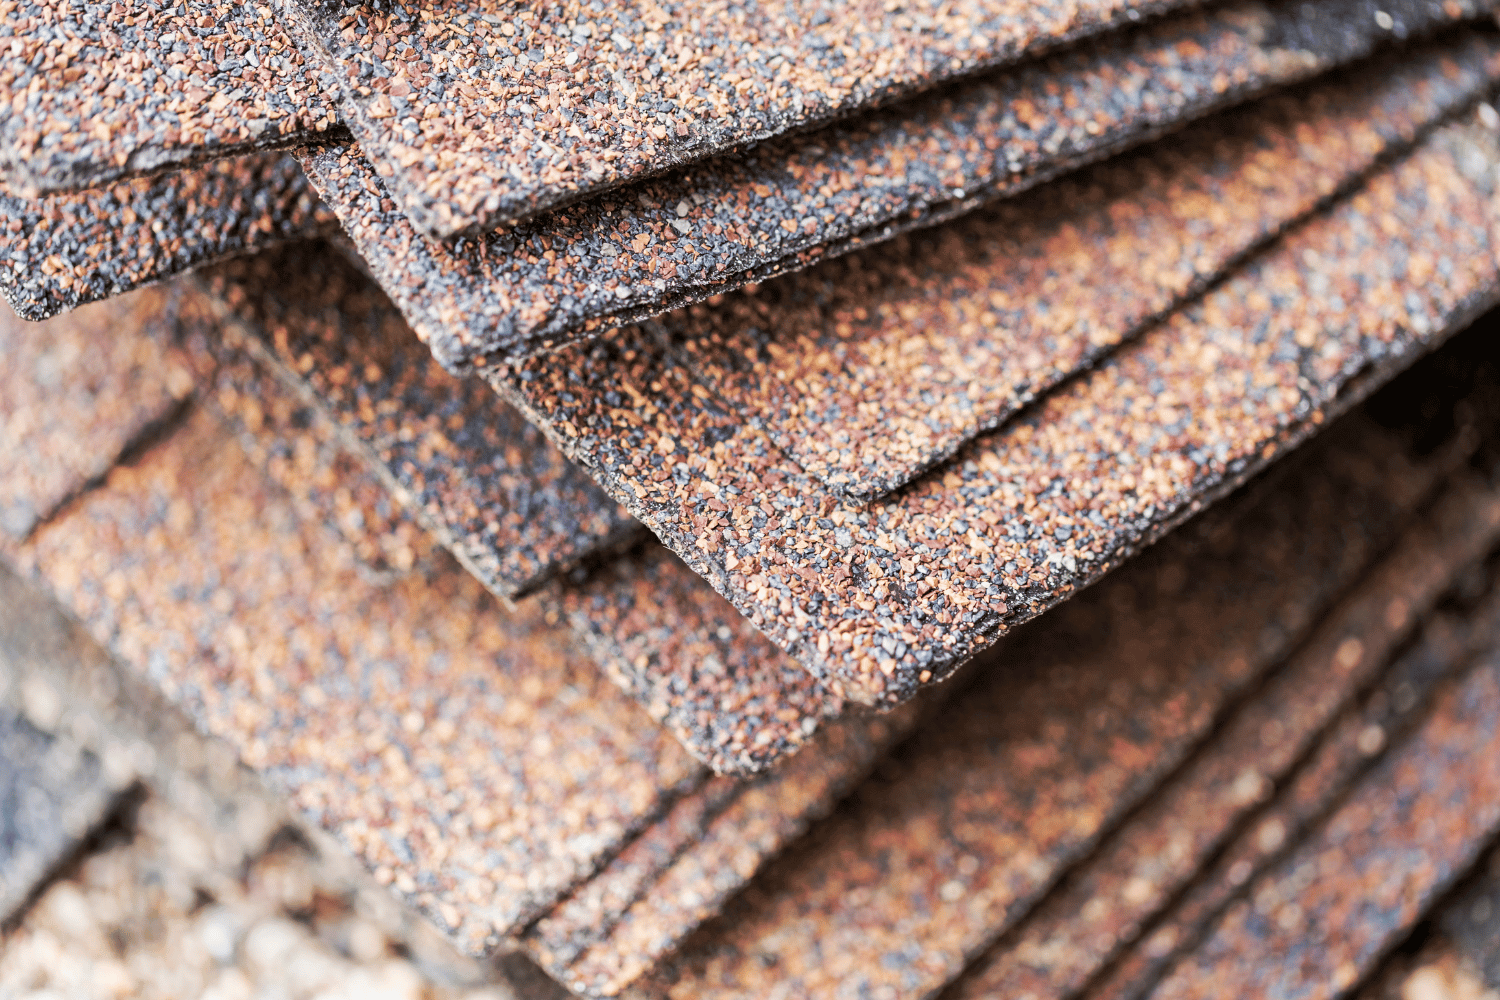
Key roofing materials including asphalt shingles and underlayment.

Top Roofing Materials for Laurel, MD Homes

in Roofing/by Dream Home Roofers

Choosing the right roofing material for your Laurel, MD home is a major decision that affects your property’s protection, appearance, and long-term value. With the area’s seasonal weather swings—including humid summers, snowy winters, and occasional storms—it’s essential to choose a material that can withstand local conditions while enhancing your home’s curb appeal. This guide explores the most popular roofing materials and which options are best suited for homes in Laurel.

Key Takeaways

  • Asphalt shingles are the most popular and affordable roofing option in Laurel.
  • Architectural shingles offer enhanced durability and style for Maryland’s varied climate.
  • Metal roofing is ideal for long-term performance and energy efficiency.
  • Local climate and roof slope should influence material selection.

Asphalt Shingles: Budget-Friendly and Reliable

Asphalt shingles are the most common roofing material in Laurel, MD. They offer a reliable balance of performance and affordability. Basic 3-tab shingles provide weather resistance and a clean, simple look, while architectural (dimensional) shingles offer greater durability and a more textured appearance.

Pros:

  • Cost-effective
  • Easy installation and replacement
  • Variety of colors and styles

Cons:

  • Lifespan of 15–30 years depending on quality
  • Susceptible to high winds and algae in humid conditions

Owens Corning Duration® architectural shingles are a strong choice, offering improved wind resistance and stain protection ideal for Laurel’s climate.

Metal Roofing: Long-Lasting and Energy Efficient

Metal roofing is gaining popularity among Laurel homeowners for its longevity, fire resistance, and modern aesthetic. Metal panels or shingles can reflect solar heat, keeping attic temperatures down during hot Maryland summers.

Pros:

  • Lifespan of 40–70 years
  • Resistant to fire, mildew, and insects
  • Excellent energy efficiency

Cons:

  • Higher upfront cost
  • Requires professional installation

Metal roofing is especially well-suited to homes with low slopes and in neighborhoods prone to storms or heavy snowfall.

Synthetic Roofing: Slate and Shake Alternatives

Synthetic roofing materials mimic the appearance of slate or wood shake while being lighter and less expensive. They are engineered for durability and can offer excellent resistance to impact and moisture.

Pros:

  • Lightweight and easier to install than natural slate
  • Can last 30–50 years
  • Low maintenance

Cons:

  • Higher cost than asphalt shingles
  • Some products may lack authenticity in appearance

This option is ideal for homeowners looking to elevate their home’s look without the weight or expense of natural materials.

Flat Roof Materials for Additions and Garages

For homes with flat or low-slope areas, such as garages or additions, materials like modified bitumen or TPO (thermoplastic polyolefin) membranes are commonly used in Laurel. These systems provide waterproofing and UV resistance.

Pros:

  • Effective on low-slope surfaces
  • Reflective options for energy efficiency
  • Seamless installation available

Cons:

  • Less aesthetic appeal
  • Requires regular maintenance

Professional installation from Laurel roofing specialist is crucial to ensure proper drainage and long-term performance.

Factors to Consider When Choosing a Roofing Material

  • Climate: Laurel experiences temperature swings, humidity, and snowfall. Choose materials with proven performance in all conditions.
  • Budget: Consider not just initial cost but also lifespan and maintenance requirements.
  • Aesthetic goals: Match roofing style to your home’s architecture.
  • HOA or zoning restrictions: Some neighborhoods may limit certain roofing types or colors.
  • Energy efficiency: Reflective or insulated roofing can reduce HVAC costs.

Why Work with a Local Laurel Roofing Expert

Dream Home Roofers understands the roofing challenges specific to Prince George’s County. As an Owens Corning Platinum Preferred Contractor, we offer premium roofing systems with strong warranties and certified installation.

Schedule a free consultation today to explore your best roofing options for Laurel, MD.

Frequently Asked Questions

What is the best roofing material for Maryland homes?
Architectural asphalt shingles are a top choice due to their cost-effectiveness and weather resistance. Metal roofs are also excellent for energy efficiency and longevity.

How long does a new roof last in Laurel, MD?
Asphalt shingles last 20–30 years; metal and synthetic roofs can last 40–70 years with proper care.

Is metal roofing noisy during rain?
Not with proper underlayment and insulation. A professionally installed metal roof is no louder than other materials.

Can I install a new roof over old shingles?
It depends on local code and roof condition. In many cases, a full tear-off is recommended for optimal results.

Do roofing materials affect home value?
Yes. High-quality materials improve curb appeal, energy efficiency, and resale value.


https://dreamhomeroofers.com/wp-content/uploads/2025/03/Key-roofing-materials-including-asphalt-shingles-and-underlayment.-1.png 1000 1500 Dream Home Roofers https://dreamhomeroofers.com/wp-content/uploads/2024/09/dhr-logo.png Dream Home Roofers2025-09-17 01:10:042026-04-27 23:30:07Top Roofing Materials for Laurel, MD Homes
Fix a leaking roof

Common Causes of Roof Leaks in Fairfax, VA

in Roofing/by Dream Home Roofers

Roof leaks are one of the most common and frustrating problems homeowners face in Fairfax, VA. The area’s mix of heavy rainfall, winter snow, and seasonal temperature swings makes residential roofs vulnerable to moisture intrusion. Understanding what causes these leaks can help you identify issues early and protect your home from expensive damage. This guide explores the most frequent culprits behind roof leaks and how to address them.

Key Takeaways

  • Roof leaks often originate from flashing, shingles, vents, or drainage issues.
  • Fairfax’s humid summers and freezing winters accelerate roofing wear.
  • Routine inspections can catch problems before they lead to major repairs.
  • Certified contractors ensure long-lasting, code-compliant fixes.

Damaged or Missing Shingles

Asphalt shingles form your roof’s first layer of defense against rain and snow. In Fairfax, summer heat and storm winds can loosen, crack, or completely dislodge shingles. Once a shingle is compromised, water can penetrate the underlayment and decking, leading to leaks inside your home.

Look for curled edges, bald spots, or missing tabs during a visual inspection—especially after severe weather. Even minor damage can expose your roof to water intrusion, and when that happens Dream Home should be your first call as the #1 roofing choice in Fairfax.

Faulty Flashing Around Chimneys and Vents

Flashing is the thin metal installed around chimneys, vents, and roof valleys to divert water away from seams. Improperly installed or deteriorated flashing is a major cause of roof leaks.

In older Fairfax homes, flashing may have corroded or separated from the masonry, creating gaps that allow water infiltration. Professional resealing or replacement is often required.

Clogged or Improperly Sloped Gutters

Gutters are crucial for directing rainwater away from the roof and foundation. In fall and spring, Fairfax homeowners frequently deal with clogged gutters due to leaves and debris.

When gutters overflow, water can back up under shingles or pool at the eaves. Over time, this leads to rot, ice dams in winter, and interior leaks. Ensure gutters are cleaned regularly and slope properly toward downspouts.

Roof Vent and Pipe Boot Failures

Vents and plumbing stacks penetrate the roof surface and must be sealed with pipe boots or flashing. Over time, UV exposure and thermal cycling degrade the rubber or plastic materials used.

Cracked or deteriorated pipe boots are a hidden but common cause of leaks. During Fairfax’s freeze-thaw cycles, these minor failures can allow water to seep into attic insulation and drywall.

Ice Dams During Winter

Fairfax winters bring snow and fluctuating temperatures that can lead to ice dams. These form when warm air in the attic melts snow on the roof, which then refreezes at the eaves.

Ice dams trap water behind them, forcing it under shingles and into the roof deck. Proper attic insulation, ventilation, and ice and water shield membranes can help prevent this seasonal issue.

Skylight or Solar Panel Installation Errors

Improperly installed skylights or solar panels can compromise your roof’s waterproofing. If flashing isn’t integrated correctly or seals fail, water can easily penetrate around these roof features.

Any roof penetrations in Fairfax should be installed or inspected by certified professionals familiar with local climate conditions and code requirements.

Aging Roofing Materials

Even the best-installed roofs will eventually degrade. Asphalt shingles in Fairfax typically last 20–30 years, depending on their quality and exposure.

If your roof is approaching or beyond this age range, leaks may appear due to granule loss, shingle curling, or failing adhesives. Proactive replacement can prevent widespread moisture damage.

When to Call a Fairfax Roofing Professional

Not all leaks are visible from the ground. If you notice ceiling stains, musty odors, or unexplained moisture in your attic, it’s time for a professional inspection. Dream Home Roofers offers free roof evaluations in Fairfax and uses Owens Corning materials for certified, long-lasting repairs.

Schedule your inspection today and stop small leaks before they cause major damage.

Frequently Asked Questions

How do I know if my roof leak is serious?
Any leak can lead to mold, wood rot, and structural damage if left untreated. A professional assessment can determine the severity.

Can I fix a roof leak myself?
Small repairs like resealing flashing may be DIY-friendly, but most leaks should be addressed by a certified roofer for safety and warranty protection.

Are roof leaks covered by insurance?
Leaks caused by storms or sudden damage may be covered. Wear-and-tear or poor maintenance typically is not.

How long do roof repairs take?
Most minor repairs are completed in 1–2 days. Larger replacements or storm damage may take longer.

How often should I inspect my roof?
Twice a year—typically in spring and fall—plus after any major storm.

https://dreamhomeroofers.com/wp-content/uploads/2024/03/how-to-fix-a-leaking-roof-from-the-inside-blog-img.jpg 720 1280 Dream Home Roofers https://dreamhomeroofers.com/wp-content/uploads/2024/09/dhr-logo.png Dream Home Roofers2025-09-02 09:30:042026-04-27 23:33:57Common Causes of Roof Leaks in Fairfax, VA
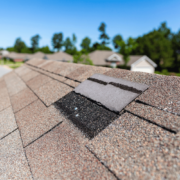
A house with a visibly damaged roof indicating the need for a roof replacement.

Signs You Need a New Roof in King of Prussia

in Roofing/by Dream Home Roofers

Roof problems often start small—until one heavy rain or winter freeze reveals something more serious. For homeowners in King of Prussia, PA, recognizing early signs of roof damage can save thousands in repair or replacement costs. In this guide, we’ll walk through the most common indicators that your roof may be nearing the end of its life and explain what to do next.

Key Takeaways

  • Missing shingles, leaks, and sagging areas are early warning signs of roof failure.
  • King of Prussia’s snowy winters and humid summers accelerate roof wear.
  • Roofs over 20 years old may be due for inspection and replacement.
  • Owens Corning-certified materials and installers ensure long-term protection.

Visible Shingle Damage

Shingles are your roof’s first line of defense. If you notice curling, cracking, or missing shingles, that’s a clear sign your roof has sustained weather damage. Harsh UV rays, snow, and ice common to the King of Prussia area can degrade asphalt shingles over time.

Also look for excessive granule loss—you may spot granules in gutters or downspouts. This erosion weakens the shingles’ protective layer, leaving the underlayment exposed. If you’re seeing these, it is time to call King of Prussia’s most trusted roofers.

Water Stains and Interior Leaks

Brown stains on ceilings or water running down walls during heavy rain usually indicate a roof leak. Moisture intrusion can cause mold growth and structural damage if not addressed promptly. Leaks often originate around flashing, chimneys, or roof valleys—especially in older homes with aging sealants.

Prompt inspection by a professional can locate the exact source and determine whether repairs or full replacement are needed.

Sagging Rooflines or Uneven Surfaces

A sagging roofline or visible dips in your roof are red flags of serious structural concerns. Often caused by water-damaged decking or inadequate ventilation, sagging sections mean your roof is no longer distributing weight evenly.

This issue is particularly dangerous during King of Prussia’s snow-heavy winters. Accumulated snow can add thousands of pounds of weight, worsening sag and increasing the risk of collapse.

Moss, Algae, and Vegetation Growth

Moss and algae may seem like cosmetic issues, but they often signal trapped moisture—especially on north-facing roof slopes that get less sunlight. In King of Prussia’s humid summers, these conditions thrive.

Trapped moisture accelerates shingle decay and can rot the wood decking below. Cleaning can help temporarily, but recurring moss often points to poor ventilation or aging materials.

Age of Roof and Local Weather Exposure

If your roof is over 20 years old and made from standard 3-tab shingles, it may be time for an upgrade. King of Prussia’s weather patterns—including hail, windstorms, and snow—can cut short the expected lifespan of roofing materials.

An inspection by a certified contractor can help determine if your roof still has life left or if it’s time to consider replacement with higher-grade architectural shingles.

Frequent Repairs and Rising Energy Bills

If you’ve called for roof repairs more than once in the past few years, or your energy bills are climbing despite consistent usage, your roof might be the cause. Poor insulation, air leaks, or failing shingles can all reduce energy efficiency.

Replacing an aging roof with modern Owens Corning systems can restore insulation performance and stabilize monthly energy costs.

When to Contact a Professional Roofer in King of Prussia

Don’t wait for visible damage to become an emergency. Dream Home Roofers offers professional roof inspections and free estimates throughout King of Prussia. As an Owens Corning Platinum Preferred Contractor, we use certified materials and proven installation techniques for long-lasting protection.

Schedule your free inspection today to protect your home before the next storm hits.

Frequently Asked Questions

How often should a roof be replaced in King of Prussia?
Typically every 20–30 years depending on the materials used and exposure to weather. Architectural shingles offer longer durability than 3-tab shingles.

Can I replace just part of my roof?
In some cases, partial replacement is possible, but it may not resolve underlying issues like poor ventilation or failing underlayment.

What does a roof inspection include?
Our inspections check shingles, flashing, vents, gutters, attic ventilation, and signs of leaks or moisture damage.

Is financing available for roof replacement?
Yes, Dream Home Roofers offers flexible financing options to make your new roof affordable.

Do you handle insurance claims?
We assist with insurance paperwork and storm damage claims to ensure a smooth process for homeowners.

https://dreamhomeroofers.com/wp-content/uploads/2025/03/A-house-with-a-visibly-damaged-roof-indicating-the-need-for-a-roof-replacement.-1.png 1000 1500 Dream Home Roofers https://dreamhomeroofers.com/wp-content/uploads/2024/09/dhr-logo.png Dream Home Roofers2025-08-17 08:55:582025-11-17 06:45:27Signs You Need a New Roof in King of Prussia
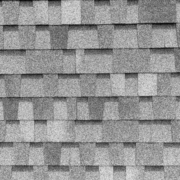
asphalt shingles

An Asphalt Shingles Buyer’s Guide for West Caldwell, NJ

in Roofing/by Dream Home Roofers

Asphalt shingles remain the most popular roofing choice for homeowners in West Caldwell, NJ—and for good reason. They offer a balance of affordability, durability, and aesthetic flexibility that suits the local climate and architectural styles. If you’re planning a roof replacement or building a new home, understanding your options for asphalt shingles is essential. This guide breaks down everything you need to know to make an informed decision.

Key Takeaways

  • Asphalt shingles are ideal for West Caldwell’s variable climate, providing weather resistance and longevity.
  • Architectural shingles offer more durability and curb appeal than traditional 3-tab styles.
  • Choosing Owens Corning shingles ensures certified quality and manufacturer-backed warranties.
  • Always hire a certified local contractor familiar with New Jersey building codes.

Why Asphalt Shingles Are Popular in West Caldwell

Homeowners in West Caldwell face seasonal weather extremes, from hot summers to snowy winters. Asphalt shingles provide excellent resistance to UV exposure, wind, rain, and ice. They are also easier and quicker to install compared to other materials, helping to reduce labor costs.

Moreover, asphalt shingles work well with the colonial, Cape Cod, and contemporary-style homes prevalent throughout Essex County. Whether you need basic functionality or want to boost curb appeal, asphalt shingles deliver flexible solutions.

Types of Asphalt Shingles Available

There are three main categories of asphalt shingles:

3-Tab Shingles

These are the most economical and simplest in design. While cost-effective, they typically offer a shorter lifespan and lower wind resistance than other types.

Architectural Shingles (Dimensional)

Architectural shingles are the preferred choice for many West Caldwell homeowners. Their dual-layer construction provides enhanced durability and a more dimensional appearance. They’re also better at withstanding strong winds and storms.

Luxury Shingles

Luxury shingles mimic the appearance of slate or cedar shake but come at a higher price. They provide excellent durability and aesthetic appeal, suitable for high-end homes or those in historic neighborhoods.

Choosing the Right Shingle for West Caldwell Weather

When selecting shingles, consider the local climate:

  • Winter durability: Look for impact-resistant ratings to protect against freeze-thaw cycles and hail.
  • Summer heat: Opt for shingles with reflective granules to reduce attic temperatures.
  • Wind resistance: West Caldwell occasionally experiences strong winds, so shingles rated for 110-130 mph are recommended.

Owens Corning shingles—especially the Duration® series—are engineered to meet these demands and are available through certified contractors like Dream Home Roofers.

Installation and Underlayment Considerations

A proper asphalt shingle roof installation in West Caldwell includes:

  • Synthetic underlayment for moisture protection
  • Ice and water shield in valleys and eaves (required by NJ building codes)
  • Proper ventilation to avoid moisture buildup in winter
  • Starter strips and ridge cap shingles for a secure seal

Hiring a certified installer ensures compliance with local codes and eligibility for extended warranties.

Why Work with a Certified Local Contractor

Dream Home Roofers is an Owens Corning Platinum Preferred Contractor with a strong presence in West Caldwell and Essex County. This distinction means:

  • Access to exclusive Owens Corning roofing systems
  • Eligibility for extended manufacturer warranties
  • Workmanship backed by a trusted brand

A local West Caldwell roofing contractor also understands regional building codes and permitting requirements, ensuring a smoother installation process.

Maintenance Tips to Extend Shingle Life

To get the most from your investment:

  • Schedule a roof inspection after major storms
  • Clean gutters regularly to prevent water pooling
  • Trim overhanging branches that could damage shingles
  • Reapply sealant around flashing as needed

Routine maintenance can help your asphalt shingle roof last 20–30 years or more.

Ready to Upgrade Your Roof in West Caldwell?

Dream Home Roofers offers free roof inspections and detailed consultations for West Caldwell residents. Whether you’re replacing old shingles or starting fresh, our team ensures every project meets high standards using Owens Corning products.

Request a free quote today to learn more about your shingle options and get expert guidance tailored to your home.

Frequently Asked Questions

How long do asphalt shingles last in West Caldwell, NJ?
With proper installation and maintenance, architectural shingles can last 25–30 years in this region.

What is the best asphalt shingle brand?
Owens Corning is widely trusted for quality and durability, especially the Duration® series.

Do I need a permit to replace my roof in West Caldwell?
Yes, Essex County requires a permit for roof replacements. Your contractor should handle the application.

Can I install shingles in the winter?
Yes, but cold weather requires special techniques. Choose a contractor with winter installation experience.

What color shingles are best for hot summers?
Lighter-colored shingles reflect more sunlight and help keep attic spaces cooler during summer months.

https://dreamhomeroofers.com/wp-content/uploads/2025/03/AdobeStock_282621052-resize.jpeg 667 1000 Dream Home Roofers https://dreamhomeroofers.com/wp-content/uploads/2024/09/dhr-logo.png Dream Home Roofers2025-08-01 10:00:282025-11-17 06:45:35An Asphalt Shingles Buyer’s Guide for West Caldwell, NJ
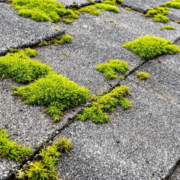
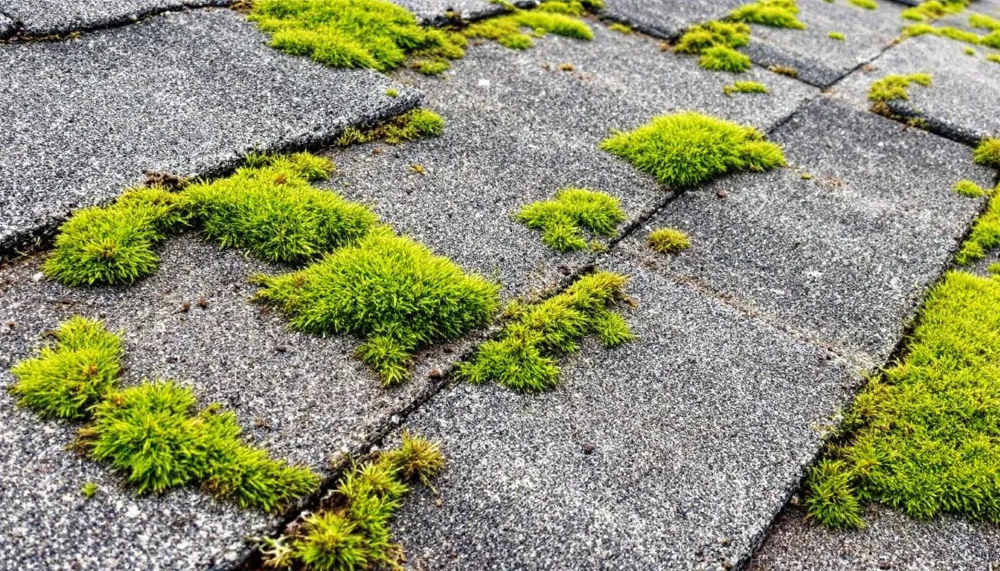
A close-up view of moss growing on a roof, illustrating the issue of moss growth on roofs.

Top Tips for How to Get Moss Off the Roof in New Jersey

in Roofing/by Dream Home Roofers

Moss on your roof in New Jersey is more than just an eyesore—it can cause significant damage. Scheduling regular roof inspections is essential to catch moss growth early. Learning how to get moss off the roof in New Jersey is essential to maintaining your home. A roof inspector can assess the roof’s condition and provide maintenance recommendations. This guide will cover practical removal techniques and prevention tips.

Key Takeaways

  • Moss thrives in New Jersey’s damp climate and can cause serious damage to roofs if not addressed early.
  • Regular inspections of your roof are crucial to catch moss or algae growth early to prevent extensive damage.
  • Hiring professionals for moss removal is recommended to ensure safety and avoid potential damage, as DIY efforts can often lead to more issues.
  • Hiring professionals for moss removal can also include replacement services if the roof is significantly damaged.

Understanding Moss Growth on Your Roof

A close-up view of moss growing on a roof, illustrating the issue of moss growth on roofs.


Moss has a tendency to flourish in environments that are moist, cool, and not directly exposed to sunlight, particularly where debris accumulates. Given New Jersey’s yearly average precipitation of around 47 inches, the conditions are ideal for moss proliferation. The roof’s surface, especially in shaded areas, can create an ideal habitat for moss. Consequently, your home’s roof faces an ongoing threat from moss infestation which needs to be dealt with swiftly before it escalates into a more severe problem.

The presence of moss on asphalt shingles isn’t just aesthetically disturbing. It poses tangible harm as well. By holding onto moisture after rainfalls or dew accumulation—moisture can linger under the shady cover provided by the growth—the longevity of your roof is compromised due to enhanced wear and tear including frost damage susceptibility. Moss typically thrives on north-facing sections of the roof due to the cooler, moisture-retaining environment. As time passes without intervention, this persistent dampness may erode the structural soundness of your rooftop significantly.

Moss dissemination exacerbates its harmful impact on roofs—it propagates through spores carried by wind currents that find their way effortlessly between individual shingles. Rapid colonization follows once these spores establish themselves within those crevices making immediate attention crucial at initial detection stages of any burgeoning green patches atop one’s sheltering structure.

Assessing the Extent of Moss Growth

Identifying early signs of moss and algae growth on your roof is key to preventing more significant issues in the future. The appearance of dark lines or discoloration on shingles, particularly black stains, can signal the onset of these elements. Conducting regular roofing inspections enables you to detect these indicators promptly and take corrective measures before they escalate.

Moss often forms dense patches that quickly expand while retaining moisture, which ultimately leads to deterioration of roofing materials. Consequently, it’s crucial to tackle moss proliferation immediately because this retained moisture infiltrates into the shingles causing them damage.

A thorough inspection by professionals involves a detailed examination of structural supports and stability among other roofing components for any evidence of damage or presence related to moss growth. A roofing inspector will also look for damages such as lost shingles or staining induced by moss accumulation, advising replacement with a new roof if deemed necessary. It’s vital not only from an integrity standpoint, but also for evaluating overall condition during both separate roof inspections and comprehensive home inspections. Periodic assessments are recommended including meticulous checks for potential cracks.

Additionally, a home inspector plays a crucial role in providing a broader assessment of the roof’s condition during real estate transactions, ensuring that potential buyers are aware of any underlying issues.

The initial phase in conducting a roof inspection typically entails scrutinizing the support system underneath the deck to ensure all around foundational sturdiness is present. Understanding how far-reaching the problem like moss has become allows homeowners appropriate action against its removal Safeguarding against possible impairments.

Tools and Supplies Professionals Need for Moss Removal

Professionals in the roofing industry arrive fully prepared with an assortment of equipment and materials for removing moss. Essential items typically include a spray bottle filled with chlorine bleach, as well as a ladder and garden hose to facilitate the process while safeguarding your roof from harm.

It is crucial to have essential roofing components like roof flashing and drip edge properly installed to prevent leaks and ensure compliance with building codes.

Upholding safety is critical when eliminating moss. Roofers are outfitted with various protective gear such as safety ropes, rubber gloves, shoes that resist slipping, eye protection, and garments meant for rough use to secure their wellbeing during work. They might utilize a harness or anchors for enhanced stability to minimize risks of accidents.

While conducting moss removal yourself may seem like an option worth considering, it’s usually not recommended because amateur efforts can lead to damage or impact warranty terms and insurance coverage negatively. Relying on professionals guarantees that the task will be executed properly without compromising your roof’s condition.

Safe Moss Removal Techniques

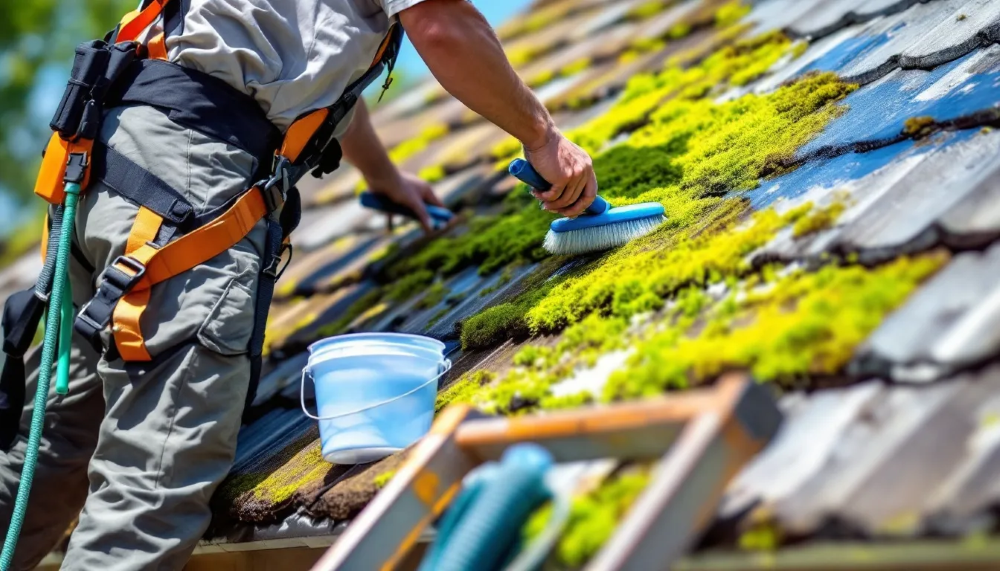
A professional using safe techniques to remove moss from a roof, showcasing moss removal techniques.


It is crucial to employ meticulous methods when eliminating moss from your roof to prevent harm. If left unattended, the growth of moss and algae on roofs can hold onto additional moisture, causing the roofing materials to degrade over time.

A roofing expert advises that specialists tend to opt for manual tools rather than power washing in order to safeguard the materials of the roof and avert any potential damage. It is important to avoid using a pressure washer when cleaning roofs, as the high-powered jets can damage shingles. For preserving the condition of your roof, soft wash roof cleaning is typically suggested by professionals.

How You Can Expect Professionals to Prepare Your Roof

Prior to commencing with moss removal, experts undertake numerous preparatory steps for your roof installation. Ensuring the area is safe mitigates the risk of mishaps, and observable indications of moss necessitate an immediate inspection followed by prompt measures. It is crucial to inspect the roof’s condition before starting the moss removal process to identify any potential issues. The safety protocols entail wearing a harness and eye protection, as well as making certain that ladders overshoot the edge of the roof by at least three feet to provide adequate stability.

It’s critical for those working on the roof to wear shoes that offer strong grip in order to prevent falls. During the thorough process of removing moss from roofs, professionals utilize tarps or plastic coverings not only to collect dislodged pieces of moss but also to safeguard surrounding plants and landscapes below. These preventative actions contribute significantly towards guaranteeing both a secure execution and an efficient outcome in eradicating moss from roofs.

Applying Cleaning Solutions

The subsequent stage involves the utilization of cleaning agents, where experts apply either commercial moss removers or a concoction of vinegar and water prepared at home. This phase commences with the distribution of the cleaning agent over the existing moss to exterminate it, allowing a minimum dwell time of 15 minutes.

Preventing mold growth is crucial, and this can be achieved by eliminating damp areas and using appropriate cleaning solutions.

To safeguard nearby vegetation throughout this operation, draping them with protective tarps is recommended. Utilization of rubber gloves and plastic sheeting serves as additional protection for flora and other surfaces. To eliminate both moss and cleansing substances post-treatment, employ a garden hose equipped with a spray attachment, ensuring that you opt for a gentle pressure setting to prevent any harm to your roof.

Preventing Future Moss Growth

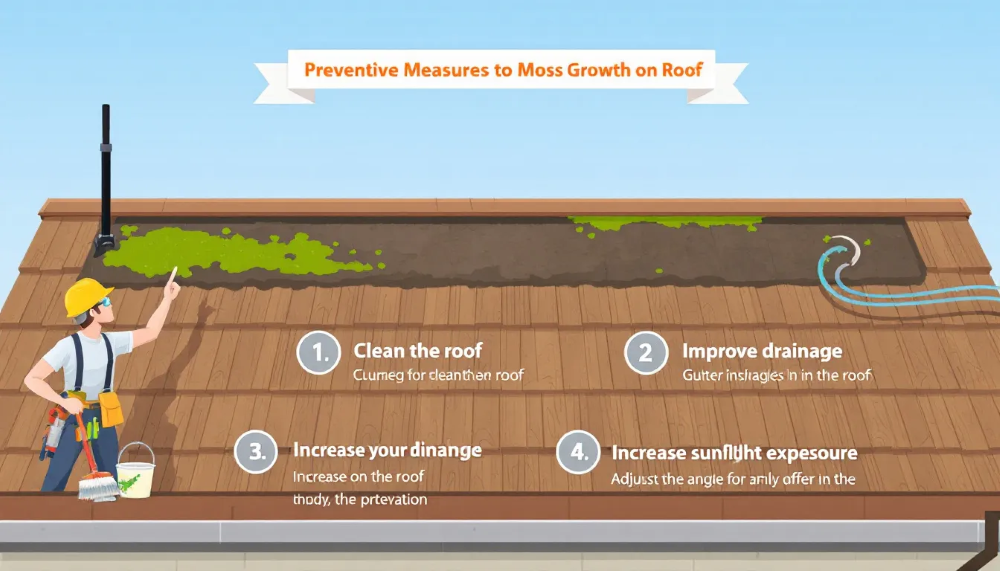
An illustration of preventive measures against moss growth on roofs, including proper drainage and sunlight exposure.


It’s just as critical to prevent the formation of moss on your roof as it is to eliminate it. A proactive strategy involves cutting back any surrounding trees to increase direct sunlight on the roof, thereby discouraging the development of moss. By doing so and eliminating areas of shade, you significantly diminish the likelihood that moss will take hold on your roofing materials. Maintaining the roof’s integrity is crucial to prevent water damage and other structural issues.

The installation of copper or zinc strips along your roof can also serve as a deterrent against future growths of moss. To optimize their effectiveness in preventing moss proliferation, these metal elements should be affixed right beneath the peak ridge running across both sides of the roof. Preventing water damage by ensuring proper drainage and eliminating excess moisture is essential.

Ensuring that gutters remain unobstructed is vital for staving off excess moisture conducive to both mold and moss accumulation. Prioritize having a clean gutter system and a clear rooftop from existing clumps before introducing anti-moss metal strips while maintaining trimmed foliage around your home for ongoing prevention efforts.

When to Call a Professional Roofing Contractor

Employing a professional roofing contractor when necessary can prevent extensive damage and costs. If your roof exhibits clear signs of moss growth, shingle deterioration, or water intrusion, it is prudent to engage the expertise of a roofing specialist for these complications. Ignoring moss on your roof may cause serious issues. The vegetation can weaken shingles over time, leading to leaks that compromise the overall stability of your roofing structure. It is essential to hire a roofing professional to assess the roof’s condition and provide necessary repairs or replacements.

Before attempting DIY moss removal from their roofs, homeowners should take into consideration both its age and how much moss has accumulated. Involving experienced contractors in this process typically results in greater savings over time by addressing potential hidden damages and ensuring safety measures are upheld during cleaning operations. Such professionals offer reliable evaluations for any required repairs or replacements following thorough inspections of the condition at hand. If the roof is significantly damaged by moss growth, a roof replacement may be necessary.

Cost of Moss Removal in New Jersey

A visual representation of the costs associated with moss removal in New Jersey, featuring a contractor assessing a roof.


The cost of moss removal can vary depending on several factors. DIY materials, such as zinc strips, can range between $25 to $50 for a 50-foot roll. However, professional moss removal services generally cost between $300 to $750, depending on the size of the roof. It is important to obtain estimates from multiple roofing companies to understand the potential costs involved.

Algae-resistant shingles typically cost 10-20% more than regular asphalt shingles. The average pricing for roof cleaning falls between $0.20 and $0.35 per square foot, with the typical expense for cleaning a 2,000 square foot roof averaging around $440. Investing in professional moss removal can lead to long-term savings by preventing more significant damage and costly repairs.

Understanding these costs can help New Jersey homeowners make informed decisions about moss removal and provide an estimate.

Benefits of Regular Roof Inspections

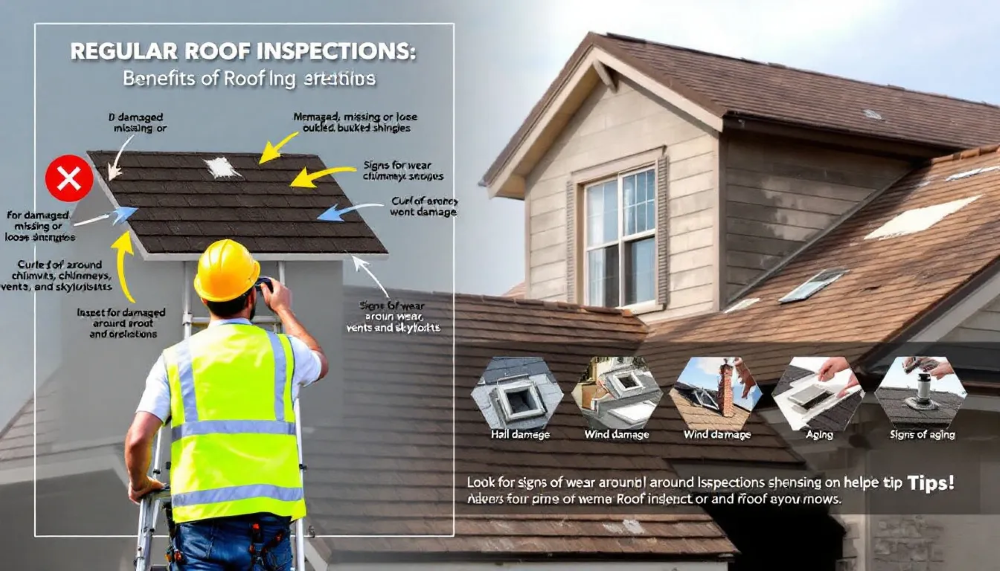
A roofing inspector conducting a thorough roof inspection, highlighting the benefits of regular inspections.


It is crucial for homeowners to carry out regular roof inspections to ensure the durability and proper condition of their roofs. By performing these inspections annually, the need for expensive full-scale
roof replacements can be postponed significantly, as frequent checks help in detecting issues early on. Assessing the roof’s condition through regular inspections can identify potential issues early, aiding in budgeting for future repairs and understanding the overall state of the roofing. The cost involved with routine maintenance through these inspections often pales in comparison to the cost involved with addressing larger repair needs that could arise if a roof is left unchecked.

Maintaining a record of consistent roofing inspections can simplify the process when filing insurance claims related to any damage sustained by the roof. These evaluations are key in spotting initial indications of deterioration such as mold or moss presence, water marks on interior ceilings or walls, and accumulation of shingle granules within gutters. Roofing professionals can provide thorough inspections and maintenance recommendations, ensuring that homeowners keep their roofs well-maintained and circumvent unforeseen financial burdens stemming from sudden roofing failures.

Summary

In summary, it is imperative to comprehend and tackle the issue of moss accumulation on your roof to preserve the structural integrity of your home. Properly evaluating the severity of moss presence, employing appropriate removal tools and methods, and enacting measures for prevention will ensure that your roof remains in pristine condition. Conducting regular inspections of your roof and recognizing when it’s time to enlist a professional roofing company can prevent considerable expenses, save you valuable time, and avert potential stress over time.

Keep in mind that consistent upkeep not only safeguards but also augments the value of your dwelling. If the roof is significantly damaged by moss growth, full roof replacements may be necessary to maintain the integrity of your home. Therefore, do not delay addressing this concern until moss overgrowth escalates into an extensive complication. Act promptly so as to guarantee a durable and robustly maintained moss-free roof well into the future.

Frequently Asked Questions

What are the early signs of moss growth on my roof?

If you’re spotting dark streaks or discoloration on your shingles, that’s likely the first sign of moss growth on your roof.

Keeping an eye on those changes can help you tackle the issue early!

Why is DIY moss removal discouraged?

DIY moss removal is discouraged because it can lead to more damage and might void your warranties or insurance claims.

It’s often best to leave it to the professionals.

How do professionals prepare for moss removal?

Professionals take precautions to ensure safety and protect the surrounding environment when preparing for moss removal. They equip themselves with harnesses, secure sturdy ladders in place, and cover nearby plants with tarps or plastic sheets to avoid damage.

The focus is on maintaining a safe work area while preserving everything around it during the moss removal process!

What are some effective preventive measures for moss growth?

To effectively prevent moss growth, trim overhanging trees, install copper or zinc strips, and keep your gutters clean.

These simple steps can make a big difference!

What is the cost range for professional moss removal in New Jersey?

Professional moss removal in New Jersey typically costs between $300 and $750, depending on your roof’s size.

So, it’s good to get a quote based on your specific needs!

https://dreamhomeroofers.com/wp-content/uploads/2025/07/sa.png 571 1000 Dream Home Roofers https://dreamhomeroofers.com/wp-content/uploads/2024/09/dhr-logo.png Dream Home Roofers2025-05-01 19:46:152026-01-30 17:23:58Top Tips for How to Get Moss Off the Roof in New Jersey
Demolition and removal tools used in roofing projects.

What Supplies Are Needed to Replace a Roof? A Complete Checklist

in Roof Replacement, Roofing/by Dream Home Roofers

Replacing a roof can seem overwhelming. To help, we’ve compiled a list of all the essential supplies needed to replace a roof. From tools to materials, this guide will ensure you’re fully prepared for a seamless roof replacement project.

Key Takeaways

  • Proper tools and safety equipment are essential for a safe and efficient roof replacement, including ladders, fall protection kits, and toe boards.

  • Selecting quality materials, like asphalt shingles and synthetic underlayment, is crucial for durability and protecting against weather damage.

  • Hiring professional roofers guarantees expertise and quality workmanship, enhancing the longevity of your roof and providing peace of mind.

Essential Tools for Roof Replacement

Essential tools for roof replacement including a ladder and safety equipment.

Embarking on a roof replacement without the proper tools is akin to cooking a gourmet meal without pots and pans. The right tools simplify the job and significantly boost safety and efficiency. Balancing on a steep roof without proper equipment can lead to serious injury. This makes having the right tools essential.

The right tools assist in safe roof access and perfect shingle alignment. Here are the must-have items for a smooth roofing project.

Ladder, Scaffold, or Shingle Lift

A sturdy ladder, scaffold, or shingle lift is vital for safe roof access. These tools offer a secure platform for roofers to reach elevated areas, especially on steep roofs. Carrying heavy materials like asphalt shingles up a flimsy ladder is both dangerous and inefficient. A scaffold or shingle lift makes this task safer and more manageable.

These tools provide the stability needed for effective roofing work, making them preferred by most roofers. Investing in a good ladder or scaffold is wise for both professionals and DIY enthusiasts.

Plus, using the proper safety equipment like hard hats and harnesses further ensures a safe and secure working environment.

Fall Protection Kit

Safety is paramount when working on a roof, making a fall protection kit essential. These kits typically include a reusable roof anchor, safety harness, rope lifeline, and shock-absorbing lanyard. They are designed to prevent falls and ensure that, in the event of a slip, you are securely anchored and safe from serious injury.

Having a fall protection kit keeps you safe and allows you to focus on the task at hand. Proper safety measures, including hard hats and utility knives, are crucial for any roofing project. Don’t skimp on safety; your life could depend on it.

Toe Boards

Toe boards are another critical safety feature, especially when working on steep roofs. These boards provide secure footing and prevent workers from slipping. Installing toe boards along the roof edges enhances safety and prevents tools and materials from falling, reducing the risk of injuries or property damage.

Balancing on a steep roof without support can be disastrous. Toe boards offer the stability needed for safe and efficient roofing tasks.

This simple yet effective safety measure is a must for any roofing project.

Demolition and Removal Tools

Demolition and removal tools used in roofing projects.

Removing old roofing materials is the first step before installing new ones. Demolition and removal tools are crucial for this phase. Prying off old shingles with bare hands would be extremely difficult and time-consuming.

The right tools expedite this task. Crowbars and flat head shovels are essential for any roof replacement project. Here are the tools you’ll need to remove old roofing.

Crowbar or Utility Bar

Crowbars and utility bars are essential during the demolition phase of roof replacement. They offer the leverage required to efficiently remove old nails and shingles. Imagine trying to pull out stubborn nails without the proper tool—it would be a frustrating and time-consuming task.

Using a crowbar or utility bar makes the removal process more manageable and less strenuous. These tools are designed to make quick work of even the most stubborn old roofing materials, streamlining the entire project.

Flat Head Shovel

A flat head shovel is crucial for removing old shingles. It lifts and removes shingles quickly, speeding up the demolition phase. Imagine trying to scrape off old shingles with a regular shovel—it would take forever and likely damage the roof deck.

Using a flat head shovel allows you to efficiently remove old roofing materials without causing unnecessary damage. This tool is a must-have for anyone tackling a roof replacement project.

Installation Tools

With the old roof removed, installing new roofing materials begins. The right installation tools ensure proper alignment and secure fastening. Without a nail gun or hammer, achieving a professional finish would be nearly impossible.

From hammers to chalk lines, these tools are essential for the installation phase. Let’s explore the tools you’ll need to ensure a smooth and successful installation process.

Hammer or Roofing Nailer

For securing shingles, a hammer or roofing nailer is indispensable. While a hammer is useful for small tasks, a roofing nailer is preferred by most roofers for its speed and efficiency. Imagine trying to nail each shingle by hand—it would take forever and wear you out quickly.

A roofing nailer ensures that each nail is driven in with the perfect amount of force, providing a secure and durable attachment. This tool is essential for achieving a professional finish and ensuring the longevity of your new roof.

Chalk Line

A chalk line is an effective tool for straight shingle installation. Snapping a chalk line creates a guide for perfect alignment of each shingle row. Imagine trying to install shingles without any guide—it would be nearly impossible to keep everything straight.

Using a chalk line ensures that your shingles are installed in straight, even rows, which not only looks better but also helps prevent leaks. This tool is a must-have for any roofing project.

Utility Knife

A utility knife, especially one with a hook blade, is essential for making precise cuts in shingles and underlayment. This tool allows you to trim materials to fit perfectly around roof edges and other obstacles. Imagine trying to cut shingles with a regular knife—it would be difficult to achieve clean, accurate cuts.

A utility knife with a hook blade offers better control and precision, ensuring perfect fitting of roofing materials. This tool is essential for any roof replacement project.

Key Roofing Materials

Key roofing materials including asphalt shingles and underlayment.

With the right tools in hand, focus shifts to the key roofing materials needed for replacement. These materials are the backbone of your new roof, offering durability, protection, and aesthetic appeal. Replacing your roof without knowing the essential materials would be like baking a cake without knowing the ingredients.

From asphalt shingles to synthetic underlayment, let’s explore the key roofing material that will ensure your roof stands the test of time.

Asphalt Shingles

Asphalt shingles are the most popular choice for roofing due to their low cost, durability, and design flexibility.

Asphalt shingles are primarily categorized into three types:

  • 3-Tab shingles, which offer a traditional look

  • Architectural shingles, which provide a more dimensional appearance

  • Luxury shingles, which have a premium appearance and enhanced durability

Each type offers different benefits, catering to various aesthetic preferences and budget considerations.

Selecting the right asphalt shingles significantly impacts your roof’s longevity and appearance. Most roofers recommend architectural shingles for their durability and aesthetic appeal. These shingles are designed to provide a dimensional look, adding depth and character to your roof.

Synthetic Underlayment

Synthetic underlayment is vital for any roof replacement project. It prevents moisture from reaching the roof decking, offering protection from water damage. Compared to traditional felt paper, synthetic underlayment is more durable and offers better water repellence.

Synthetic underlayment keeps your roof protected from moisture, preventing leaks and extending its lifespan. This material is essential for any roofing project.

Drip Edge

A drip edge protects roof edges from water damage. It directs water away from the fascia and into the gutters, preventing seepage under the shingles. Installing a drip edge is a small step that greatly extends your roof’s lifespan by preventing water damage and leaks.

Tin snips allow you to cut the metal drip edge to the required length and install it along roof edges. This simple component ensures proper water drainage and maintains the roof system’s integrity.

Protective Elements

Protective elements for roof safety, including hard hats and safety equipment.

Protective elements are crucial for ensuring that your roof can withstand the elements and prevent leaks. Components like ice and water shields, flashing, and pipe boots offer extra protection to vulnerable roof areas. Installing a new roof without these protective elements would almost certainly lead to water damage and leaks.

Let’s explore the key protective elements that will keep your roof in top condition for years to come.

Ice and Water Shield

Ice and water shields protect your roof from damage, especially in regions with heavy snowfall. Installed along roof edges and valleys, they prevent leaks caused by ice dams and water infiltration.

Building codes often mandate ice and water shields in specific areas to protect roofs during harsh weather. This element is essential for roof replacement projects in colder climates.

Flashing

Flashing prevents water infiltration around roof penetrations like chimneys, vents, and valleys. Made from materials like aluminum, steel, or copper, it directs water away from vulnerable areas, preventing leaks and damage.

Properly installed flashing is crucial for your roof’s longevity. It should be replaced with a new roof to ensure effective performance. This small but vital element plays a significant role in maintaining a leak-free roof.

Pipe Boots

Pipe boots are specialized flashing used to seal around roof ventilation pipes. They prevent water from seeping through pipe openings, crucial for avoiding leaks and water damage.

Neoprene pipe boots are popular for their durability and effectiveness. However, they need to be replaced about every decade to ensure a watertight seal and prevent roof leaks. This simple maintenance step can significantly prolong the life of your roof.

Ventilation and Insulation Components

Ventilation and insulation components for roofing systems.

Proper ventilation and insulation are crucial for a healthy roof system. Inadequate ventilation can turn your attic into a breeding ground for mold and mildew, causing structural damage and higher energy bills. Repairing extensive mold damage due to poor roof ventilation can be costly.

Let’s explore the components that ensure your roof remains well-ventilated and insulated.

Roof Vents

Roof vents regulate attic temperature and reduce humidity, facilitating airflow to prevent moisture buildup that can cause mold and structural damage. Properly installed roof vents are essential for maintaining a healthy roof and attic.

When installing roof vents, make sure to secure them properly and seal around the edges to prevent leaks. A well-ventilated attic extends your roof’s life and helps lower energy costs by maintaining a stable indoor temperature.

Ridge Cap Shingles

Ridge cap shingles, used at the roof’s peak, provide wind resistance and complete the roof system. They cover the ridge and help prevent wind-driven rain from entering.

Properly installing ridge cap shingles enhances your roof’s appearance and provides additional protection against the elements. This crucial step ensures a secure and leak-free roof.

Safety Equipment

Safety is paramount when working on a roof, and the right safety equipment prevents accidents and injuries. OSHA mandates personal fall arrest systems for work at heights, making safety equipment essential for any roofing project. Working on a steep roof without safety measures is a recipe for disaster.

Let’s explore the key safety equipment that will keep you protected during your roof replacement project.

Hard Hats

Hard hats protect workers from head injuries caused by falling debris and accidental impacts. These helmets absorb shocks and provide a crucial barrier against head injuries when working at heights.

Wearing a hard hat is a simple and effective way to prevent serious injuries. This essential safety equipment should be worn at all times during roofing work to ensure a safe environment.

Safety Harnesses

Safety harnesses prevent falls, especially on steep roofs. They provide secure attachment points and support, reducing the risk of serious injuries. Losing your footing on a steep roof without a harness could result in a life-threatening fall.

Safety harnesses ensure secure anchorage and protection while working at heights. This essential safety measure is a must for any roofing project to ensure the crew’s safety and well-being.

Preparing for the Project

Proper preparation is key to a successful roof replacement project. From obtaining the necessary permits to coordinating material delivery, preparation ensures that the project runs smoothly and efficiently. Imagine starting a roofing project without any preparation—it would be chaotic and prone to delays.

Let’s explore the steps you need to take to prepare for your roof replacement project.

Material Delivery

Coordinating the delivery of roofing materials is crucial for ensuring a smooth installation process. Ideally, materials should be delivered one to two days before the installation begins to allow for timely preparation. Storing materials in a dry area prevents damage and ensures they are ready for use.

Proper coordination and storage of roofing materials are essential for a successful roofing project. This simple step can prevent delays and ensure that the installation process goes smoothly.

Site Preparation

Preparing the worksite is another crucial step before starting the roof installation. This involves laying down tarps to protect the ground and catch debris, as well as covering plants and landscaping to prevent damage. Informing your neighbors about the project also helps them prepare for the noise and activity.

Proper site preparation ensures that the surroundings are protected and the project can proceed without unnecessary interruptions. This step is essential for a smooth and efficient roof installation process.

Hiring Professional Roofers

While DIY roof replacement can be tempting, hiring professional roofers offers numerous benefits. Professional roofers possess the necessary training and equipment to ensure high-quality work, reducing the risk of costly mistakes and ensuring proper installation. Imagine the peace of mind knowing that your roof is being handled by experts.

Let’s explore the benefits of hiring professional roofers and how it can enhance the quality and longevity of your roof.

Expertise and Quality

Hiring professional roofers provides peace of mind through their expertise and assurance of quality workmanship. Reputable roofing contractors and a skilled roofing contractor have the skills and experience needed to ensure proper installation of roofing materials, which greatly enhances the roof’s longevity and reliability.

Quality workmanship from experienced roofers leads to reduced future repair costs and increased property value. This investment in professional expertise ensures that your roof replacement project is done right the first time.

Satisfaction Guaranteed

At Dream Home Roofers, customer satisfaction is our top priority. We offer a satisfaction guarantee, promising to address any concerns after the project’s completion. Our focus on quality and diligence ensures that every roofing project meets high standards and yields guaranteed results.

Through thorough consultation and communication, we understand and meet our clients’ needs, ensuring they are completely satisfied with our roofing work. This commitment to customer satisfaction sets us apart and ensures a seamless and professional experience for every homeowner.

Summary

In summary, a successful roof replacement project requires the right tools, materials, and safety equipment. From essential tools like ladders and nailers to protective elements like flashing and pipe boots, each component plays a crucial role in ensuring the longevity and durability of your new roof. Proper preparation and the expertise of professional roofers further enhance the quality of the installation.

By following this comprehensive checklist, you can ensure a smooth and efficient roof replacement process. Remember, investing in the right supplies and professional expertise will pay off in the long run, providing you with a roof that stands the test of time.

Frequently Asked Questions

What discount is currently being offered on materials for roof replacements?

You can snag fantastic discounts for roof replacements with Dream Home Roofers! It’s a great time to save on that project you’ve been considering. Check out our current specials!

What type of roofing materials does Dream Home Roofers work with?

Dream Home Roofers primarily uses premium Owens Corning roofing materials, ensuring quality and durability for your roof. You’re in good hands with their top-notch selections!

How can I set up a free consultation with Dream Home Roofers?

To set up a free consultation with Dream Home Roofers, just give them a call at 1-888-513-9184. It’s that simple!

 

https://dreamhomeroofers.com/wp-content/uploads/2025/03/Demolition-and-removal-tools-used-in-roofing-projects.-1.png 1000 1500 Dream Home Roofers https://dreamhomeroofers.com/wp-content/uploads/2024/09/dhr-logo.png Dream Home Roofers2025-03-15 08:00:302026-03-27 11:25:57What Supplies Are Needed to Replace a Roof? A Complete Checklist
Installation of new roofing materials on a residential building.

Understanding the Roof Replacement Process: What to Expect

in Roof Replacement, Roofing/by Dream Home Roofers

Need to replace your roof? This guide walks you through the entire roof replacement process. From identifying the signs to picking the best materials and obtaining permits, you’ll learn each step to ensure a smooth project.

Key Takeaways

  • Identifying signs of roof deterioration, such as leaks and damaged shingles, is crucial for timely replacement to maintain home integrity.

  • Hiring a professional roofing contractor for inspections and material selection ensures a thorough and informed roof replacement process.

  • Understanding financing options and warranties is essential for homeowners, with current promotions providing cost-effective solutions for roof replacement.

Identifying the Need for a Roof Replacement

A house with a visibly damaged roof indicating the need for a roof replacement.

Identifying when your roof requires replacement is the initial important step. Common indicators that it may be time for a new roof include persistent leaks and missing or damaged shingles. Additionally, the age of your roof can also suggest the need for replacement. If your roof is around 20 years old or appears visibly worn, it might be nearing the end of its lifespan.

Specific signs that necessitate roof replacement include:

  • Curled shingle edges or cupped tabs, which suggest that the shingles are deteriorating

  • Bald areas where granules are missing from shingles

  • Cracked shingles, which are clear indicators that your roof is in distress

  • Dark streaks caused by algae, which, while often a cosmetic issue, can also signal aging

Moss growth, especially in shaded areas, poses another problem. Moss can trap moisture against the roof surface, leading to damage over time. Moreover, if you notice that neighbors are replacing their roofs, it could be a sign that your roof is also due for replacement, as homes in the same area often age similarly.

Understanding these signs is vital for maintaining the integrity of your home. Early identification of roof replacement needs can prevent further damage and ensure your home’s safety and durability.

Initial Roof Inspection

Conducting a thorough roof inspection helps identify existing issues and plan for an effective replacement. Homeowners should clear debris from roofs and gutters beforehand to allow for a comprehensive evaluation. This step allows the inspection to uncover all potential issues, such as leaks, damaged shingles, structural concerns, and underlayment problems.

Hiring a professional roofing contractor is highly recommended to minimize risks and handle the complexities involved in the roof replacement process. At Dream Home Roofers, we provide comprehensive roofing inspections and detailed estimates to assist homeowners in making informed decisions. A reputable roofing contractor and roofing contractors can further enhance this experience.

A professional inspection identifies the current state of your roof and offers insights into the best course of action, ensuring a clear plan for your roof replacement project.

Choosing the Right Roofing Material

Different types of roofing materials displayed for selection.

Choosing the right roofing material involves balancing durability, aesthetics, and cost. The main considerations include how long the roof material will last, how it looks, and how much it costs. Common types of roofing materials include asphalt shingles, metal roofing, tile, and slate.

Asphalt shingles are generally more cost-effective, making them a popular choice for homeowners on a budget. They come in various styles and colors, including architectural shingles, which provide a multi-layered construction for enhanced durability and aesthetic appeal.

Metal roofs, on the other hand, offer longevity and energy efficiency by reflecting heat, making them an excellent choice for those looking for a durable and eco-friendly option.

Clay tiles and slate roofs, while providing exceptional durability and a unique aesthetic, come at a higher price point. These materials are heavier and may require additional structural support. The upfront cost of roofing materials can significantly vary, impacting homeowners’ choices.

Ultimately, choosing the right roofing material involves balancing quality, aesthetic appeal, and budget considerations. Understanding the benefits and drawbacks of each material helps you make an informed decision that suits your needs and enhances your home’s value.

Obtaining Permits and Preparing Your Home

Securing the necessary permits for roof replacement ensures adherence to local laws and prevents potential legal issues. Failing to secure the proper permits can result in fines and complications that could delay your roofing project. At Dream Home Roofers, we ensure all required permits are obtained, providing peace of mind for homeowners.

Prepare your home before the roof installation begins. Protect outdoor furniture with covers to prevent damage during the roofing process. Cover landscaping and remove any obstructive items from around the home to facilitate the roofing process. Informing your neighbors ahead of time about the upcoming noise and disruption is also a courteous step to take.

Removing Old Roofing Materials

Workers removing old roofing materials during the roof replacement process.

Removing old roofing materials starts with preparing the yard by covering landscaping and placing a dumpster nearby for debris. This preparation helps protect your property and ensures that debris is managed efficiently throughout the project.

The removal starts at the peak of the roof ridge, with ridge caps being taken off first, followed by stripping away the existing shingles and underlayment. Once the roof is bare, the roof deck is inspected for damage, particularly looking for broken or rotted sections that may need replacement.

The roofing crew picks up debris and ensures it goes to the dump trailer, keeping the work area clean and safe.

Inspecting and Repairing Roof Decking

After removing the old roofing materials, inspecting the roof decking for damage or rot is crucial to ensure a stable base for the new roof. If any damaged or rotting roof decking is found, it must be replaced before installing the new materials. Plank decking with gaps exceeding 1/8 inch must also be replaced to comply with installation guidelines.

A solid roof deck is crucial. It ensures proper installation and enhances the longevity of the new roofing materials. Ensuring that the roof decking is in good condition will provide a strong foundation for the new roof and prevent future issues.

Installing Underlayment and Flashing

Installing the underlayment correctly enhances moisture protection in roofing. The underlayment must comply with local building codes to ensure long-term effectiveness. Common materials used include felt paper and synthetic underlayment, with the latter being lighter and tougher, making it easier to install.

Flashing is installed around critical areas like chimneys and vents to block water from entering the roof structure and prevent leaks. Correct flashing installation maintains structural integrity and prevents water infiltration where different materials meet.

Together, underlayment and flashing play a vital role in the overall durability and effectiveness of the new roofing system, ensuring that your home remains protected from the elements.

Installing New Roofing Materials

Installation of new roofing materials on a residential building.

Start the installation of new roofing materials with starter shingles, which provide a secure base for the main shingles and allow for easier water runoff. Main shingles are then installed in overlapping rows from the bottom of the roof to the ridge, ensuring proper alignment and coverage.

Underlayment is installed after the starter shingles, providing additional protection against moisture. Ridge cap shingles are used to cover the ridge of the roof where two planes meet, providing a finished appearance and additional protection.

Proper alignment and coverage during installing a new roof ensure the new roof’s longevity and effectiveness, allowing it to withstand the elements and protect your home for years.

Ensuring Proper Ventilation

Maintaining proper ventilation is key to extending roof longevity and enhancing energy efficiency. Identifying ventilation issues during an inspection is vital, as poor ventilation can lead to moisture buildup and mold growth. Ridge vents facilitate the release of warm air from attics, enhancing airflow across the entire roof area.

Attic fans actively expel hot air, effectively reducing temperatures and humidity levels during extreme heat. A balanced ventilation system is necessary; too much or too little can impair both ridge vents and attic fans’ effectiveness.

Final Inspection and Cleanup

A roofing contractor conducting a final inspection of a newly installed roof.

The final inspection confirms that the work meets high standards and all requirements. Typically conducted the day after the installation is completed, the project manager performs a full inspection, checking for proper installation and ensuring quality.

Thorough cleanup is performed post-installation to remove debris and ensure quality. Cleanup involves blowing off roof debris and using magnetic tools to pick up stray nails, ensuring the work area is tidy and safe.

Understanding Warranties and Future Maintenance

Homeowners need to understand the different types of roofing warranties. The three primary types are manufacturer’s warranty, workmanship warranty, and extended manufacturer’s warranty. Most standard manufacturer warranties cover defective materials but not installation-related issues.

Extended warranties often include coverage for all components of the roofing system, unlike standard warranties. Contractor workmanship warranties protect against errors in installation, and some may offer lifetime coverage. It’s important to register your warranty promptly to ensure coverage if a claim needs to be filed later.

Warranties can be voided if the manufacturer’s installation instructions are not followed. Regular inspections and cleaning, proper ventilation and insulation, and addressing damage promptly are essential for extending the lifespan of a new roof.

Summary

In summary, the roof replacement process involves several critical steps, from identifying the need for a new roof to ensuring proper ventilation. Recognizing the signs of roof deterioration, choosing the right materials, obtaining permits, and preparing your home are essential first steps. The removal of old materials, inspection and repair of roof decking, and installation of underlayment and flashing set the stage for installing the new roofing materials.

Proper ventilation, final inspection, and understanding warranties and future maintenance ensure the longevity and effectiveness of your new roof. By following this guide and taking advantage of available financing options and promotions, you can ensure a smooth and successful roof replacement project.

Frequently Asked Questions

What are the common signs that my roof needs replacement?

Common signs that your roof needs replacement include persistent leaks, missing or damaged shingles, curled edges, bald areas, and its overall age. Addressing these issues promptly can prevent more significant damage to your home.

Why is a professional roof inspection important?

A professional roof inspection is crucial as it uncovers existing issues and guides you on the best course of action, enabling a well-informed roof replacement plan. This proactive approach helps prevent more significant problems and expenses down the line.

What are the main considerations when choosing roofing materials?

When choosing roofing materials, prioritize durability, aesthetics, and cost to ensure a beneficial long-term investment. Options such as asphalt shingles, metal roofing, tile, and slate each offer distinct advantages to meet your needs.

Why is proper ventilation important for my roof?

Proper ventilation is crucial as it prevents moisture buildup and mold growth, which can significantly extend your roof’s lifespan and improve energy efficiency. Ensuring adequate airflow protects your investment and maintains a healthy home environment.

What financing options are available for roof replacement?

Viable financing options are available for roof replacement by companies like Dream Home Roofers, along with potential discounts on materials. This can significantly reduce the upfront costs involved in a roof replacement project.


https://dreamhomeroofers.com/wp-content/uploads/2025/03/Installation-of-new-roofing-materials-on-a-residential-building.-1.png 1000 1500 Dream Home Roofers https://dreamhomeroofers.com/wp-content/uploads/2024/09/dhr-logo.png Dream Home Roofers2025-03-10 06:00:012025-08-25 09:50:37Understanding the Roof Replacement Process: What to Expect
A properly installed downspout directing water away from the house foundation.

The Ultimate Guide to Rainwater Gutter Installation in Easy Steps

in Roofing/by Dream Home Roofers

Rainwater gutter installation is essential for safeguarding your home from water damage. This guide covers every step: planning, measuring, cutting, and installing gutters and downspouts. Follow along to ensure your system works effectively and keeps your home dry.

Key Takeaways

  • Installing rain gutters is essential for protecting a home’s foundation and preventing costly water damage, erosion, and mold growth.

  • Thorough planning, accurate measurements, and the right materials are critical for a successful gutter installation, which includes assessing roof pitch and strategically placing downspouts.

  • Regular maintenance, such as cleaning and inspecting gutters and downspouts, is crucial for ensuring long-term performance and preventing clogs that can lead to structural damage.

Why Installing Rain Gutters is Crucial

A house with well-installed rain gutters that effectively divert rainwater.

Rain gutters are the unsung heroes of home maintenance, playing a pivotal role in diverting and carrying rainwater away from your home’s foundation, thus protecting its overall structural integrity. Without a well-installed gutter system, homes are vulnerable to severe water damage, including roof leaks and erosion, which can lead to costly repairs.

Moreover, installing gutters helps preserve the condition of your siding and roof materials by directing rainwater away, thus preventing the degradation of these essential components. Improper water runoff can lead to mold growth, which not only causes structural damage but also poses health risks to residents.

Basement flooding is another significant concern that can be avoided with a proper gutter system. When rainwater is not diverted effectively, it can seep into the basement, leading to extensive water damage and creating a damp environment that attracts pests. Additionally, without gutters, the garden areas around your home can suffer from excess moisture, harming plants and creating pollution.

Rain gutters represent a small investment that can prevent substantial, costly damage, keeping your home safe, dry, and structurally sound. To protect your home effectively, it is essential to install rain gutters and ensure that the rain gutter system is functioning properly.

Planning Your Rainwater Gutter Installation Project

Blueprints and tools laid out for planning a rainwater gutter installation project.

Thorough planning is necessary before installing rain gutters. Start by assessing your house’s structure and any existing components to ensure compatibility with the new gutter system. Visualize the layout by drawing a plan that identifies the lengths needed and the overall configuration of the gutters. This step helps in determining precise measurements and placement of the gutters, preventing overflow and foundation damage.

Next, calculate the roof’s pitch by measuring both horizontally and vertically to determine the slope. An appropriate slope ensures efficient water flow away from the foundation, preventing water-related problems. Strategically place downspouts to facilitate efficient drainage, keeping in mind that a downspout is generally needed for every 20 feet of gutter length.

Lastly, budget for additional materials beyond the gutters, such as brackets, downspouts, and potential repairs. Such comprehensive planning lays the groundwork for a smooth and successful gutter installation.

Essential Tools and Materials for Gutter Installation

Essential tools for gutter installation including a drill and various gutter materials.

Installing gutters effectively requires a range of essential tools and gutter material. Aluminum gutters, gutter sealant, and stainless steel screws are fundamental components of a quality gutter installation. Aluminum gutters are particularly popular due to their durability and resistance to rust.

Before:

The necessary tools for the job are equally important. You’ll need tin snips and a hacksaw for cutting the gutters to the desired lengths. A cordless drill and a hex head driver are also necessary for securing the gutters to the fascia board. Additionally, a drill with a 4-inch hole saw bit is recommended for making downspout holes in the gutters.

After:

The necessary tools for the job are equally important. You’ll need:

  • Tin snips and a hacksaw for cutting the gutters to the desired lengths

  • A cordless drill and a hex head driver for securing the gutters to the fascia board

  • A drill with a 4-inch hole saw bit for making downspout holes in the gutters

Don’t forget the additional components like gutter fascia, which should be on hand for installation. Having the proper tools and materials equips you to tackle your gutter installation project efficiently.

Measuring and Marking for Precision

Accuracy is crucial when installing rain gutters. Inaccurate measurements can lead to water pooling in the wrong places or an inefficient use of materials. Start by marking the highest and lowest points of the gutter run to establish the necessary slope for effective water flow. Usually, the pitch should be set at 1/2 inch for every 10 feet toward the downspout to ensure proper drainage.

Using a chalk line helps maintain the correct level and alignment of the gutters. Snap a chalk line between the highest and lowest points to guide your installation.

Tools such as a tape measure and RoofScope or GutterScope help in taking exact measurements, ensuring accurate installation and proper functioning of your gutters.

Cutting and Preparing Gutter Sections

Once you’ve measured, it’s time to cut and prepare the gutter sections. Saw the sections to the correct length, accounting for any corners or turns where elbow joints are needed. Use tin snips to cut outlet holes for downspouts and smooth out any sharp edges with a file to ensure seamless connections.

Pre-drilling holes for the gutter end caps and applying gutter sealant at the joints ensures leak-free connections. Properly preparing gutter sections is essential for a tight fit and effective water flow.

Installing Fascia Brackets and Hangers

Installing fascia brackets and hangers is a vital step in the gutter installation process. Begin by measuring the gutter length and marking hanger positions for even spacing. Use a ladder to safely access the roofline and drive spikes into the fascia board for secure attachment when using spikes and ferrules.

Ensure the screws used for attaching hangers are long enough to securely penetrate both the gutter and the fascia. Avoid positioning hangers directly over downspouts to prevent water flow issues. Hidden hangers, which are not visible from the ground, provide a neat appearance and enhance the overall aesthetics of the gutter system.

For added security, install gutter hangers through the fascia board into the rafter ends whenever possible. This method ensures a robust attachment, capable of supporting the weight of the gutters and the water they will channel.

Attaching the Gutter Sections

Now that the brackets and hangers are installed, the next step is to attach the gutter sections. Continue with this part of the setup. Begin at the highest point of the slope, positioning the sections in sequence near the installation site. Secure the sections using screws or gutter spikes, ensuring a sturdy connection.

For corners, use connectors or strips of metal to link two gutters together. Hook the back side of the strip miter through the rear edge and secure it with screws to ensure a tight fit. Brackets should be mounted every 18 to 24 inches to provide adequate support for the gutter runs.

Ensure that the installed gutters slope away from the downspout location to facilitate proper water flow and prevent pooling.

Sealing Joints and Connections

To prevent leaky gutters, sealing joints and connections is crucial. Apply gutter sealant along any seams to ensure that the gutters are watertight. This step is essential for maintaining the integrity of the gutter system and preventing costly repairs.

Apply sealant to all holes and elbows connecting gutter materials. Press the components tightly together after applying the caulk to ensure a secure, leak-free connection.

Installing Downspouts and Ensuring Proper Drainage

A properly installed downspout directing water away from the house foundation.

Correct downspout installation is vital for effective drainage. Determine the number and placement of downspouts to prevent water pooling around the foundation. Downspouts are typically installed at the ends of the gutter system. They can also be positioned at the corners.

Use brackets to secure the downspouts properly, attaching U-shaped elbow brackets to connect the downspout to the house corners. Downspout extensions can guide water further away from the foundation, reducing the risk of basement flooding.

For optimal performance, seal gutter seams on a warm, dry day and clean old caulk and debris before applying new sealant. Press the components tightly together after applying caulk to ensure a secure connection.

Adding Gutter Guards for Maintenance-Free Gutters

A house with gutter guards installed, ensuring maintenance-free gutters.

Gutter guards are an excellent addition to any gutter system, preventing debris buildup and reducing the frequency of gutter cleanings. Installing gutter guards helps keep the inside of the gutters clean, preventing water damage and ensuring proper flow.

Micromesh gutter guards are highly recommended for protecting rain gutters. LeafFilter gutter guards, for example, offer a clog-free guarantee, significantly reducing the need for regular cleaning.

Testing Your Installed Gutter System

After installation, testing the gutter system ensures it functions correctly. Run water through the system to check for leaks and observe water flow. This test helps identify any pooling or improper drainage issues needing attention.

Perform visual inspections to locate any visible damage such as cracks or sagging in the gutters. Promptly addressing these issues will ensure the longevity and effectiveness of your gutter system.

Tips for Maintaining Your Rain Gutters

Proper maintenance is essential for the longevity and performance of your rain gutters. Regular maintenance includes gutter cleaning and downspouts at least twice yearly to prevent clogs and ensure proper function. This practice helps avoid common issues such as clogs and leaks in the gutter system.

Using gutter guards minimizes the risks associated with cleaning gutters, reducing the time spent on ladders and enhancing safety. Gutter guards also lower the fire hazard risk by preventing debris accumulation that can catch fire.

Regularly check for signs of rust, corrosion, or sagging in your gutters. Inspect downspouts regularly for blockages to prevent overflow and subsequent damage.

Summary

Installing rain gutters is a critical task that protects your home from water damage and maintains its structural integrity. By following this guide, you’ve learned the step-by-step process of planning, installing, and maintaining a reliable gutter system. With proper tools, careful measurements, and regular maintenance, your gutters will efficiently divert rainwater away from your home, ensuring it remains safe and dry. Take action today and safeguard your home with a well-installed gutter system.

Frequently Asked Questions

Why do most houses in Florida not have gutters?

Most houses in Florida do not have gutters because they can trap debris, leading to clogs and potential roof damage, while the state’s wet climate and heavy rains make maintenance challenging. Consequently, many homeowners opt for alternatives to reduce upkeep.

Why is it important to install rain gutters?

Installing rain gutters is essential to protect your home’s foundation by redirecting rainwater away, which helps prevent structural damage, mold growth, and flooding. This proactive measure safeguards both your property and your investment.

What tools and materials are essential for gutter installation?

For gutter installation, essential materials are aluminum gutters, gutter sealant, and stainless steel screws, while necessary tools include tin snips, a hacksaw, a cordless drill, and a hex head driver. Ensuring you have these items will facilitate a smooth installation process.

How should I measure and mark for gutter installation?

To accurately install gutters, measure the highest and lowest points along the run, then snap a chalk line to establish a slope of 1/2 inch for every 10 feet toward the downspout. This ensures proper drainage and functionality.

What are the benefits of installing gutter guards?

Installing gutter guards effectively prevents debris buildup and reduces the need for frequent cleanings, ensuring proper water flow. This not only enhances safety by minimizing cleaning risks but also mitigates fire hazards.


https://dreamhomeroofers.com/wp-content/uploads/2025/02/A-properly-installed-downspout-directing-water-away-from-the-house-foundation.-1.png 1000 1500 Dream Home Roofers https://dreamhomeroofers.com/wp-content/uploads/2024/09/dhr-logo.png Dream Home Roofers2025-02-21 08:00:032025-08-25 08:57:38The Ultimate Guide to Rainwater Gutter Installation in Easy Steps
Preparing a roof deck for shingle installation.

Roof Shingle Overlap: The Complete Guide From a Licensed NJ Roofer

in Roof Installation, Roofing/by Dream Home Roofers

Shingle overlap is one of those specifications that looks simple until you understand what happens when it’s wrong. Too little overlap and wind-driven rain gets under the shingles. Too much and you’ve wasted material and changed the way water sheds off the roof. Dream Home Roofers has installed and inspected hundreds of roofs in West Caldwell and across northern New Jersey. This is what correct overlap looks  like, what happens when it’s off, and how to know if your existing roof was installed properly.

The Terminology: Headlap, Exposure, and Offset

Before getting into the numbers, it helps to understand the three terms that define how shingles are positioned relative to each other.
• Headlap: the distance the top edge of a lower course is covered by the course two rows above it.
This is the primary waterproofing measurement.
• Exposure: how much of each shingle is visible after installation. This is what you see from the ground.
• Offset: how far the vertical joints in each course are staggered from the course below. This prevents water from tracking straight down through aligned cutouts.

Correct Overlap Measurements by Shingle Type

Three-Tab Asphalt Shingles

Three-tab shingles are 12 inches tall with a 5-inch exposure, leaving a 7-inch headlap. The minimum headlap required by most building codes and manufacturers is 2 inches, but a proper installation targets 5 to 7 inches for full coverage. The offset on three-tab shingles should be at least 6 inches from the joints in
the course below.

Architectural (Dimensional) Shingles

Architectural shingles are typically 13 to 14 inches tall with a 5-5/8 inch exposure. The standard headlap target is around 6 inches. Because architectural shingles don’t have uniform cutouts, the offset needs to be managed by starting alternating courses with a half-shingle or a measured starter piece to keep the joints staggered.

Hip and Ridge Caps

Ridge cap shingles are overlapped along the ridge and hip lines. Standard ridge cap overlap is 5 to 6 inches, with the exposed fasteners of the lower cap covered by the cap above it. An improperly
overlapped ridge cap is one of the most common sources of leaks we find on roofs that were otherwise installed correctly.

What Happens When Shingle Overlap Is Wrong

Too Little Overlap

Insufficient headlap exposes the underlayment to wind-driven rain. In New Jersey’s climate, nor’easters and late-season storms push rain horizontally, which is a completely different stress than vertical rain. An exposed underlayment can fail within a few seasons under that kind of repeated stress. Once the underlayment is compromised, the decking follows quickly in our humid climate.

Too Much Exposure

Excessive shingle exposure reduces the headlap below minimum, which has the same effect as insufficient overlap. It also makes the roof look wrong from the street. Both conditions may void the
manufacturer’s warranty.

Misaligned Offsets

When the vertical joints of two adjacent courses align instead of stagger, water can track straight down between the shingles without being deflected. This is less common than headlap errors but still shows up on inspections, particularly on roofs installed quickly or by less experienced crews.

How to Check Your Roof’s Shingle Overlap

You can get a rough read on shingle exposure from the ground by measuring the visible portion of a shingle course with a tape measure. On a standard architectural shingle roof, the exposed portion should be right around 5 to 5-5/8 inches. If you’re seeing 7 or 8 inches of exposure, the headlap is likely short of spec. A roof inspection is the only way to confirm the actual headlap measurement and check the ridge cap and valley details.

What Roof Installation Costs in West Caldwell, NJ

• Standard architectural shingle replacement on a typical West Caldwell home (1,500 to 2,200 sq ft of roof surface): $7,000 to $12,000 including removal of the existing roof and standard underlayment.
• Premium shingles, steep pitch, or homes requiring decking repair will run toward the higher end or above this range.
• Dream Home Roofers provides free written estimates with a detailed scope of work.

Frequently Asked Questions: Roof Shingle Overlap

How much should asphalt shingles overlap?

Standard three-tab asphalt shingles require a minimum headlap of 2 inches, with most manufacturers targeting 5 to 7 inches. Architectural shingles typically run a 6-inch headlap with a 5-5/8 inch exposure. Getting this measurement wrong reduces both wind and water resistance and can void the manufacturer’s warranty.

What happens if shingles don’t overlap enough?

Insufficient shingle overlap leaves the underlayment and decking exposed to wind-driven rain. Over time this causes leaks, sheathing rot, and mold growth in the attic. In New Jersey’s climate, where nor’easters push rain horizontally, this failure mode is faster and more destructive than in drier markets. It can also void your shingle warranty.

How do I know if my shingles were installed with the right overlap?

A basic visual check from the ground can reveal excessive exposure (more than about 6 inches visible on an architectural shingle course is a red flag), but only an on-roof inspection with measurements confirms the actual headlap. Dream Home Roofers provides free roof inspections in West Caldwell, NJ and documents installation defects in writing.

Does incorrect shingle overlap void the manufacturer warranty?

Yes, in most cases. Shingle manufacturers require installation to their published specifications as a condition of the warranty. An inspection that finds headlap short of spec can be grounds for a warranty denial on materials, even if the shingles themselves are defective. This is one of the reasons using a licensed and experienced installer matters.

https://dreamhomeroofers.com/wp-content/uploads/2025/02/Preparing-a-roof-deck-for-shingle-installation.-1.png 1000 1500 Dream Home Roofers https://dreamhomeroofers.com/wp-content/uploads/2024/09/dhr-logo.png Dream Home Roofers2025-02-15 08:00:592026-04-07 05:01:01Roof Shingle Overlap: The Complete Guide From a Licensed NJ Roofer
Page 4 of 7«‹23456›»

Pages

  • About us
  • Blogs
  • Careers
  • Contact Us
  • Current Specials at Dream Home Roofers
  • FAQS
  • Feedbacks
  • Financing
  • Gutter Guards in the Delaware Valley
  • Gutters in Delaware Valley
  • Home
  • new form test
  • Opt-out preferences
  • Privacy Policy
  • Rate
  • Review Feedback Form
  • Reviews
  • Roof Inspection in Delaware Valley
  • Roof Inspection in Turnersville, NJ
  • Roof Inspection in West Caldwell, NJ
  • Roof Inspections in Laurel, MD
  • Roof Replacement in Cherry Hill, NJ
  • Roof Replacement in Columbia, MD
  • Roof Replacement in Delaware Valley
  • Roof Replacement in Harrisburg, PA
  • Roof Replacement in King of Prussia, PA
  • Roof Replacement in Lancaster, PA
  • Roof Replacement in Laurel, MD
  • Roof Replacement in Philadelphia, PA
  • Roof Replacement in Turnersville, NJ
  • Roof Replacement in Vineland, NJ
  • Roof Replacement in West Caldwell, NJ
  • Roofing Company in Fairfax, VA
  • Roofing Company in King of Prussia, PA
  • Roofing Company in Laurel, MD
  • Roofing Company in Maryland
  • Roofing Company in New Jersey
  • Roofing Company in Pennsylvania
  • Roofing Company in Scranton, PA
  • Roofing Company in Turnersville, NJ
  • Roofing Company in West Caldwell, NJ
  • Roofing Company in Wilmington, DE
  • Roofing in Allentown, PA
  • Roofing in Atlantic City, NJ
  • Roofing in Bethesda, MD
  • Roofing in Bethlehem, PA
  • Roofing in Blairstown, NJ
  • Roofing in Boonsboro, MD
  • Roofing in Bowie, MD
  • Roofing in Burlington, NJ
  • Roofing in Camden, NJ
  • Roofing in Cherry Hill, NJ
  • Roofing in Chester, PA
  • Roofing in Clifton, NJ
  • Roofing in Columbia, MD
  • Roofing in Delaware Valley
  • Roofing in Delaware Valley
  • Roofing in Delaware Valley
  • Roofing in Dundalk, MD
  • Roofing in Egg Harbor, NJ
  • Roofing in Ellicott City, MD
  • Roofing in Elm, PA
  • Roofing in Fairfax, VA
  • Roofing in Frankford, NJ
  • Roofing in Freehold, NJ
  • Roofing in Gaithersburg, MD
  • Roofing in Germantown, MD
  • Roofing in Glen Allen, VA
  • Roofing in Glen Burnie, MD
  • Roofing in Gloucester Township, NJ
  • Roofing in Hamilton, NJ
  • Roofing in Harrisburg, PA
  • Roofing in King of Prussia, PA
  • Roofing in King Of Prussia, PA
  • Roofing in Lancaster, PA
  • Roofing in Laurel, MD
  • Roofing in Laurel, MD
  • Roofing in Lebanon, PA
  • Roofing in Lehigh Valley
  • Roofing in Levittown, PA
  • Roofing in Mahwah, NJ
  • Roofing in Maryland
  • Roofing in Monroe, NJ
  • Roofing in Mount Laurel, NJ
  • Roofing in New Jersey
  • Roofing in Norristown, PA
  • Roofing in Pennsylvania
  • Roofing in Philadelphia, PA
  • Roofing in Potomac, MD
  • Roofing in Reading, PA
  • Roofing in Rockville, MD
  • Roofing in Severn, MD
  • Roofing in Silver Spring, MD
  • Roofing in Smithsburg, MD
  • Roofing in Somerset, NJ
  • Roofing in South Jersey
  • Roofing in Tinton Falls, NJ
  • Roofing in Towson, MD
  • Roofing in Turnersville NJ
  • Roofing in Turnersville, NJ
  • Roofing in Union, NJ
  • Roofing in Vineland, NJ
  • Roofing in Voorhees, NJ
  • Roofing in Waldorf, MD
  • Roofing in Washington Township, NJ
  • Roofing in West Caldwell, NJ
  • Roofing in West Caldwell, NJ
  • Roofing in Weston, PA
  • Roofing in Wilkes-Barre, PA
  • Service Area
  • Services
  • SMS Terms and Conditions
  • Template – Labor day banner
  • Template All Brands Logos
  • Template All Brands Logos New
  • Template Blogs
  • Template Certification
  • Template Financing Banner
  • Template Financing Banner – Location
  • Template Gutter Brands
  • Template our Process
  • Template our Process – Locations
  • Template Our Work
  • Template Our Work – Locations
  • Template Project Block
  • Template Review Banner
  • Template Review Banner (King of Prussia, PA)
  • Template Review Banner (Laurel, MD)
  • Template Review Banner (Turnersville, NJ)
  • Template Review Banner (West Caldwell, NJ)
  • Template Roofing Brands
  • Template Service Blocks (All)
  • Template Service Blocks (Glen Allen)
  • Template Service Blocks (King of Prussia, PA)
  • Template Service Blocks (Laurel, MD)
  • Template Service Blocks (Turnersville, NJ)
  • Template Service Blocks (West Caldwell, NJ)
  • Terms and Conditions

Categories

  • Blog
  • Roof Installation
  • Roof Repair
  • Roof Replacement
  • Roofing
  • Uncategorized

Archive

  • October 2026
  • September 2026
  • August 2026
  • July 2026
  • June 2026
  • May 2026
  • April 2026
  • March 2026
  • February 2026
  • January 2026
  • November 2025
  • October 2025
  • September 2025
  • August 2025
  • July 2025
  • June 2025
  • May 2025
  • March 2025
  • February 2025
  • January 2025
  • December 2024
  • November 2024
  • October 2024
  • August 2024
  • July 2024
  • June 2024
  • May 2024
  • April 2024
  • March 2024
  • February 2024
  • November 2023
  • October 2023
  • July 202

Service Areas

  • Turnersville, NJ
  • Voorhees, NJ
  • West Caldwell, NJ
  • King of Prussia, PA

  • Scranton, PA
  • Wilkes-Barre, PA
  • Laurel, MD

  • Fairfax, VA
  • Glen Allen, VA
  • Wilmington, DE
dhr-logo

Dream Home Roofers provides expert residential roofing, attic insulation, gutter, and window services across Maryland, New Jersey, Pennsylvania, Virginia, and Delaware. As an Owens Corning Platinum Preferred Contractor, our factory-trained crews deliver quality installations backed by lifetime warranties. Whether you need a full roof replacement or storm damage repair, homeowners across the Mid-Atlantic trust us for reliable protection and straightforward service.

Our Office Locations

Map icon 501 NJ‑168, Turnersville, NJ 08012

Map icon 175 Fairfield Ave, Suite 2B, West Caldwell, NJ 07006

Map icon 144 E. Dekalb Pike, Suite 200, King of Prussia, PA 19406

Map icon 8920 Stephens Rd, #104, Laurel, MD 20723

Map icon 613 Baltimore Dr, Wilkes-Barre, PA 18702

Map icon 4461 Cox Rd, Glen Allen, VA 23060

Map icon 4085 Chain Bridge Rd, Suite 302, Fairfax, VA 22030

NJ Lic. #13VH11352200 | PA Lic. #PA161658 | MD Lic. #157465 | DE HIC# 2025-000012170 | VA HIC# 2705196076

Privacy Policy | Service Area

Follow Us

Check out our social pages and let us know how we’re doing See the latest from Dream Home Roofers and let us know what we can do for you.

BBB Accredited

blue seal

BBB Accredited

Local Roofing Contractors
Financing
Careers
Contact

© 2026 Dream Home Roofers

Scroll to top