Dream Home Roofers
1-855-610-9720
Get Free Estimate 1-855-610-9720
Free Estimate 1-855-610-9720
  • About us
    • Reviews
    • Careers
    • Financing
    • Blogs
  • Services
    • Roofing
      • Replacement
      • Repair
      • Inspection
    • Gutters
      • Gutter Protection
  • Service Area
    • Turnersville, NJ
    • West Caldwell, NJ
    • King of Prussia, PA
    • Laurel, MD
    • Fairfax, VA
  • Current Specials
  • Contact Us
  • Menu Menu
Act Now for 50% OFF Materials. Click here for details.

Tag Archive for: Roofing Questions

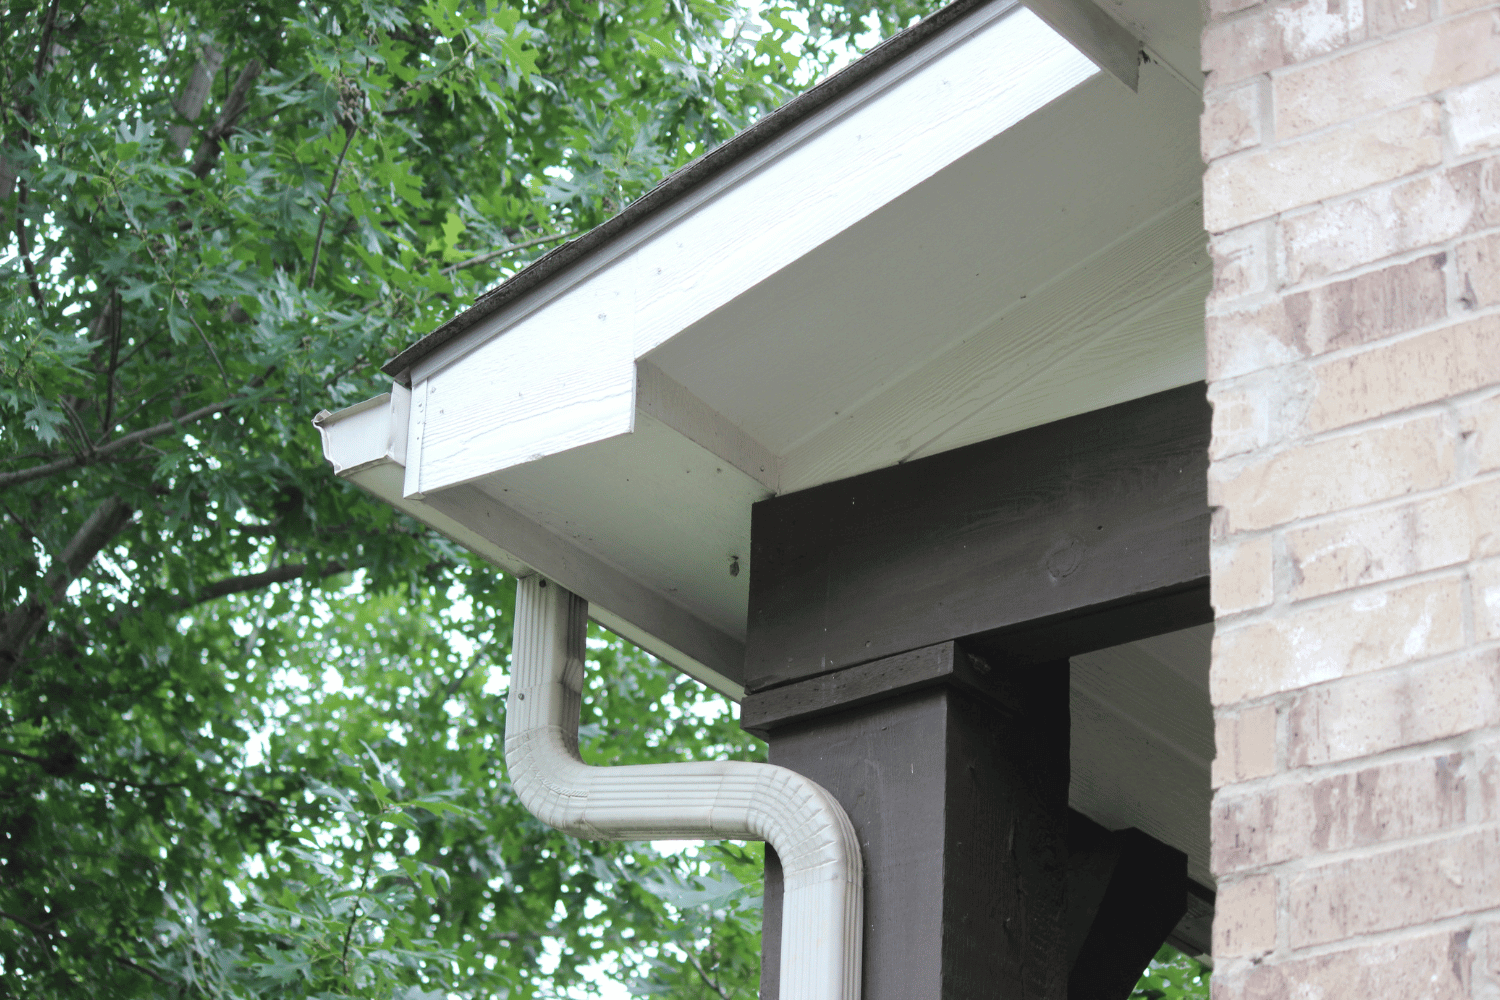
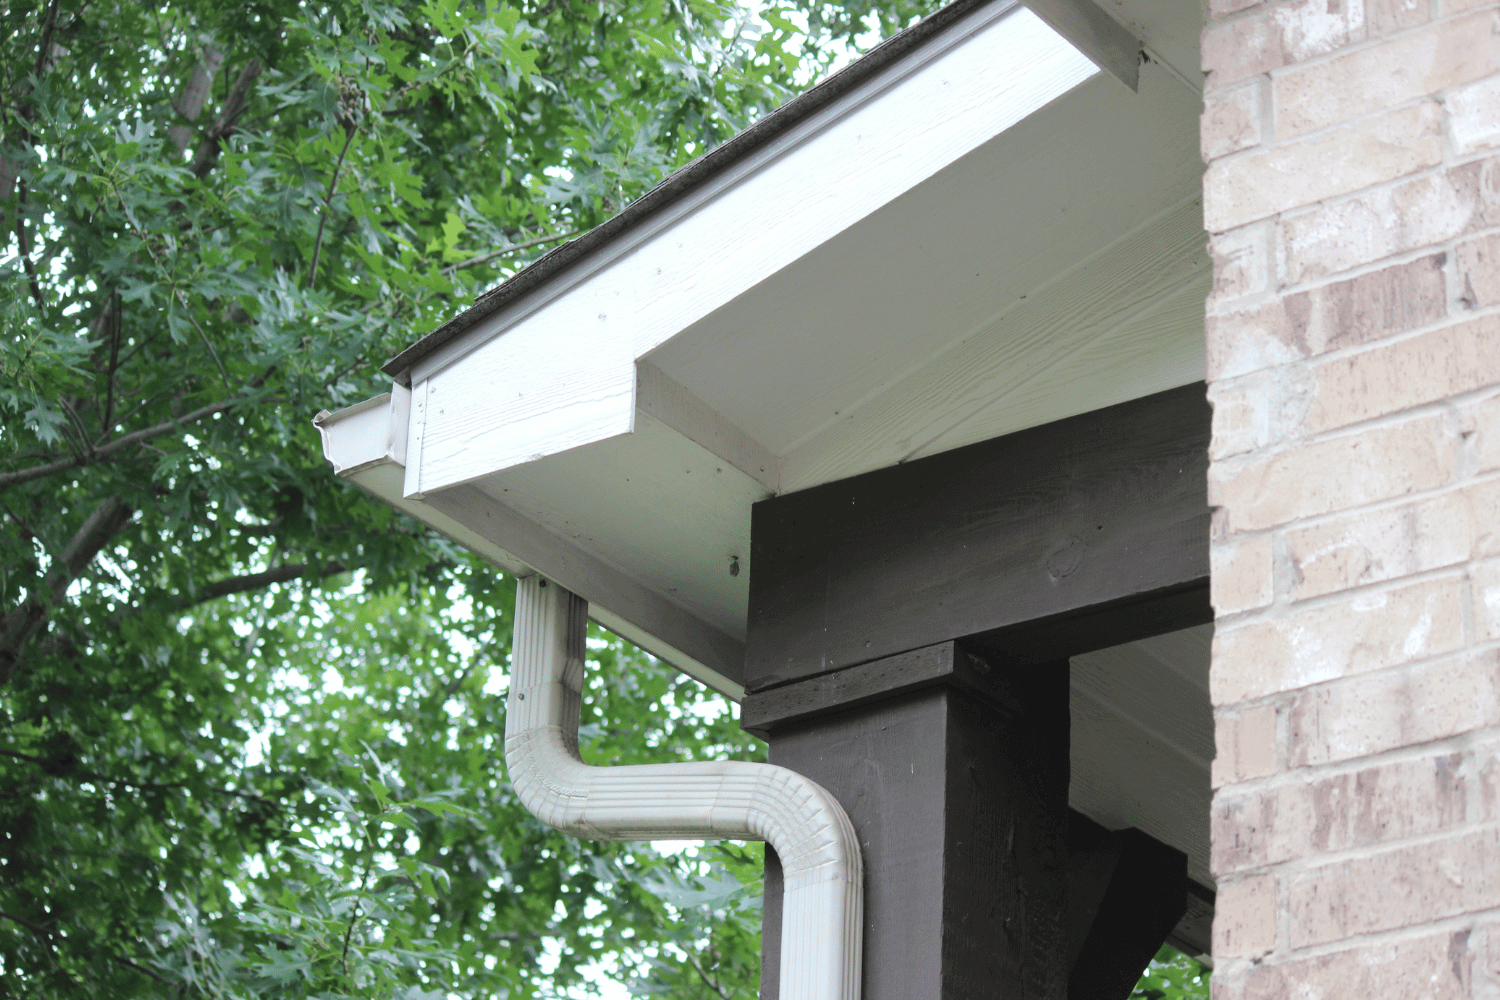
A properly installed downspout directing water away from the house foundation.

The Ultimate Guide to Rainwater Gutter Installation in Easy Steps

February 21, 2025/in Roofing/by Dream Home Roofers

Rainwater gutter installation is essential for safeguarding your home from water damage. This guide covers every step: planning, measuring, cutting, and installing gutters and downspouts. Follow along to ensure your system works effectively and keeps your home dry.

Key Takeaways

  • Installing rain gutters is essential for protecting a home’s foundation and preventing costly water damage, erosion, and mold growth.

  • Thorough planning, accurate measurements, and the right materials are critical for a successful gutter installation, which includes assessing roof pitch and strategically placing downspouts.

  • Regular maintenance, such as cleaning and inspecting gutters and downspouts, is crucial for ensuring long-term performance and preventing clogs that can lead to structural damage.

Why Installing Rain Gutters is Crucial
A house with well-installed rain gutters that effectively divert rainwater.

Rain gutters are the unsung heroes of home maintenance, playing a pivotal role in diverting and carrying rainwater away from your home’s foundation, thus protecting its overall structural integrity. Without a well-installed gutter system, homes are vulnerable to severe water damage, including roof leaks and erosion, which can lead to costly repairs.

Moreover, installing gutters helps preserve the condition of your siding and roof materials by directing rainwater away, thus preventing the degradation of these essential components. Improper water runoff can lead to mold growth, which not only causes structural damage but also poses health risks to residents.

Basement flooding is another significant concern that can be avoided with a proper gutter system. When rainwater is not diverted effectively, it can seep into the basement, leading to extensive water damage and creating a damp environment that attracts pests. Additionally, without gutters, the garden areas around your home can suffer from excess moisture, harming plants and creating pollution.

Rain gutters represent a small investment that can prevent substantial, costly damage, keeping your home safe, dry, and structurally sound. To protect your home effectively, it is essential to install rain gutters and ensure that the rain gutter system is functioning properly.

Planning Your Rainwater Gutter Installation Project
Blueprints and tools laid out for planning a rainwater gutter installation project.

Thorough planning is necessary before installing rain gutters. Start by assessing your house’s structure and any existing components to ensure compatibility with the new gutter system. Visualize the layout by drawing a plan that identifies the lengths needed and the overall configuration of the gutters. This step helps in determining precise measurements and placement of the gutters, preventing overflow and foundation damage.

Next, calculate the roof’s pitch by measuring both horizontally and vertically to determine the slope. An appropriate slope ensures efficient water flow away from the foundation, preventing water-related problems. Strategically place downspouts to facilitate efficient drainage, keeping in mind that a downspout is generally needed for every 20 feet of gutter length.

Lastly, budget for additional materials beyond the gutters, such as brackets, downspouts, and potential repairs. Such comprehensive planning lays the groundwork for a smooth and successful gutter installation.

Essential Tools and Materials for Gutter Installation
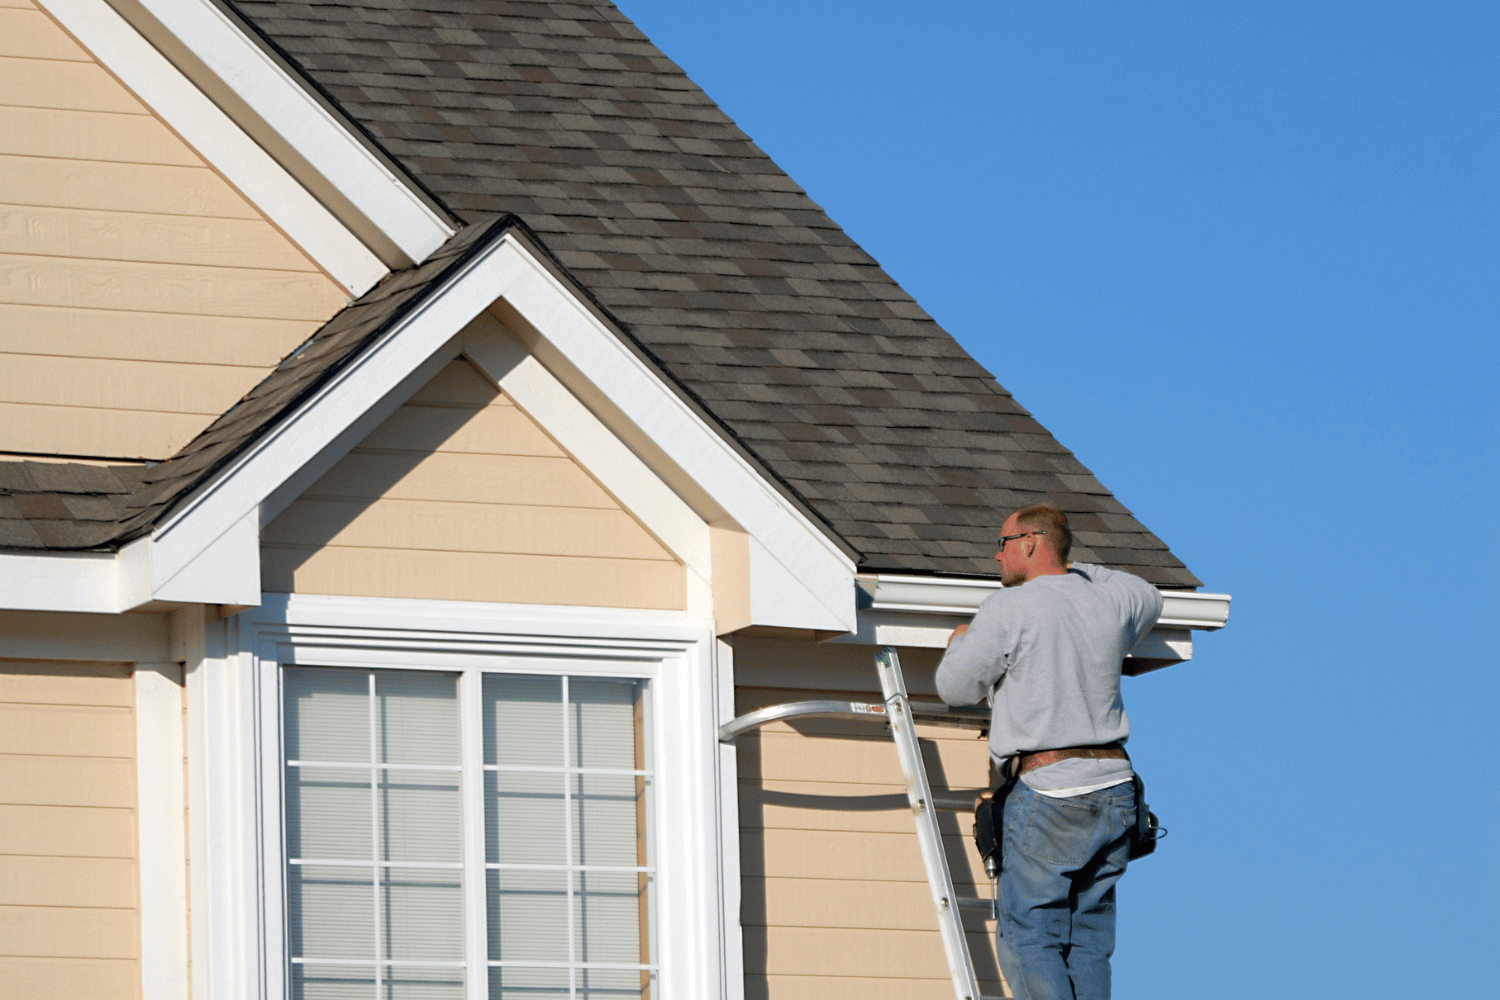
Essential tools for gutter installation including a drill and various gutter materials.

Installing gutters effectively requires a range of essential tools and gutter material. Aluminum gutters, gutter sealant, and stainless steel screws are fundamental components of a quality gutter installation. Aluminum gutters are particularly popular due to their durability and resistance to rust.

Before:

The necessary tools for the job are equally important. You’ll need tin snips and a hacksaw for cutting the gutters to the desired lengths. A cordless drill and a hex head driver are also necessary for securing the gutters to the fascia board. Additionally, a drill with a 4-inch hole saw bit is recommended for making downspout holes in the gutters.

After:

The necessary tools for the job are equally important. You’ll need:

  • Tin snips and a hacksaw for cutting the gutters to the desired lengths

  • A cordless drill and a hex head driver for securing the gutters to the fascia board

  • A drill with a 4-inch hole saw bit for making downspout holes in the gutters

Don’t forget the additional components like gutter fascia, which should be on hand for installation. Having the proper tools and materials equips you to tackle your gutter installation project efficiently.

Measuring and Marking for Precision

Accuracy is crucial when installing rain gutters. Inaccurate measurements can lead to water pooling in the wrong places or an inefficient use of materials. Start by marking the highest and lowest points of the gutter run to establish the necessary slope for effective water flow. Usually, the pitch should be set at 1/2 inch for every 10 feet toward the downspout to ensure proper drainage.

Using a chalk line helps maintain the correct level and alignment of the gutters. Snap a chalk line between the highest and lowest points to guide your installation.

Tools such as a tape measure and RoofScope or GutterScope help in taking exact measurements, ensuring accurate installation and proper functioning of your gutters.

Cutting and Preparing Gutter Sections

Once you’ve measured, it’s time to cut and prepare the gutter sections. Saw the sections to the correct length, accounting for any corners or turns where elbow joints are needed. Use tin snips to cut outlet holes for downspouts and smooth out any sharp edges with a file to ensure seamless connections.

Pre-drilling holes for the gutter end caps and applying gutter sealant at the joints ensures leak-free connections. Properly preparing gutter sections is essential for a tight fit and effective water flow.

Installing Fascia Brackets and Hangers

Installing fascia brackets and hangers is a vital step in the gutter installation process. Begin by measuring the gutter length and marking hanger positions for even spacing. Use a ladder to safely access the roofline and drive spikes into the fascia board for secure attachment when using spikes and ferrules.

Ensure the screws used for attaching hangers are long enough to securely penetrate both the gutter and the fascia. Avoid positioning hangers directly over downspouts to prevent water flow issues. Hidden hangers, which are not visible from the ground, provide a neat appearance and enhance the overall aesthetics of the gutter system.

For added security, install gutter hangers through the fascia board into the rafter ends whenever possible. This method ensures a robust attachment, capable of supporting the weight of the gutters and the water they will channel.

Attaching the Gutter Sections

Now that the brackets and hangers are installed, the next step is to attach the gutter sections. Continue with this part of the setup. Begin at the highest point of the slope, positioning the sections in sequence near the installation site. Secure the sections using screws or gutter spikes, ensuring a sturdy connection.

For corners, use connectors or strips of metal to link two gutters together. Hook the back side of the strip miter through the rear edge and secure it with screws to ensure a tight fit. Brackets should be mounted every 18 to 24 inches to provide adequate support for the gutter runs.

Ensure that the installed gutters slope away from the downspout location to facilitate proper water flow and prevent pooling.

Sealing Joints and Connections

To prevent leaky gutters, sealing joints and connections is crucial. Apply gutter sealant along any seams to ensure that the gutters are watertight. This step is essential for maintaining the integrity of the gutter system and preventing costly repairs.

Apply sealant to all holes and elbows connecting gutter materials. Press the components tightly together after applying the caulk to ensure a secure, leak-free connection.

Installing Downspouts and Ensuring Proper Drainage
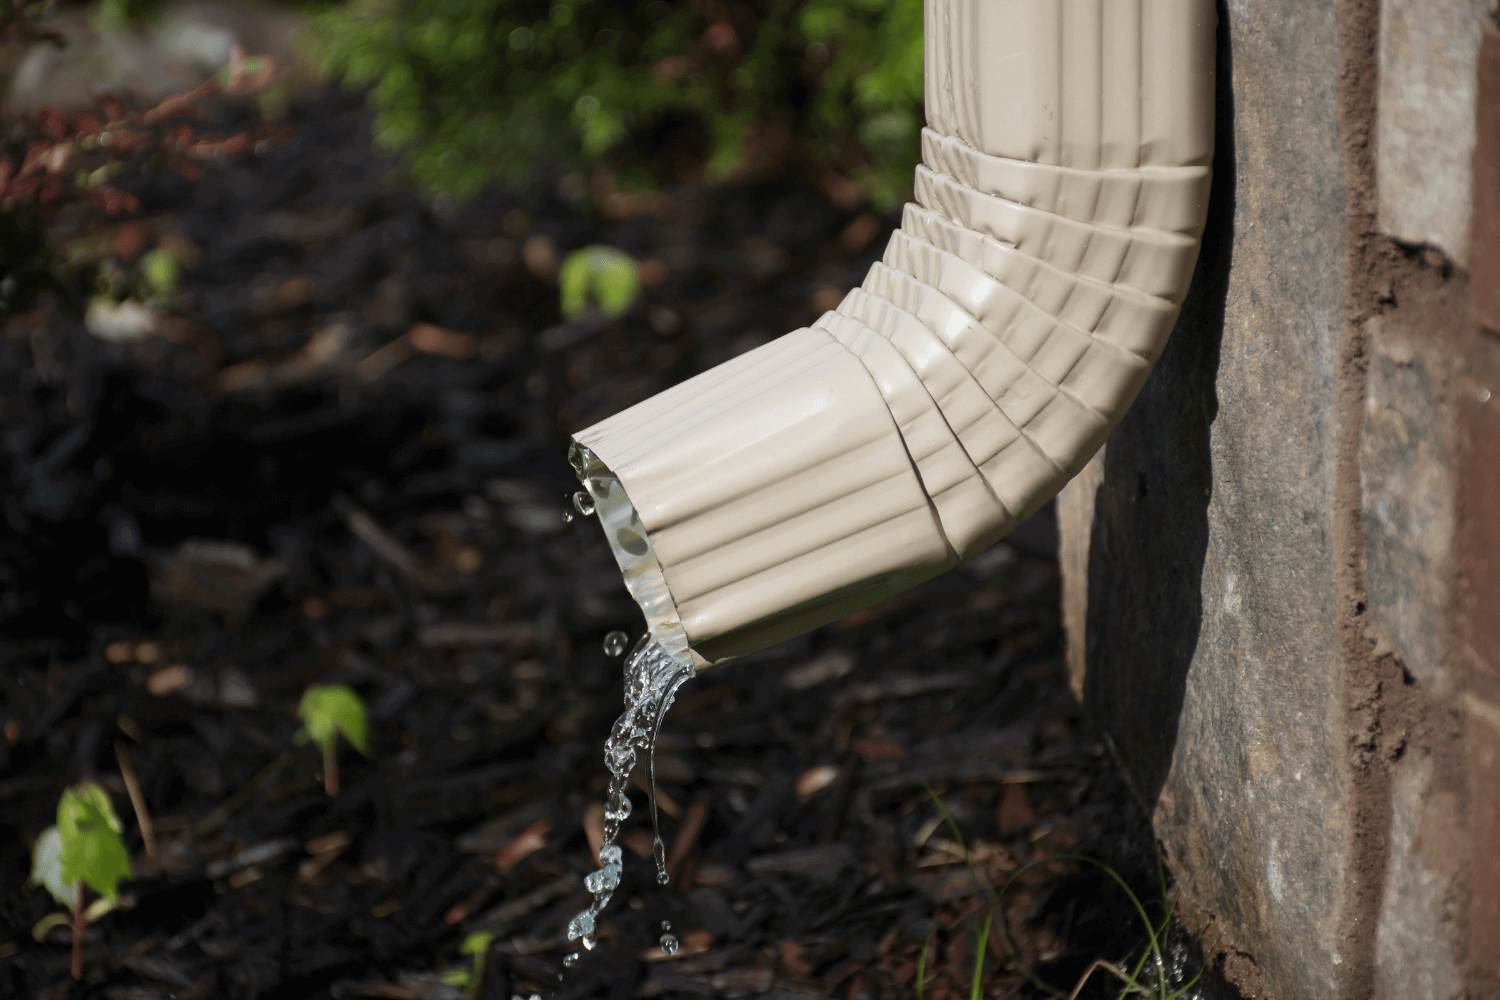
A properly installed downspout directing water away from the house foundation.

Correct downspout installation is vital for effective drainage. Determine the number and placement of downspouts to prevent water pooling around the foundation. Downspouts are typically installed at the ends of the gutter system. They can also be positioned at the corners.

Use brackets to secure the downspouts properly, attaching U-shaped elbow brackets to connect the downspout to the house corners. Downspout extensions can guide water further away from the foundation, reducing the risk of basement flooding.

For optimal performance, seal gutter seams on a warm, dry day and clean old caulk and debris before applying new sealant. Press the components tightly together after applying caulk to ensure a secure connection.

Adding Gutter Guards for Maintenance-Free Gutters
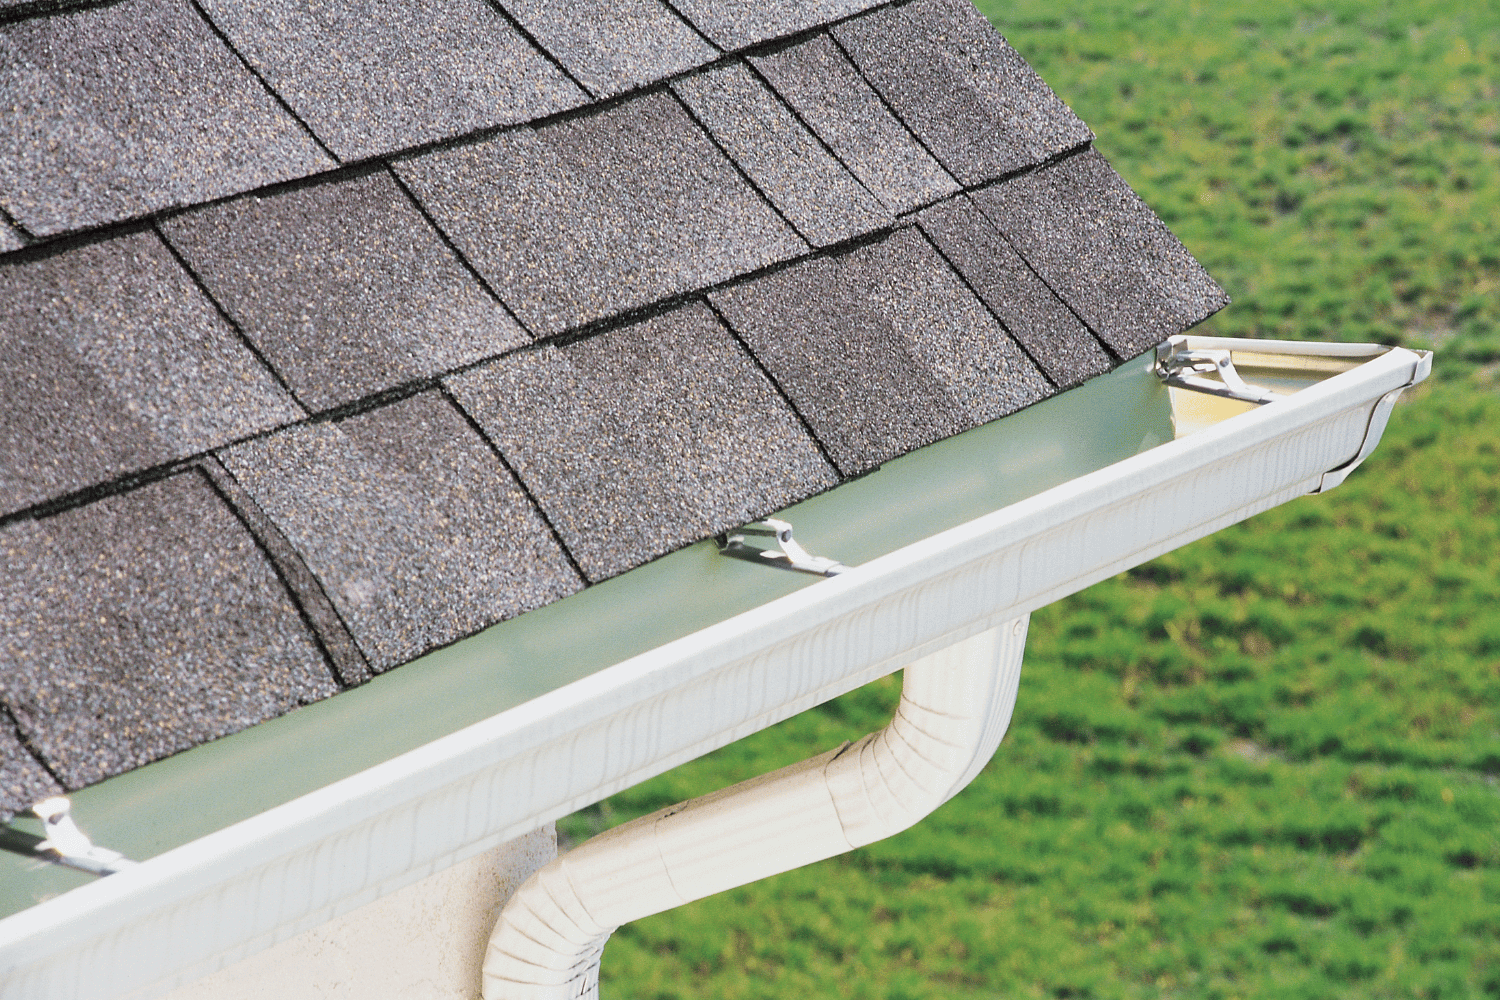
A house with gutter guards installed, ensuring maintenance-free gutters.

Gutter guards are an excellent addition to any gutter system, preventing debris buildup and reducing the frequency of gutter cleanings. Installing gutter guards helps keep the inside of the gutters clean, preventing water damage and ensuring proper flow.

Micromesh gutter guards are highly recommended for protecting rain gutters. LeafFilter gutter guards, for example, offer a clog-free guarantee, significantly reducing the need for regular cleaning.

Testing Your Installed Gutter System

After installation, testing the gutter system ensures it functions correctly. Run water through the system to check for leaks and observe water flow. This test helps identify any pooling or improper drainage issues needing attention.

Perform visual inspections to locate any visible damage such as cracks or sagging in the gutters. Promptly addressing these issues will ensure the longevity and effectiveness of your gutter system.

Tips for Maintaining Your Rain Gutters

Proper maintenance is essential for the longevity and performance of your rain gutters. Regular maintenance includes gutter cleaning and downspouts at least twice yearly to prevent clogs and ensure proper function. This practice helps avoid common issues such as clogs and leaks in the gutter system.

Using gutter guards minimizes the risks associated with cleaning gutters, reducing the time spent on ladders and enhancing safety. Gutter guards also lower the fire hazard risk by preventing debris accumulation that can catch fire.

Regularly check for signs of rust, corrosion, or sagging in your gutters. Inspect downspouts regularly for blockages to prevent overflow and subsequent damage.

Summary

Installing rain gutters is a critical task that protects your home from water damage and maintains its structural integrity. By following this guide, you’ve learned the step-by-step process of planning, installing, and maintaining a reliable gutter system. With proper tools, careful measurements, and regular maintenance, your gutters will efficiently divert rainwater away from your home, ensuring it remains safe and dry. Take action today and safeguard your home with a well-installed gutter system.

Frequently Asked Questions

Why do most houses in Florida not have gutters?

Most houses in Florida do not have gutters because they can trap debris, leading to clogs and potential roof damage, while the state’s wet climate and heavy rains make maintenance challenging. Consequently, many homeowners opt for alternatives to reduce upkeep.

Why is it important to install rain gutters?

Installing rain gutters is essential to protect your home’s foundation by redirecting rainwater away, which helps prevent structural damage, mold growth, and flooding. This proactive measure safeguards both your property and your investment.

What tools and materials are essential for gutter installation?

For gutter installation, essential materials are aluminum gutters, gutter sealant, and stainless steel screws, while necessary tools include tin snips, a hacksaw, a cordless drill, and a hex head driver. Ensuring you have these items will facilitate a smooth installation process.

How should I measure and mark for gutter installation?

To accurately install gutters, measure the highest and lowest points along the run, then snap a chalk line to establish a slope of 1/2 inch for every 10 feet toward the downspout. This ensures proper drainage and functionality.

What are the benefits of installing gutter guards?

Installing gutter guards effectively prevents debris buildup and reduces the need for frequent cleanings, ensuring proper water flow. This not only enhances safety by minimizing cleaning risks but also mitigates fire hazards.

 

https://dreamhomeroofers.com/wp-content/uploads/2025/02/A-properly-installed-downspout-directing-water-away-from-the-house-foundation.-1.png 1000 1500 Dream Home Roofers https://dreamhomeroofers.com/wp-content/uploads/2024/09/dhr-logo.png Dream Home Roofers2025-02-21 08:00:032025-02-09 00:10:22The Ultimate Guide to Rainwater Gutter Installation in Easy Steps
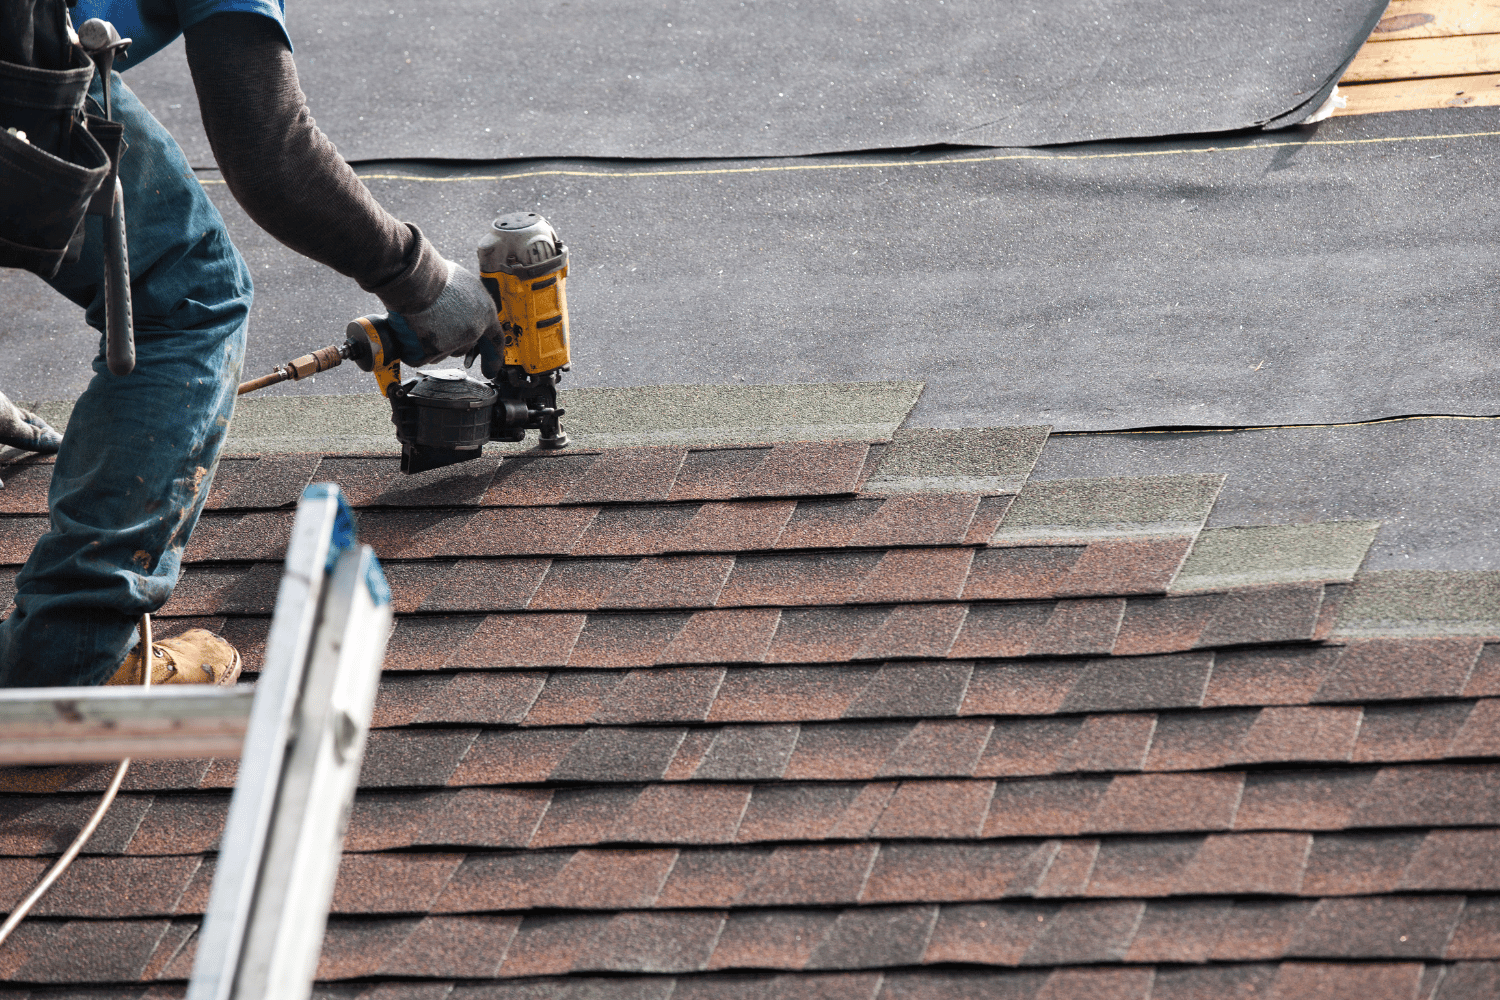
Preparing a roof deck for shingle installation.

The Best Guide to Perfect Roof Shingle Overlap: Tips & Techniques

February 15, 2025/in Roof Installation, Roofing/by Dream Home Roofers

Ensuring the correct roof shingle overlap is key to a durable, leak-free roof. This guide will help you understand the right techniques, avoid common mistakes, and achieve the perfect overlap for lasting protection.

Key Takeaways

  • Proper shingle overlap is critical for preventing leaks and enhancing the durability of a roof, as it ensures effective water drainage and protects against weather elements.

  • Preparing the roof deck, including inspecting for damage and installing protective components like drip edges and ice shields, is essential for successful shingle installation.

  • Common mistakes, such as misalignment and inadequate nailing during shingle installation, should be avoided to ensure optimal roof performance; professional help is recommended for complex roofing issues.

Understanding Roof Shingle Overlap

An illustration showing the proper roof shingle overlap technique.

Proper shingle overlap maintains the integrity of a roof. Each course of shingles should maintain a consistent overlap to ensure effective drainage and prevent leaks. Optimal shingle overlap enhances the roof’s durability against weather elements, making it vital for any roofing project. Correctly installed shingles protect the roof deck from water infiltration, preventing significant damage.

However, many homeowners and even some roofing contractors make common mistakes during shingle installation that compromise the roof’s effectiveness. Recognizing the role of gravity in shingle overlap and avoiding common mistakes are vital for a long-lasting roof.

The Role of Gravity in Shingle Overlap

Gravity plays a crucial role in roof design, guiding water down the slope of the roof. With the force of gravity, water flows easily off the roof when shingles are properly installed. Proper overlap ensures water flows over the shingles, preventing potential water damage. Staggering the seams of the shingles prevents water leakage and creates a visually appealing pattern.

Imagine a steep roof where gravity draws water swiftly downwards; if the roof shingles aren’t overlapping correctly, water can seep into the shingle joints, leading to leaks and structural damage. Properly overlapping shingles protects your investment and ensures the longevity of your roofing project.

Common Mistakes in Shingle Overlap

Homeowners often encounter mistakes during shingle installation that compromise the roof’s effectiveness. One of the most frequent errors is failing to achieve proper overlap between asphalt shingles, which can lead to water infiltration and reduced longevity of the roof. Proper alignment of the first row of shingles is critical to achieving the desired aesthetic and functional outcome.

Addressing these mistakes ensures a durable and effective roofing system. Misaligned shingles, inadequate overlap, and improper nailing are pitfalls that can turn a simple roofing project into a costly repair job. Understanding and avoiding these mistakes ensures roofs look great and perform optimally.

Preparing Your Roof Deck for Shingle Installation

Preparing a roof deck for shingle installation.

Before starting shingle installation, properly prepare your roof deck. Inspect the roof deck for any damaged or rotted areas and repair or replace them as needed. If your roof is over 20 years old, it’s advisable to consult a roofing expert to assess its condition. Visible shingle granules in gutters may indicate that your roof’s lifespan is nearing its end and requires professional evaluation.

A smooth and secure roof deck is vital for optimal shingle installation and longevity. A clean and flat deck surface ensures a smooth appearance of the finished roof. Installing a drip edge and ice and water shield enhances the roof’s durability against weather elements.

Ensuring a Smooth and Secure Roof Deck

A well-prepared roof deck is the foundation of a successful roofing project. Corrosion-resistant nails maintain the roof’s durability. Inspecting the roof deck beforehand identifies gaps and prevents future leaks during rain. A smooth and secure roof deck not only secures shingles but also enhances the overall protection of the home.

A smooth, securely fastened, dry roof deck free of gaps or holes is crucial. This preparation step achieves a seamless and aesthetically pleasing roof. A well-prepared deck ensures each component of the shingle installation performs effectively.

Applying Drip Edge and Ice and Water Shield

A drip edge is a metal flashing installed at the roof edges to prevent water damage and prolong the roof’s life by directing water away from the fascia into the gutter. The drip edge should be installed on top of the underlayment at the roof’s edges and rakes, creating a clean roof edge and providing increased resistance against wind uplift.

Applying an ice and water shield is another vital step. Felt underlayment should be laid out in horizontal courses, overlapping the ice and water protector by 4 inches. This creates a barrier against water infiltration, especially in cold climates where ice dams can form. Proper installation ensures a watertight seal and enhances the roof’s overall durability.

Step-by-Step Guide to Installing Shingles with Proper Overlap

Step-by-step process of installing shingles with proper overlap.

Installing shingles with the correct overlap requires meticulous attention to detail. Proper shingle overlap directs water away from the roof’s edges, reducing leak risk. Insufficient overlap during shingle installation can expose vulnerable areas to water damage.

A step-by-step approach is advisable for perfect shingle installation. This includes using starter shingles, laying the first row, and continuing shingle courses. Chalk lines ensure rows of shingles remain straight, enhancing the roof’s appearance.

Starting with Starter Shingles

Starter shingles enhance wind resistance and create a uniform appearance at the roof’s edge. Install starter strip shingles with the adhesive side facing up for a secure base. Starter shingles should overhang the roof edge by ¼ to ¾ inch for effective water management. Using six nails per shingle enhances wind resistance and provides better protection.

Nails should penetrate the wood deck at least ¾ inch to ensure effective holding power. Fastener placement is critical for maximizing wind-resistance performance. Good nailing technique significantly affects the longevity and performance of nail shingles.

Laying the First Row of Shingles

A clean, dry, debris-free roof deck is crucial for successful shingle installation. Cover the starter row with the first full row of shingles. Staggering shingles avoids a straight line vertically across the roof. This distributes the load and prevents water from infiltrating the shingle joints.

Proper alignment of the first row sets the stage for the rest of the shingle courses. Correct placement and secure fastening of the first row are vital for the roof’s integrity and appearance.

Continuing Shingle Courses

Lay shingles horizontally up the roof, ensuring each course overlaps the one below properly. Starter strips provide a straight edge for field courses and enhance wind resistance. This method ensures consistent overlap and uniform appearance.

Maintain a consistent pattern and proper nailing for secure shingle installation. Though repetitive, this process is crucial for a durable and aesthetically pleasing roof.

Special Techniques for Hip and Ridge Cap Shingles

Special techniques for installing hip and ridge cap shingles.

Hip and ridge cap shingles require special techniques for a watertight seal and wind resistance. Install hip shingles from the bottom up, ensuring each overlaps the one below to prevent water penetration. Install ridge cap shingles in a staggered pattern with securely fastened edges to resist wind uplift and provide a finished look.

These techniques are essential for the overall performance and appearance of the roof. Proper installation of hip and ridge cap shingles enhances the roof’s durability and visual appeal.

Installing Hip Shingles

Apply hip shingles starting from the bottom of the hip. Begin hip shingle installation at the bottom, ensuring corners do not extend into the gutter. This method ensures that each shingle overlaps the one below, creating a barrier against water infiltration.

Proper alignment and securing of hip shingles prevent leaks and ensure structural integrity. This approach ensures hip shingles perform effectively.

Installing Ridge Cap Shingles

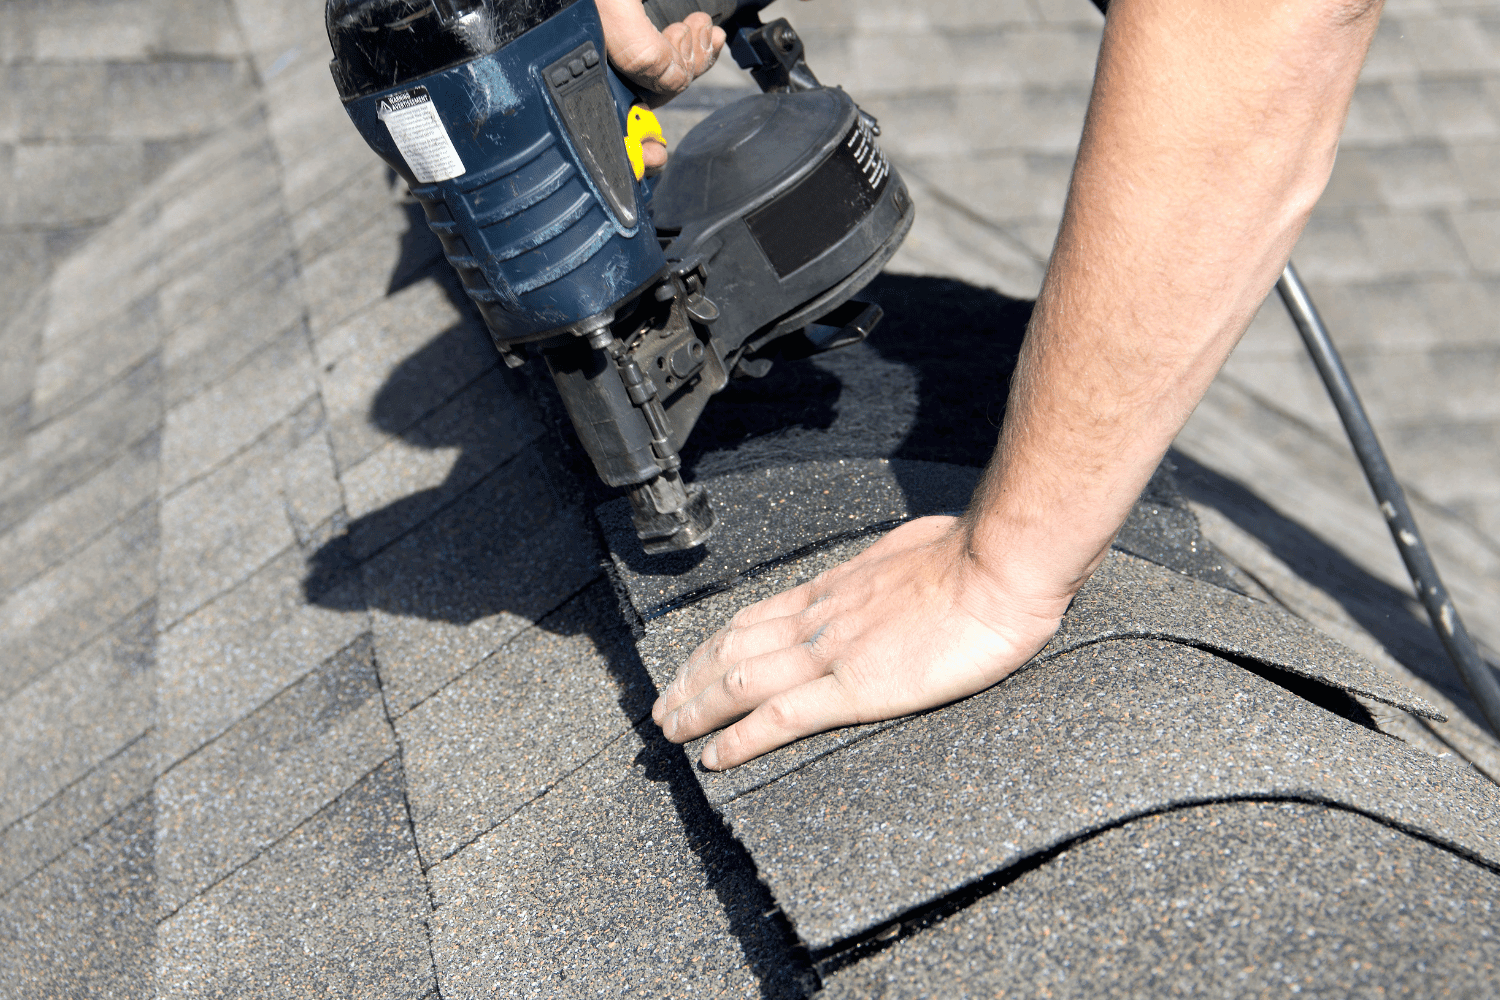
Cut ridge cap shingles to fit the ridge line and install for a watertight seal. Use longer nails that penetrate deeper into the roof layers, ideally multiple nails per shingle for secure fastening. Seal nail heads and cover with asphalt roofing cement for a watertight seal.

Enhance wind resistance by installing ridge cap shingles from the end opposite the prevailing wind direction. This technique ensures ridge cap shingles provide maximum protection against wind uplift and water infiltration.

Pro Tips for Perfect Shingle Overlap

Professional tips for achieving perfect shingle overlap.

Perfect shingle overlap requires attention to detail and adherence to best practices. Architectural shingles typically require four nails—two at the top and two at the bottom. Use fasteners that penetrate at least 3/4 inches into the roof deck for ridge cap shingles.

Use chalk lines to guide the placement of ridge cap shingles for a tidy installation. These tips ensure shingles are securely fastened and properly aligned, enhancing the roof’s performance and appearance. Chalk lines and proper nailing techniques are essential for a successful roofing project.

Using Chalk Lines for Precision

Chalk lines are essential to maintain straight lines in roofing projects. Use a chalk line to mark straight lines for shingle rows. Maintaining straight lines ensures proper overlap, preventing leaks and ensuring roof longevity.

Chalk lines serve as a visual guide for consistent straightness across shingle rows. This simple tool significantly enhances the quality of your shingle installation.

Nailing Techniques for Secure Shingles

Nailing placement is critical for wind resistance and warranty coverage. Use four nails per 3-tab shingle for secure fastening. Nail at the thickest part of the shingles for secure fastening. This technique prevents shingles from being lifted by strong winds and ensures they remain attached to the roof deck.

Proper nailing techniques involve using the right type and length of nails. Roofing nails should penetrate at least 3/4 inches into the roof deck for a strong hold. In high-wind areas, using six nails per shingle provides additional security and peace of mind.

When to Call a Roofing Professional

Even the most skilled DIY enthusiast should sometimes call a roofing professional. Recognizing signs that indicate the need for a roofing contractor can save time, money, and prevent safety hazards. Professional assistance is advisable for intricate tasks like installing flashing or working on steep roofs. If uncertain or uncomfortable working on a sloped roof, hire a professional.
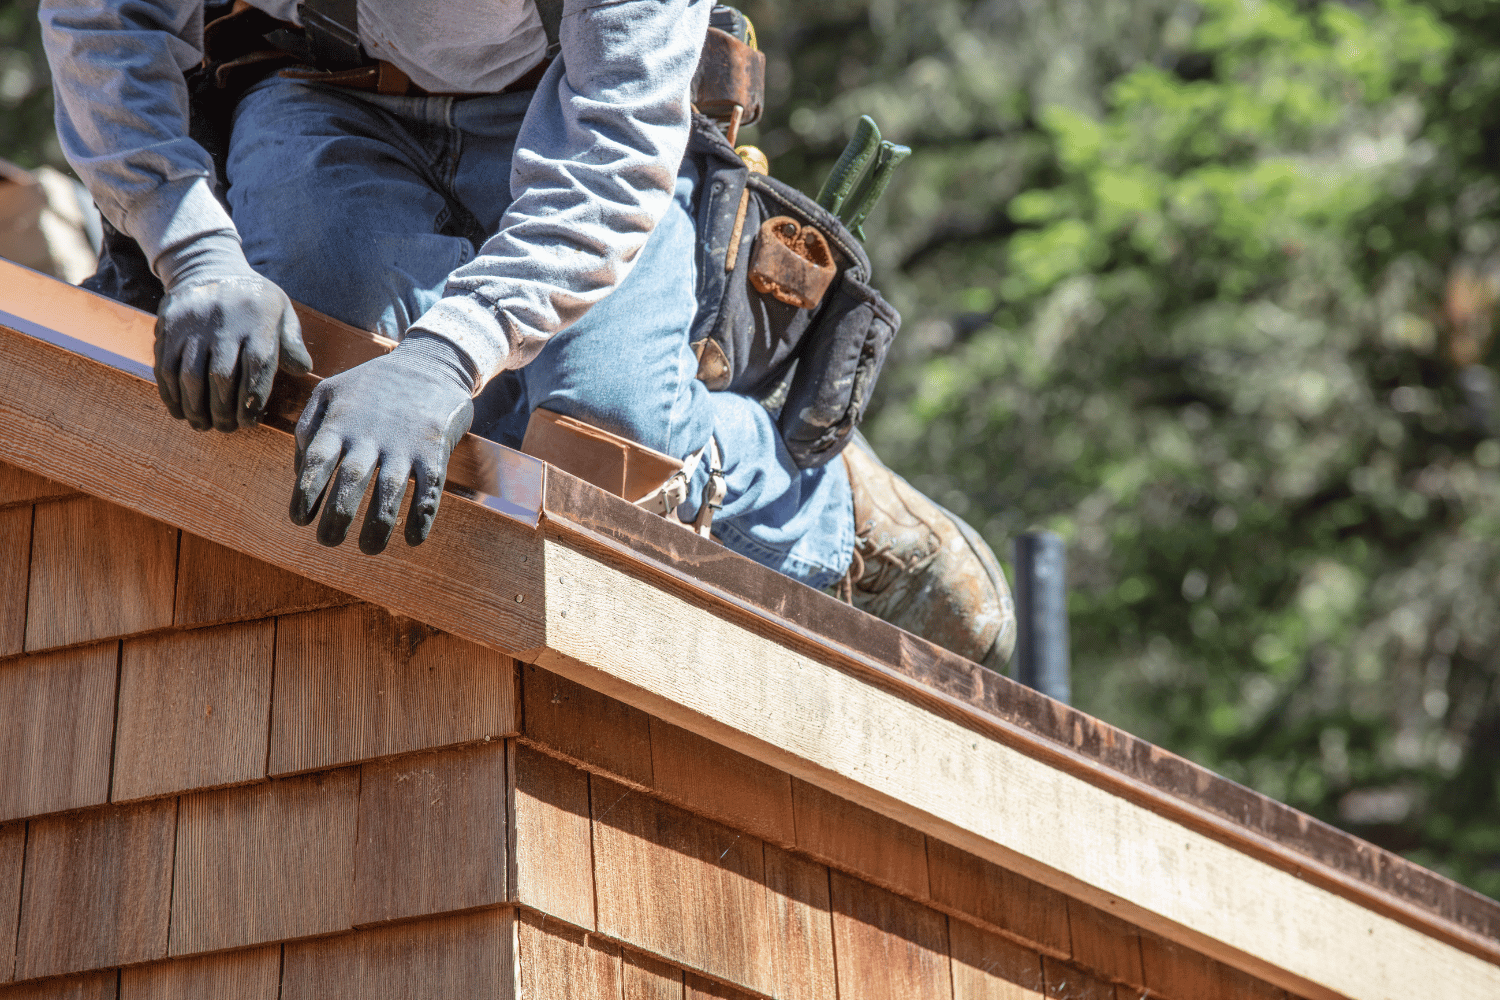
In cases of doubt regarding roofing work, consulting a professional ensures safety and quality. Dream Home Roofers, as Owens Corning Platinum Preferred Contractors, offer expertise and commitment to quality, ensuring your roofing project is in capable hands.

Recognizing Complex Roofing Projects

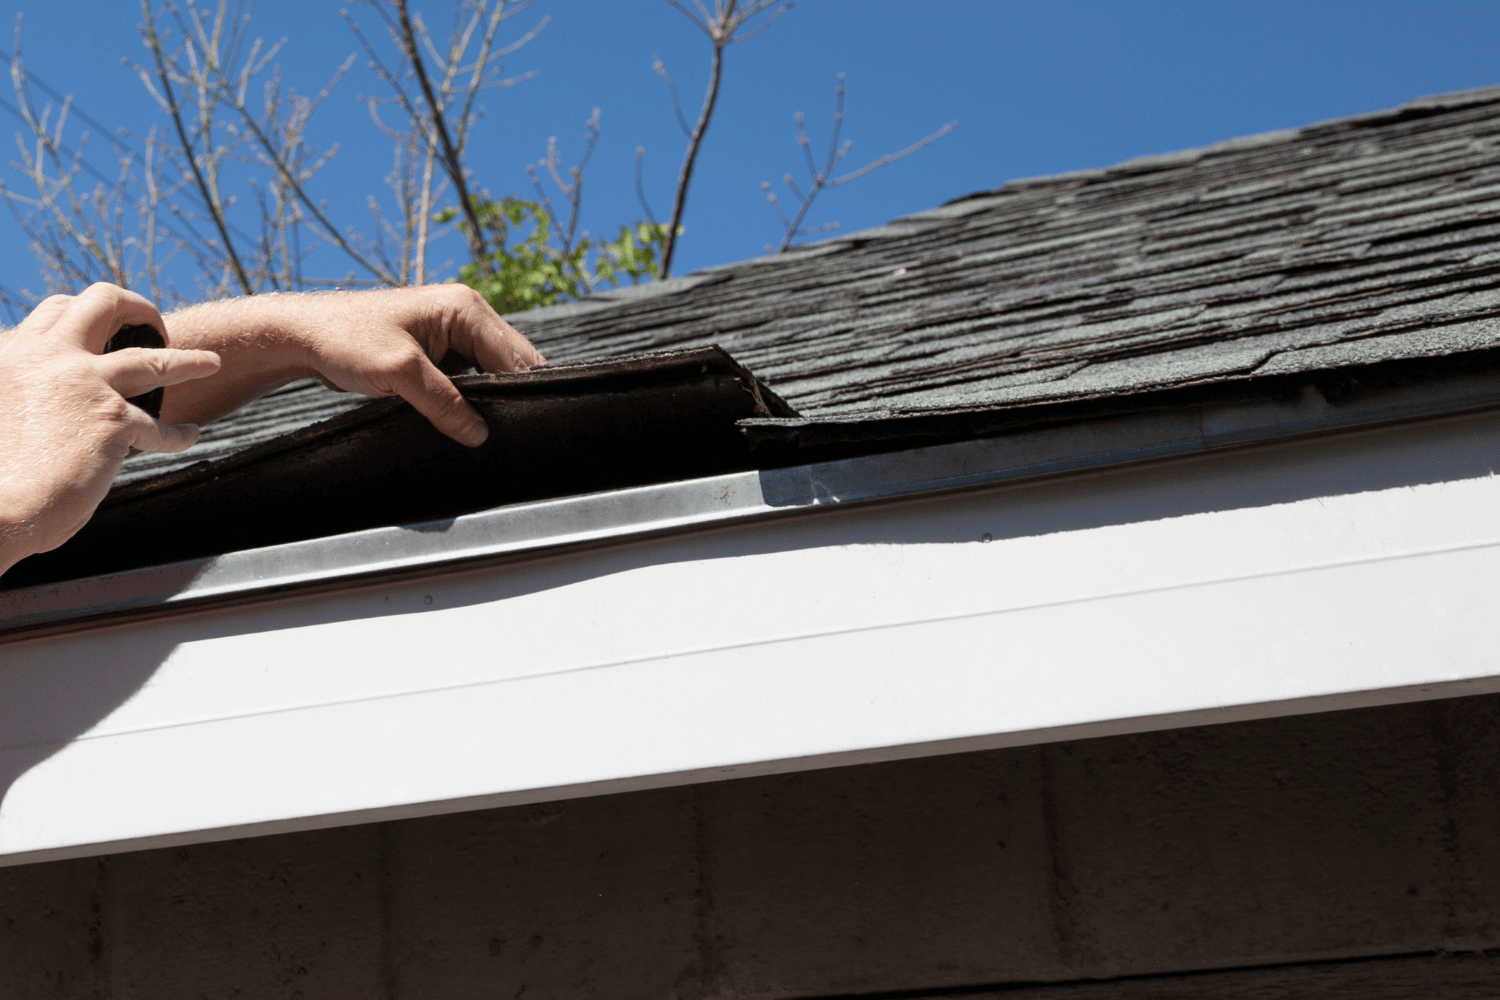
A sagging roof often signifies serious structural issues needing immediate professional attention. Missing or broken shingles create vulnerability to water damage, indicating the need for professional repair. Use safety harnesses, straps, cables, and scaffolding on high-sloped roofs to ensure safety.

Complex roofing projects involving significant structural repairs or high-sloped roofs require specialized skills and equipment. Adhering to local building codes and safety regulations is crucial; a professional roofing contractor ensures compliance and quality workmanship.

Benefits of Hiring Owens Corning Platinum Preferred Contractors

Hiring certified contractors like Dream Home Roofers ensures quality workmanship and access to premium materials, leading to a durable roofing solution. Dream Home Roofers, as Owens Corning Platinum Preferred Contractors, bring a high level of expertise and commitment to quality in roofing service. They work with a variety of premium Owens Corning roofing materials, offering homeowners confidence in their roofing project.

Choosing a Platinum Preferred Contractor means you benefit from top-notch craftsmanship, reliable service, and a roof that not only looks great but also stands the test of time. With Dream Home Roofers, you can rest assured that your new roof will provide lasting protection and peace of mind.

Summary

In this comprehensive guide, we’ve explored the essential steps and techniques for achieving perfect roof shingle overlap. From understanding the role of gravity and common mistakes to preparing your roof deck and installing shingles, each step is crucial for ensuring a durable and effective roofing system. Proper shingle overlap not only enhances the visual appeal of your home but also provides critical protection against water infiltration and weather damage.

Whether you’re tackling a DIY roofing project or hiring a professional, following these guidelines will help you achieve a flawless and long-lasting roof. Remember, when in doubt, consulting a professional like Dream Home Roofers can ensure your roofing project is executed with expertise and precision. With the right approach and attention to detail, you can enjoy a beautiful, resilient roof for years to come.

Frequently Asked Questions

Should shingles overlap side to side?

Shingles should not overlap side to side; instead, they should be butted together to allow water to run down without entering the joints. This method ensures effective shedding of water by the preceding course of shingles.

Is overlaying a roof bad?

Overlaying a roof can compromise your home’s structural integrity due to the added weight and may mask underlying issues that could lead to higher long-term costs. Therefore, it is advisable to carefully consider this approach and weigh the potential risks.

How does gravity affect shingle overlap?

Proper shingle overlap is essential as gravity directs water down the roof slope, ensuring it flows over the shingles and preventing water from seeping underneath, which could lead to damage.

What are starter shingles, and why are they important?

Starter shingles are essential for improving wind resistance and ensuring proper water management by overhanging the roof edge, while also providing a uniform appearance. Their installation is crucial for maintaining the integrity and aesthetics of the roofing system.

When should I call a roofing professional?

You should call a roofing professional when facing complex issues, such as structural problems or high-sloped roofs, or if you feel uncertain about handling the project. This ensures safety and quality workmanship.


https://dreamhomeroofers.com/wp-content/uploads/2025/02/Preparing-a-roof-deck-for-shingle-installation.-1.png 1000 1500 Dream Home Roofers https://dreamhomeroofers.com/wp-content/uploads/2024/09/dhr-logo.png Dream Home Roofers2025-02-15 08:00:592025-02-08 23:43:37The Best Guide to Perfect Roof Shingle Overlap: Tips & Techniques
A detailed view of shingle roof components including underlayment and drip edge.

Shingle Roof Detail: A Comprehensive Guide to Roofing Essentials

February 7, 2025/in Roofing/by Dream Home Roofers

Need shingle roof detail? This guide covers essential components, installation steps, and maintenance tips for a durable shingle roof. Perfect for homeowners and professionals, it provides the detailed insights you need.

Key Takeaways

  • A shingle roof consists of several essential components including the roof deck, underlayment, and drip edge, each crucial for performance and longevity.

  • Asphalt shingles come in three main types: three-tab, dimensional, and luxury, each offering distinct benefits and aesthetic options for homeowners.

  • Regular maintenance, including inspections and debris cleaning, is vital for extending the life of asphalt shingle roofs and preventing costly repairs.

Understanding Shingle Roof Components

A detailed view of shingle roof components including underlayment and drip edge.

A shingle roof is more than just the visible layer of roof shingles; it’s a complex system made up of several key components. These include the roof deck, underlayment, and drip edge, each playing a crucial role in the overall performance and longevity of the roof.

Understanding these components will help you appreciate the intricacies of asphalt shingle roofing systems and the importance of each element in protecting your home.

Roof Deck

The roof deck serves as the foundation for your shingle roof, providing the structural integrity necessary to support the roofing system. Typically made from plywood or oriented strand board (OSB), the roof deck is crucial for evenly distributing the weight of the roof, thereby reducing the risk of structural damage.

A smooth, properly fastened, and gap-free roof deck is crucial for the effective application of roofing shingles. Quality roof decking not only supports the roof system but also contributes significantly to the overall performance and longevity of your asphalt shingle roof.

Underlayment

Underlayment acts as a secondary layer of protection beneath the asphalt shingles, safeguarding your home against water infiltration. Typically made from materials such as asphalt-saturated felt or synthetic options like IKO’s RoofGard-Cool Grey Synthetic Roof Underlayment, this layer is vital for preventing moisture damage to the roof deck.

Installation begins at the eaves, ensuring overlap over the drip edge, and continues in horizontal courses to provide comprehensive coverage. The underlayment’s primary role is to offer an additional barrier against water, enhancing the overall durability and resilience of the roofing system.

Drip Edge

The drip edge is an essential component that protects the lower edge of the roof deck from water damage. Installed along the eaves and rakes, drip edges guide water away from the roof’s edge, preventing it from seeping into the fascia and causing rot or other structural issues.

Drip edges efficiently direct water runoff, maintaining the roofing system’s integrity, preventing leaks, and prolonging the roof’s lifespan.

Types of Asphalt Shingles

Various types of asphalt shingles displayed together.

Asphalt shingles are the preferred roofing material in North America, prized for their versatility, cost-effectiveness, and weather resilience. These shingles come in several types, each offering distinct advantages. The three main categories are three-tab shingles, dimensional shingles, and luxury shingles.

Knowing the differences between these types enables you to choose the right shingle for your specific needs and aesthetic preferences.

Three-Tab Shingles

Three-tab shingles are a popular choice for many homeowners due to their affordability and straightforward design. Characterized by their flat appearance and single-layer construction, three-tab shingles offer a uniform look that suits a variety of roofing projects.

Their cost-effectiveness and ease of installation make them an excellent option for budget-conscious homeowners looking for a reliable roofing solution.

Dimensional Shingles

Dimensional shingles, also known as architectural shingles and laminated shingles, offer enhanced aesthetic appeal and performance. These shingles feature a multi-layered design that provides added depth and texture, mimicking the look of more expensive materials like wood and slate.

The additional layers not only improve the visual appeal but also enhance the weather resistance of the roof, making dimensional shingles a favored choice for homeowners seeking a balance of beauty and durability.

Luxury Shingles

Luxury shingles are designed to replicate the appearance of high-end roofing materials such as wood shake shingles, cedar shakes, and slate tiles. These premium shingles offer an upscale look without the associated cost, providing homeowners with a sophisticated and elegant roofing option.

Beyond their aesthetic appeal, luxury shingles offer superior durability and performance, making them an excellent investment for enhancing home curb appeal and longevity.

Installation Process of Asphalt Shingles

A roofing contractor installing asphalt shingles on a roof.

The installation process of asphalt shingles involves several critical steps, each essential for ensuring a durable and effective roofing system. Each phase, from preparing the roof deck to laying the underlayment and installing the shingles, must be meticulously executed for optimal results.

Appreciating this process helps ensure that your roofing project meets the highest standards.
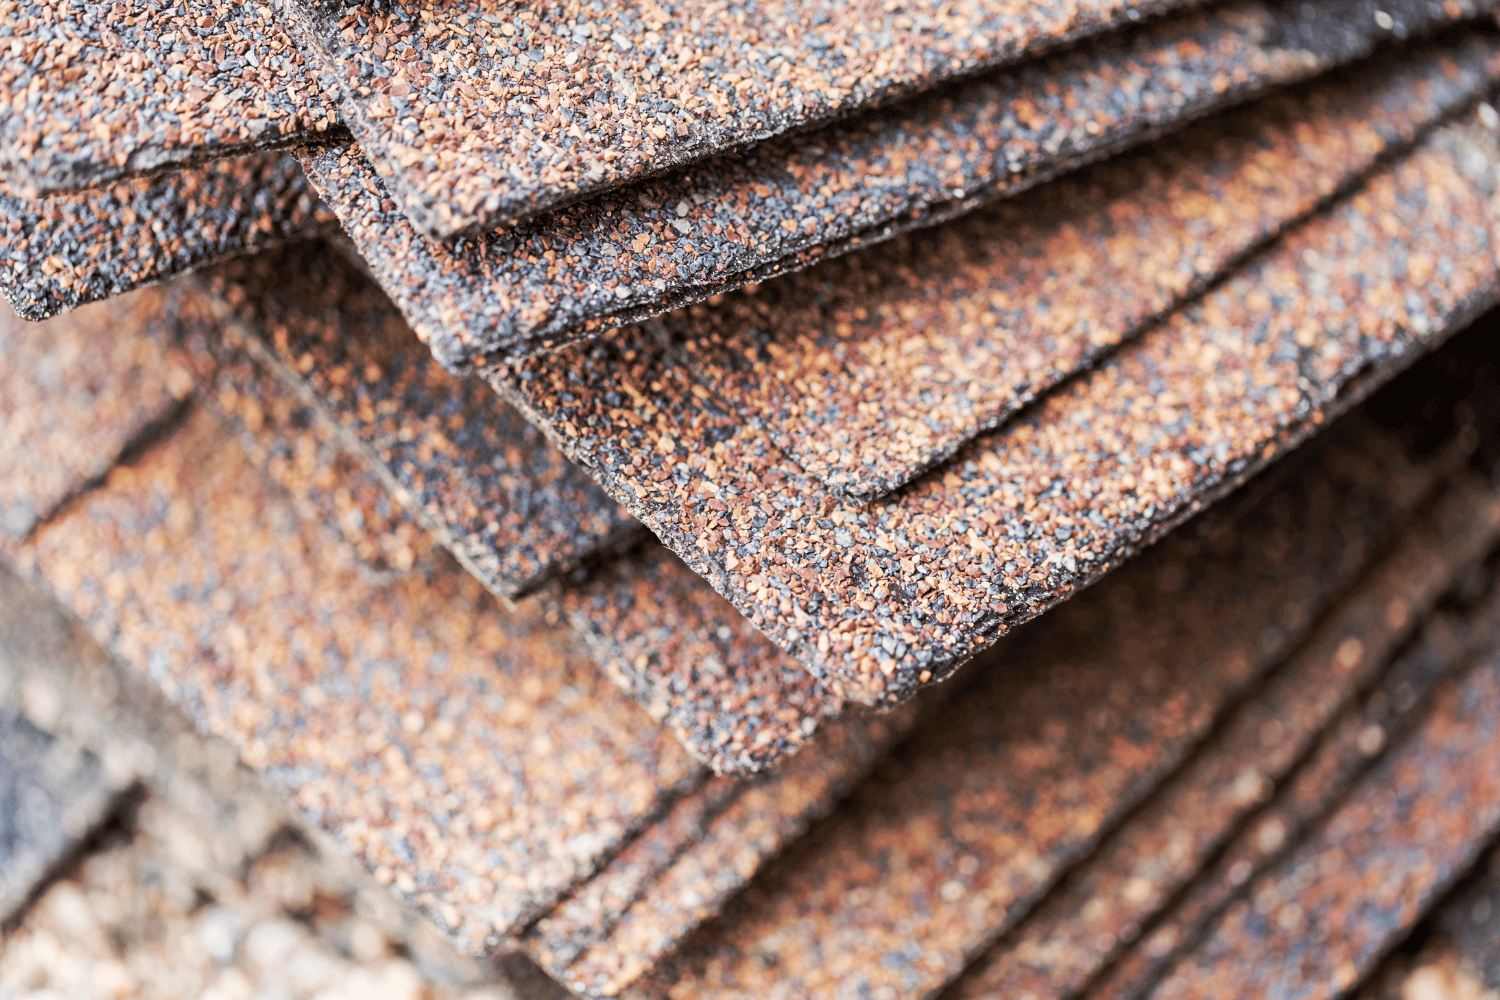
Preparing the Roof Deck

Preparing the roof deck is the first step in the installation process and involves ensuring the deck is smooth, properly fastened, dry, and free of gaps or holes. This preparation is crucial for the effective application of shingles, as any imperfections can affect the roof’s performance and longevity.

A clean and secure roof deck provides a solid foundation for the entire roofing system, ensuring that the shingles adhere properly and perform as intended.

Laying the Underlayment

The underlayment is typically applied in horizontal courses, starting at the eaves and overlapping the drip edge for enhanced protection. Special attention is given to valleys and areas prone to water infiltration, where ice and water shields are often installed to prevent leaks.

This layer acts as a secondary barrier against moisture, ensuring that the roof deck remains dry and protected from potential damage.

Installing Shingles

Shingle installation begins at the bottom of the roof and progresses upward, with each row overlapping the one below to ensure proper water shedding. Starter shingles are crucial for providing an initial layer of adhesion and facilitating water runoff.

Proper nail placement and the strategic installation of ridge cap shingles enhance wind resistance and overall roof durability, ensuring your asphalt shingle roof performs optimally in various weather conditions.

Enhancing Roof Durability

A close-up of a shingle roof with an ice and water shield.

Enhancing the durability of your asphalt shingle roof involves implementing measures such as using protective membranes, ensuring proper ventilation, and opting for algae-resistant shingles. These strategies help extend the life of the roof, maintain its aesthetic appeal, and protect your home from potential damage.

Maintaining your roof regularly and making proactive enhancements are vital for keeping it in top condition.

Ice and Water Shield

Ice and Water Shield is a critical component for preventing leaks and ice dams, particularly in regions prone to severe weather. This waterproof barrier is installed at the eaves, valleys, and other vulnerable areas to protect against water infiltration from ice dams and wind-driven rain.

By preventing moisture damage, Ice and Water Shield significantly enhances the durability and longevity of the roofing system.

Ventilation

Proper attic ventilation is essential for extending the life of your shingles and maintaining the overall health of your roof system. Effective ventilation helps regulate attic temperature, reducing heat buildup that can damage shingles and cause premature aging.

Additionally, it minimizes moisture accumulation, crucial for preventing shingle deterioration and maintaining the roof’s integrity.

Algae-Resistant Shingles

Algae-resistant shingles are treated with compounds that inhibit algae growth, helping maintain the roof’s aesthetic appeal and structural integrity over time. These shingles prevent unsightly stains and deterioration caused by microbial growth, ensuring that your roof remains clean and attractive.

Homeowners opting for algae-resistant shingles benefit from a longer-lasting and visually appealing roof.

Maintenance Tips for Asphalt Shingle Roofs

Regular maintenance is essential for maximizing the lifespan of your asphalt shingle roof. Simple practices like routine inspections, cleaning debris, and repairing minor damage can prevent more significant issues and costly repairs.

A proactive approach to maintenance ensures your roof continues to protect your home effectively.

Regular Inspections

Periodic roof inspections are crucial for identifying potential issues before they escalate. It’s recommended to inspect the roof twice a year, ideally in spring and autumn, to catch wear and potential leaks early. Regular inspections help maintain the roof’s integrity and prevent minor problems from becoming major concerns.

Cleaning Debris

Keeping the roof clear of leaves, branches, and other debris is vital for preventing water accumulation and potential damage. Regular roof and gutter cleaning ensures free water flow, reducing leak risks and prolonging shingle life.

This simple maintenance step can significantly enhance the durability of your asphalt shingle roof.

Repairing Damage

Addressing minor repairs promptly can prevent more extensive damage and costly repairs. Replacing damaged shingles and fixing small leaks are relatively simple tasks that can be performed to maintain the roof’s integrity.

Addressing these minor issues early protects your roof from more severe damage and extends its lifespan.

Choosing the Right Roofing Contractor

Selecting a reliable roofing contractor is crucial for the success of your roofing project. Verifying their qualifications, including required licenses and insurance coverage, is the first step. A reputable contractor with the right credentials ensures your roof is installed correctly and meets industry standards, providing peace of mind and a high-quality roofing system.

Certification and Experience

Hiring roofing contractors with proper certification ensures quality work and adherence to industry standards. Certified contractors, such as Owens Corning Platinum Preferred Contractors, have undergone specialized training and adhere to best practices, ensuring skilled execution of roofing projects.

These certifications indicate a contractor’s expertise and reliability, giving homeowners confidence in their new roof’s quality.

Reviews and References

Checking online reviews and requesting references from past clients is essential for gauging a contractor’s reputation and reliability. Online reviews provide insights into the contractor’s quality of work and customer satisfaction, while personal references offer a more detailed account of their performance on specific projects.

This information helps you choose a contractor with a proven track record of delivering high-quality results.

Detailed Estimates

Detailed estimates from multiple contractors are crucial for understanding your roofing project’s overall costs. A comprehensive estimate should include the costs of materials, labor, permits, and any additional fees that may arise.

Comparing these estimates allows homeowners to manage budgets effectively, avoid unexpected costs, and ensure transparency and value for their investment.

The Benefits of Asphalt Shingle Roofing

A family standing in front of their home with an asphalt shingle roof.

Asphalt shingle roofing offers numerous benefits, making it a popular choice among homeowners. From its cost-effectiveness to its versatility and durability, asphalt shingles provide a reliable and aesthetically pleasing asphalt roofing shingles solution.

Understanding these benefits will help you appreciate why asphalt shingle roofs are a favored option for residential properties.

Affordability

Asphalt shingles are one of the most affordable roofing options available, providing high-quality roofing at a lower upfront cost compared to other materials. The installation cost typically ranges from $3.50 to $9.50 per square foot, making it a financially sensible choice for budget-conscious homeowners.

This cost-effectiveness, combined with the durability and aesthetic appeal of asphalt shingles, makes them an excellent value for homeowners looking to replace their roofs.

Versatility

Asphalt shingles come in a wide array of colors and styles, allowing homeowners to customize their roofs to match their personal taste and home design. Whether you prefer the classic look of three-tab shingles or the sophisticated appeal of dimensional shingles, there is an asphalt shingle option to suit your aesthetic needs.
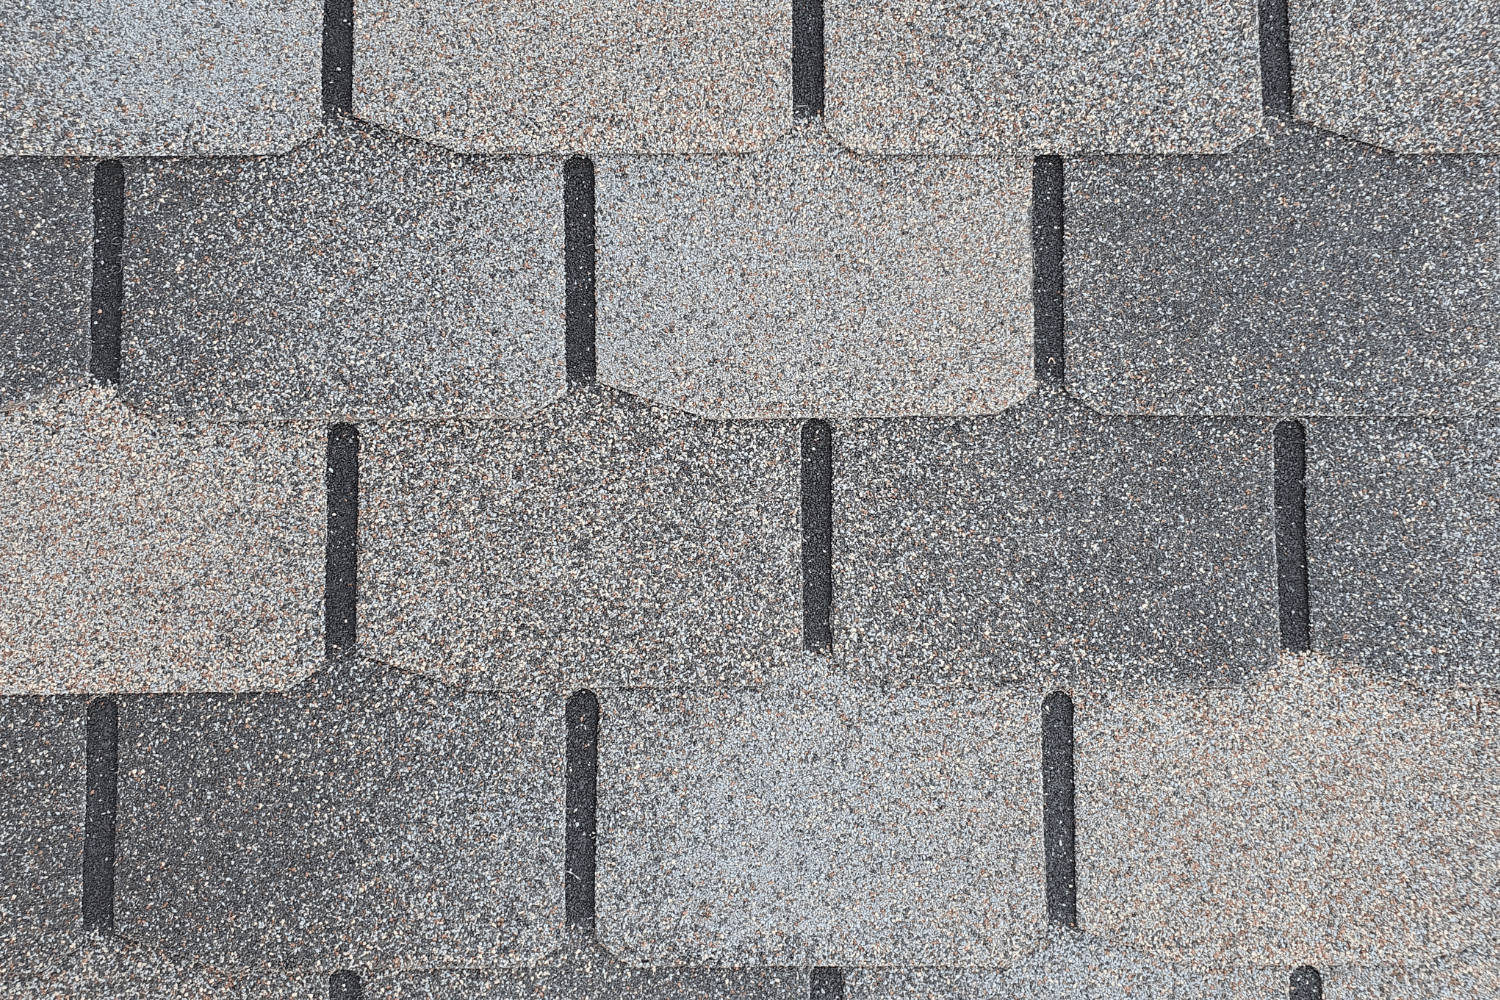
This versatility makes asphalt shingles a popular choice for various architectural styles and personal preferences.
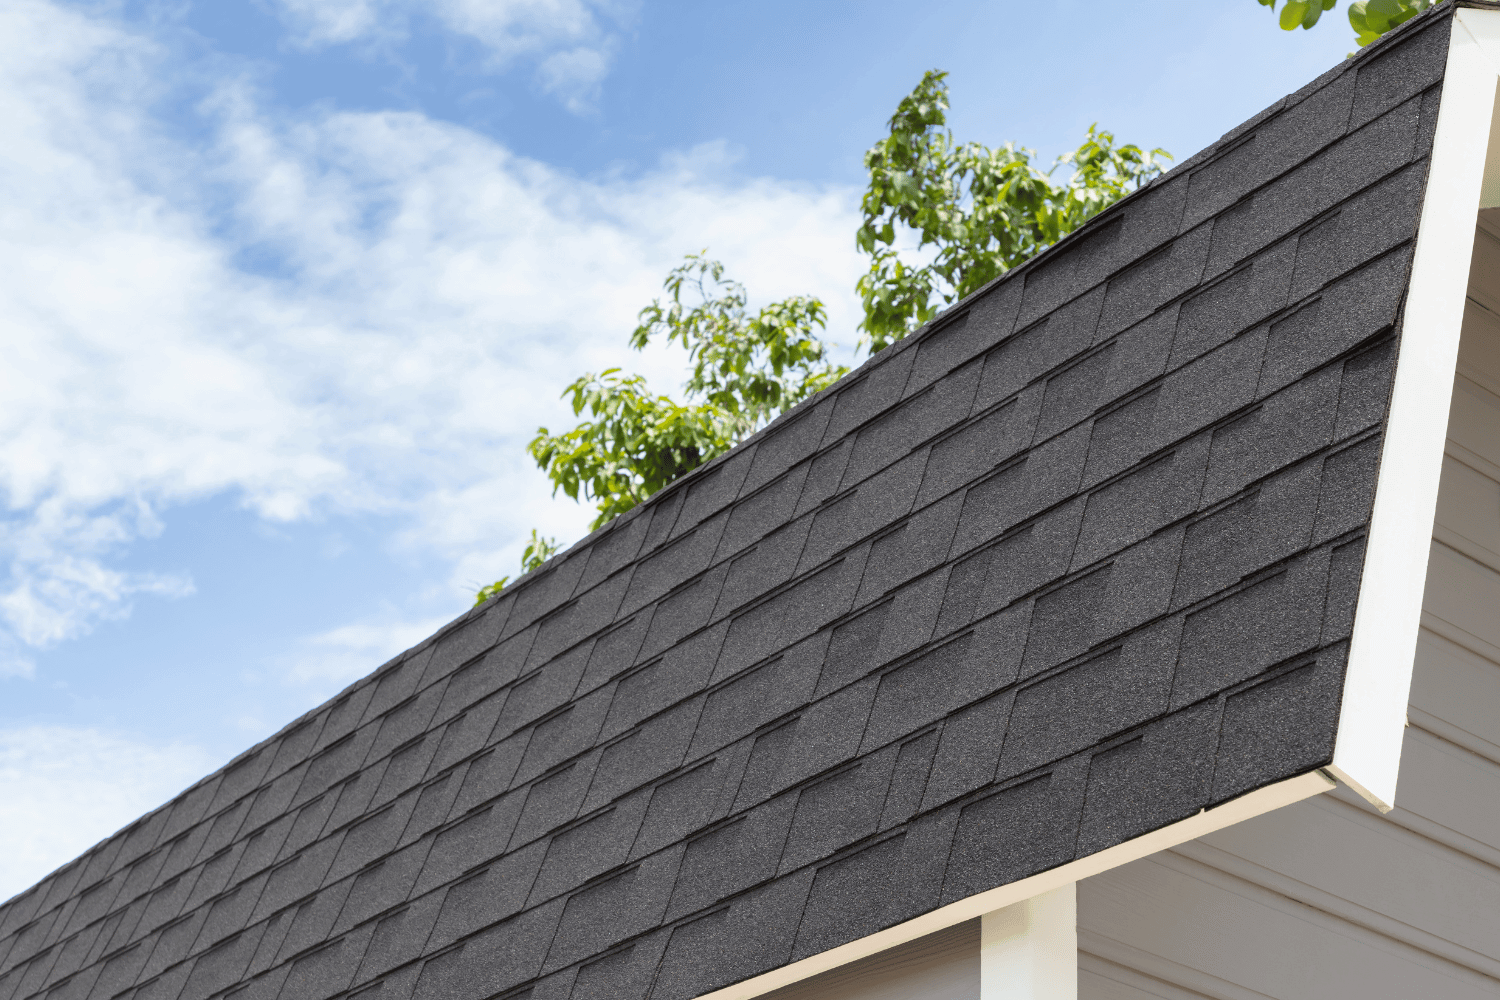
Durability

Modern asphalt shingles are engineered to withstand high winds and various weather conditions, with some able to resist gusts of up to 130 mph. Their durability and resilience make them a suitable choice for homeowners looking for reliable protection against the elements, as well as from asphalt shingle manufacturers.
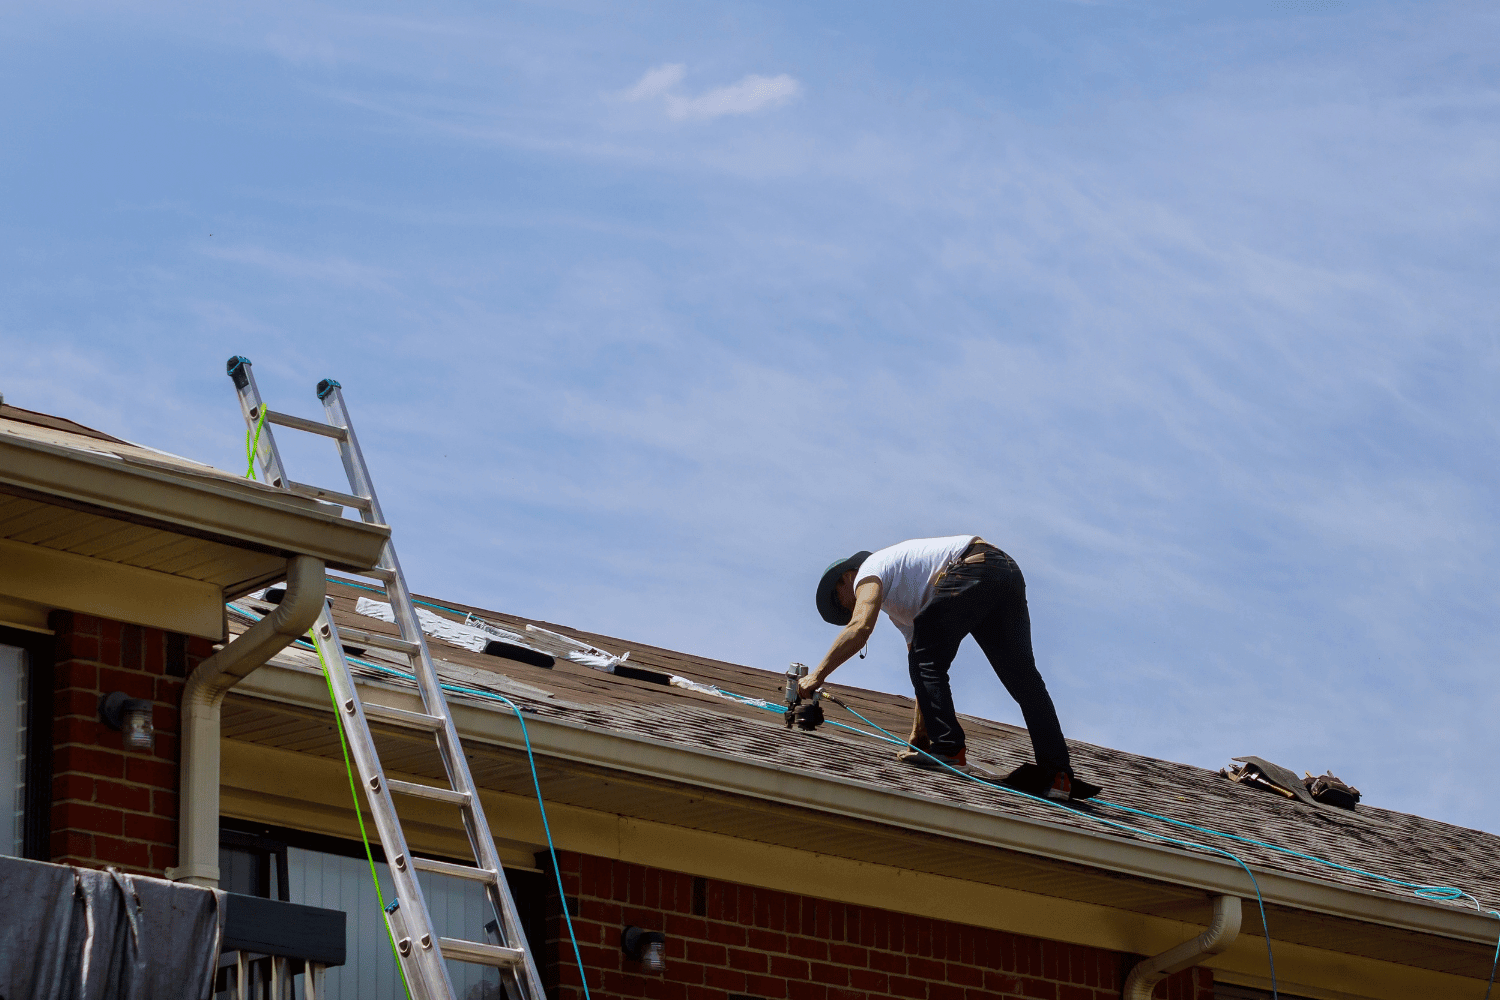
Regular maintenance and inspections further enhance the performance and longevity of asphalt shingle roofs, ensuring they continue to protect your home effectively over time.

Summary

In conclusion, asphalt shingle roofing offers a combination of affordability, versatility, and durability that makes it an ideal choice for homeowners. Understanding the components of a shingle roof, the different types of asphalt shingles, and the installation process can help you make informed decisions about your roofing project. Regular maintenance and choosing a reputable roofing contractor are crucial for ensuring the longevity and performance of your new roof. By following the insights provided in this guide, you can enjoy a beautiful, durable, and reliable asphalt shingle roof that enhances the protection and aesthetic appeal of your home.

Frequently Asked Questions

Is an asphalt roof expensive?

An asphalt roof can be considered moderately expensive, with costs typically ranging from $3.50 to $9.50 per square foot, depending on materials and labor. For a standard home, total replacement costs can fall between $6,000 and $16,500, based on the size and complexity of the roof.

What types of roofing materials does Dream Home Roofers work with for residential roof replacement?

Dream Home Roofers specializes in premium Owens Corning roofing materials for residential roof replacements. Their diverse product offerings ensure quality and durability for your roofing needs.

What certification do Dream Home Roofers hold?

Dream Home Roofers hold the certification of Owens Corning Platinum Preferred Contractors, ensuring high standards in roofing services.

What are architectural shingles also known as?

Architectural shingles are also known as dimensional shingles.

How do architectural shingles differ from traditional three-tab shingles?

Architectural shingles feature multiple layers that provide a more textured appearance compared to traditional three-tab shingles. This enhanced design not only improves aesthetics but also increases durability and longevity.


https://dreamhomeroofers.com/wp-content/uploads/2025/02/A-detailed-view-of-shingle-roof-components-including-underlayment-and-drip-edge.-1.png 1000 1500 Dream Home Roofers https://dreamhomeroofers.com/wp-content/uploads/2024/09/dhr-logo.png Dream Home Roofers2025-02-07 08:00:122025-02-06 19:35:55Shingle Roof Detail: A Comprehensive Guide to Roofing Essentials

Are Gutter Guards Worth It? A Proven Guide to Gutter Protection

December 19, 2024/in Uncategorized/by Dream Home Roofers

Are gutter guards worth it? If you’re dealing with frequent gutter clogs and costly cleanings, you might be considering gutter guards. This guide breaks down their benefits and potential downsides, helping you decide if installing them is a smart investment for your home.

Key Takeaways

  • Gutter guards prevent debris accumulation, ensuring proper water drainage and reducing the risk of water damage and costly repairs.
  • Different types of gutter guards, such as mesh screens, reverse curve guards, and foam guards, cater to specific needs and climates, affecting their effectiveness and maintenance requirements.
  • Investing in gutter guards can lead to long-term savings on maintenance and repairs, making them a worthwhile investment for enhancing home safety and protection.

Why Gutter Guards Are Essential for Your Home

A home with gutter guards installed, showcasing their importance in protecting the gutter system.

Gutter guards keep gutters clear and prevent debris from blocking the flow of water, ensuring proper water drainage. This is crucial for maintaining your home’s foundation and reducing maintenance requirements. Clogged gutters can lead to severe issues such as mold growth and leaks, which can be expensive to fix.

Installing gutter guards directs water away from the foundation, reducing the risk of water damage over time and protecting your home’s landscaping. Gutter guards enhance water flow and decrease the need for frequent gutter cleanings, lowering year-round maintenance efforts. This saves your home from potential damage and costly repairs.

Gutter guards enhance home safety by preventing clogs and water damage, ensuring your home remains well-protected and maintained. Homeowners who regularly clear debris or notice water damage will find gutter guards transformative.

Key Benefits of Installing Gutter Guards

A graphic illustrating the key benefits of installing gutter guards, highlighting their advantages.

Gutter guards offer several key benefits that make them a gutter guards worth investment for many homeowners. They provide protection against debris, reduced maintenance costs, and enhanced home safety.

Protection Against Debris

Gutter guards act as barriers, preventing debris such as leaves and twigs from entering the gutters and maintaining their functionality. Blocking larger debris ensures proper water flow and reduces clog risks. While highly effective, they don’t offer complete protection against all debris types, such as pine needles and seed pods.

Different types of gutter guards, such as micro-mesh guards and gutter screens, are particularly effective in blocking even the smallest debris and maintaining optimal water flow. Despite limitations, gutter guards significantly reduce debris accumulation, making them valuable for any home.

Reduced Maintenance Costs

Gutter guards reduce debris accumulation, decreasing the frequency of necessary cleanings and saving homeowners time and effort. Gutter covers can lead to less frequent maintenance requirements, which can translate to substantial long-term savings on cleaning and repairs when gutter guards installed are used.

Gutter guards still need cleaning, but far less frequently, often just once a year or less.

Enhanced Home Safety

Gutter guards enhance home safety by reducing the need for ladder use during maintenance. This decrease in ladder use minimizes the risk of ladder-related accidents, providing a safer environment for homeowners.

Reducing accident risks during cleaning makes home maintenance safer and more manageable.

Types of Gutter Guards Available

Different types of gutter guards displayed, showcasing their variety and functionality.

Gutter guards come in various types, each designed to address specific needs and debris management. Knowing the available options helps in choosing the best gutter system and gutter guard system for your home.

Mesh Screens

Mesh and micro-mesh gutter guards filter out small debris like pine needles while allowing water to flow through. Their tiny openings effectively block both large and small debris, though periodic cleaning is needed to maintain functionality.

Mesh screens are relatively easy to install and offer a cost-effective solution for many homeowners.

Reverse Curve Guards

Reverse curve guards use water adhesion to direct water into the gutter, allowing debris to fall off. They guide water into the gutter using surface tension, effectively keeping out larger debris.

They may struggle with smaller particles like pine needles and are less effective in snowy areas. Professional installation can enhance their performance.

Foam Guards

Foam guards block debris while allowing water to flow and are easy to install. Requiring no special tools, homeowners can install these guards themselves. However, they may lack the durability of other options and can become moldy over time.

Foam guards are an attractive option for those looking for an affordable solution.

Factors to Consider When Choosing Gutter Guards

Choosing the right gutter guards involves considering factors like local climate, roof type, and budget. These elements can significantly impact the effectiveness and longevity of your gutter guard system.

Climate and Local Vegetation

The choice of gutter guard should account for local weather conditions and the types of trees nearby. For example, micro-mesh guards are effective in areas with diverse debris, filtering out small particles while allowing water to pass through.

Knowing your local climate and vegetation helps in selecting the most suitable gutter guards.

Roof Type and Pitch

Different roof designs can greatly affect how well gutter guards function. Consider your roof type and pitch when selecting gutter guards, as these factors impact installation and performance.

Steep roofs, for example, may benefit more from professional installation to ensure optimal functionality.

Budget Constraints

The price range for gutter guard materials averages from $1 to $9 per linear foot, with professional installation costs typically between $10 to $25 per linear foot. Balancing cost and performance is crucial when choosing a gutter guard solution.

More expensive options like micro-mesh guards can last 20 years or longer, offering long-term value. However, consider your budget and choose a system that meets your needs.

DIY vs. Professional Gutter Guard Installation

Homeowners can choose between DIY gutter guard installation or hiring professionals for professionally installed gutter guards. Each approach has its own advantages and disadvantages.

Pros and Cons of DIY Installation

DIY installation can save upfront costs, typically ranging from $170 to $700, compared to professional services. However, risks include leaks, sagging gutters, and structural damage from errors. Improperly installed DIY gutter guards might not work effectively and could void the roof warranty.

Assess your skills and comfort with heights before attempting DIY installation.

Benefits of Professional Installation

Professional installation ensures precision and effectiveness, avoiding gaps that let in debris. Professionals can prevent common DIY pitfalls, such as improper fitting and drainage problems.

For steep or unusual roofs, professional installation is highly recommended to ensure optimal functionality.

Maintenance Tips for Gutter Guards

Regular maintenance is essential to keep gutter guards effective. Proper care extends the lifespan of your gutter guard system and prevents issues.

Regular Cleaning and Inspections

Gutter guards reduce the need for cleaning but don’t eliminate it. Clean gutters at least once every two years, or more frequently depending on tree coverage. Regular checks and gentle cleaning help identify and clear blockages, ensuring proper system function.

Avoid harsh chemicals or pressure washers, which can damage the guards.

Preventing Ice Dams

In cold climates, improperly maintained gutter guards may contribute to ice dam formation. Maintaining clear drainage through the guards reduces the risk of ice dam formation during winter.

Most guards can withstand winter, but metal-based guards should be considered for removal to prevent damage.

Cost Analysis: Are Gutter Guards a Worthwhile Investment?

A cost analysis chart comparing the investment in gutter guards and their long-term savings, addressing whether gutter guards are worth it.

Investing in gutter guards can lead to long-term savings by reducing the frequency of gutter cleaning and repair costs. While upfront costs for gutter guards may be higher than traditional gutters, long-term savings can be substantial. Reducing the need for regular gutter cleaning, which can cost $100 to $360 annually, gutter guards offer significant financial benefits over time.

Gutter guards help avoid extensive water damage costs by ensuring proper water flow through gutters. This protection can save homeowners from costly repairs, making gutter guards a worthwhile long-term investment.

Alternatives to Gutter Guards

For those not ready to invest in gutter guards, alternatives exist to help maintain clear gutters. Regular cleaning schedules can prevent debris buildup, reducing the need for intensive maintenance. A routine cleaning plan ensures gutters remain functional and prevents potential issues.

Installing a gutter cleaning robot can automate the process, making maintenance easier and more efficient. Some homeowners may prefer hiring professional gutter cleaning services, especially if they have time constraints or safety concerns.

Summary

In summary, gutter guards offer numerous benefits, including protection against debris, reduced maintenance costs, and enhanced home safety. They come in various types, each with its own advantages and suitability for different environments. While the initial investment may be higher, the long-term savings and protection against water damage make gutter guards a worthwhile investment for many homeowners.

By understanding the factors to consider when choosing gutter guards, the pros and cons of DIY versus professional installation, and essential maintenance tips, homeowners can make an informed decision to protect their homes. Gutter guards not only preserve the integrity of your home but also provide peace of mind knowing that your gutters are functioning correctly.

Frequently Asked Questions

Do gutter guards add value to your home?

Gutter guards can contribute to your home’s value by preventing damage that could significantly lower resale potential, making your property more appealing to buyers in rainy areas. Therefore, investing in gutter guards is a practical choice for maintaining and enhancing your home’s worth.

What services does Dream Home Roofers specialize in?

Dream Home Roofers specializes in high-quality gutter systems, specifically providing services related to gutter guards to enhance home protection.

What do gutter guards prevent from clogging gutters?

Gutter guards effectively prevent leaves and debris from clogging your gutters, ensuring proper water flow and reducing maintenance needs.

What is one benefit of installing gutter guards?

One significant benefit of installing gutter guards is their ability to protect your home’s foundation and landscaping by ensuring water flows effectively away from the house. This helps prevent costly damage over time.

What is the TitanGuard Leaf Protection System?

The TitanGuard Leaf Protection System is a premium product utilized by Dream Home for gutter guard installations, providing exceptional defense against leaves and debris. It ensures your gutters remain clear and functional.

https://dreamhomeroofers.com/wp-content/uploads/2024/09/dhr-logo.png 0 0 Dream Home Roofers https://dreamhomeroofers.com/wp-content/uploads/2024/09/dhr-logo.png Dream Home Roofers2024-12-19 08:00:202025-01-03 17:54:40Are Gutter Guards Worth It? A Proven Guide to Gutter Protection

Do Roofers Install Gutters When Replacing Your Roof?

December 17, 2024/in Roofing/by Dream Home Roofers

Do roofers install gutters? The answer is yes, many roofing contractors can install gutters when replacing your roof. This combined service offers convenience, cost savings, and a streamlined process. In this article, we’ll explore how roofers manage gutter installations, why it’s beneficial, and what you should know when considering this option.

Key Takeaways

  • Many roofing contractors can handle both roof and gutter installations, streamlining the process and often saving costs for homeowners.
  • Replacing gutters alongside a roof is advisable to ensure optimal functionality and prevent water damage, as old gutters can negatively impact new roofs.
  • Choosing a qualified contractor for both jobs is essential, with attention to their experience, credentials, and transparency concerning project timelines and costs.

Can Roofing Contractors Install Gutters?

A roofing contractor working on a roof while discussing the installation of gutters.

The short answer is yes, many roofing contractors are well-equipped to install gutters. This dual capability brings a significant convenience to homeowners. Imagine managing two separate contractors for your roof and gutters – coordinating schedules, ensuring quality from both ends, and potentially dealing with misalignment issues. Hiring a single roofing contractor for both tasks streamlines the process, reduces potential headaches, and often saves on overall costs.

At Dream Home Roofers, this approach not only simplifies the project but also enhances the overall quality of the work. Having one team handle both the roof replacement and new gutter installation, supported by our in house gutter division, ensures that both systems are perfectly aligned, crucial for effective water drainage and long-term durability.

Many roofing contractors offer bundled services that can lead to cost savings, making this a financially wise decision.

Benefits of Combining Roof and Gutter Installation

Combining roof and gutter installations under a single contractor can change the game. One of the primary benefits is the efficiency in project coordination. A single team managing both roof and gutter work streamlines scheduling, ensuring each phase of the project transitions smoothly.

Moreover, this approach enhances the cohesiveness of the work. The same contractor overseeing both installations ensures the gutter system aligns perfectly with the new roof, preventing potential water damage and ensuring optimal function. This coordination reduces the risk of miscommunication and errors typical of dealing with multiple contractors.

Another significant advantage is the potential cost savings. Bundling roof and gutter installations often allows homeowners to negotiate better rates on labor and materials. This reduces overall costs and ensures both systems are installed using compatible materials and techniques, enhancing the durability and effectiveness of the installation.

Combining these projects can also shorten the project timeline. One contractor handling the entire job completes the project faster, minimizing disruption to your daily life and ensuring your home is protected sooner.

Expertise in Gutter Systems

Roofing contractors have the expertise to ensure gutters are correctly installed and integrated with new roofs. This prevents potential water damage from improperly aligned gutters. Our team at Dream Home Roofers, for example, understands the intricacies of how gutters should interact with the roof to manage rainwater effectively.

Proper gutter installation requires perfect alignment with the roof’s edge and the installation of features like a drip edge. A drip edge is a metal flashing that manages water flow, preventing leaks under roof shingles. This small but essential component can make a significant difference in protecting your roof deck and the overall structure of your home.

Roofing contractors are skilled in addressing the unique challenges posed by different roofing materials and designs. Whether you have a metal roof, asphalt shingles, or another type of roofing, these professionals from a roofing company integrate the gutter system seamlessly to ensure optimal performance and longevity.

Why Should You Replace Your Gutters When Replacing Your Roof?

Old gutters being replaced with new ones during a roof replacement.

Assessing the condition of your gutters during a roof replacement is essential. Old or failing gutters can compromise the functionality and integrity of a new roof, so addressing both systems simultaneously is advisable. If a roof inspection reveals issues like sagging, clogs, or water damage, it’s often best to replace your gutters along with your roof.

Replacing both your roof and gutters at the same time streamlines scheduling and can lead to reduced costs. This approach allows coordination of one project timeline, reducing labor costs and minimizing disruption to your daily life. It also ensures that both systems work together, enhancing the overall durability and effectiveness of your home’s exterior.

If your existing gutters are in good condition and compatible with the new roof, they might be retained. This decision depends on factors such as materials used and the type of roof being installed. Consulting with your roofing contractor can help in making an informed decision about whether to replace your gutters during the roof replacement.

Signs Your Gutters Need Replacement

Determining if your gutters need replacement involves looking for several key signs. One obvious indicator is sagging gutters or gutters pulling away from the house. This can indicate that the gutters are overloaded with debris or that the fasteners are failing.

Water stains on siding or walls and pooling water around the foundation are also red flags. These issues suggest that the gutters are not effectively channeling water away from your home, leading to serious structural damage over time.

If you notice nails and fasteners on the ground around your home, it might be time for a gutter replacement. These elements are critical for keeping the gutters securely attached to your home, and their failure can lead to further damage.

Addressing these issues promptly is essential. Ignoring them can result in more extensive damage to your home’s structure and foundation, leading to costly repairs later.

The Impact of Old Gutters on New Roofs

Old or clogged gutters can significantly impact a new roof negatively. Clogged gutters can cause shingles to curl or buckle, eventually leading to a roof leak in the roof decking and the interior of your home.

Poorly functioning gutters can contribute to water-related issues such as mold growth and foundation cracks. These problems compromise the structural integrity of your home and pose health risks to its occupants.

Investing in a new gutter system during a roof replacement can prevent these issues. Ensuring that your gutters function correctly protects both your roof and the exterior structures of your home, safeguarding your investment.

Types of Gutters Installed by Roofing Contractors

Different types of gutters installed on a house, showcasing seamless and traditional styles.

Roofing contractors install various gutter types, each with its own benefits. Common materials include aluminum and copper gutters. Aluminum gutters generally last about 20 years, while copper gutters can last 50 years or more, making them a more durable but expensive option.

Standard residential gutters typically come in a 5-inch size, suitable for most homes. For homes with steep roofs, oversized gutters are often recommended to enhance water handling capacity. This ensures that even during heavy rainfall, the gutters efficiently channel water away from the home.

Seamless gutters are another popular option. These gutters are produced using a gutter extruding machine, creating a continuous piece of gutter tailored to the specific dimensions of your home. Seamless gutters are preferred for reducing the potential for leaks, providing a more reliable water drainage system.

Seamless Gutters

Seamless gutters are crafted from a single piece of material, eliminating joints that can cause leaks. This design enhances the gutter’s functionality and aesthetic appeal, making it popular among homeowners.

These gutters can be custom-fabricated from materials like aluminum, copper, or steel to fit the specific dimensions of a home. This customization ensures a perfect fit and optimal performance, as the gutters are tailored to handle the specific water drainage needs of the property.

The absence of joints in seamless gutters reduces the likelihood of leaks, providing a more reliable and durable water drainage system. This makes them an excellent investment for homeowners looking to protect their home from water damage.

Gutter Guards

Gutter guards are a valuable addition to any gutter system, blocking leaves and debris from entering the gutters. This significantly reduces the frequency of maintenance needed, making them a convenient option for homeowners.

Preventing clogs, gutter guards ensure better water flow and minimize the risk of overflow during heavy rain. This helps protect the foundation of your home and prevents water damage to the exterior walls.

Installing gutter guards reduces the need for regular cleaning, as they prevent debris accumulation. This saves time and effort and extends the lifespan of the gutters by reducing wear and tear.

The Roof Replacement Process and Gutter Installation

A roofing contractor installing new gutters after completing a roof replacement.

Replacing gutters during roof installation allows for a more efficient and integrated installation process. At Dream Home Roofers, removing gutters simultaneously with old shingles facilitates the roof replacement process. This ensures that the entire roof system, including the drip edge and other critical components, is installed correctly.

During roof replacement, existing gutters are typically covered and protected to prevent damage from falling debris. Roofing contractors avoid leaning ladders against the gutters and use tarps to shield them from excess weight and materials. This handling preserves the integrity of the existing gutters, ensuring they remain in good condition throughout the roofing process.

Once the new roof is installed, the next step is installing the new gutters. This is usually done after ensuring the roof deck and all roofing materials are properly in place. The average time to install gutters after replacing a roof is about one day, making it a quick and efficient process to complete your home’s exterior upgrade.

Protecting Existing Gutters During Roof Replacement

Roofing contractors work around existing gutters by using tarps to cover them and handling materials with care to avoid excess weight and damage. This is particularly important when the existing gutters are still in good condition and do not need replacement.

Sometimes, gutters might need to be removed to provide better access for roofers. This is often necessary to improve the installation of a drip edge or ensure the proper alignment of roofing materials. In such cases, the gutters can be reinstalled or new gutters can be put in place once the roofing work is completed.

If the existing gutters are older or damaged, it is generally advisable to replace them during the roof replacement process. This ensures that the new roof has a reliable gutter system that can effectively manage water drainage and protect the structural integrity of the home.

Installing New Gutters Post-Roof Replacement

After the roof replacement, professional roofing teams assess the roof pitch and local rainfall patterns to create effective gutter solutions tailored to your home. This ensures that the new gutters installed are capable of handling the specific water drainage needs of the property after the roof replaced.

Old gutters might be incompatible with the new roof type, which is why it’s important to install new gutters that are designed to work with the new roofing materials. This compatibility is crucial for preventing water damage and ensuring the longevity of both the roof and the gutter system.

To ensure proper functionality, contractors often clear the gutters of debris after the roof installation using a powerful blower. This step is essential for maintaining the effectiveness of the gutters and preventing any potential blockages that could compromise the new roof.

Financing Options for Roof and Gutter Replacements

A family discussing financing options for roof and gutter replacements with a contractor.

Financing a roof replacement and gutter installation can be a significant investment, but there are various options available to help homeowners manage the costs. Roof loans can cover expenses for roof or gutter replacements, typically ranging between $1,000 and $100,000. These loans provide the necessary funds to complete the project without having to pay the entire cost upfront.

Personal loans are another option, though they often come with higher interest rates compared to home equity loans due to the lack of collateral. Home equity loans and home equity lines of credit (HELOCs) allow homeowners to draw funds as needed, usually with lower interest rates, making them a more affordable financing option.

Government-insured loans can also provide favorable terms for home repairs, including options that require lower credit scores, making them accessible to a broader range of homeowners. Additionally, some roofing companies, including Dream Home Roofers, may offer financing directly or through partnering financial institutions, providing convenient payment plans tailored to your needs.

Using a credit card for roof repairs can be beneficial if the balance can be paid off within a promotional 0% interest period. This option allows homeowners to spread the cost over several months without incurring interest charges, provided they adhere to the promotional terms.

How to Choose the Right Roofing Contractor for Both Jobs

Choosing the right roofing contractor for both roof and gutter installations is crucial for ensuring quality workmanship and reliability. Start by discussing the contractor’s credentials, ensuring they are registered, bonded, and insured. This provides peace of mind that they meet industry standards and are protected against liability.

Experience is another critical factor. A contractor with more experience indicates tested workmanship and reliability, which is essential for such significant home improvement projects. At Dream Home Roofers, our extensive experience ensures that we deliver high-quality results every time.

Transparency about budget and timelines is also important. Make sure the contractor provides a clear estimate and timeline for the project, setting realistic expectations and ensuring accountability. This openness helps prevent misunderstandings and keeps the project on track.

Professionalism and reliability are essential traits to look for in a contractor. Check online reviews and ask for references to gauge their reputation. Contractors who resolve negative reviews and address customer concerns demonstrate a commitment to professionalism and customer satisfaction.

Finally, use a checklist to find contractors specializing in both roofing and gutter installation. This ensures they have the necessary skills and knowledge to handle both aspects of the project, providing a seamless and integrated service.

Summary

Combining roof and gutter installations under a single contractor offers numerous benefits, including efficient project coordination, enhanced cohesiveness, potential cost savings, and a shorter project timeline. This approach ensures that both systems are perfectly aligned and functioning optimally, protecting your home from water damage and other issues.

Seamless gutters and gutter guards are excellent investments for homeowners looking to enhance their home’s water drainage system. Seamless gutters provide a more reliable and aesthetically pleasing solution, while gutter guards reduce maintenance and prevent clogs, ensuring better water flow.

Choosing the right roofing contractor, such as Dream Home Roofers, is essential for achieving high-quality results. By considering credentials, experience, transparency, and professionalism, homeowners can make an informed decision and ensure their home improvement projects are completed to the highest standards.

Frequently Asked Questions

Can roofing contractors install gutters?

Yes, roofing contractors can install gutters, offering convenience and cost savings by managing both roofing and gutter installation together.

Why should I replace my gutters when replacing my roof?

Replacing your gutters when you replace your roof enhances functionality and ensures both systems work cohesively, ultimately reducing long-term maintenance costs. This cohesive approach promotes the overall efficiency of your home’s drainage system.

What are seamless gutters, and why should I consider them?

Seamless gutters are made from a single piece of material, which minimizes joints and the risk of leaks, ensuring a more reliable and visually appealing drainage system. Consider them for enhanced durability and improved aesthetics for your property.

What financing options are available for roof and gutter replacements?

For roof and gutter replacements, available financing options include roof loans, personal loans, home equity loans, HELOCs, government-insured loans, and credit card promotions, in addition to financing plans offered by some roofing companies. Consider your financial situation to determine the best choice for your needs.

How do I choose the right roofing contractor for both roof and gutter installations?

Choosing the right roofing contractor involves ensuring they have the necessary credentials, relevant experience, and a reputation for professionalism. Additionally, transparency regarding budget and timelines is crucial for a successful installation.

https://dreamhomeroofers.com/wp-content/uploads/2024/09/dhr-logo.png 0 0 Dream Home Roofers https://dreamhomeroofers.com/wp-content/uploads/2024/09/dhr-logo.png Dream Home Roofers2024-12-17 08:00:592025-01-03 20:07:14Do Roofers Install Gutters When Replacing Your Roof?
Understanding different types of roofing warranties.

How Long Can a Roof Last? Tips for Maximizing Roof Lifespan

November 19, 2024/in Roof Replacement, Roofing/by Dream Home Roofers

How long can a roof last? The lifespan of a roof depends mainly on the materials used, ranging from 15 years for asphalt shingles to over 100 years for materials like slate and metal. This article will explore various roofing materials, the factors that influence their longevity, and how you can extend the lifespan of your roof.

Key Takeaways

  • The lifespan of roofing materials varies significantly, with asphalt shingles lasting 15-30 years and metal roofs potentially lasting 40-70 years, while slate and clay tiles can last up to 200 years.
  • Key factors influencing roof longevity include the quality of installation, regular maintenance, environmental conditions, and proper ventilation and insulation.
  • Homeowners should recognize signs that indicate a roof needs replacement, such as missing shingles, roof leaks, and sagging areas, to prevent costly repairs and ensure safety.

Understanding Roof Lifespan by Material

Different roofing materials showcasing their lifespan and durability.


Different roofing materials offer varying lifespans, from short-term solutions to investments that last a lifetime. Knowing these differences helps you choose the best roofing material for your home and budget.

The longevity of a roof depends on the type of material used, with options ranging from asphalt shingles to metal roofs, and from wood shingles to slate and clay tiles. Each material comes with its own benefits and potential drawbacks.

Asphalt Shingle Roofs

Asphalt shingle roofs are one of the most common roofing materials due to their affordability and ease of installation. Typically, these roofs last between 15 to 30 years, with architectural shingles often outlasting the traditional three-tab variety. Manufacturing defects, extreme weather, and maintenance practices significantly influence the lifespan of an asphalt shingle roof.

Asphalt shingles might need replacement every 14 years in warmer climates, while they can last over 20 years in cooler regions.

Metal Roofs

Metal roofs are prized for their durability and longevity, generally lasting between 40 to 70 years. Some premium metals, like copper and zinc, can endure for over a century. The specific lifespan of a metal roof can vary based on the type and gauge of the metal used, influencing the roof’s life expectancy.

These roofs are highly resistant to weather extremes and require minimal maintenance, making them a cost-effective option over the long term.

Wood Shingles and Shakes

Wood shingles and shakes offer a natural, rustic aesthetic and typically last around 30 years with proper maintenance. Cedar is the preferred wood due to its natural resistance to decay and insects.

To preserve their longevity, regular maintenance like cleaning and repainting or staining every five years is necessary.

Slate and Clay Tile Roofs

Slate and clay tile roofs are among the longest-lasting roofing materials available, with slate roof tiles lasting between 75 to 200 years and clay tiles lasting 50 to 100 years. These materials are incredibly durable but require proper installation and regular maintenance to achieve their maximum lifespan.

Freezing and thawing cycles in colder climates can affect the longevity of clay tiles.

Key Factors Influencing Roof Longevity

Factors influencing roof longevity, including maintenance and installation quality.

Various factors significantly influence how long a roof lasts, regardless of the material used. The quality of installation, regular maintenance, environmental conditions, and proper ventilation and insulation all play crucial roles in determining a roof’s life expectancy.

Knowing these factors enables homeowners to take proactive steps to extend their roof’s lifespan.

Quality of Installation

High-quality installation is crucial for ensuring roof longevity. Poor installation practices, such as mistakes by inexperienced roofers, can lead to rapid deterioration and the need for frequent repairs. Hiring reputable and experienced roofing contractors prevents common issues like mold, mildew, and structural damage.

Furthermore, many contractor workmanship warranties cover labor and materials needed for repairs caused by installation errors, providing an added layer of protection.

Regular Maintenance

Routine maintenance is vital for extending any roof’s lifespan. Annual inspections help identify and fix minor problems before they escalate. Homeowners should perform seasonal maintenance tasks, such as cleaning gutters, removing debris, and checking for signs of damage after storms.

Ignoring maintenance can cause moisture retention and accelerated damage, compromising the roof’s integrity.

Environmental Conditions

Local climate and weather patterns significantly impact roof durability. For instance, roofs in northern regions must be fortified to support heavy snow and ice, while continuous sun exposure can cause roofing materials to dry out and crack. High winds, abrupt temperature changes, and moisture can also stress roofing materials, leading to premature failure.

Proper Ventilation and Insulation

Proper ventilation and insulation prevent moisture buildup and heat damage, both of which can shorten a roof’s lifespan. Poor roofing ventilation can lead to issues such as overheated shingles, ice dams, and mold growth. Maintaining adequate ventilation helps avoid these problems and contributes to the overall longevity of the roof.

Signs Your Roof Needs Replacement

Signs indicating a roof needs replacement, including missing shingles and leaks.

Recognizing the signs that indicate a roof needs replacement can save homeowners from more extensive damage and costly repairs. Common indicators include missing or damaged shingles, roof leaks, and sagging areas. Proactively evaluating these signs can prevent further deterioration and ensure the home’s safety and integrity.

Missing or Damaged Shingles

Cracked, loose, curling, or distorted shingles are clear indicators that an asphalt roof needs replacement. Large areas of missing or damaged shingles can expose the underlying materials to the elements, leading to further damage and potential leaks.

Regular shingle inspections and prompt issue resolution can prevent more significant problems later.

Roof Leaks and Water Damage

Visible water stains on ceilings or walls are clear indicators of potential roof leaks. Persistent leaks can lead to significant interior damage, including mold growth and structural issues. Ignoring roof leaks can lead to costlier repairs, so addressing them promptly is crucial.

Sagging Roof Areas

Sagging roof areas are a critical sign of potential failure in the roof’s structural integrity. This issue often suggests underlying problems such as compromised structural supports or moisture damage.

When sagging is evident, a full roof replacement is often necessary to ensure safety and stability.

Maximizing Your Roof’s Lifespan

Seasonal roof inspections to maximize lifespan and identify issues.


Regular upkeep and proactive measures are key to maximizing your roof’s lifespan. Seasonal inspections, cleaning gutters, and professional evaluations can significantly extend your roof’s durability and functionality.

These practices not only enhance the roof’s appearance but also prevent minor issues from escalating into costly repairs.

Seasonal Roof Inspections

Professional annual roof inspections are crucial for identifying early signs of wear and preventing costly repairs. Annual inspections can catch potential issues before they worsen.

The National Roofing Contractors Association suggests conducting roof inspections twice a year, preferably in spring and fall, to ensure optimal roof longevity.

Cleaning Gutters and Removing Debris

Cleaning gutters regularly prevents water overflow and ensures effective drainage. Blocked gutters can cause water accumulation, increasing the risk of leaks and damage. It is recommended to clean gutters at least twice a year to avoid these issues and maintain the roof’s integrity.

Professional Roof Evaluations

Professional evaluations can spot warning signs and offer maintenance recommendations to extend the roof’s lifespan. Regular assessments ensure minor issues are addressed promptly, preventing escalation.

Seeking professional evaluations after severe weather can uncover hidden damages that might not be visible during casual inspections.

Roofing Warranties Explained

Understanding different types of roofing warranties.


Knowing roofing warranties protects your investment. There are three primary types of warranties: standard manufacturer warranties, contractor workmanship warranties, and extended manufacturer warranties.

These warranties cover material defects and installation issues, offering peace of mind and financial protection.

Manufacturer’s Warranty

Manufacturer’s warranties typically last between 20 to 50 years and cover defects in the materials. These warranties often start with an initial complete replacement of defective shingles, but certain conditions, such as improper attic ventilation and contractor damage, can void the warranty.

Awareness of these conditions helps maintain warranty coverage.

Contractor’s Workmanship Warranty

A contractor’s workmanship warranty usually covers damage resulting from poor installation and typically lasts between 5 to 10 years. While it does not cover manufacturing defects or damage from typical hazards, it provides protection against installation errors.

Some states require contractors to offer a workmanship warranty, adding an extra layer of security for homeowners.

Schedule a Free Roof Inspection with Dream Home Roofers

Dream Home Roofers provides free on-site inspections to assess roof conditions and identify potential issues before they become costly repairs. Customers can schedule an inspection without any obligation, evaluating their roofing needs at no cost.

These evaluations plan necessary repairs or replacements, ensuring your roof remains in optimal condition.

Summary

Understanding the lifespan of your roof and the factors that influence it is key to maintaining a safe and durable home. By choosing the right materials, ensuring proper installation, and committing to regular maintenance, you can significantly extend your roof’s life. Regular inspections and professional evaluations are essential steps in this process. Take action today to protect your investment and ensure your home remains secure for years to come.

Frequently Asked Questions

Can a roof last 50 years?

Yes, a roof can last 50 years, but its lifespan largely depends on the quality and type of materials used. Proper maintenance and installation also play crucial roles in achieving this duration.

What is the average lifespan of a roof?

The average lifespan of a roof is around 30 years, but this can vary depending on the roofing material. Proper maintenance and environmental factors also play a significant role in determining its longevity.

How often should I inspect my roof?

It is advisable to inspect your roof at least once a year, with the National Roofing Contractors Association recommending twice a year, specifically in spring and fall, to ensure its condition is maintained. Regular inspections can help identify potential issues before they escalate.

What are the benefits of professional roof evaluations?

Professional roof evaluations are essential as they identify warning signs, recommend maintenance, and reveal hidden damages that may go unnoticed. This proactive approach ensures the longevity and integrity of your roof.

What types of warranties are available for roofs?

There are three primary types of roofing warranties: standard manufacturer warranties, which cover defects in materials; contractor workmanship warranties, which cover installation errors; and extended manufacturer warranties, which offer additional coverage for a longer period. Understanding these options is essential for protecting your investment.

https://dreamhomeroofers.com/wp-content/uploads/2024/11/Understanding-different-types-of-roofing-warranties.-1.png 1000 1500 Dream Home Roofers https://dreamhomeroofers.com/wp-content/uploads/2024/09/dhr-logo.png Dream Home Roofers2024-11-19 08:00:322025-01-01 19:43:04How Long Can a Roof Last? Tips for Maximizing Roof Lifespan

When Is the Best Time to Install a Roof?

November 14, 2024/in Roof Installation, Roof Replacement, Roofing/by Dream Home Roofers

Choosing the best time to install a roof is crucial. Factors like weather, materials, and contractor schedules play a big role. This article explores how different seasons impact roof installation to help you pick the best time for your project.

Key Takeaways

  • Roof installation timing matters; summer and fall are popular due to ideal weather, but winter can offer cost benefits with careful planning.
  • Spring is a great option for roof replacements due to mild weather, but be ready for potential rain delays.
  • Choosing the right roofing materials impacts durability; asphalt shingles thrive in warmer months, while metal roofs are versatile for any season.

Understanding Roofing Seasons

Understanding roofing seasons and their impact on roof installation.

The changing seasons can significantly influence roof replacement projects. Factors such as:

  • rain
  • snow
  • heat
  • humidity
  • crew scheduling

are all affected. Recognizing these seasonal impacts helps in scheduling roof replacements and maintaining high-quality service. Different roofing materials perform better under specific weather conditions, and selecting the right time for your roof installation can enhance its longevity and effectiveness.

Certain roofing materials are more suitable for specific weather conditions, which can influence their durability and performance. Proper planning and an understanding of seasonal effects allow for effective scheduling of roof replacements year-round, ensuring a durable roof.

Busy Season

Roof replacements are most common during the summer. Additionally, the fall also experiences a high volume of replacements. During these times, the demand for roof installation peaks due to the favorable weather conditions, leading to longer wait times for homeowners. If you’re planning to replace your roof during these months, be prepared for potential delays in appointments due to the high demand for roofing work.

Fall is particularly challenging for scheduling because reputable roofing companies are often at their busiest. Homeowners should plan well in advance to avoid these delays. Knowing the busy season dynamics helps in better preparation and timely completion of your roof replacement project.

Slow Season

Winter is typically considered the slow season for roof replacements due to lower demand. This season can present unique advantages, such as lower material costs and increased availability of contractors, making it potentially more affordable for homeowners. However, the extreme cold temperatures can complicate roofing projects, making shingles brittle and harder to install.

Additionally, the shorter daylight hours in winter can affect the completion time of roofing projects. Homeowners should also be mindful of holiday commitments that might cause scheduling complications during this season.

Although winter presents challenges, careful planning can make winter roof replacements successful and cost-effective.

Spring Roof Installation

Spring roof installation benefits and considerations.

Spring is an excellent time for roof installation due to milder weather and less humidity, making it an ideal choice for many homeowners. This season offers moderate temperatures that benefit the installation process and allow contractors to work comfortably.

However, homeowners should be aware of the potential for spring storms, which can cause delays in the project timeline.

Pros of Spring Roof Installation

One of the main advantages of spring roof installation is the temperate weather, which helps prevent extreme temperatures from damaging roofing materials. The mild weather conditions also enhance worker comfort and efficiency, leading to a smoother installation process. Spring typically features more predictable weather patterns than winter, aiding in the scheduling of roofing projects.

Additionally, addressing any winter damage early in the year can prevent further issues and prepare your home for the upcoming seasons. Planning a spring roof replacement allows for high-quality installation, avoiding the extreme weather challenges of summer and winter.

Cons of Spring Roof Installation

Despite the favorable conditions, spring roof installations can face challenges due to unpredictable spring storms. These storms can hinder roof installation timelines, causing potential delays that typically last a day or two. Increased rain during this season is a common issue that can disrupt roofing projects.

Homeowners should be prepared for these weather-related delays and plan accordingly. While the mild temperatures are beneficial, the unpredictability of spring weather can pose significant challenges to the scheduling and completion of roof replacement projects.

Summer Roof Installation

Summer roof installation advantages and challenges.

Summer is generally the most favorable time to schedule roof replacements due to warm temperatures and more predictable weather. Summer roof replacement is often recommended as roofing companies tend to be busier in the summer, so advanced scheduling is crucial.

Despite the increased demand, the combination of warm weather and longer daylight hours makes summer an ideal time for roof installations.

Pros of Summer Roof Installation

Warm summer temperatures enhance the adhesion of roofing materials, making it an excellent time for installing asphalt shingles. Asphalt shingles perform best when installed in temperatures between 60°F and 100°F, ensuring they seal properly and maintain their integrity. Scheduling roofing work in peak summer months can lead to quicker project completions due to extended daylight hours.

Additionally, the generally reliable weather conditions during the summer season minimize the risk of weather-related delays. Scheduling a roof replacement in summer ensures optimal installation conditions and efficient project completion.

Cons of Summer Roof Installation

However, the extreme heat during summer can weaken new materials, making roof installation problematic. High temperatures can create unworkable conditions for workers, leading to potential delays in the installation process. If a roof project is delayed too far into summer, the extreme heat may affect the installation process and the performance of the roofing materials.

Humidity and potential summer storms can also complicate roofing projects, adding to the challenges of scheduling and completing roof replacements during this busy season.

Despite these issues, with proper planning and timely execution, summer can still be an effective time for roof installations.

Fall Roof Installation

Fall roof installation pros and considerations.

Fall is widely considered the optimal time for roof replacement due to favorable conditions. The cool, consistent weather during this season is less likely to disrupt installations, making it an ideal time for roofing projects.

Fall weather allows for better shingle sealing and adhesion, ensuring a quality roof replacement that prepares your home efficiently for winter.

Pros of Fall Roof Installation

Fall provides ideal temperatures for roof installations, especially for sealing asphalt shingles effectively. The cool and stable weather conditions minimize heat-related complications and enhance the overall quality of the installation. The likelihood of severe weather occurrences decreases in fall, making this season suitable for timely project completion.

Additionally, planning for a fall roof installation is advisable due to generally accessible contractor availability, leading to efficient scheduling and minimal disruptions from unexpected storms or heavy rainfall. Opting for a fall roof replacement guarantees a high-quality installation, maximizing durability and effectiveness.

Cons of Fall Roof Installation

The high demand for roof installation during the fall season requires early planning and scheduling. Homeowners should plan their roof replacement about 1 to 2 months in advance to ensure timely installation during fall. Higher demand makes scheduling difficult, leading to potential delays in appointments.

Due to this high demand, roofing prices could be higher than at other times of the year. Despite these challenges, early planning and proactive scheduling can help you secure a spot with a reputable roofing contractor and avoid potential delays.

Winter Roof Installation

Winter roof installation benefits and challenges.

Winter is a less conventional but viable option for winter roof replacement, provided experienced contractors are engaged. While cold weather can complicate the installation process, premium Owens Corning materials are ideal for harsh winter conditions, ensuring durability. If you need your roof replaced, consider the benefits of winter installation.

With proper planning and the right professionals, winter roof replacements can be successful and cost-effective.

Pros of Winter Roof Installation

Increased contractor availability during winter months allows homeowners to find the right professional for their projects more easily. With a decrease in the number of roofing projects during winter, homeowners can expect shorter wait times for their roof replacements. The combination of greater contractor flexibility and reduced project demand makes winter an appealing time for roof installation.

Winter roof installation offers unique advantages such as lower prices and quicker scheduling due to reduced demand. Using these advantages, a high-quality roof replacement can be achieved without the high costs and scheduling challenges of busier seasons.

Cons of Winter Roof Installation

Cold weather can hinder the performance of roofing tools and materials, making installation more challenging. Asphalt shingles may become brittle and are more likely to break if installed below 40 degrees Fahrenheit. When working with asphalt shingles in cold conditions, flexibility is reduced, making them harder to cut and nail.

Temperatures above 40°F are ideal for installing shingles in winter to ensure proper sealing and material integrity. Additionally, roofing projects may take longer in winter due to challenges with materials and shorter daylight hours. The need for extra labor costs might arise due to hand-sealing techniques required in colder weather.

Despite these challenges, with careful planning and the right materials, winter roof replacements can still be effective.

How to Plan Your Roof Installation

Proper planning is crucial for a successful roof replacement, regardless of the season. Weather conditions significantly influence the scheduling and pace of roofing projects. Scheduling a roof replacement during moderate weather conditions can enhance the installation quality and ensure the longevity of the roofing materials.

Addressing any urgent issues, such as missing shingles or leaking roofs, promptly can prevent further damage and potentially save on heating bills during winter. Planning ahead and considering seasonal impacts enable homeowners to achieve a high-quality roof replacement that fits their needs and budget.

Consulting with Experienced Roofing Contractors

Hiring an experienced roofing contractor ensures that your roof installation is done right, regardless of the season. Experienced roofing contractors like Dream Home Roofers provide high-quality roof replacement that adapts to varying seasonal conditions. With a complete range of services, including both roof repairs and replacements, these professionals can handle any roofing project.

Roofing companies are committed to delivering high-quality services to homeowners, ensuring satisfaction and longevity of work. Consulting with experienced roofing contractors allows you to benefit from their expertise and achieve a reliable and durable roof installation.

Financing Options and Discounts

There are various financial support options available for roof replacements, making them more affordable for homeowners. Financing options, such as 0% financing for home improvements, allow homeowners to upgrade their roofs without the burden of upfront costs. Current discounts may include offers such as 50% off materials, further reducing the cost of roof replacements.

Utilizing these financing options and discounts helps homeowners manage roof replacement costs more effectively. Proper planning and financial support can make high-quality roof replacements accessible and affordable for all.

Choosing the Right Roofing Materials

Selecting the right roofing materials is essential for the success and longevity of your roof replacement project. Different roofing materials have varying performance based on seasonal weather conditions, which can impact their effectiveness.

Understanding the specific requirements and benefits of each material can help you make an informed decision.

Asphalt Shingles

Asphalt shingles are a popular roofing material choice due to their balance of cost and performance. Best installed in warm weather, preferably in spring, summer, or early fall, asphalt shingles require temperatures above 45°F for proper installation. Extreme heat has the potential to soften asphalt shingles. This can lead to a decrease in their overall durability, especially with asphalt shingle roofs.

In colder weather, asphalt shingles may not seal properly, posing challenges for roofing materials. The type of roofing material and the timing of installation are important factors. They can significantly affect both the success and longevity of a roofing project. Choosing asphalt shingles and scheduling installation during favorable weather ensures a high-quality roof replacement.

Metal Roofs

Metal roofs are a versatile choice that can be installed in a variety of weather conditions, making them a reliable option for many homeowners. Unlike asphalt shingles, metal roofs can be installed under various weather conditions without compromising their integrity. However, specific temperature requirements must still be adhered to during installation to ensure proper material handling and performance.

The durability and versatility of metal roofs make them suitable for different climates and weather patterns. Opting for metal roofs provides homeowners with a long-lasting and resilient roofing solution that performs reliably year-round.

Premium Owens Corning Roofing Materials

Premium Owens Corning roofing materials provide enhanced durability and aesthetic appeal, making them suitable for diverse climates. These materials are designed to withstand various weather conditions, ensuring performance and longevity. The aesthetic appeal of Owens Corning materials also enhances the overall appearance of roofs, adding value to homes.

Due to their robust design, Owens Corning materials are ideal for protecting against harsh weather conditions, ensuring your home remains secure and visually appealing. Selecting premium Owens Corning roofing materials ensures a high-quality roof replacement that blends durability with aesthetic appeal.

Summary

Choosing the best time to install a roof requires careful consideration of various factors, including weather conditions, material performance, and contractor availability. Each season offers distinct advantages and challenges for roof replacement projects. Spring provides moderate temperatures and efficient scheduling, while summer offers warm weather and longer daylight hours. Fall is widely regarded as the optimal season due to its favorable conditions and minimal weather disruptions. Winter, although less conventional, can still be a viable option with the right planning and materials.

To ensure a successful roof replacement, homeowners should consult with experienced roofing contractors like Dream Home Roofers, who can provide high-quality installations tailored to seasonal conditions. Taking advantage of financing options and discounts can also make roof replacements more affordable.

Ultimately, the best time to install a roof depends on your specific needs, budget, and the local climate. By considering all these factors and planning ahead, you can achieve a high-quality roof replacement that enhances the durability and aesthetics of your home.

Frequently Asked Questions

What discount is currently being offered on materials for roof replacements?

You can snag a great deal right now with Dream Home Roofers, offering a whopping 50% discount on materials for roof replacements!

What financing option is available for roof replacements?

You can explore 0% financing options for roof replacements, making it easier to manage the costs without interest. It’s a great way to ensure your home stays protected without breaking the bank!

What type of roofing materials does Dream Home Roofers work with?

Dream Home Roofers primarily uses premium Owens Corning roofing materials, offering a solid choice for your roofing needs. You’re in good hands with their selection!

Why is fall considered the optimal time for roof replacement?

Replacing your roof in the fall is ideal because the cool weather helps shingles seal better and reduces the likelihood of weather-related delays. It’s a smart move to ensure your roof is ready for winter.

Can roofs be replaced in winter?

Absolutely, roofs can be replaced in winter with the right materials and skilled contractors. Just make sure to choose durable products to withstand the cold!

0 0 Dream Home Roofers https://dreamhomeroofers.com/wp-content/uploads/2024/09/dhr-logo.png Dream Home Roofers2024-11-14 08:00:322024-11-14 08:00:32When Is the Best Time to Install a Roof?

Roof Shingle Types Architecture: A Comprehensive Overview

October 29, 2024/in Roofing/by Dream Home Roofers

Need to choose the right roof shingle for your home? This guide breaks down the types of roof shingles and their architectural impacts, including various roof shingle types architecture. Discover which shingle types fit different home styles and why each might be the best choice for your roofing needs.

Key Takeaways

  • Asphalt shingles are popular for their cost-efficiency and variety, with three main types: three-tab, architectural, and luxury shingles, each offering different aesthetics and durability.
  • Architectural shingles provide enhanced durability, aesthetic appeal, and overall value compared to traditional three-tab shingles, making them a preferred choice for many homeowners.
  • Choosing the right architectural shingles involves considering factors like home style, climate, and budget, while professional installation and routine maintenance are crucial for maximizing their lifespan.

Understanding Asphalt Shingles

An illustration showing different types of asphalt shingles including architectural shingles and laminated shingles.


Asphalt shingles are a staple in the roofing industry, favored for their aesthetic appeal, ease of installation, and cost-efficiency. These roofing shingles are designed to suit various climates and are known for their long-lasting performance and reliability. Among the different types of asphalt roofing shingles, three-tab shingles, architectural shingles, and luxury shingles are the most common.

Asphalt shingles cater to various needs and preferences with their unique benefits. Whether you’re looking for a simple, cost-effective solution or a high-end, stylish option, there’s a shingle type that fits your requirements. Let’s explore these categories in more detail, starting with the ever-popular three-tab shingles.

Three-Tab Shingles

Three-tab shingles are perhaps the most recognizable type of asphalt shingle. Made from a single layer of asphalt-coated fiberglass, these shingles are cut into three equal tabs, giving them a flat, uniform appearance. They are lightweight, easy to install, and have a lifespan of up to 20 years, making them a cost-effective option for many homeowners.

Their simple design and functionality have made them a popular choice in residential roofing projects.

Architectural Shingles

Architectural shingles, also known as dimensional or laminated shingles, offer a significant upgrade from traditional three-tab shingles. These shingles are crafted with multiple layers of fiberglass mat, which gives them a dimensional and textured appearance. This layered design not only enhances the shingle’s aesthetic appeal but also contributes to a more robust and durable roofing solution.

One of the standout features of architectural shingles is their versatility. They come in various colors, styles, and textures, allowing homeowners to customize their roof to match their home’s style and personal taste. Additionally, they can mimic the look of natural materials like wood shakes, slate, and tile, adding architectural interest and significantly boosting curb appeal.

They protect your home from the elements while enhancing its overall appearance.

Luxury Shingles

For those looking to make a bold statement, luxury shingles, also known as designer architectural laminated shingles, are an excellent choice. These shingles are characterized by their unique shapes, colors, and superior durability.

Ideal for estate homes or properties of distinction, luxury shingles offer unmatched curb appeal and weather resistance, making them a premium option for discerning homeowners.

Benefits of Architectural Shingles

An artistic representation of a house with architectural shingles, showcasing their aesthetic appeal.


Architectural shingles have become a favorite among homeowners and roofing contractors alike, thanks to their blend of style and functionality. They provide a more visually appealing option compared to traditional three-tab shingles, with varied profiles and textures that add depth and character to any roof. Let’s dive deeper into the specific benefits that make architectural shingles a standout choice.

The benefits of architectural shingles can be grouped into three main categories: durability and weather resistance, aesthetic appeal, and cost vs. value. Each of these aspects plays a crucial role in making architectural shingles a preferred choice for residential roofing projects.

Durability and Weather Resistance

One of the most compelling reasons to choose architectural shingles is their durability. These shingles can withstand severe weather conditions, thanks to their multi-layered construction which enhances their thickness and strength. Typically, architectural shingles have a lifespan of up to 20 years, with upgraded versions lasting even longer, between 25 to 30 years. This resilience makes them an excellent choice for areas prone to harsh weather.

At Dream Home Roofers, we use high-quality Owens Corning products known for their durability and performance. A durable roof is essential for protecting your home from the elements, and architectural shingles excel in providing that protection. Their multi-layered design also makes them more resistant to wind and weather impacts, ensuring your roof remains intact even during severe storms.

Aesthetic Appeal

The aesthetic appeal of architectural shingles is another significant advantage. Their multi-layered construction creates a textured look that enhances the visual appeal of your home. Available in a wide range of colors and styles, these shingles allow homeowners to customize their roof to match their personal taste and the overall aesthetics of their home.

When selecting architectural shingles, consider factors such as local climate, aesthetic preferences, and budget to ensure a cohesive look for your home.

Cost vs. Value

While architectural shingles may come with a higher upfront cost compared to traditional asphalt shingles, their long-term benefits often justify the investment. Each bundle of architectural shingles typically ranges from $35 to $45, reflecting their enhanced features and durability.

Although they are initially more expensive, their longevity and reduced need for repairs can make them a more economical choice over time. Homeowners should assess the total cost of materials and installation when budgeting for architectural shingles.

Comparing Architectural Shingles to Other Roofing Materials

A comparison illustration of architectural shingles versus other roofing materials like metal and wood shakes.


When considering a new roof, it’s essential to compare architectural shingles with other roofing materials to make an informed decision. Architectural shingles provide a unique combination of durability, aesthetics, and increased property value. However, different roofing materials offer varying benefits and drawbacks, depending on the local climate and specific needs of the homeowner.

Let’s explore how architectural shingles stack up against metal roofing, wood shakes, and slate tile shingles in terms of cost, durability, and overall performance. Each of these materials has distinct characteristics that may make them more or less suitable for your roofing project.

Metal Roofing

Metal roofing is known for its longevity and durability, often lasting several decades longer than architectural shingles. However, this durability comes at a higher cost, with metal roofing systems typically ranging from $8 to $16 per square foot, compared to $2 to $6 per square foot for architectural shingles. The installation of metal roofs is also more complex and time-consuming, requiring skilled labor and additional time compared to architectural shingles.

Despite the higher cost and installation complexity, metal roofs offer exceptional durability and can withstand severe weather conditions. They are an excellent choice for homes in areas prone to extreme weather, but their higher upfront cost and longer installation time may be a consideration for some homeowners.

Wood Shakes

Wood shakes, typically made from cedar shakes or redwood, offer a rustic and natural appearance that appeals to many homeowners. However, they require more maintenance compared to architectural shingles and are more susceptible to weather-related damage.

While wood shakes provide a charming, homespun look, the increased maintenance and potential for higher long-term costs may make architectural shingles a more practical choice for many homeowners.

Slate Tile Shingles

Slate tile shingles are a premium roofing option known for their elegance and durability. However, they are significantly heavier than architectural shingles, which can impact installation and structural requirements. The cost of slate tile roofing is also much higher, making it a less accessible option for many homeowners.

Architectural shingles, with their multidimensional design, can mimic the look of slate tiles at a fraction of the cost, offering a more affordable yet stylish alternative. Architectural roofing shingles provide a similar aesthetic while enhancing durability.

How to Choose the Right Architectural Shingles for Your Home

An illustrated guide on choosing architectural shingles based on home style and color coordination.


Choosing the right architectural shingles for your home involves considering several factors, including climate, architectural design, longevity, aesthetics, and budget. Consider your style preferences and home needs when selecting upgraded architectural shingles. Additionally, selecting a reliable roofing contractor is crucial for effective installation and maintenance.

Let’s delve into specific considerations such as home style and color coordination, local climate, and budget and financing options to help you make an informed decision.

Home Style and Color Coordination

When choosing architectural shingles, consider how they will complement your home’s style and color scheme. Architectural shingles are available in numerous colors, textures, and designs, allowing homeowners to customize their roof’s look. Key considerations include:

  • Matching the shingle color with your home’s style
  • Using samples in different lighting conditions
  • Consulting with professionals to ensure a coordinated appearance

Keeping trim or shutter colors within the same color family as the roof can also enhance the overall aesthetic.

Local Climate Considerations

The local climate plays a crucial role in determining the appropriateness of roofing materials. Asphalt shingles and asphalt roofing are favored in cold climates due to their resilience against freeze-thaw cycles and ability to insulate.

In hot, dry climates, materials like clay tiles and metal roofs are recommended for their heat-reflecting properties. In humid and tropical regions, algae-resistant asphalt shingles and metal roofing are preferred to combat moisture and prevent algae growth.

In regions prone to strong winds and storms, high wind-resistant asphalt shingles and metal roofing are ideal due to their durability. Coastal regions benefit from roofing materials that resist saltwater corrosion, such as metal roofs and treated wood shingles.

Budget and Financing Options

Budget is a critical factor when choosing roofing materials. Roofing financing allows homeowners to address urgent roofing needs without upfront costs, spreading payments over time. Many roofing contractors, including Dream Home Roofers, offer financing options that make it easier for homeowners to manage the cost of roof replacement. Common financing methods include personal loans, home equity loans, and specialized roofing loans offered by contractors.

The approval process for roofing loans is generally faster than traditional loans, often providing quick access to funds. Home equity loans typically offer lower interest rates but require sufficient equity in the home for approval. Some financing options may include zero-interest plans for a limited time, allowing homeowners to pay off loans without extra costs.

Credit cards are another financing option but should be used cautiously due to high interest rates. Cash-out refinancing allows homeowners to refinance their mortgage for more than owed and use the difference for roofing projects.

Installation and Maintenance of Architectural Shingles

An illustration depicting proper installation techniques for architectural shingles.


Proper installation and routine maintenance are crucial for ensuring the longevity and performance of architectural shingles. Professional installation techniques are essential for protecting your home from the elements and preventing structural damage. Routine maintenance enhances the lifespan of architectural shingles, protecting the investment homeowners have made in their roofs.

Let’s explore the importance of proper installation techniques, routine maintenance tips, and how to deal with damage and repairs to keep your roof in top condition.

Proper Installation Techniques

Professional installation is crucial for ensuring that architectural shingles provide optimal protection and performance. Many architectural shingles come with extensive warranties, sometimes lasting up to 50 years, depending on the manufacturer, which indicates their longevity when installed correctly. These shingles are designed to endure severe weather, boasting a lifespan that can exceed 30 years when installed properly.

Asphalt shingles are easier to install due to their lighter weight and simpler application process, making professional installation beneficial for optimal performance.

Routine Maintenance Tips

Regular maintenance is essential for maximizing the lifespan of your architectural shingles. Conducting regular inspections helps catch minor issues before they escalate. Ensuring proper drainage by cleaning debris from the roof and gutters prevents damage to the shingles.

These routine maintenance practices can significantly extend the lifespan and performance of architectural shingles for homeowners.

Dealing with Damage and Repairs

Handling damage and repairs promptly is crucial for maintaining the integrity of your roof. Replacing damaged architectural shingles involves lifting the surrounding shingles and removing the nails. New shingles should be sealed with asphalt plastic cement to ensure wind resistance after replacement.

Regularly inspecting your roof for signs of damage can help prevent more significant issues down the line. If a significant number of shingles are cracked or missing, consider a full replacement.

Why Choose Dream Home Roofers?

Choosing the right roofing contractor is just as important as selecting the right roofing materials. Dream Home Roofers stand out for their commitment to quality, customer satisfaction, and current promotions that make roofing projects more affordable. By using premium Owens Corning materials and ensuring expert installation, Dream Home Roofers deliver long-lasting and aesthetically pleasing roofs.

Dream Home Roofers prioritize customer satisfaction with comprehensive guarantees on their services. Their workmanship warranty lasts for the lifetime of the home, providing clients with peace of mind knowing their investment is protected.

Quality Materials and Workmanship

Dream Home Roofers use top-tier Owens Corning materials and are recognized as Owens Corning Platinum Preferred Contractors. This designation ensures that installations are carried out by experts, maintaining the warranty and performance of the roofing materials.

The combination of high-quality materials and expert workmanship results in a durable, resilient, and visually appealing roof.

Customer Satisfaction Guarantee

Dream Home Roofers offer an exclusive workmanship warranty that lasts for the lifetime of the home. This lifetime warranty assures clients that their investment is well-protected, reinforcing trust in the quality of the services provided.

Such guarantees ensure that choosing Dream Home Roofers for your roofing needs is a decision you can rely on for years to come.

Summary

In summary, architectural shingles offer a blend of durability, aesthetic appeal, and cost-effectiveness that make them a preferred choice for many homeowners. Understanding the different types of asphalt shingles, including three-tab, architectural, and luxury shingles, helps in making an informed decision. Comparing architectural shingles with other roofing materials like metal roofing, wood shakes, and slate tile shingles highlights their unique advantages and practical benefits.

Choosing the right architectural shingles involves considering factors such as home style, local climate, and budget. Proper installation and routine maintenance are crucial for ensuring the longevity and performance of your roof. Dream Home Roofers, with their quality materials, expert workmanship, and customer satisfaction guarantees, provide an excellent choice for any roofing project. Take advantage of their current promotions to make your roofing upgrade more affordable and stress-free.

Frequently Asked Questions

What promotion is currently being offered by Dream Home Roofers?

Dream Home Roofers is currently offering a promotion that includes 50% off materials and 0% financing on full roof replacements with approved credit. This is an excellent opportunity for homeowners looking to enhance their roofs affordably.

What types of roofing materials does Dream Home Roofers work with?

Dream Home Roofers specializes in premium Owens Corning roofing materials, including architectural and asphalt shingles. Rest assured, you can expect quality options for your roofing needs.

What are architectural shingles?

Architectural shingles are a premium type of asphalt roofing that feature multiple layers, offering enhanced durability and an attractive, dimensional appearance compared to standard three-tab shingles.

What are dimensional shingles?

Dimensional shingles, or architectural shingles, are premium asphalt roofing materials designed with a multi-layered construction that adds depth and texture to your roof. Their enhanced durability and aesthetic appeal make them a popular choice for homeowners.

What financing options does Dream Home Roofers offer?

Dream Home Roofers provides flexible financing options, enabling homeowners to upgrade their homes without the pressure of upfront costs. This makes it easier to manage expenses while enhancing your living space.

https://dreamhomeroofers.com/wp-content/uploads/2024/09/dhr-logo.png 0 0 Dream Home Roofers https://dreamhomeroofers.com/wp-content/uploads/2024/09/dhr-logo.png Dream Home Roofers2024-10-29 08:00:442025-01-03 18:12:09Roof Shingle Types Architecture: A Comprehensive Overview

What Questions to Ask a Roofer

July 8, 2024/in Roofing/by Dream Home Roofers

When it’s time to replace or repair your roof, finding the right contractor is crucial. Your roof is a significant investment, and ensuring it’s in capable hands can save you a lot of headaches down the road. If you’re wondering what questions to ask a roofer, here are essential questions you should ask any potential roofer before signing on the dotted line.

Essential Questions to Ask

1. Are You Licensed and Insured?
Verify that the roofer is licensed and insured to ensure they meet industry standards and protect you from liability.
2. Can You Provide References?
Check references to gauge the roofer’s reliability and work quality.
3. What Warranties Do You Offer?
Inquire about warranties on both materials and workmanship to safeguard your investment.
4. Do You Have Experience with My Type of Roof?
Ensure the roofer has experience with your specific roofing material.
5. What Is Your Estimated Timeline?
Ask about the project’s start and completion dates to set clear expectations.
6. How Do You Handle Unexpected Issues?
Find out how the roofer addresses unforeseen problems like water damage or structural issues.
7. Can I Get a Written Estimate?
A detailed, written estimate helps prevent cost surprises.
8. How Do You Ensure Job Site Safety?
Discuss safety protocols to protect workers and your property.
9. What Is Your Cleanup Process?
Ensure the roofer will leave your property clean and debris-free.
10. How Do You Handle Payments?
Understand the payment schedule and methods to avoid misunderstandings.

Why Choose Dream Home Roofers?

When it comes to reliability and expertise, Dream Home Roofers are the ones to trust. Fully licensed and insured, we offer comprehensive warranties and transparent communication throughout the entire project. Our extensive experience with various roofing materials, commitment to safety, and thorough cleanup process ensures a hassle-free experience.

Reach Out to Our Roofing Professionals Today

Ready to repair or replace your roof with confidence? Reach out to Dream Home Roofers today. With our commitment to quality, extensive experience, and dedication to customer satisfaction, we’re here to ensure your roofing project exceeds expectations. Contact us online today to schedule a consultation and discover why homeowners trust Dream Home Roofers for their roofing needs, or if you’re still wondering what questions to ask a roofer.

https://dreamhomeroofers.com/wp-content/uploads/2024/09/dhr-logo.png 0 0 Dream Home Roofers https://dreamhomeroofers.com/wp-content/uploads/2024/09/dhr-logo.png Dream Home Roofers2024-07-08 19:07:572025-01-03 21:04:25What Questions to Ask a Roofer

Pages

  • About us
  • Blogs
  • Careers
  • Contact Us
  • Current Specials at Dream Home Roofers
  • Feedbacks
  • Financing
  • Gutter Guards in the Delaware Valley
  • Gutters in Delaware Valley
  • Home
  • No Office Location
  • Privacy Policy
  • Rate
  • Reliable Roof Repair Services in Allentown, PA
  • Reliable Roof Repair Services in Atlantic City, NJ
  • Reliable Roof Repair Services in Bethesda, MD
  • Reliable Roof Repair Services in Bethlehem, PA
  • Reliable Roof Repair Services in Blairstown, NJ
  • Reliable Roof Repair Services in Boonsboro, MD
  • Reliable Roof Repair Services in Bowie, MD
  • Reliable Roof Repair Services in Burlington, NJ
  • Reliable Roof Repair Services in Camden, NJ
  • Reliable Roof Repair Services in Cherry Hill, NJ
  • Reliable Roof Repair Services in Chester, PA
  • Reliable Roof Repair Services in Clifton, NJ
  • Reliable Roof Repair Services in Columbia, MD
  • Reliable Roof Repair Services in Dundalk, MD
  • Reliable Roof Repair Services in Egg Harbor, NJ
  • Reliable Roof Repair Services in Ellicott City, MD
  • Reliable Roof Repair Services in Elm, PA
  • Reliable Roof Repair Services in Frankford, NJ
  • Reliable Roof Repair Services in Freehold, NJ
  • Reliable Roof Repair Services in Gaithersburg, MD
  • Reliable Roof Repair Services in Germantown, MD
  • Reliable Roof Repair Services in Glen Burnie, MD
  • Reliable Roof Repair Services in Gloucester Township, NJ
  • Reliable Roof Repair Services in Hamilton, NJ
  • Reliable Roof Repair Services in Harrisburg, PA
  • Reliable Roof Repair Services in Lancaster, PA
  • Reliable Roof Repair Services in Laurel, MD
  • Reliable Roof Repair Services in Lebanon, PA
  • Reliable Roof Repair Services in Levittown, PA
  • Reliable Roof Repair Services in Mahwah, NJ
  • Reliable Roof Repair Services in Monroe, NJ
  • Reliable Roof Repair Services in Mount Laurel, NJ
  • Reliable Roof Repair Services in Norristown, PA
  • Reliable Roof Repair Services in Philadelphia, PA
  • Reliable Roof Repair Services in Potomac, MD
  • Reliable Roof Repair Services in Reading, PA
  • Reliable Roof Repair Services in Rockville, MD
  • Reliable Roof Repair Services in Severn, MD
  • Reliable Roof Repair Services in Silver Spring, MD
  • Reliable Roof Repair Services in Smithsburg, MD
  • Reliable Roof Repair Services in Somerset, NJ
  • Reliable Roof Repair Services in Tinton Falls, NJ
  • Reliable Roof Repair Services in Towson, MD
  • Reliable Roof Repair Services in Union, NJ
  • Reliable Roof Repair Services in Vineland, NJ
  • Reliable Roof Repair Services in Voorhees, NJ
  • Reliable Roof Repair Services in Waldorf, MD
  • Reliable Roof Repair Services in Washington Township, NJ
  • Reliable Roof Repair Services in Weston, PA
  • Review Feedback Form
  • Reviews
  • Roof Inspection in Delaware Valley
  • Roof Inspection in Turnersville, NJ
  • Roof Inspection in West Caldwell, NJ
  • Roof Inspections in Laurel, MD
  • Roof Repair
  • Roof Repair in Cherry Hill, NJ
  • Roof Repair in Columbia, MD
  • Roof Repair in Delaware Valley
  • Roof Repair in Harrisburg, PA
  • Roof Repair in Lancaster, PA
  • Roof Repair in Philadelphia, PA
  • Roof Repair in Turnersville, NJ
  • Roof Repair in Vineland, NJ
  • Roof Repair in West Caldwell, NJ
  • Roof Repair Services in Bethlehem, King of Prussia, PA
  • Roof Repair Services in King of Prussia, PA
  • Roof Repair Services in Norristown, King of Prussia, PA
  • Roof Replacement in Cherry Hill, NJ
  • Roof Replacement in Columbia, MD
  • Roof Replacement in Delaware Valley
  • Roof Replacement in Harrisburg, PA
  • Roof Replacement in King of Prussia, PA
  • Roof Replacement in Lancaster, PA
  • Roof Replacement in Laurel, MD
  • Roof Replacement in Philadelphia, PA
  • Roof Replacement in Turnersville, NJ
  • Roof Replacement in Vineland, NJ
  • Roof Replacement in West Caldwell, NJ
  • Roofing Company in Fairfax, VA
  • Roofing Company in King of Prussia, PA
  • Roofing Company in Laurel, MD
  • Roofing Company in Maryland
  • Roofing Company in New Jersey
  • Roofing Company in Pennsylvania
  • Roofing Company in Turnersville, NJ
  • Roofing Company in West Caldwell, NJ
  • Roofing in Allentown, PA
  • Roofing in Atlantic City, NJ
  • Roofing in Bethesda, MD
  • Roofing in Bethlehem, PA
  • Roofing in Blairstown, NJ
  • Roofing in Boonsboro, MD
  • Roofing in Bowie, MD
  • Roofing in Burlington, NJ
  • Roofing in Camden, NJ
  • Roofing in Cherry Hill, NJ
  • Roofing in Chester, PA
  • Roofing in Clifton, NJ
  • Roofing in Columbia, MD
  • Roofing in Delaware Valley
  • Roofing in Delaware Valley
  • Roofing in Delaware Valley
  • Roofing in Dundalk, MD
  • Roofing in Egg Harbor, NJ
  • Roofing in Ellicott City, MD
  • Roofing in Elm, PA
  • Roofing in Fairfax, VA
  • Roofing in Frankford, NJ
  • Roofing in Freehold, NJ
  • Roofing in Gaithersburg, MD
  • Roofing in Germantown, MD
  • Roofing in Glen Burnie, MD
  • Roofing in Gloucester Township, NJ
  • Roofing in Hamilton, NJ
  • Roofing in Harrisburg, PA
  • Roofing in King of Prussia, PA
  • Roofing in King Of Prussia, PA
  • Roofing in Lancaster, PA
  • Roofing in Laurel, MD
  • Roofing in Laurel, MD
  • Roofing in Lebanon, PA
  • Roofing in Lehigh Valley
  • Roofing in Levittown, PA
  • Roofing in Mahwah, NJ
  • Roofing in Maryland
  • Roofing in Monroe, NJ
  • Roofing in Mount Laurel, NJ
  • Roofing in New Jersey
  • Roofing in Norristown, PA
  • Roofing in Pennsylvania
  • Roofing in Philadelphia, PA
  • Roofing in Potomac, MD
  • Roofing in Reading, PA
  • Roofing in Rockville, MD
  • Roofing in Severn, MD
  • Roofing in Silver Spring, MD
  • Roofing in Smithsburg, MD
  • Roofing in Somerset, NJ
  • Roofing in South Jersey
  • Roofing in Tinton Falls, NJ
  • Roofing in Towson, MD
  • Roofing in Turnersville NJ
  • Roofing in Turnersville, NJ
  • Roofing in Union, NJ
  • Roofing in Vineland, NJ
  • Roofing in Voorhees, NJ
  • Roofing in Waldorf, MD
  • Roofing in Washington Township, NJ
  • Roofing in West Caldwell, NJ
  • Roofing in West Caldwell, NJ
  • Roofing in Weston, PA
  • Service Area
  • Services
  • Template About Our Team
  • Template All Brands Logos
  • Template All Brands Logos New
  • Template Blogs
  • Template Certification
  • Template Financing Banner
  • Template Gutter Brands
  • Template our Process
  • Template Our Work
  • Template Project Block
  • Template Review Banner
  • Template Review Banner (King of Prussia, PA)
  • Template Review Banner (Laurel, MD)
  • Template Review Banner (Turnersville, NJ)
  • Template Review Banner (West Caldwell, NJ)
  • Template Roofing Brands
  • Template Service Blocks (All)
  • Template Service Blocks (King of Prussia, PA)
  • Template Service Blocks (Laurel, MD)
  • Template Service Blocks (Turnersville, NJ)
  • Template Service Blocks (West Caldwell, NJ)

Categories

  • Blog
  • Roof Installation
  • Roof Repair
  • Roof Replacement
  • Roofing
  • Uncategorized

Archive

  • March 2025
  • February 2025
  • January 2025
  • December 2024
  • November 2024
  • October 2024
  • August 2024
  • July 2024
  • June 2024
  • May 2024
  • April 2024
  • March 2024
  • February 2024
  • November 2023
  • October 2023

Our Office Locations

Map icon 501 NJ‑168, Turnersville, NJ 08012

Map icon 175 Fairfield Ave, Suite 2B, West Caldwell, NJ 07006

Map icon 144 E. Dekalb Pike, Suite 200, King of Prussia, PA 19406

Map icon 8920 Stephens Rd, #104, Laurel, MD 20723

Map icon 4085 Chain Bridge Rd, Suite 302, Fairfax, VA 22030

NJ Lic. #13VH11352200 | PA Lic. #PA161658 | MD Lic. #157465 | DE HIC# 2025-000012170 | VA HIC# 2705196076

Privacy Policy | Service Area

Follow Us

Check out our social pages and let us know how we’re doing See the latest from Dream Home Roofers and let us know what we can do for you.

BBB Accredited

BBB Accredited

Local Roofing Contractors
Financing
Careers
Contact

© 2025 Dream Home Roofers Roofing Contractor Marketing Provided by Robben Media

Scroll to top