Dream Home Roofers
1-855-610-9720
Get Free Estimate 1-855-610-9720
Free Estimate 1-855-610-9720
  • About us
    • Reviews
    • Careers
    • Financing
    • Blogs
    • FAQS
  • Services
    • Roofing
      • Replacement
      • Inspection
    • Gutters
      • Gutter Protection
    • Windows
  • Service Area
    • Turnersville, NJ
    • Voorhees, NJ
    • West Caldwell, NJ
    • King of Prussia, PA
    • Scranton, PA
    • Wilkes-Barre, PA
    • Laurel, MD
    • Fairfax, VA
    • Glen Allen, VA
    • Wilmington, DE
  • Current Specials
  • Contact Us
  • Menu Menu
Act Now to Get Our Current Offers. Click here for details.

Tag Archive for: roof

Installation of new roofing materials on a residential building.

Understanding the Roof Replacement Process: What to Expect

March 10, 2025/in Roof Replacement, Roofing/by Dream Home Roofers

Need to replace your roof? This guide walks you through the entire roof replacement process. From identifying the signs to picking the best materials and obtaining permits, you’ll learn each step to ensure a smooth project.

Key Takeaways

  • Identifying signs of roof deterioration, such as leaks and damaged shingles, is crucial for timely replacement to maintain home integrity.

  • Hiring a professional roofing contractor for inspections and material selection ensures a thorough and informed roof replacement process.

  • Understanding financing options and warranties is essential for homeowners, with current promotions providing cost-effective solutions for roof replacement.

Identifying the Need for a Roof Replacement

A house with a visibly damaged roof indicating the need for a roof replacement.

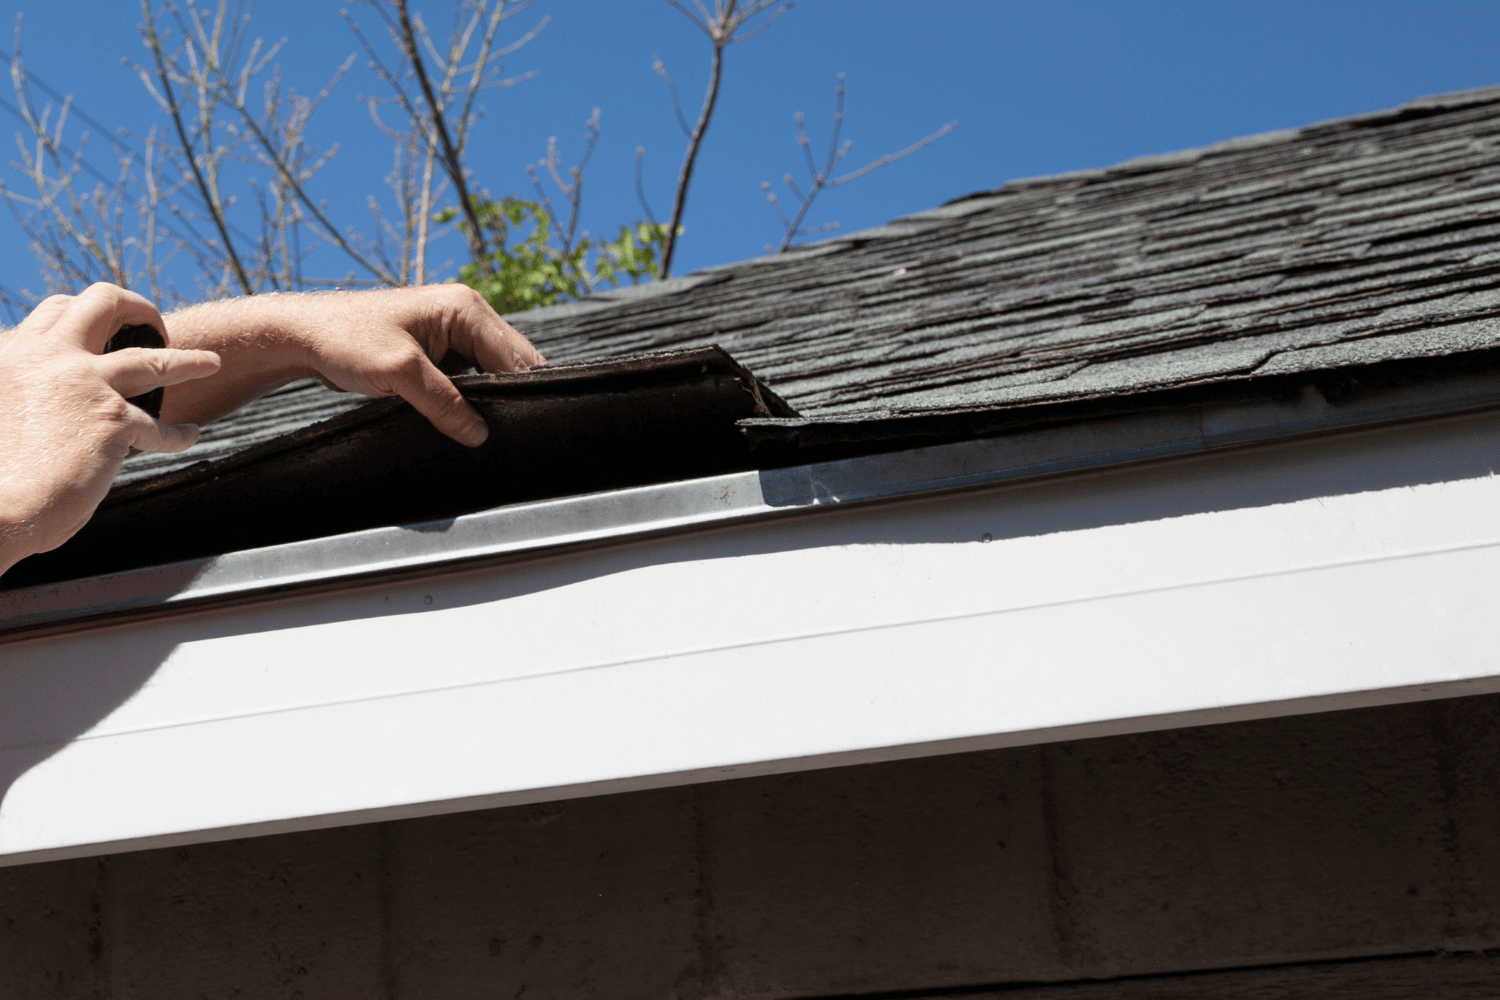
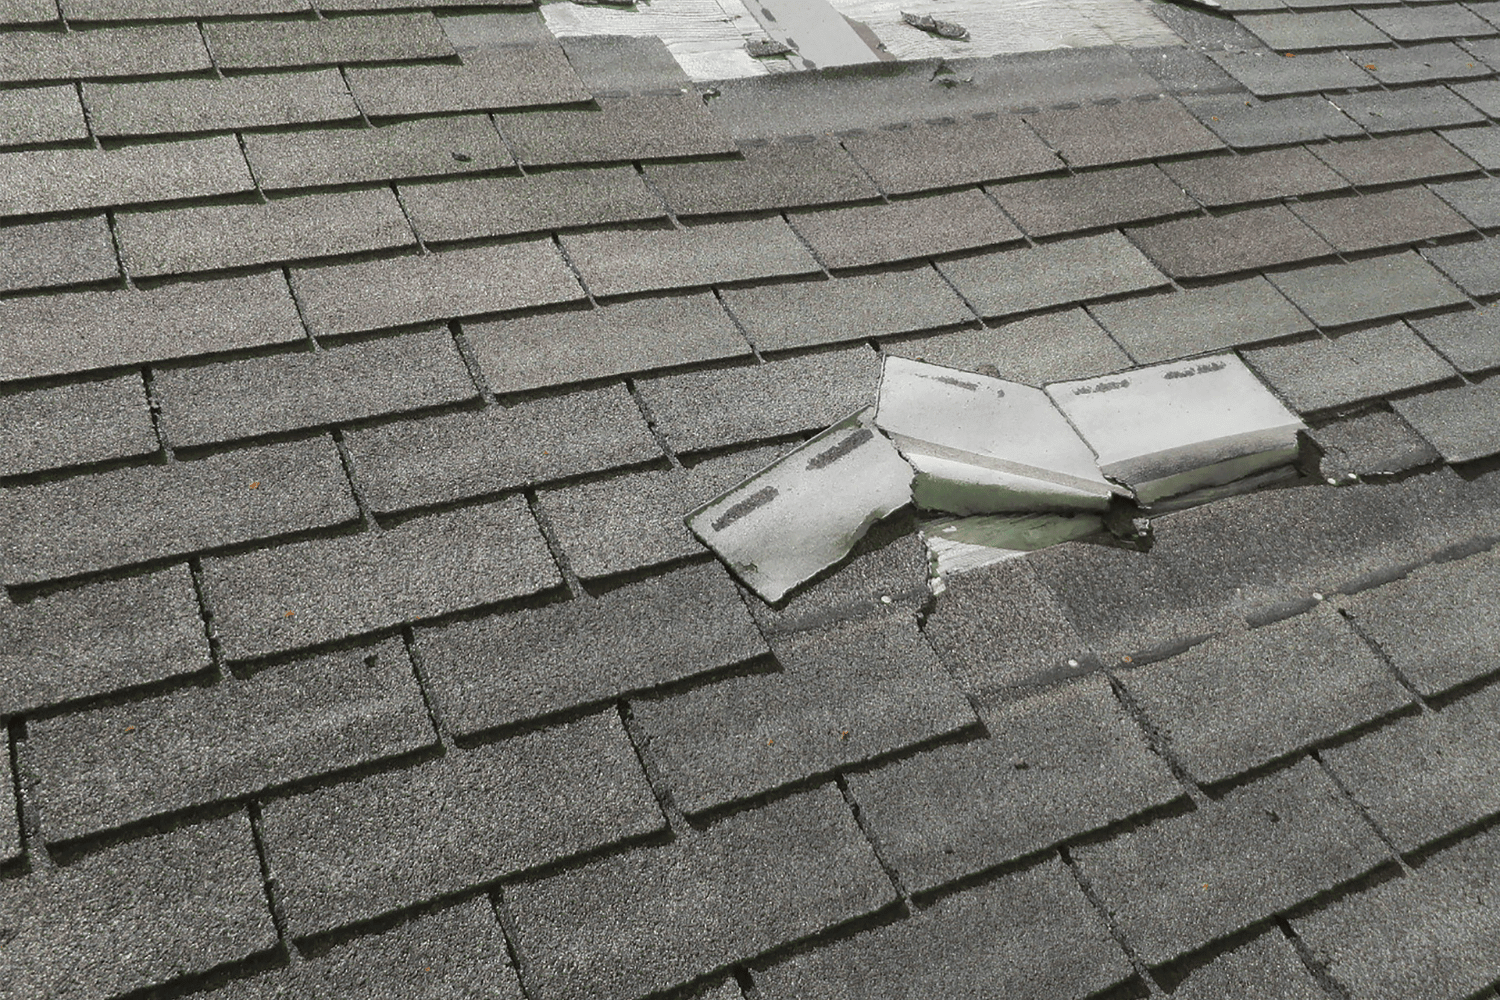
Identifying when your roof requires replacement is the initial important step. Common indicators that it may be time for a new roof include persistent leaks and missing or damaged shingles. Additionally, the age of your roof can also suggest the need for replacement. If your roof is around 20 years old or appears visibly worn, it might be nearing the end of its lifespan.

Specific signs that necessitate roof replacement include:

  • Curled shingle edges or cupped tabs, which suggest that the shingles are deteriorating

  • Bald areas where granules are missing from shingles

  • Cracked shingles, which are clear indicators that your roof is in distress

  • Dark streaks caused by algae, which, while often a cosmetic issue, can also signal aging

Moss growth, especially in shaded areas, poses another problem. Moss can trap moisture against the roof surface, leading to damage over time. Moreover, if you notice that neighbors are replacing their roofs, it could be a sign that your roof is also due for replacement, as homes in the same area often age similarly.

Understanding these signs is vital for maintaining the integrity of your home. Early identification of roof replacement needs can prevent further damage and ensure your home’s safety and durability.

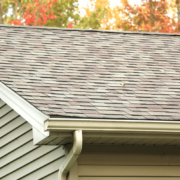
Initial Roof Inspection

Conducting a thorough roof inspection helps identify existing issues and plan for an effective replacement. Homeowners should clear debris from roofs and gutters beforehand to allow for a comprehensive evaluation. This step allows the inspection to uncover all potential issues, such as leaks, damaged shingles, structural concerns, and underlayment problems.

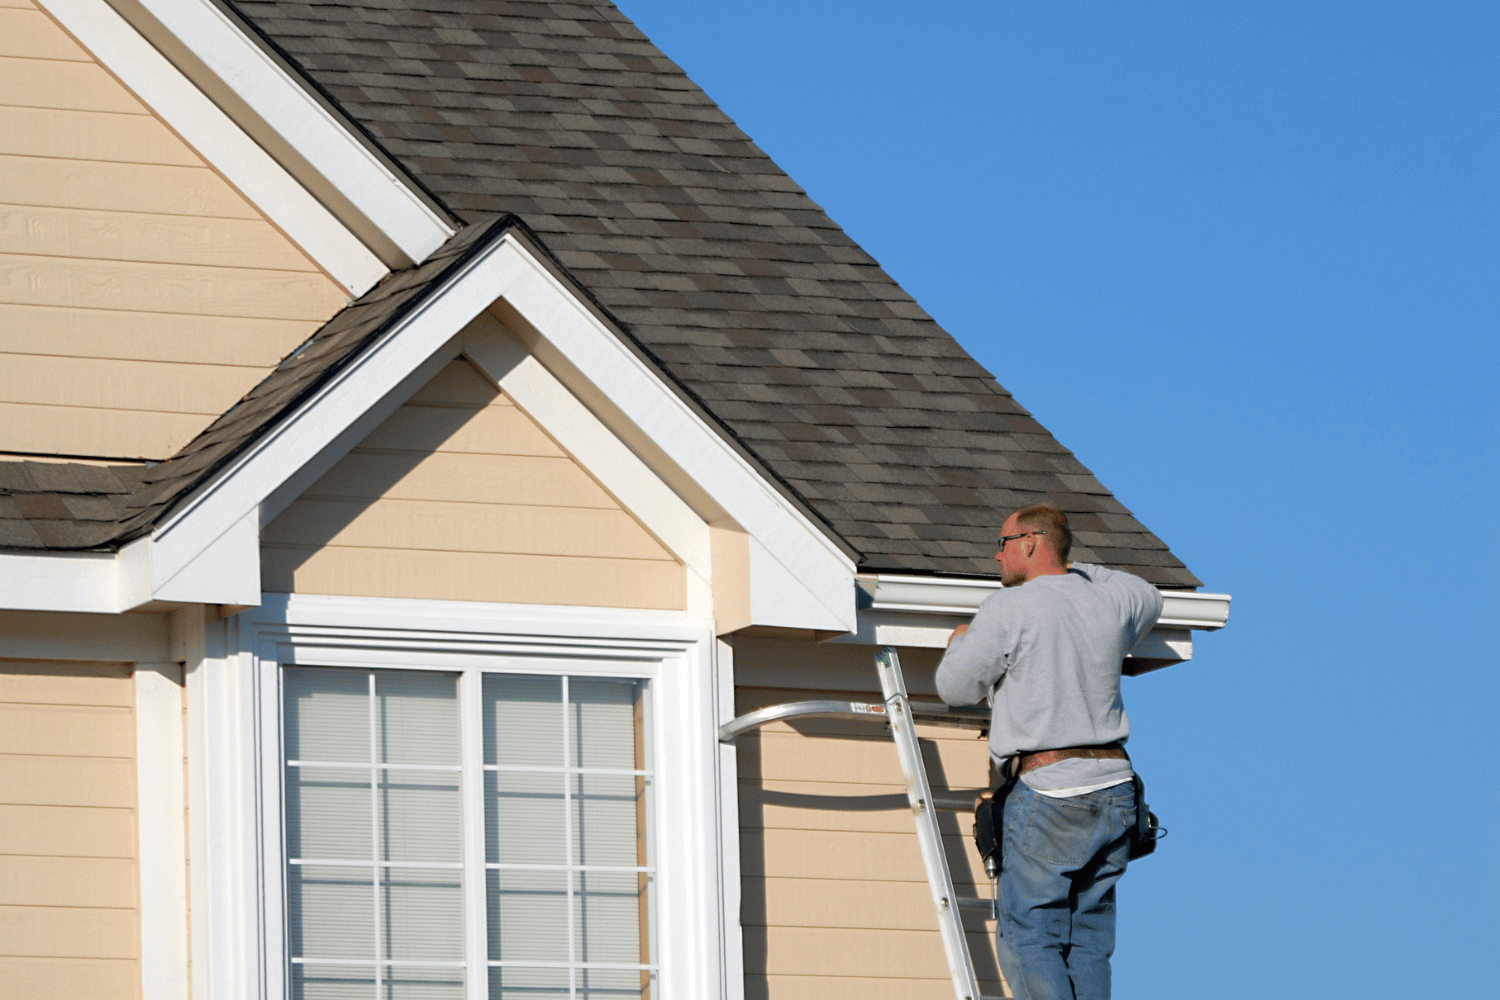
Hiring a professional roofing contractor is highly recommended to minimize risks and handle the complexities involved in the roof replacement process. At Dream Home Roofers, we provide comprehensive roofing inspections and detailed estimates to assist homeowners in making informed decisions. A reputable roofing contractor and roofing contractors can further enhance this experience.

A professional inspection identifies the current state of your roof and offers insights into the best course of action, ensuring a clear plan for your roof replacement project.

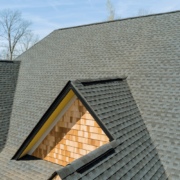
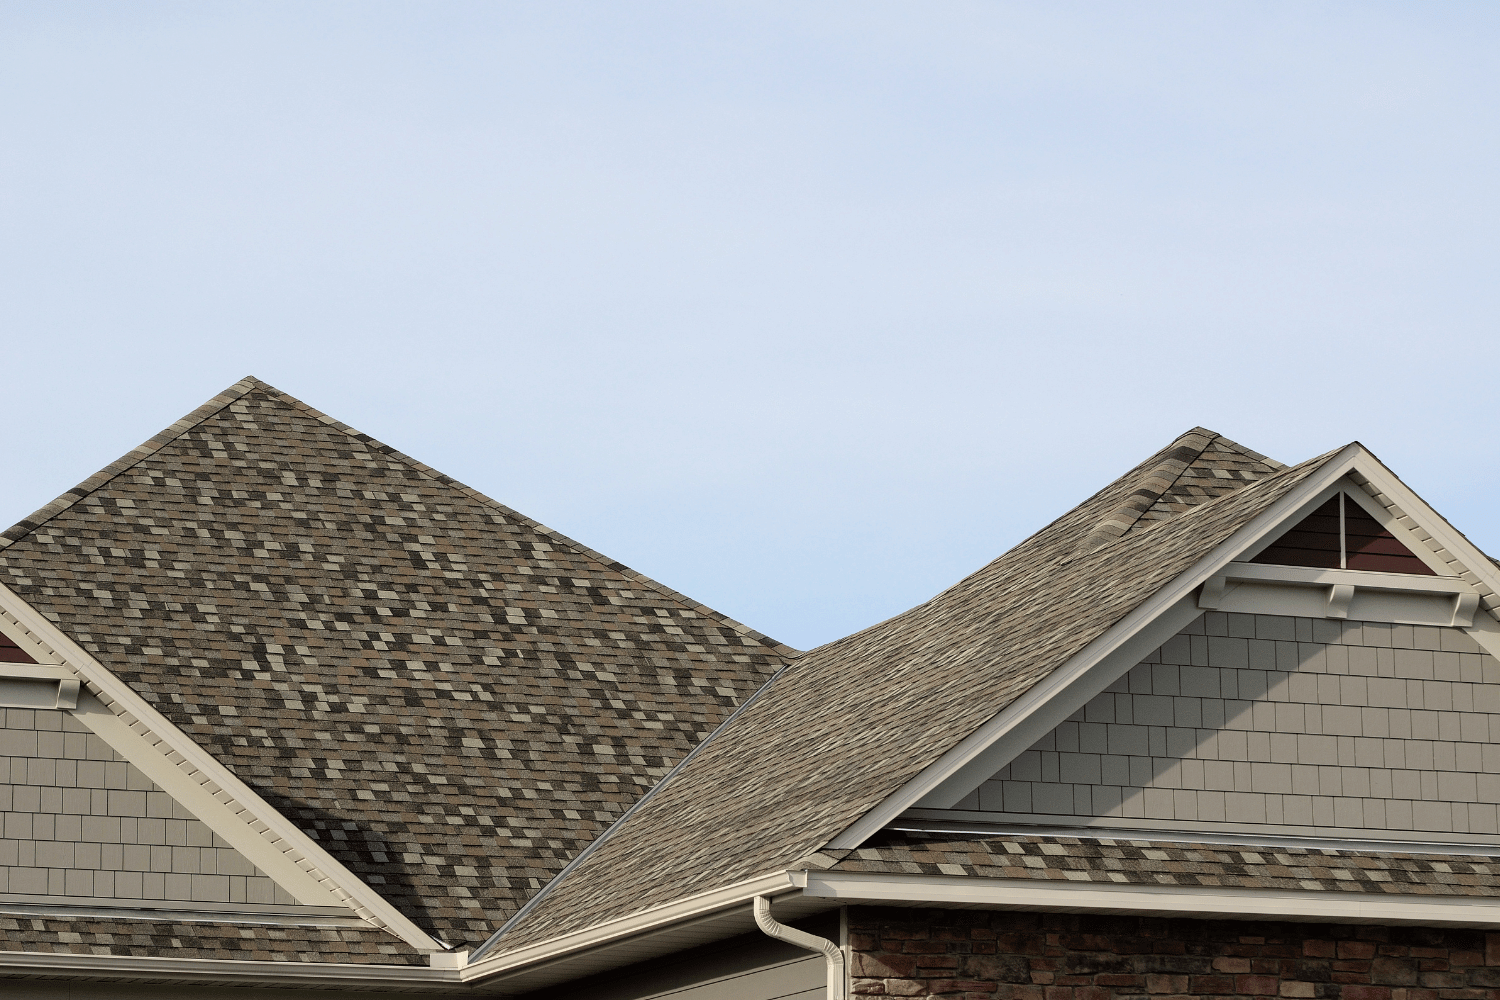
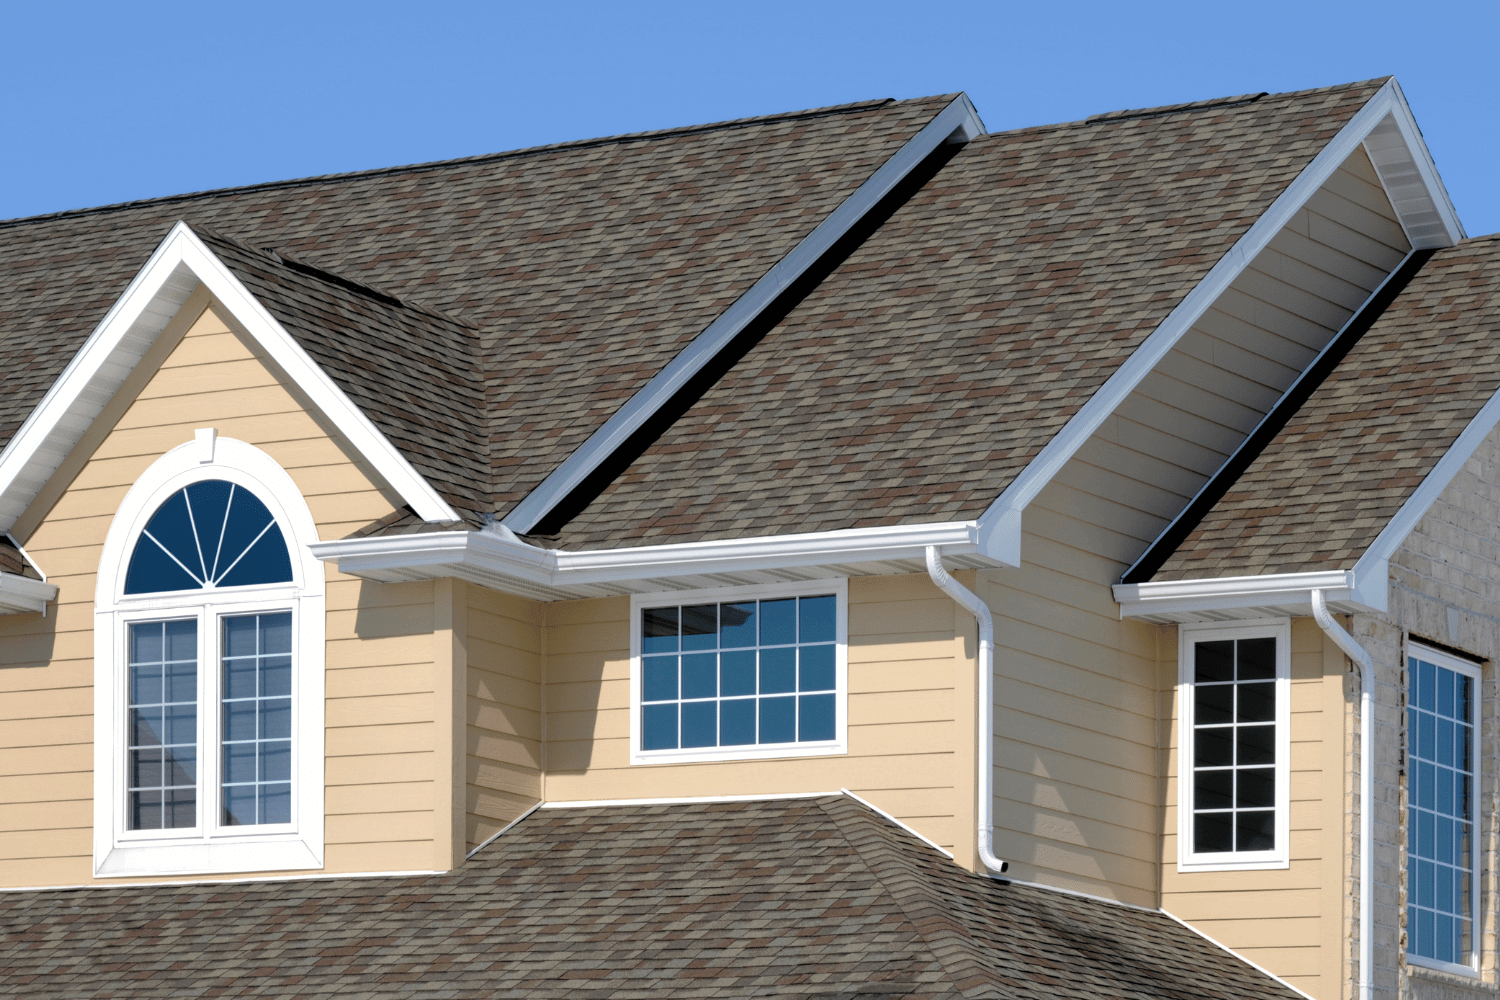
Choosing the Right Roofing Material

Different types of roofing materials displayed for selection.

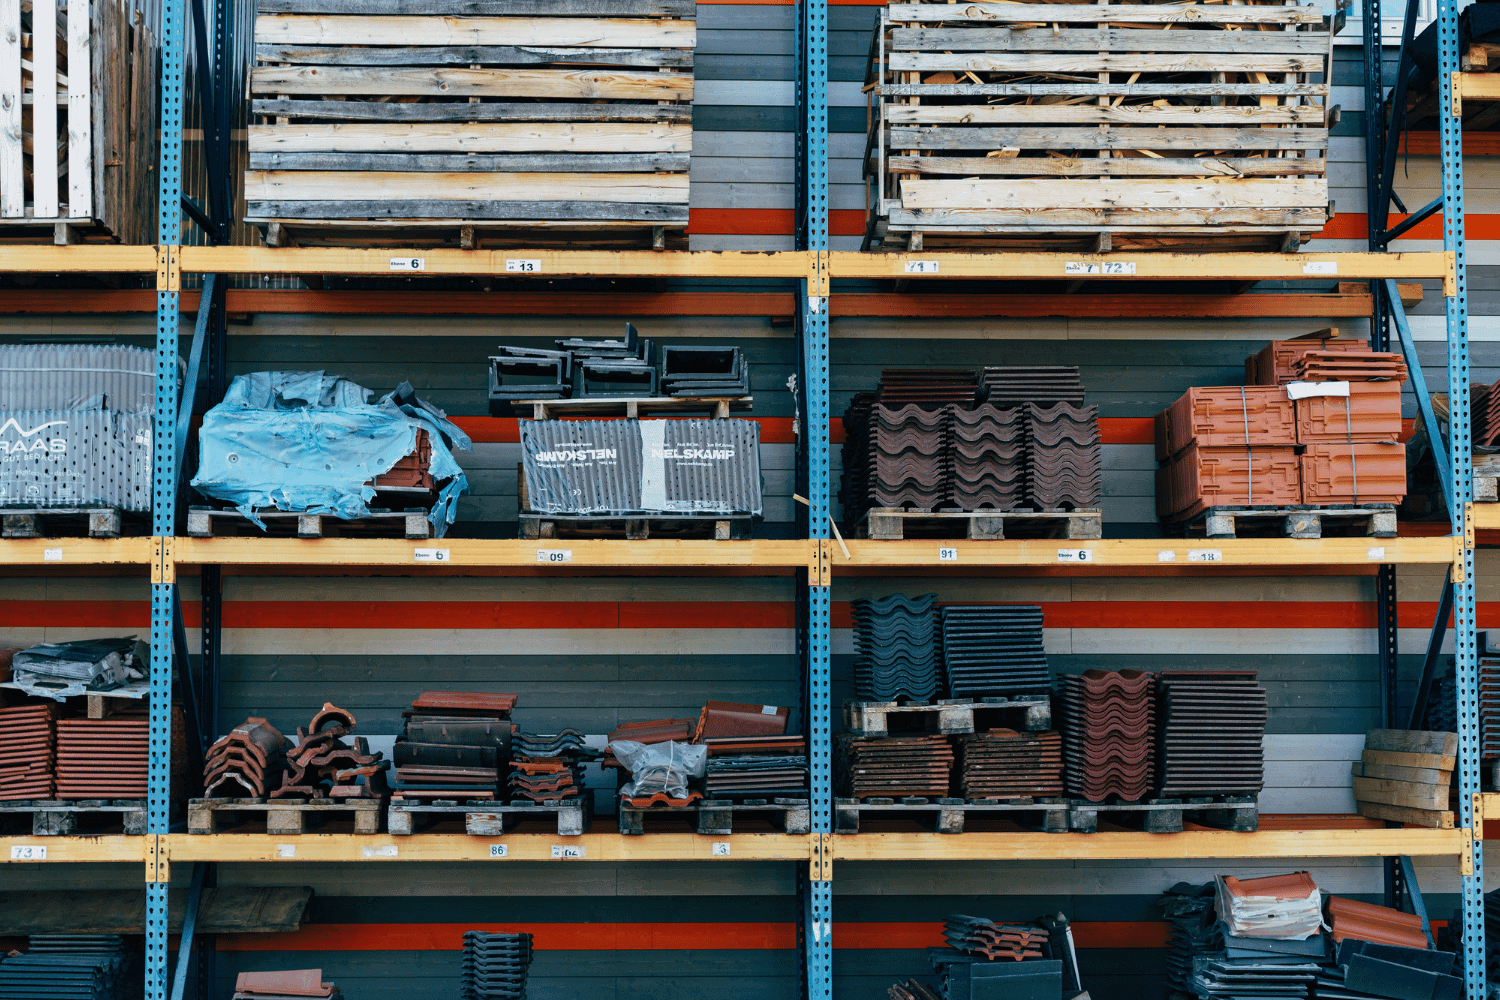
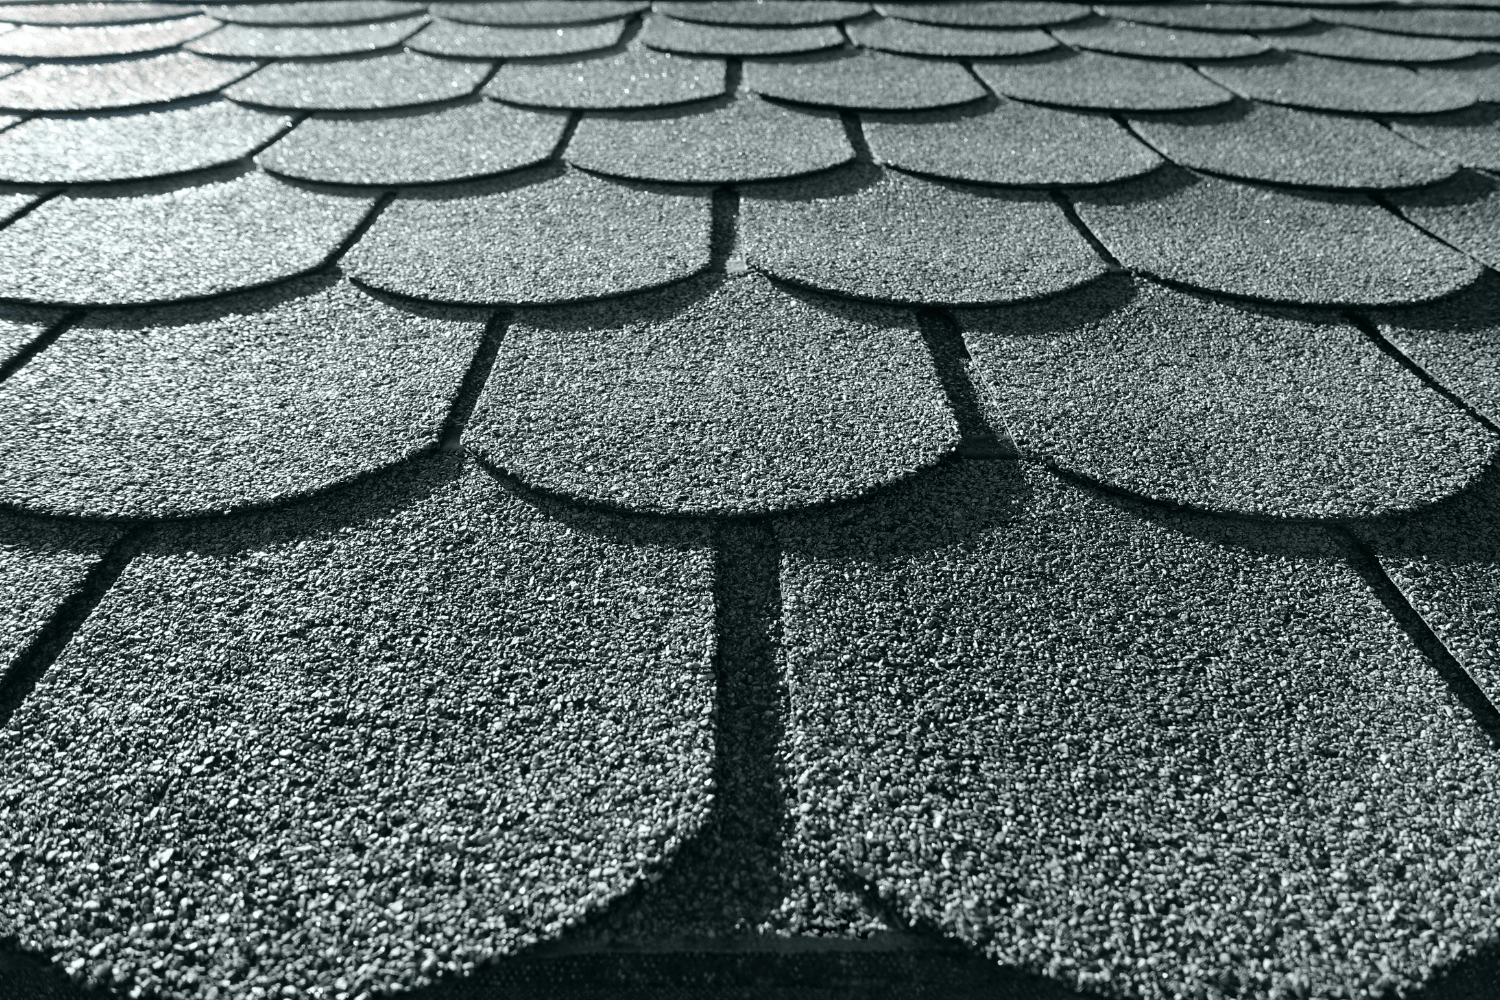
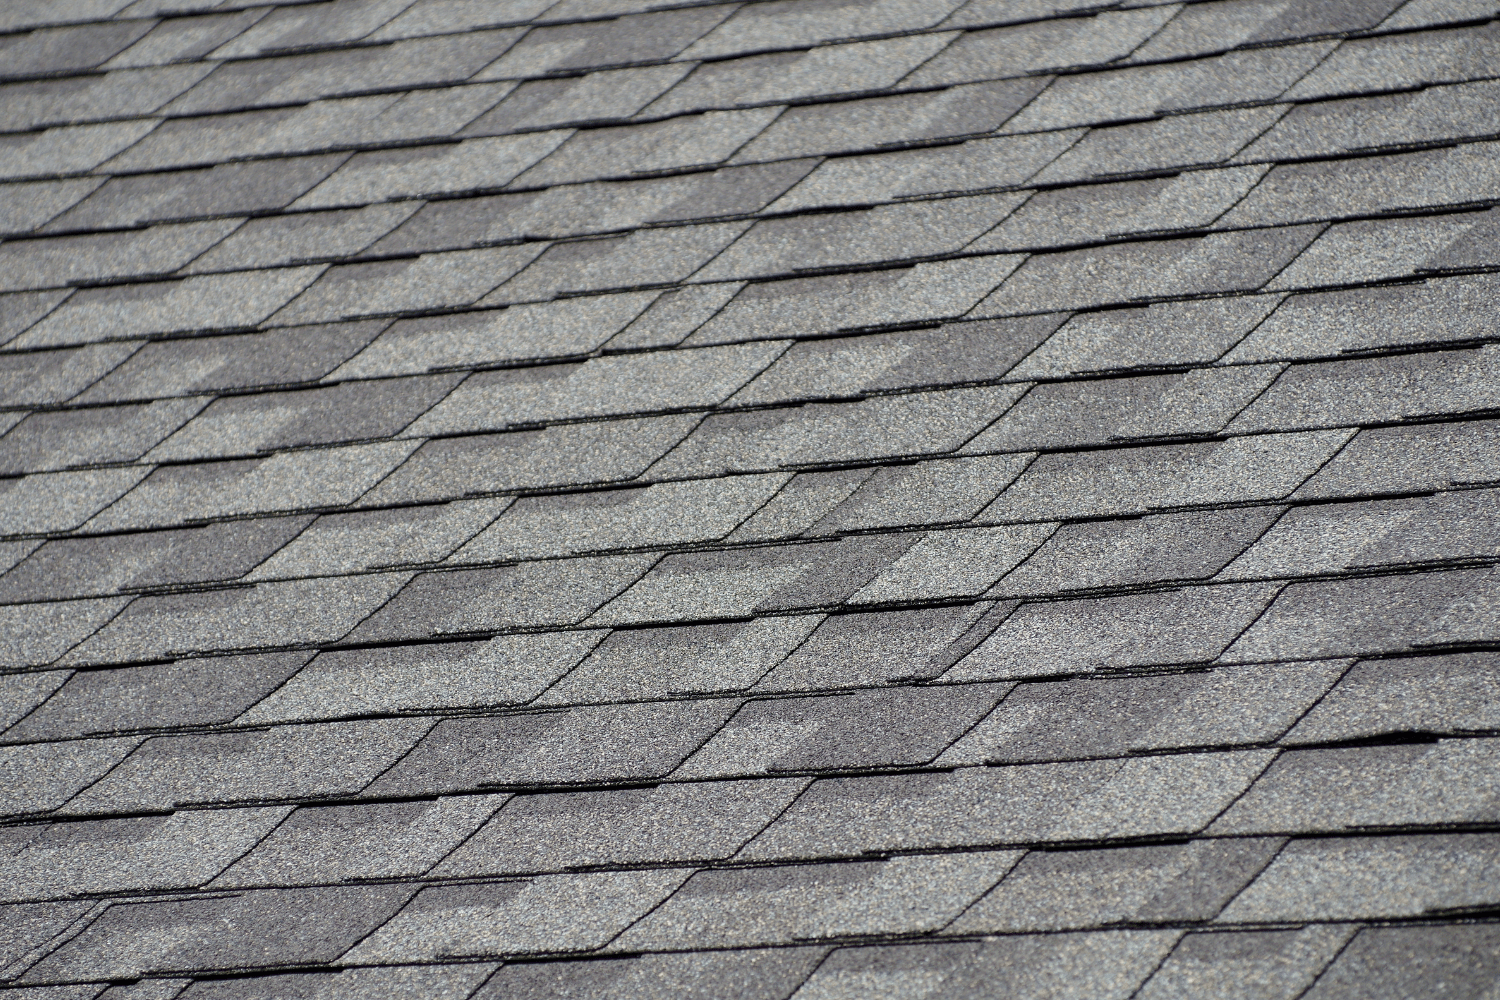
Choosing the right roofing material involves balancing durability, aesthetics, and cost. The main considerations include how long the roof material will last, how it looks, and how much it costs. Common types of roofing materials include asphalt shingles, metal roofing, tile, and slate.

Asphalt shingles are generally more cost-effective, making them a popular choice for homeowners on a budget. They come in various styles and colors, including architectural shingles, which provide a multi-layered construction for enhanced durability and aesthetic appeal.

Metal roofs, on the other hand, offer longevity and energy efficiency by reflecting heat, making them an excellent choice for those looking for a durable and eco-friendly option.

Clay tiles and slate roofs, while providing exceptional durability and a unique aesthetic, come at a higher price point. These materials are heavier and may require additional structural support. The upfront cost of roofing materials can significantly vary, impacting homeowners’ choices.

Ultimately, choosing the right roofing material involves balancing quality, aesthetic appeal, and budget considerations. Understanding the benefits and drawbacks of each material helps you make an informed decision that suits your needs and enhances your home’s value.

Obtaining Permits and Preparing Your Home

Securing the necessary permits for roof replacement ensures adherence to local laws and prevents potential legal issues. Failing to secure the proper permits can result in fines and complications that could delay your roofing project. At Dream Home Roofers, we ensure all required permits are obtained, providing peace of mind for homeowners.

Prepare your home before the roof installation begins. Protect outdoor furniture with covers to prevent damage during the roofing process. Cover landscaping and remove any obstructive items from around the home to facilitate the roofing process. Informing your neighbors ahead of time about the upcoming noise and disruption is also a courteous step to take.

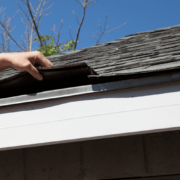
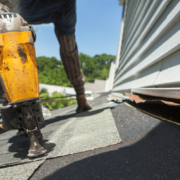
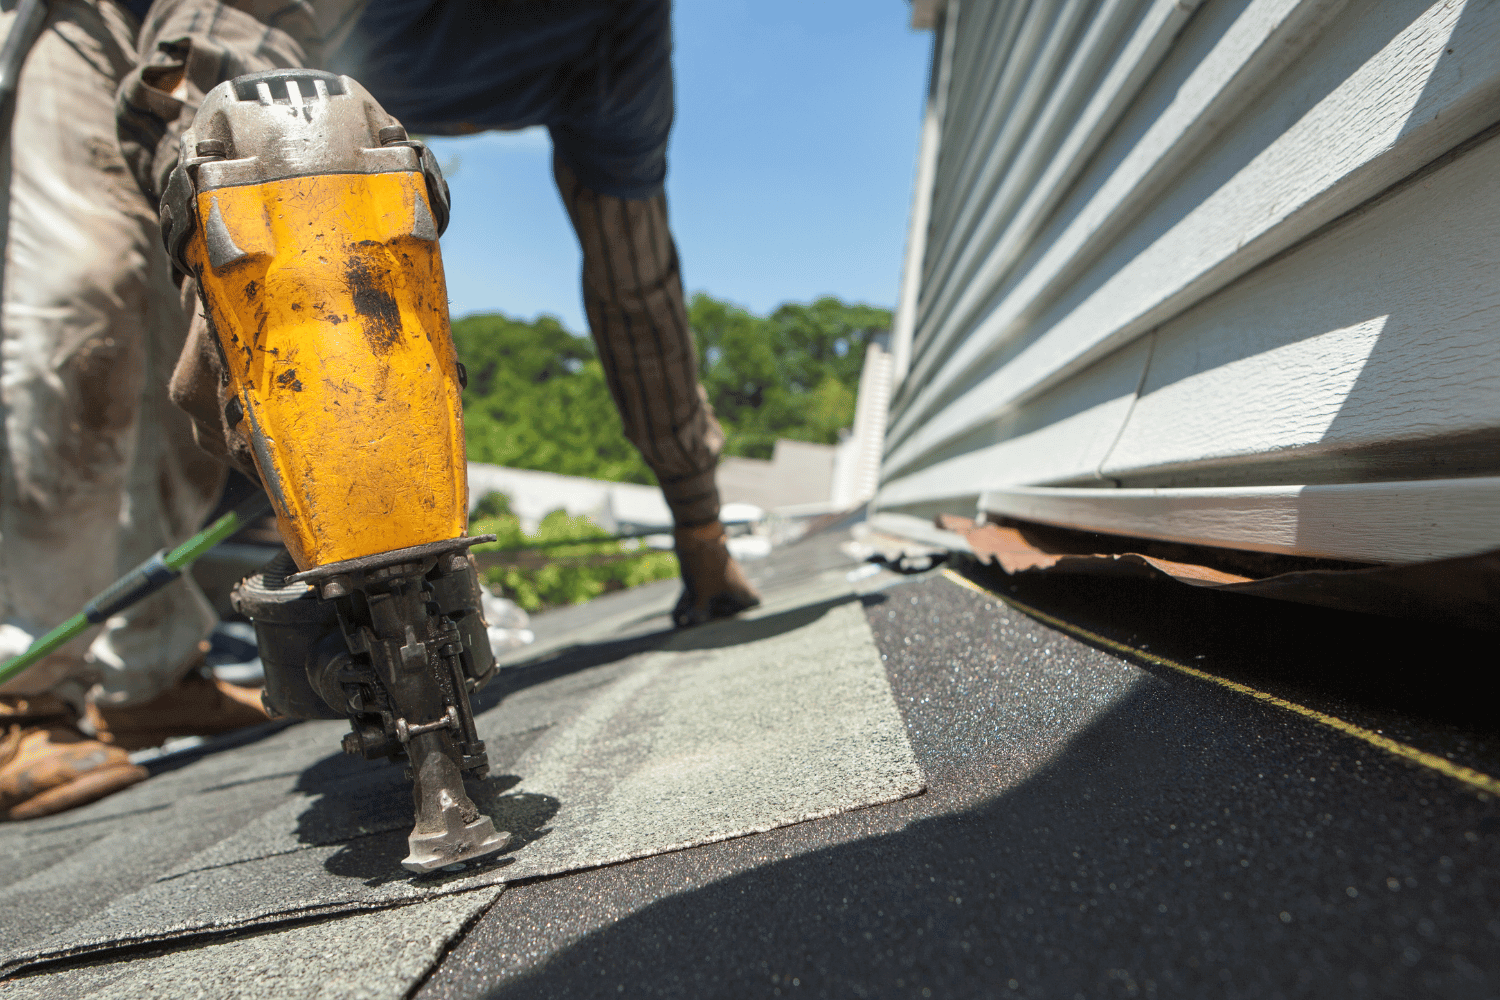
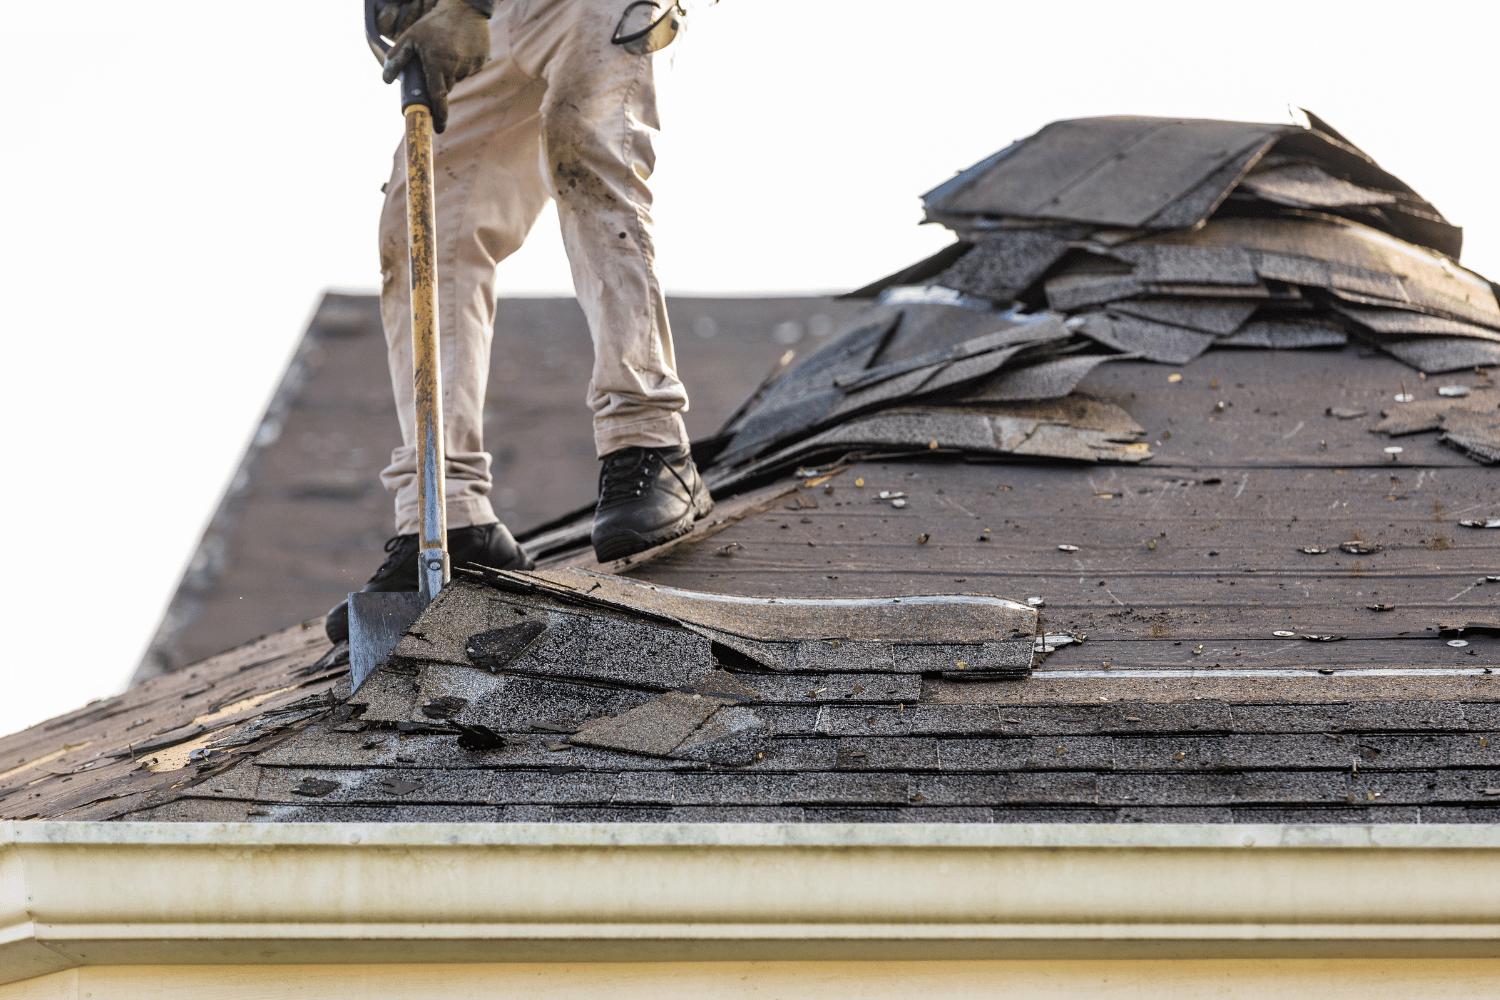
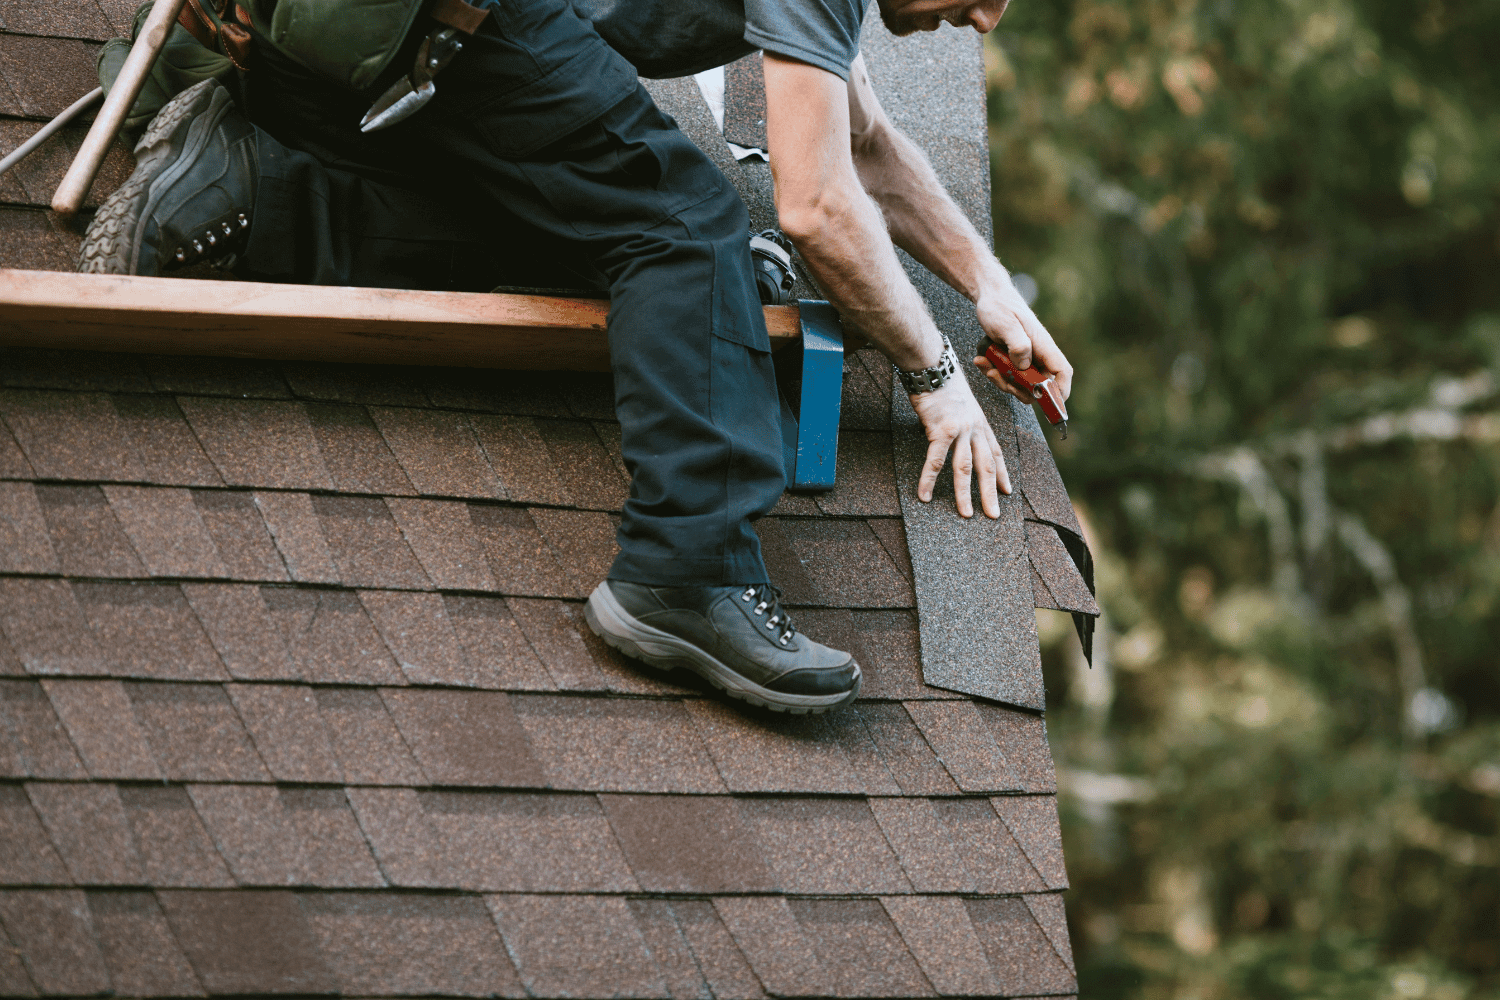
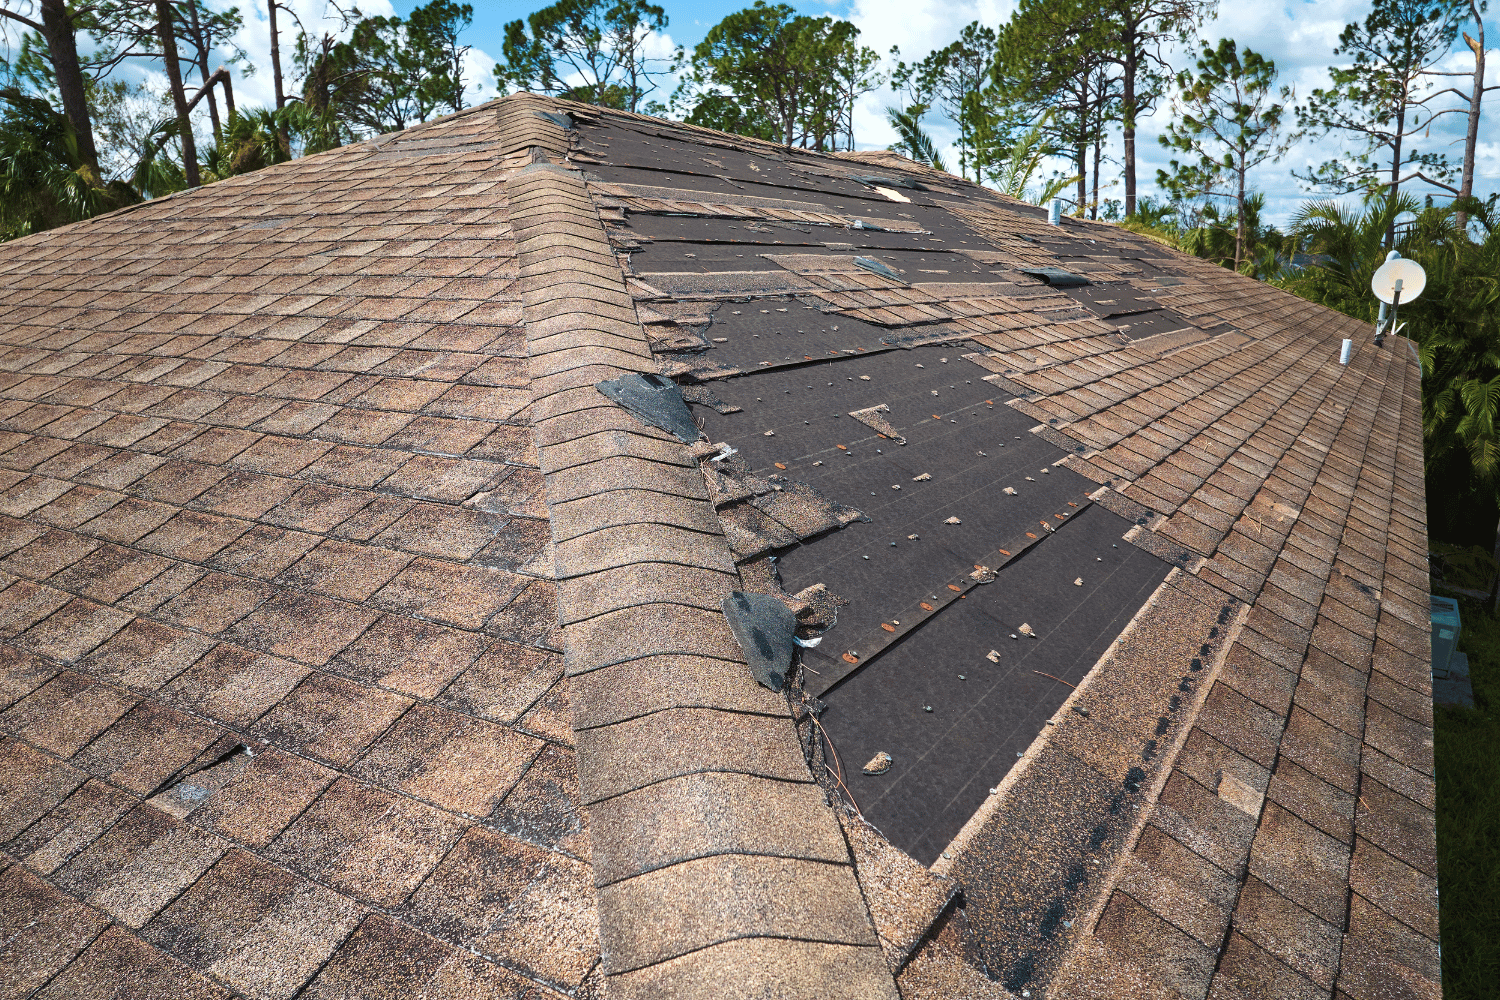
Removing Old Roofing Materials

Workers removing old roofing materials during the roof replacement process.

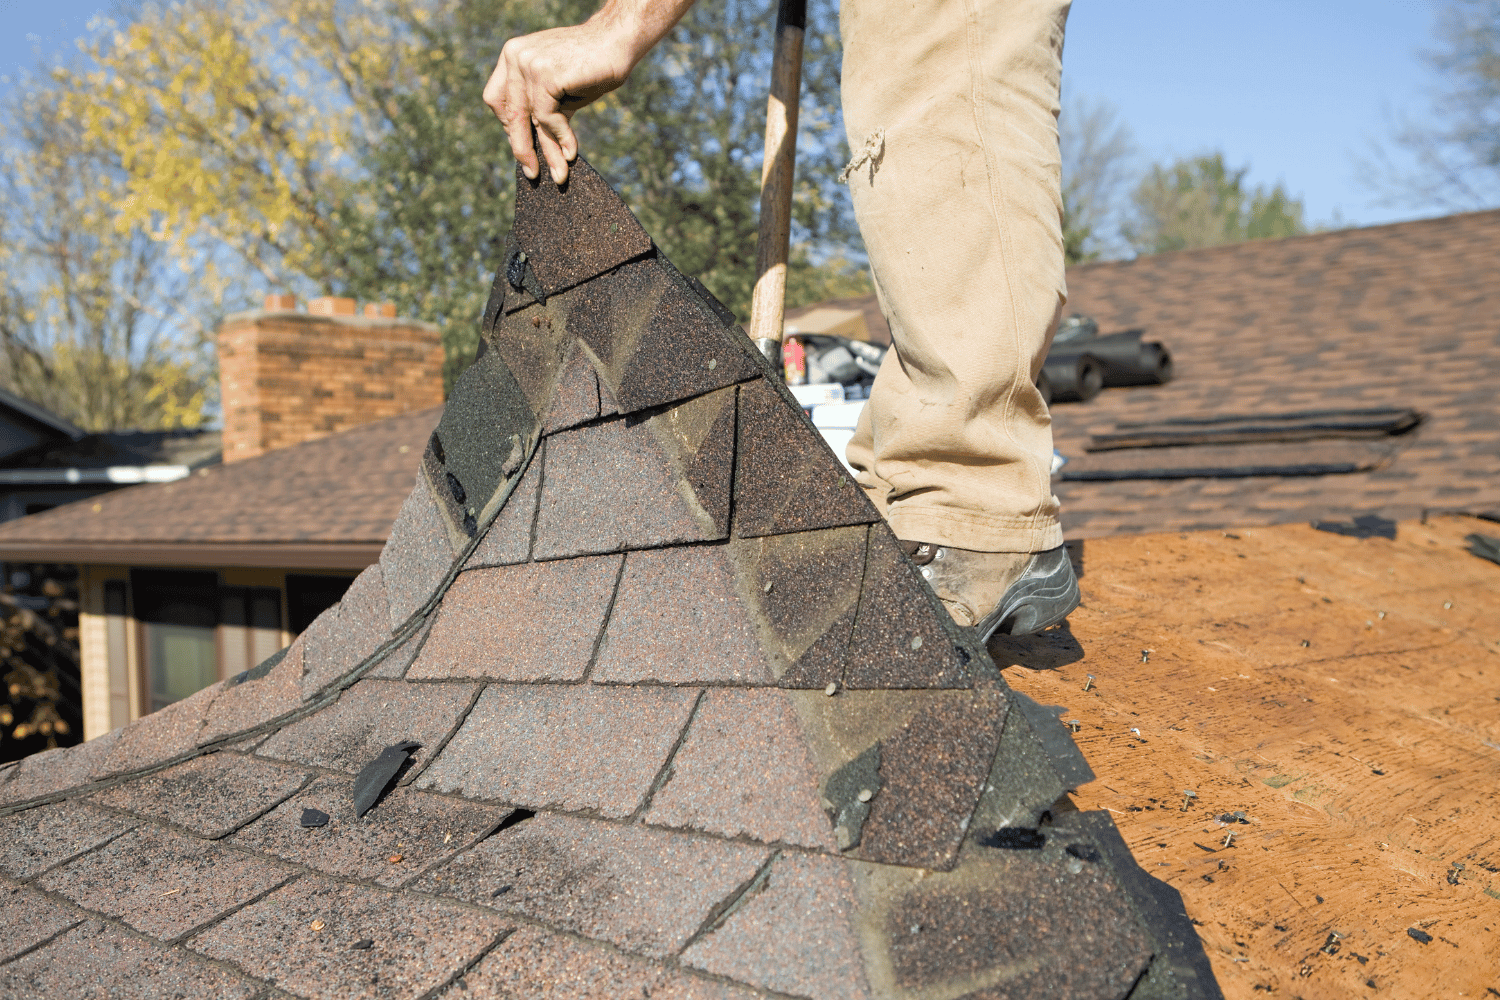
Removing old roofing materials starts with preparing the yard by covering landscaping and placing a dumpster nearby for debris. This preparation helps protect your property and ensures that debris is managed efficiently throughout the project.

The removal starts at the peak of the roof ridge, with ridge caps being taken off first, followed by stripping away the existing shingles and underlayment. Once the roof is bare, the roof deck is inspected for damage, particularly looking for broken or rotted sections that may need replacement.

The roofing crew picks up debris and ensures it goes to the dump trailer, keeping the work area clean and safe.

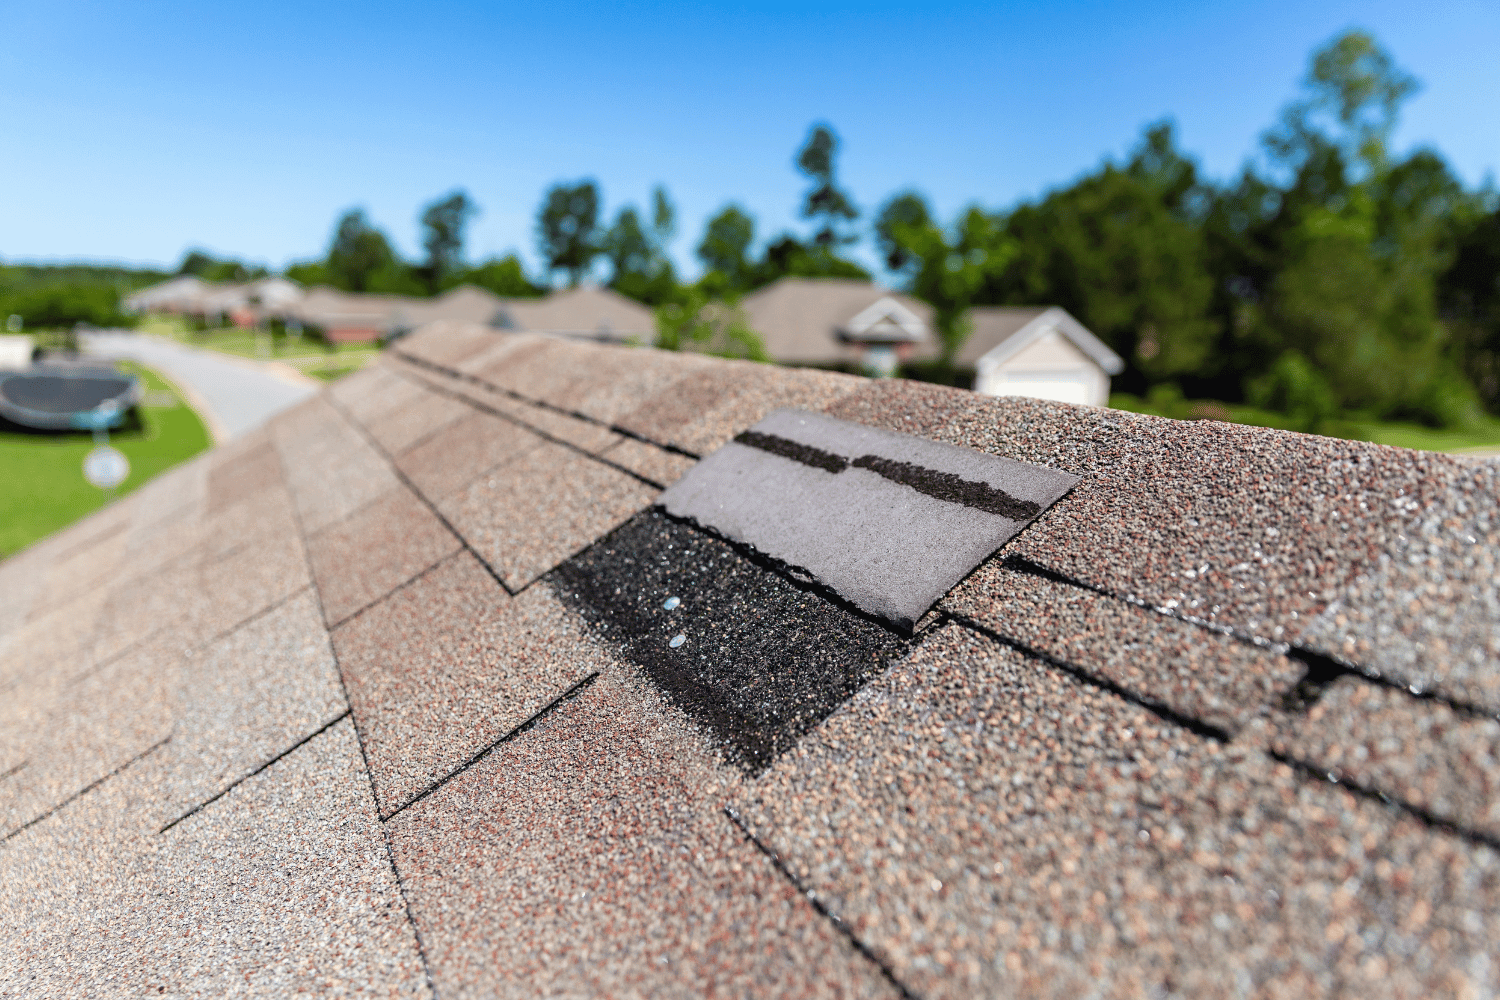
Inspecting and Repairing Roof Decking

After removing the old roofing materials, inspecting the roof decking for damage or rot is crucial to ensure a stable base for the new roof. If any damaged or rotting roof decking is found, it must be replaced before installing the new materials. Plank decking with gaps exceeding 1/8 inch must also be replaced to comply with installation guidelines.

A solid roof deck is crucial. It ensures proper installation and enhances the longevity of the new roofing materials. Ensuring that the roof decking is in good condition will provide a strong foundation for the new roof and prevent future issues.

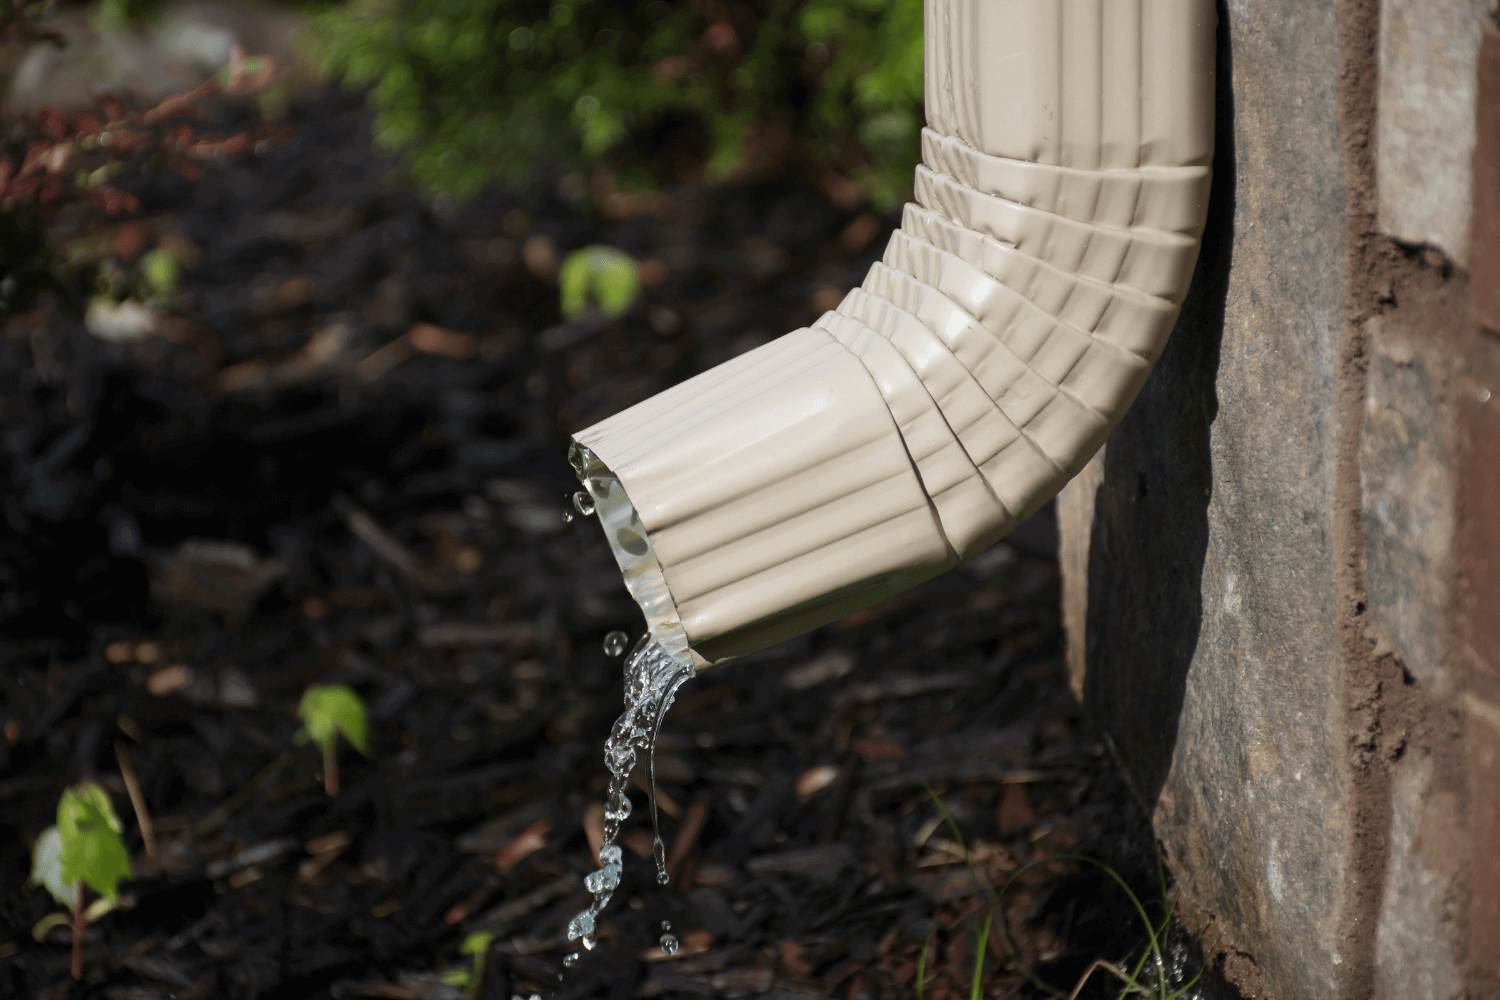
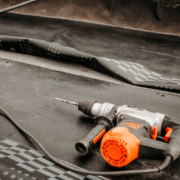
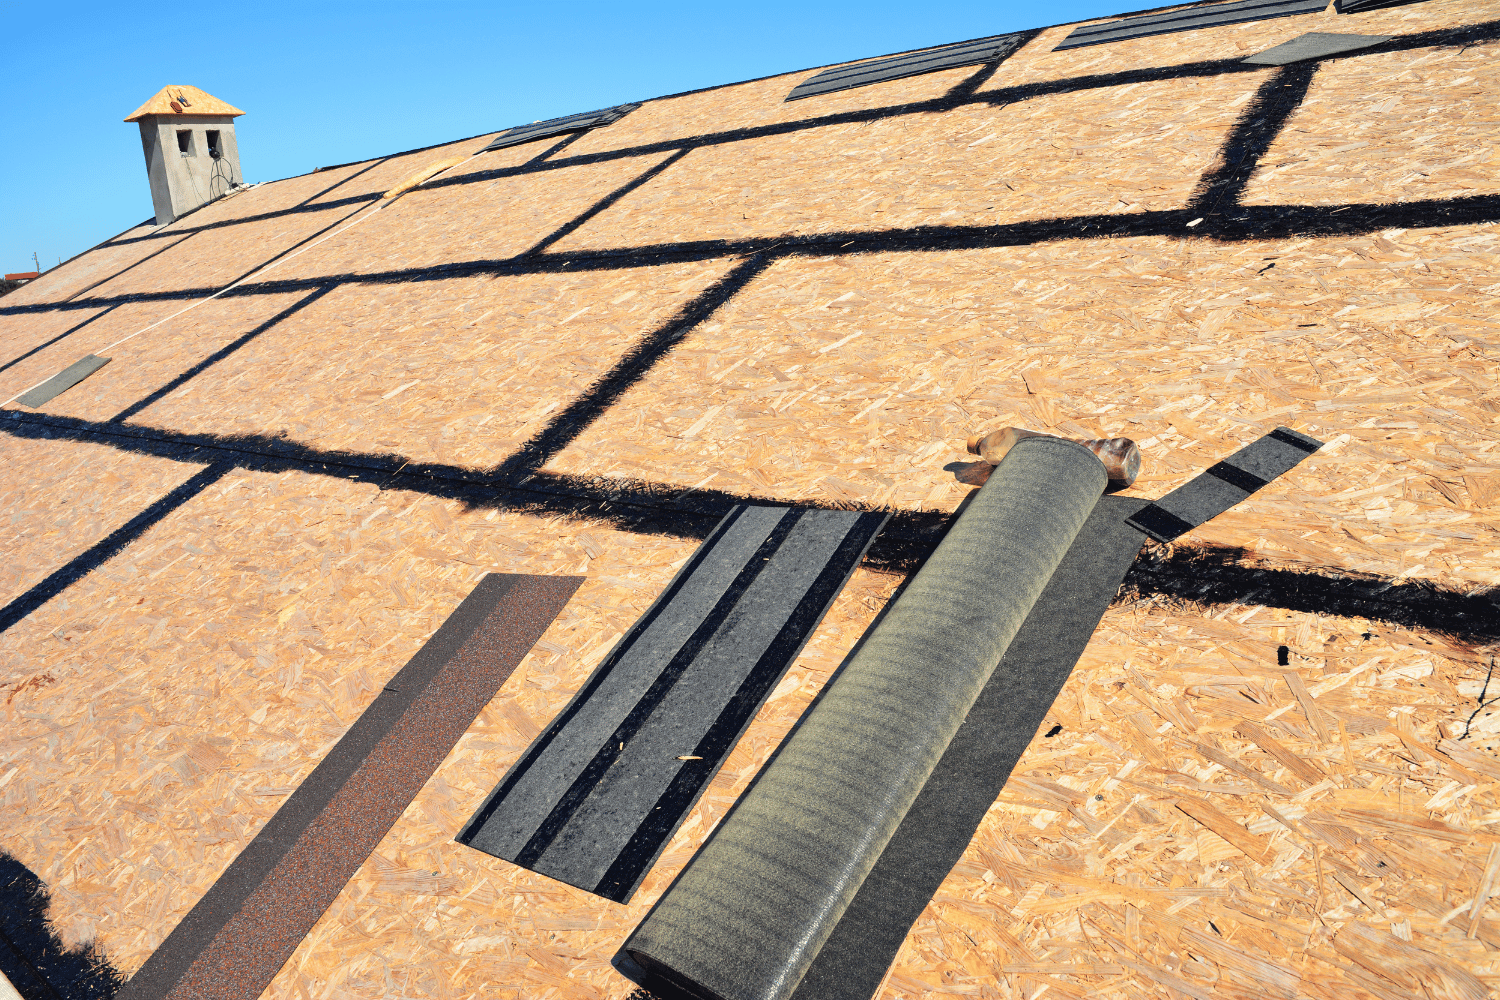
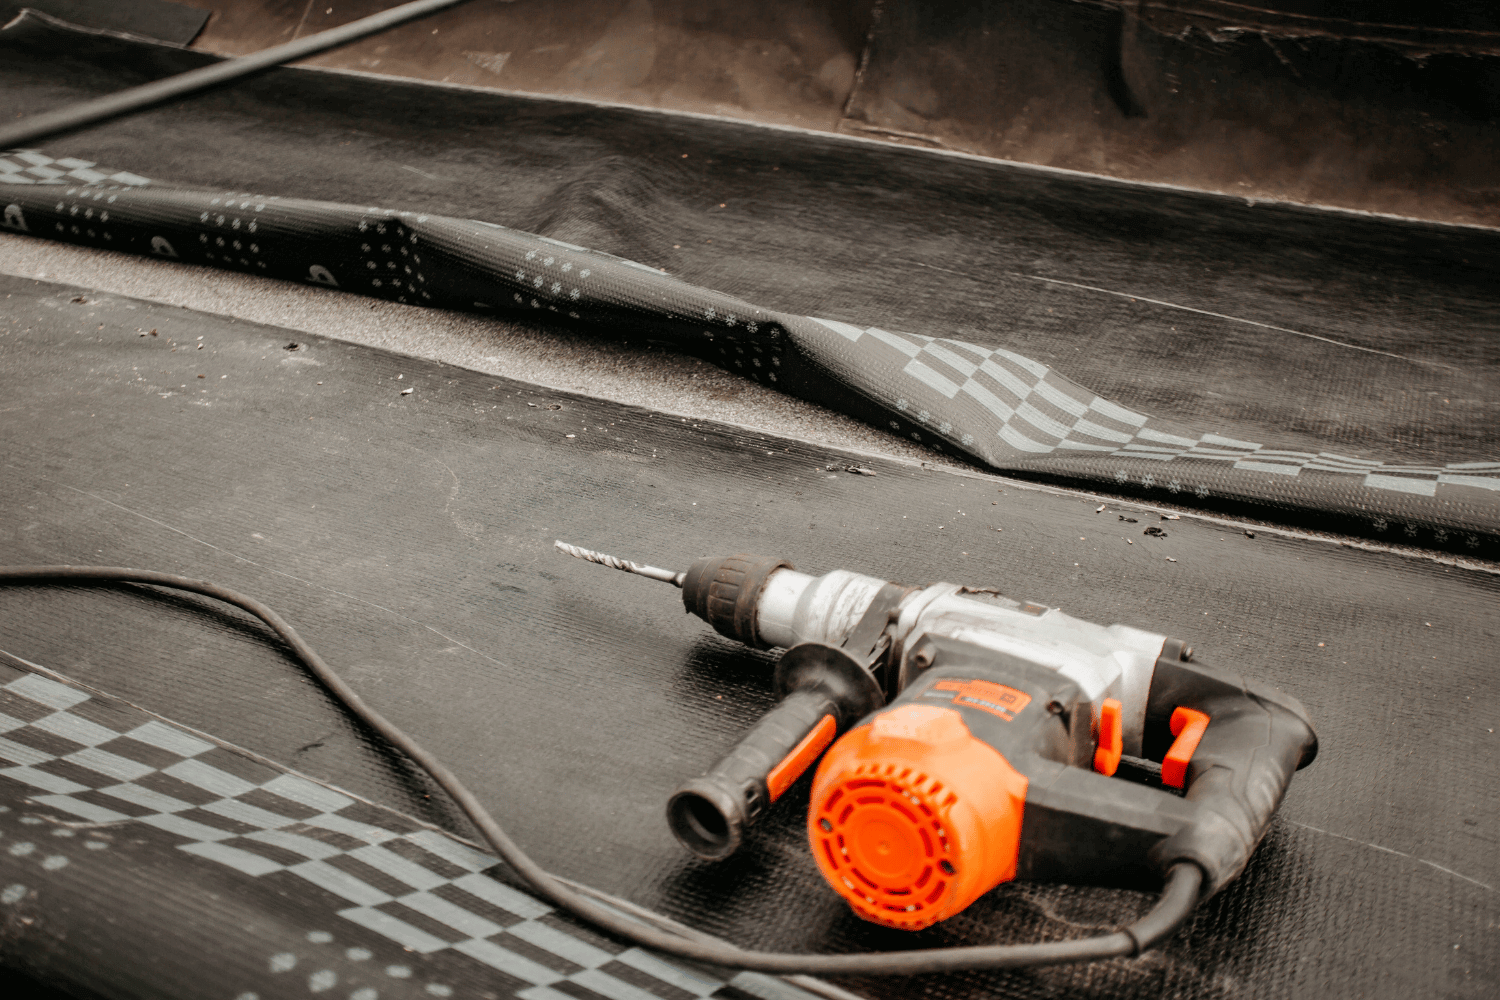
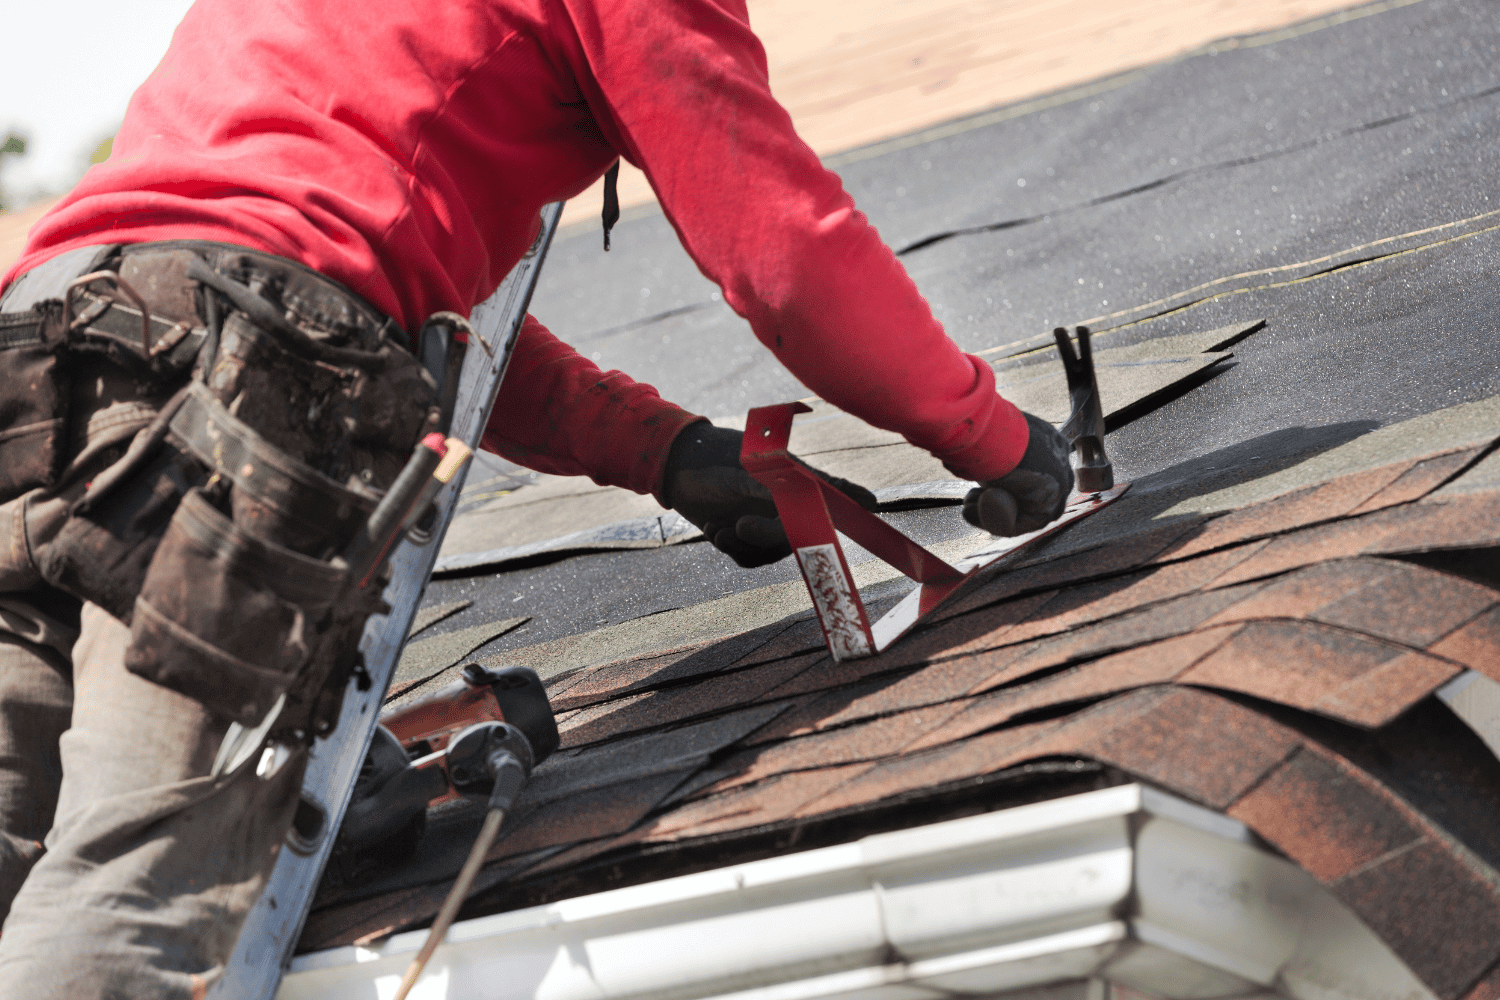
Installing Underlayment and Flashing

Installing the underlayment correctly enhances moisture protection in roofing. The underlayment must comply with local building codes to ensure long-term effectiveness. Common materials used include felt paper and synthetic underlayment, with the latter being lighter and tougher, making it easier to install.

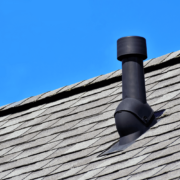
Flashing is installed around critical areas like chimneys and vents to block water from entering the roof structure and prevent leaks. Correct flashing installation maintains structural integrity and prevents water infiltration where different materials meet.

Together, underlayment and flashing play a vital role in the overall durability and effectiveness of the new roofing system, ensuring that your home remains protected from the elements.

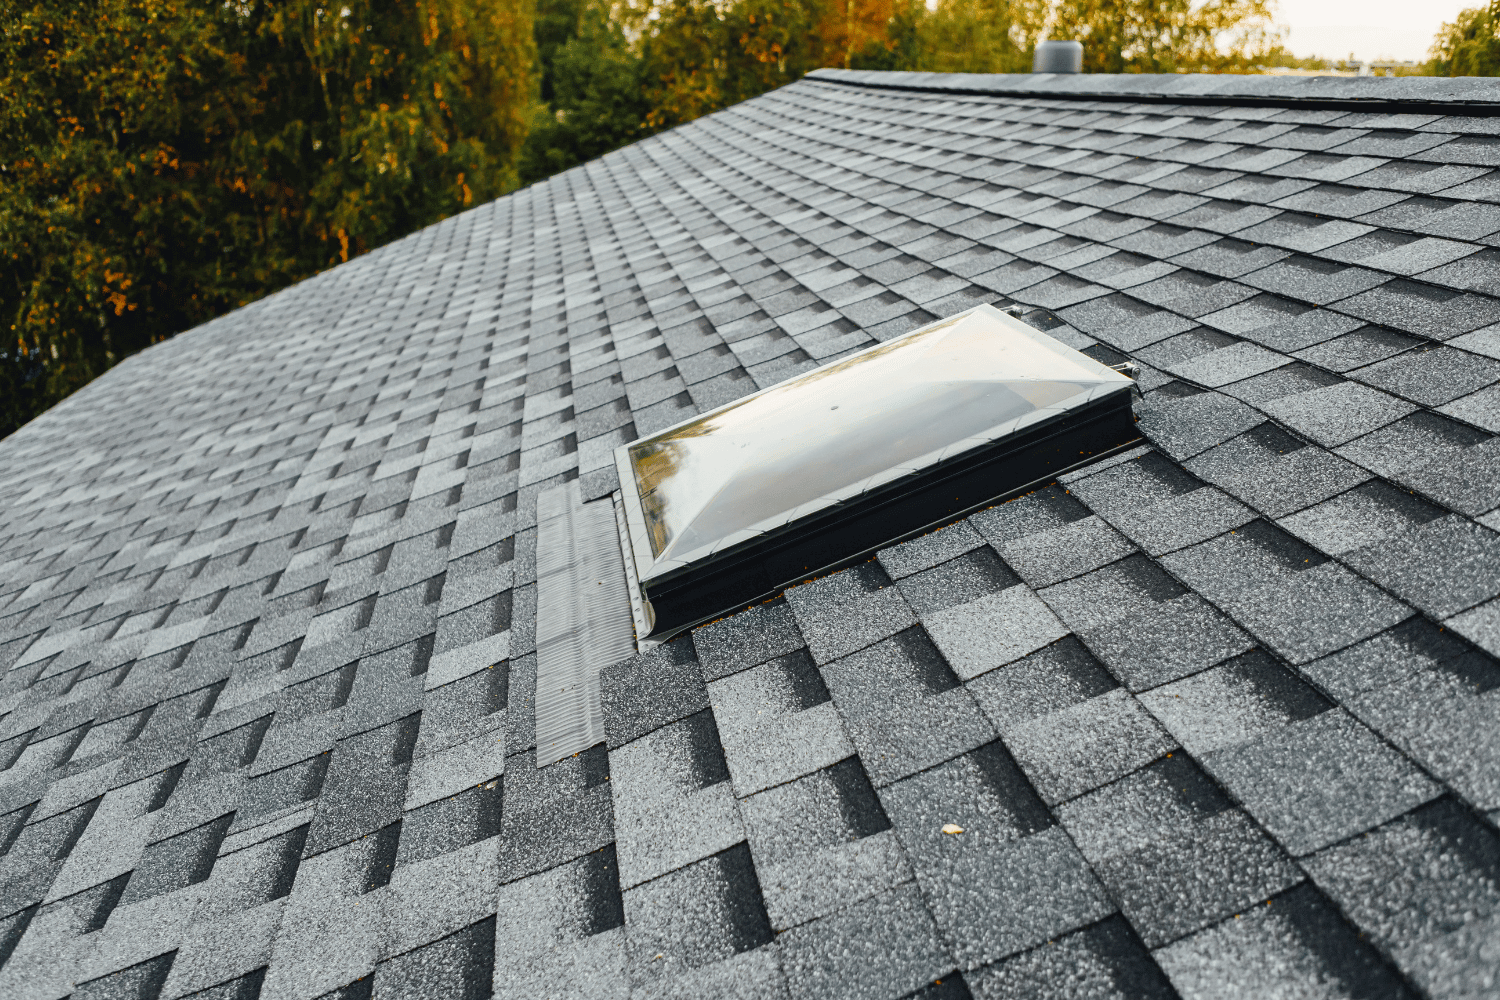
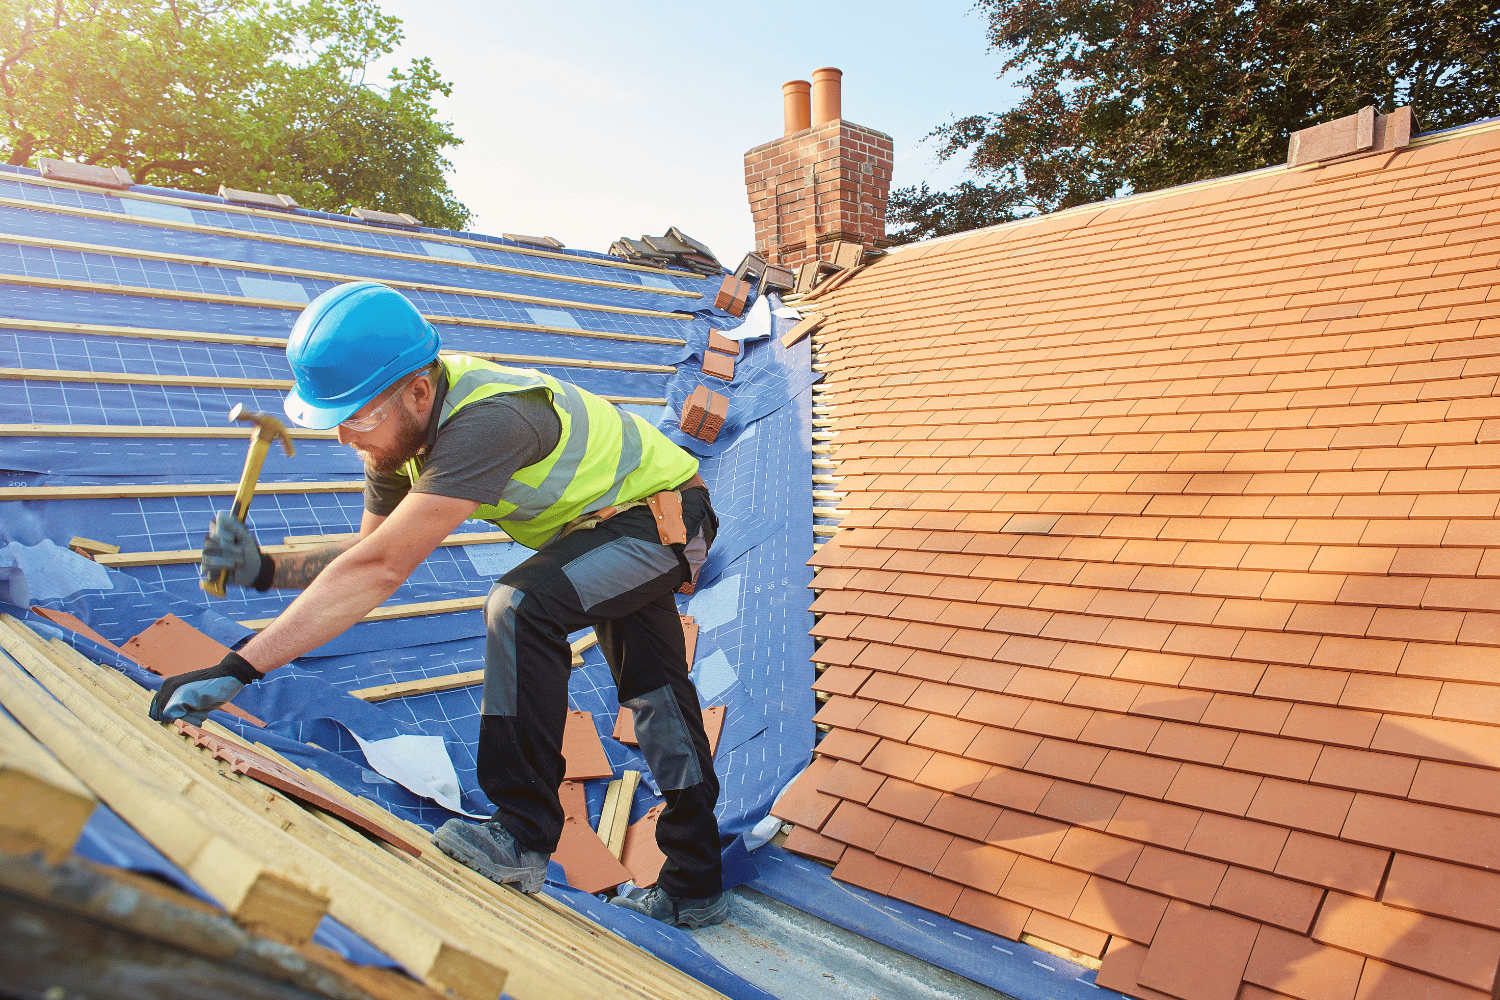
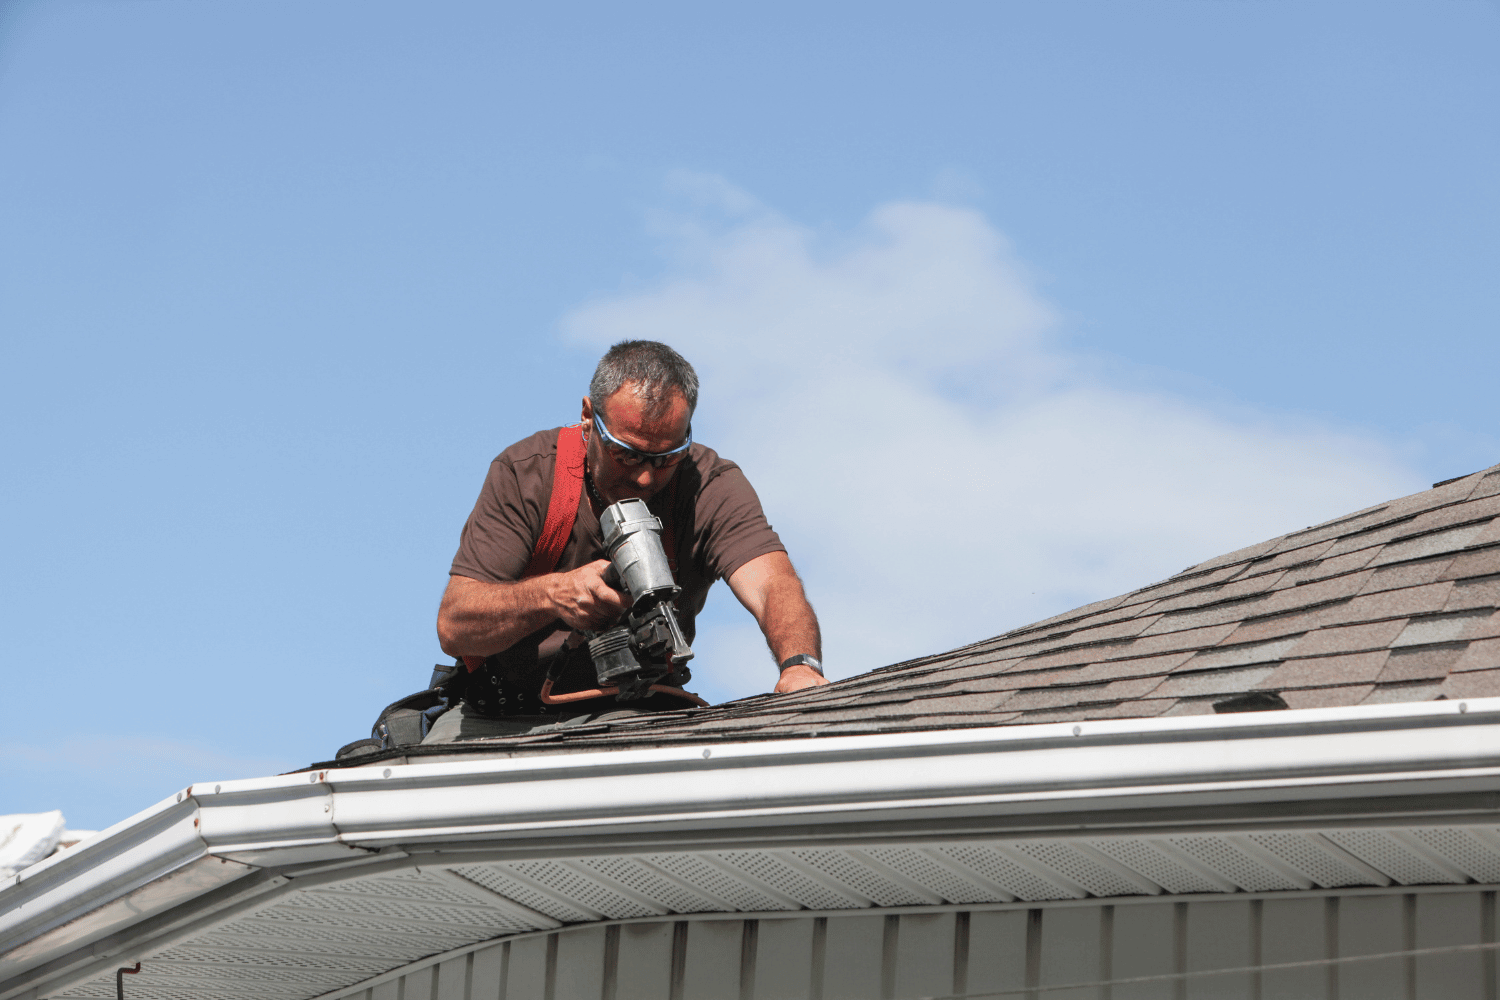
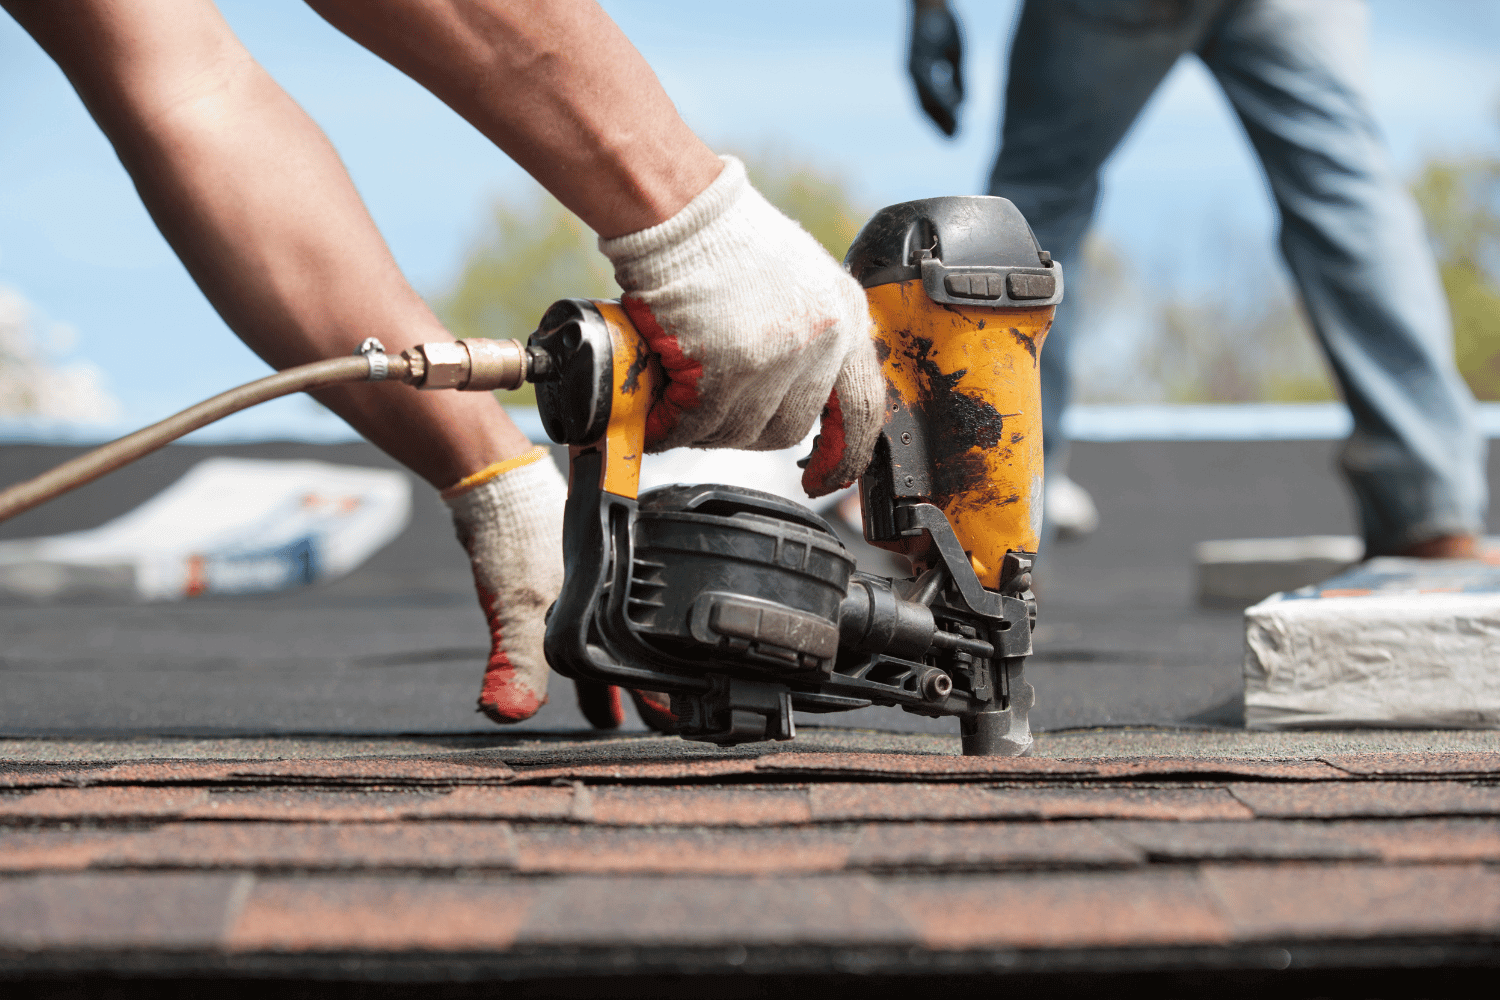
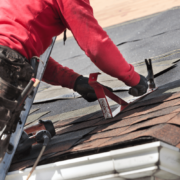
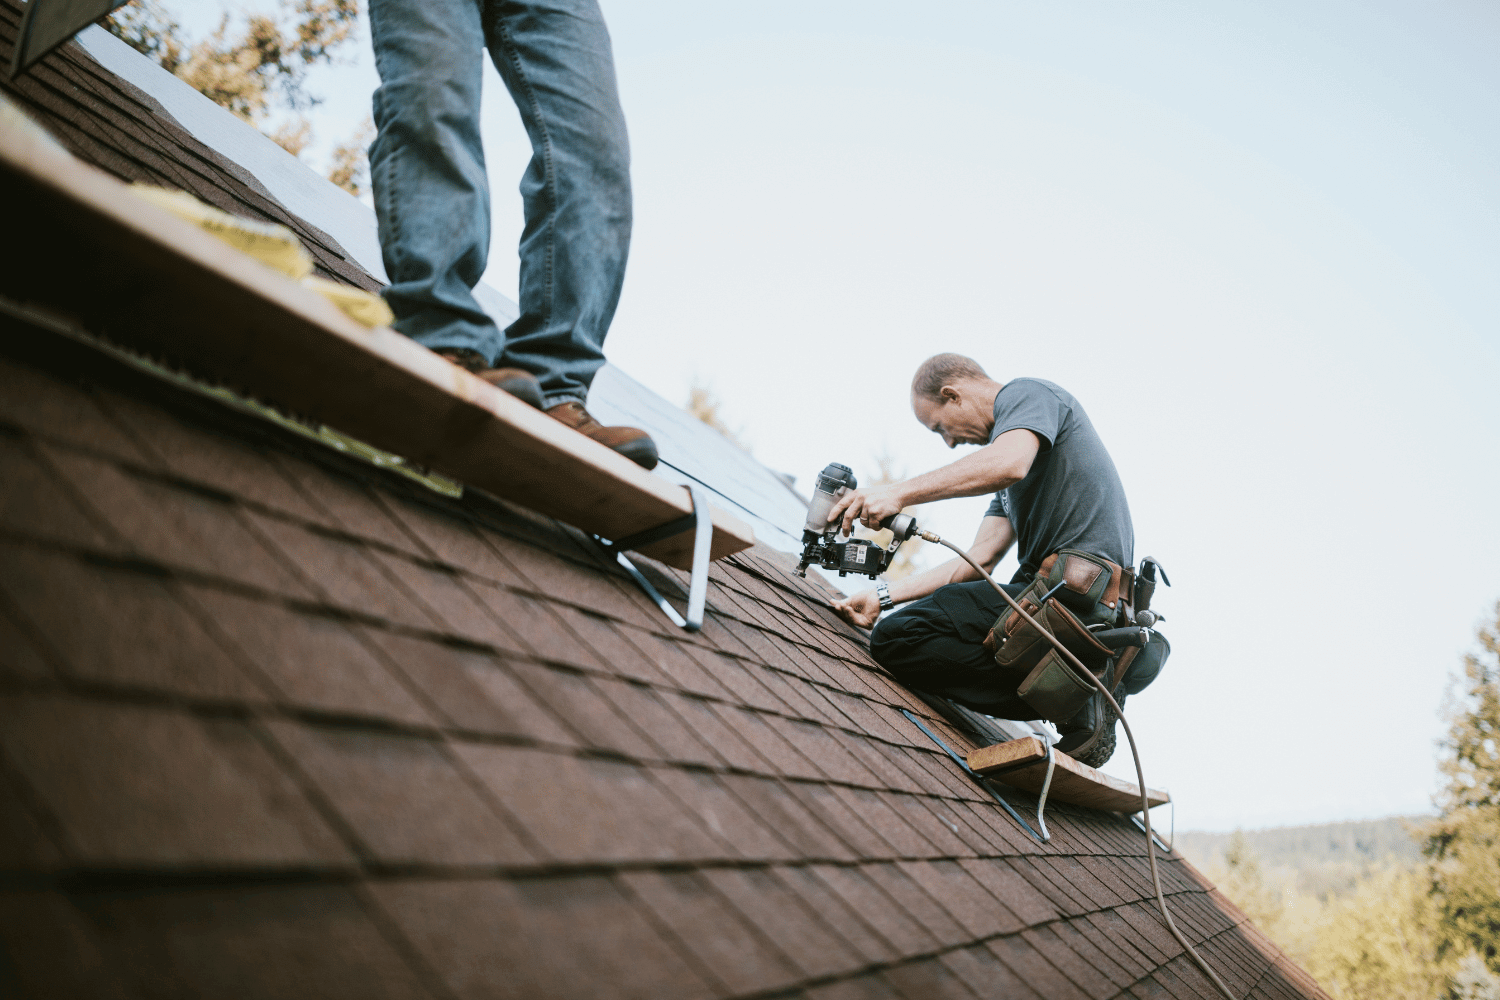
Installing New Roofing Materials

Installation of new roofing materials on a residential building.

Start the installation of new roofing materials with starter shingles, which provide a secure base for the main shingles and allow for easier water runoff. Main shingles are then installed in overlapping rows from the bottom of the roof to the ridge, ensuring proper alignment and coverage.

Underlayment is installed after the starter shingles, providing additional protection against moisture. Ridge cap shingles are used to cover the ridge of the roof where two planes meet, providing a finished appearance and additional protection.

Proper alignment and coverage during installing a new roof ensure the new roof’s longevity and effectiveness, allowing it to withstand the elements and protect your home for years.

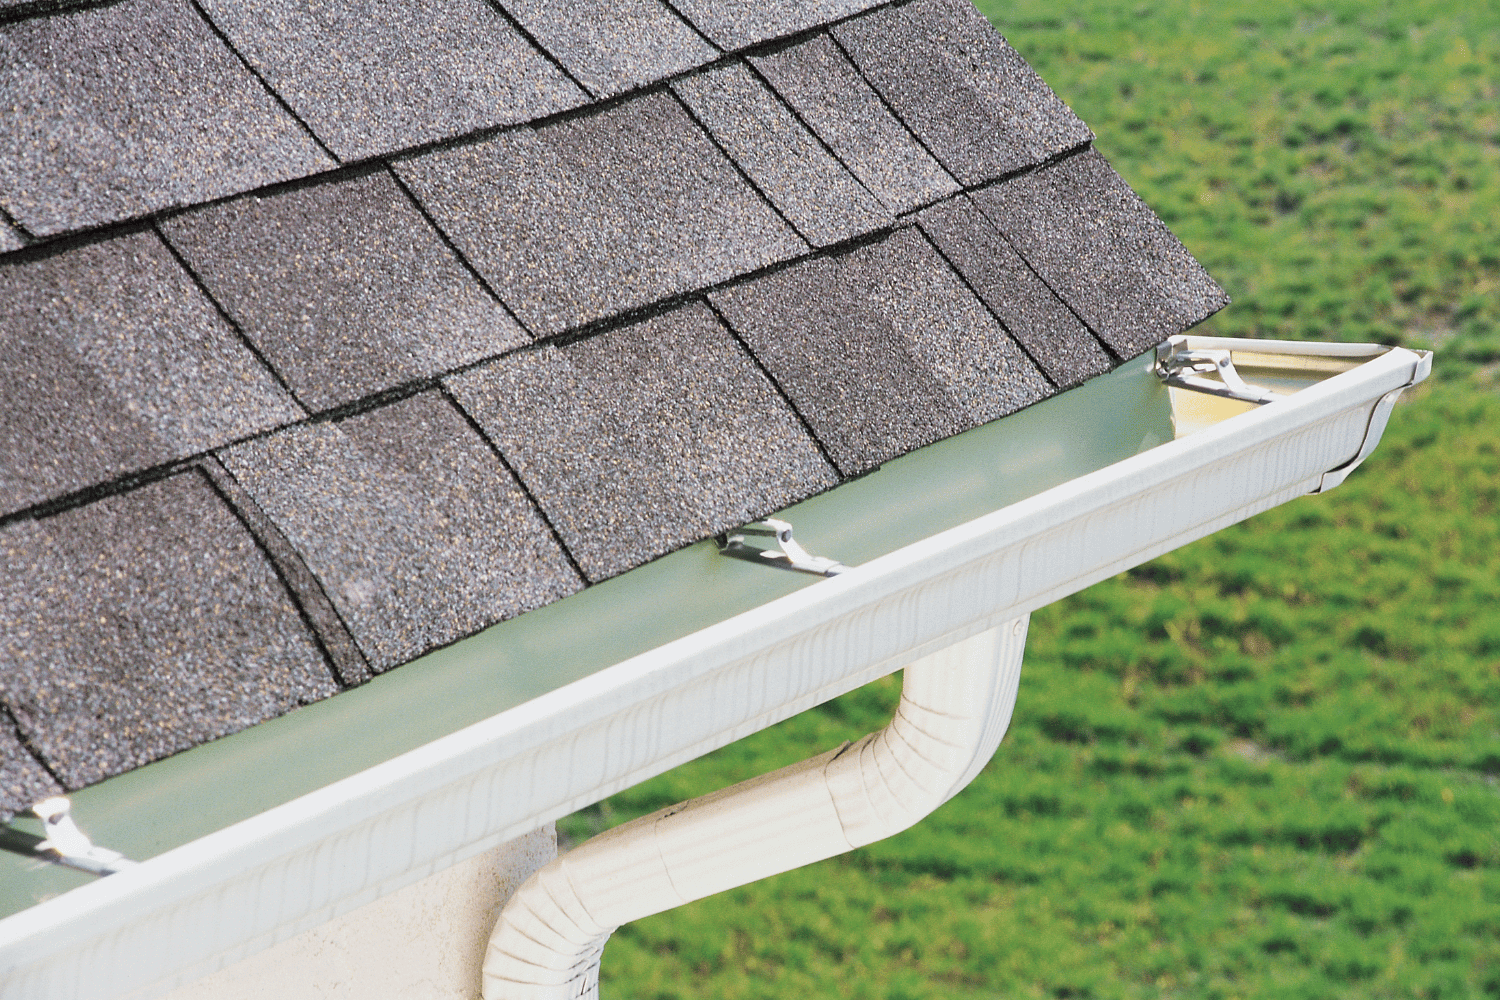
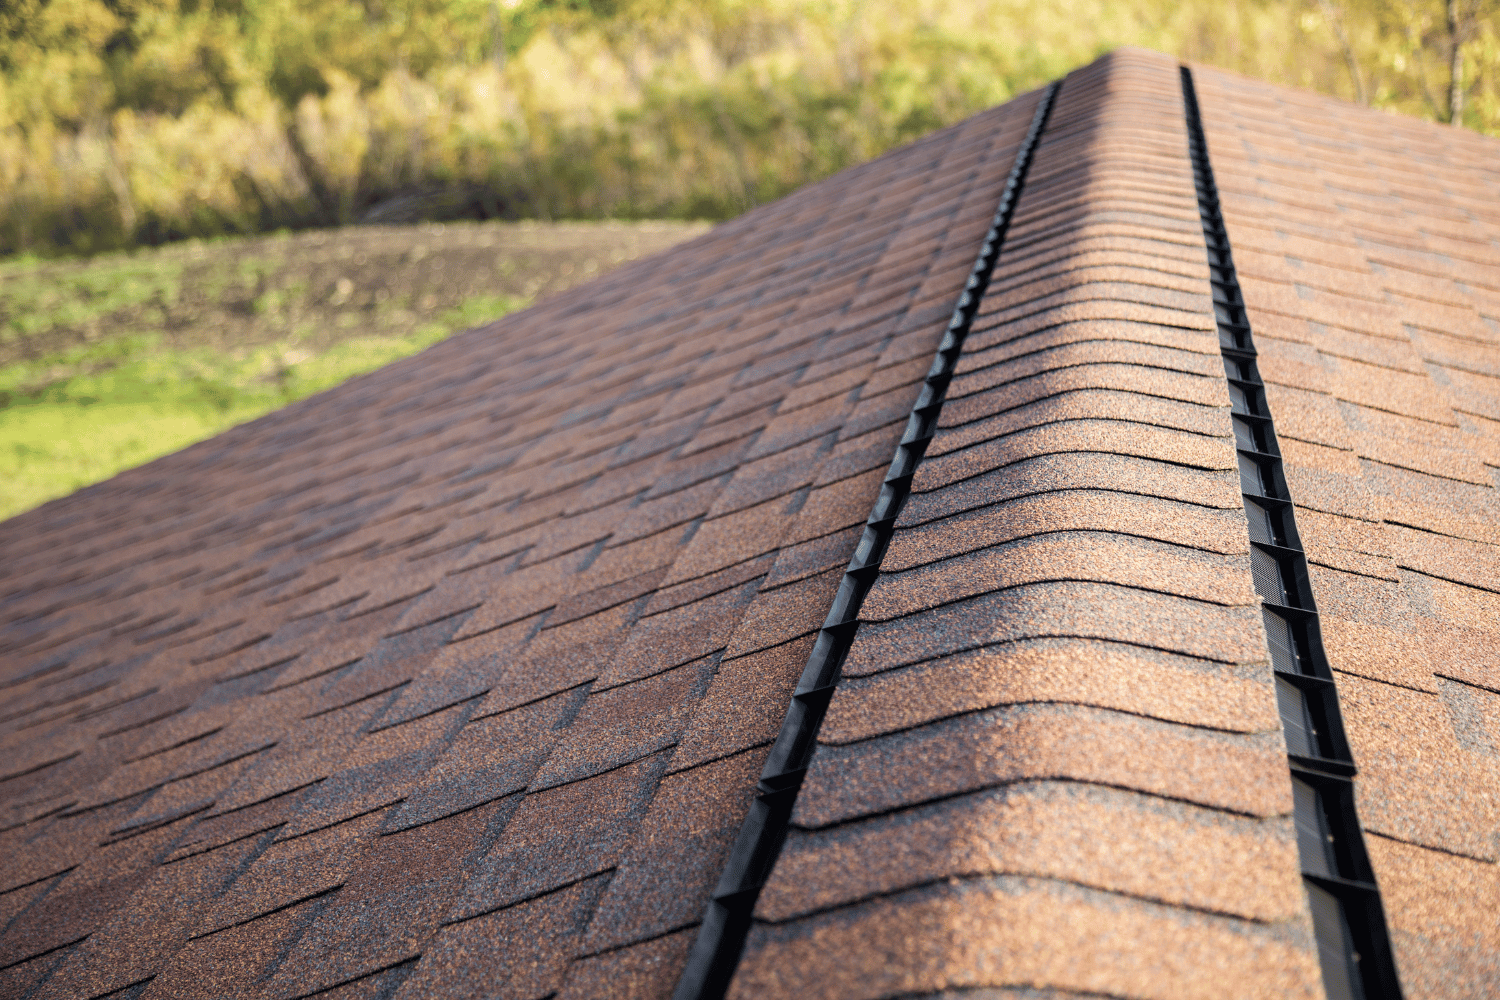
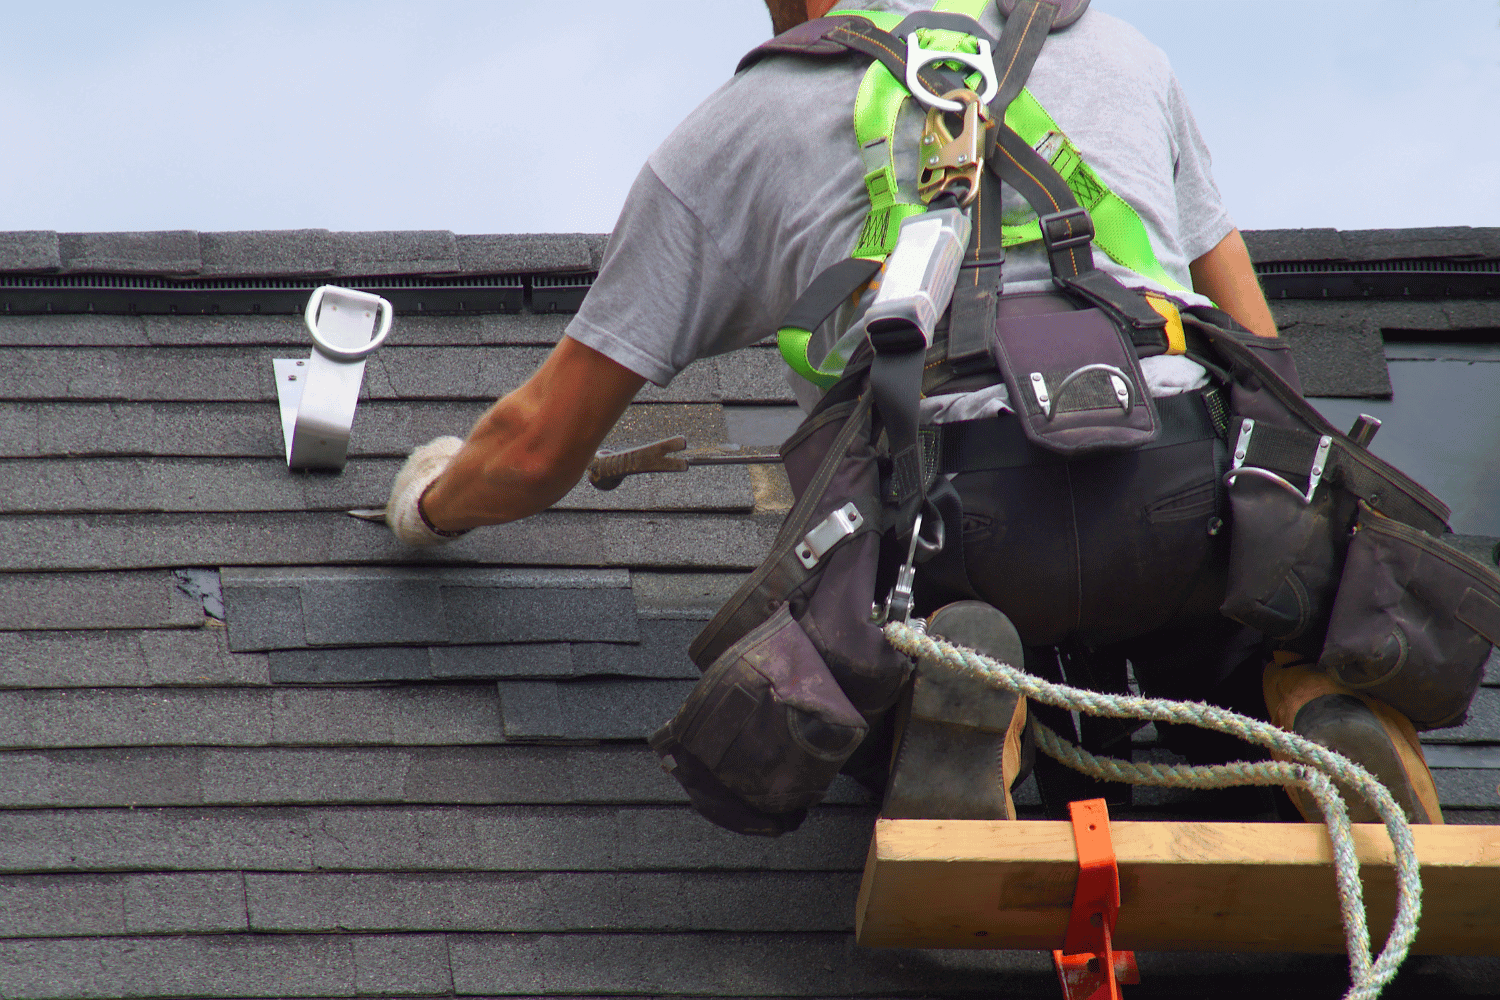
Ensuring Proper Ventilation

Maintaining proper ventilation is key to extending roof longevity and enhancing energy efficiency. Identifying ventilation issues during an inspection is vital, as poor ventilation can lead to moisture buildup and mold growth. Ridge vents facilitate the release of warm air from attics, enhancing airflow across the entire roof area.

Attic fans actively expel hot air, effectively reducing temperatures and humidity levels during extreme heat. A balanced ventilation system is necessary; too much or too little can impair both ridge vents and attic fans’ effectiveness.

Final Inspection and Cleanup

A roofing contractor conducting a final inspection of a newly installed roof.

The final inspection confirms that the work meets high standards and all requirements. Typically conducted the day after the installation is completed, the project manager performs a full inspection, checking for proper installation and ensuring quality.

Thorough cleanup is performed post-installation to remove debris and ensure quality. Cleanup involves blowing off roof debris and using magnetic tools to pick up stray nails, ensuring the work area is tidy and safe.

Understanding Warranties and Future Maintenance

Homeowners need to understand the different types of roofing warranties. The three primary types are manufacturer’s warranty, workmanship warranty, and extended manufacturer’s warranty. Most standard manufacturer warranties cover defective materials but not installation-related issues.

Extended warranties often include coverage for all components of the roofing system, unlike standard warranties. Contractor workmanship warranties protect against errors in installation, and some may offer lifetime coverage. It’s important to register your warranty promptly to ensure coverage if a claim needs to be filed later.

Warranties can be voided if the manufacturer’s installation instructions are not followed. Regular inspections and cleaning, proper ventilation and insulation, and addressing damage promptly are essential for extending the lifespan of a new roof.

Summary

In summary, the roof replacement process involves several critical steps, from identifying the need for a new roof to ensuring proper ventilation. Recognizing the signs of roof deterioration, choosing the right materials, obtaining permits, and preparing your home are essential first steps. The removal of old materials, inspection and repair of roof decking, and installation of underlayment and flashing set the stage for installing the new roofing materials.

Proper ventilation, final inspection, and understanding warranties and future maintenance ensure the longevity and effectiveness of your new roof. By following this guide and taking advantage of available financing options and promotions, you can ensure a smooth and successful roof replacement project.

Frequently Asked Questions

What are the common signs that my roof needs replacement?

Common signs that your roof needs replacement include persistent leaks, missing or damaged shingles, curled edges, bald areas, and its overall age. Addressing these issues promptly can prevent more significant damage to your home.

Why is a professional roof inspection important?

A professional roof inspection is crucial as it uncovers existing issues and guides you on the best course of action, enabling a well-informed roof replacement plan. This proactive approach helps prevent more significant problems and expenses down the line.

What are the main considerations when choosing roofing materials?

When choosing roofing materials, prioritize durability, aesthetics, and cost to ensure a beneficial long-term investment. Options such as asphalt shingles, metal roofing, tile, and slate each offer distinct advantages to meet your needs.

Why is proper ventilation important for my roof?

Proper ventilation is crucial as it prevents moisture buildup and mold growth, which can significantly extend your roof’s lifespan and improve energy efficiency. Ensuring adequate airflow protects your investment and maintains a healthy home environment.

What financing options are available for roof replacement?

Viable financing options are available for roof replacement by companies like Dream Home Roofers, along with potential discounts on materials. This can significantly reduce the upfront costs involved in a roof replacement project.


https://dreamhomeroofers.com/wp-content/uploads/2025/03/Installation-of-new-roofing-materials-on-a-residential-building.-1.png 1000 1500 Dream Home Roofers https://dreamhomeroofers.com/wp-content/uploads/2024/09/dhr-logo.png Dream Home Roofers2025-03-10 06:00:012025-08-25 09:50:37Understanding the Roof Replacement Process: What to Expect
A properly installed downspout directing water away from the house foundation.

The Ultimate Guide to Rainwater Gutter Installation in Easy Steps

February 21, 2025/in Roofing/by Dream Home Roofers

Rainwater gutter installation is essential for safeguarding your home from water damage. This guide covers every step: planning, measuring, cutting, and installing gutters and downspouts. Follow along to ensure your system works effectively and keeps your home dry.

Key Takeaways

  • Installing rain gutters is essential for protecting a home’s foundation and preventing costly water damage, erosion, and mold growth.

  • Thorough planning, accurate measurements, and the right materials are critical for a successful gutter installation, which includes assessing roof pitch and strategically placing downspouts.

  • Regular maintenance, such as cleaning and inspecting gutters and downspouts, is crucial for ensuring long-term performance and preventing clogs that can lead to structural damage.

Why Installing Rain Gutters is Crucial

A house with well-installed rain gutters that effectively divert rainwater.

Rain gutters are the unsung heroes of home maintenance, playing a pivotal role in diverting and carrying rainwater away from your home’s foundation, thus protecting its overall structural integrity. Without a well-installed gutter system, homes are vulnerable to severe water damage, including roof leaks and erosion, which can lead to costly repairs.

Moreover, installing gutters helps preserve the condition of your siding and roof materials by directing rainwater away, thus preventing the degradation of these essential components. Improper water runoff can lead to mold growth, which not only causes structural damage but also poses health risks to residents.

Basement flooding is another significant concern that can be avoided with a proper gutter system. When rainwater is not diverted effectively, it can seep into the basement, leading to extensive water damage and creating a damp environment that attracts pests. Additionally, without gutters, the garden areas around your home can suffer from excess moisture, harming plants and creating pollution.

Rain gutters represent a small investment that can prevent substantial, costly damage, keeping your home safe, dry, and structurally sound. To protect your home effectively, it is essential to install rain gutters and ensure that the rain gutter system is functioning properly.

Planning Your Rainwater Gutter Installation Project

Blueprints and tools laid out for planning a rainwater gutter installation project.

Thorough planning is necessary before installing rain gutters. Start by assessing your house’s structure and any existing components to ensure compatibility with the new gutter system. Visualize the layout by drawing a plan that identifies the lengths needed and the overall configuration of the gutters. This step helps in determining precise measurements and placement of the gutters, preventing overflow and foundation damage.

Next, calculate the roof’s pitch by measuring both horizontally and vertically to determine the slope. An appropriate slope ensures efficient water flow away from the foundation, preventing water-related problems. Strategically place downspouts to facilitate efficient drainage, keeping in mind that a downspout is generally needed for every 20 feet of gutter length.

Lastly, budget for additional materials beyond the gutters, such as brackets, downspouts, and potential repairs. Such comprehensive planning lays the groundwork for a smooth and successful gutter installation.

Essential Tools and Materials for Gutter Installation

Essential tools for gutter installation including a drill and various gutter materials.

Installing gutters effectively requires a range of essential tools and gutter material. Aluminum gutters, gutter sealant, and stainless steel screws are fundamental components of a quality gutter installation. Aluminum gutters are particularly popular due to their durability and resistance to rust.

Before:

The necessary tools for the job are equally important. You’ll need tin snips and a hacksaw for cutting the gutters to the desired lengths. A cordless drill and a hex head driver are also necessary for securing the gutters to the fascia board. Additionally, a drill with a 4-inch hole saw bit is recommended for making downspout holes in the gutters.

After:

The necessary tools for the job are equally important. You’ll need:

  • Tin snips and a hacksaw for cutting the gutters to the desired lengths

  • A cordless drill and a hex head driver for securing the gutters to the fascia board

  • A drill with a 4-inch hole saw bit for making downspout holes in the gutters

Don’t forget the additional components like gutter fascia, which should be on hand for installation. Having the proper tools and materials equips you to tackle your gutter installation project efficiently.

Measuring and Marking for Precision

Accuracy is crucial when installing rain gutters. Inaccurate measurements can lead to water pooling in the wrong places or an inefficient use of materials. Start by marking the highest and lowest points of the gutter run to establish the necessary slope for effective water flow. Usually, the pitch should be set at 1/2 inch for every 10 feet toward the downspout to ensure proper drainage.

Using a chalk line helps maintain the correct level and alignment of the gutters. Snap a chalk line between the highest and lowest points to guide your installation.

Tools such as a tape measure and RoofScope or GutterScope help in taking exact measurements, ensuring accurate installation and proper functioning of your gutters.

Cutting and Preparing Gutter Sections

Once you’ve measured, it’s time to cut and prepare the gutter sections. Saw the sections to the correct length, accounting for any corners or turns where elbow joints are needed. Use tin snips to cut outlet holes for downspouts and smooth out any sharp edges with a file to ensure seamless connections.

Pre-drilling holes for the gutter end caps and applying gutter sealant at the joints ensures leak-free connections. Properly preparing gutter sections is essential for a tight fit and effective water flow.

Installing Fascia Brackets and Hangers

Installing fascia brackets and hangers is a vital step in the gutter installation process. Begin by measuring the gutter length and marking hanger positions for even spacing. Use a ladder to safely access the roofline and drive spikes into the fascia board for secure attachment when using spikes and ferrules.

Ensure the screws used for attaching hangers are long enough to securely penetrate both the gutter and the fascia. Avoid positioning hangers directly over downspouts to prevent water flow issues. Hidden hangers, which are not visible from the ground, provide a neat appearance and enhance the overall aesthetics of the gutter system.

For added security, install gutter hangers through the fascia board into the rafter ends whenever possible. This method ensures a robust attachment, capable of supporting the weight of the gutters and the water they will channel.

Attaching the Gutter Sections

Now that the brackets and hangers are installed, the next step is to attach the gutter sections. Continue with this part of the setup. Begin at the highest point of the slope, positioning the sections in sequence near the installation site. Secure the sections using screws or gutter spikes, ensuring a sturdy connection.

For corners, use connectors or strips of metal to link two gutters together. Hook the back side of the strip miter through the rear edge and secure it with screws to ensure a tight fit. Brackets should be mounted every 18 to 24 inches to provide adequate support for the gutter runs.

Ensure that the installed gutters slope away from the downspout location to facilitate proper water flow and prevent pooling.

Sealing Joints and Connections

To prevent leaky gutters, sealing joints and connections is crucial. Apply gutter sealant along any seams to ensure that the gutters are watertight. This step is essential for maintaining the integrity of the gutter system and preventing costly repairs.

Apply sealant to all holes and elbows connecting gutter materials. Press the components tightly together after applying the caulk to ensure a secure, leak-free connection.

Installing Downspouts and Ensuring Proper Drainage

A properly installed downspout directing water away from the house foundation.

Correct downspout installation is vital for effective drainage. Determine the number and placement of downspouts to prevent water pooling around the foundation. Downspouts are typically installed at the ends of the gutter system. They can also be positioned at the corners.

Use brackets to secure the downspouts properly, attaching U-shaped elbow brackets to connect the downspout to the house corners. Downspout extensions can guide water further away from the foundation, reducing the risk of basement flooding.

For optimal performance, seal gutter seams on a warm, dry day and clean old caulk and debris before applying new sealant. Press the components tightly together after applying caulk to ensure a secure connection.

Adding Gutter Guards for Maintenance-Free Gutters

A house with gutter guards installed, ensuring maintenance-free gutters.

Gutter guards are an excellent addition to any gutter system, preventing debris buildup and reducing the frequency of gutter cleanings. Installing gutter guards helps keep the inside of the gutters clean, preventing water damage and ensuring proper flow.

Micromesh gutter guards are highly recommended for protecting rain gutters. LeafFilter gutter guards, for example, offer a clog-free guarantee, significantly reducing the need for regular cleaning.

Testing Your Installed Gutter System

After installation, testing the gutter system ensures it functions correctly. Run water through the system to check for leaks and observe water flow. This test helps identify any pooling or improper drainage issues needing attention.

Perform visual inspections to locate any visible damage such as cracks or sagging in the gutters. Promptly addressing these issues will ensure the longevity and effectiveness of your gutter system.

Tips for Maintaining Your Rain Gutters

Proper maintenance is essential for the longevity and performance of your rain gutters. Regular maintenance includes gutter cleaning and downspouts at least twice yearly to prevent clogs and ensure proper function. This practice helps avoid common issues such as clogs and leaks in the gutter system.

Using gutter guards minimizes the risks associated with cleaning gutters, reducing the time spent on ladders and enhancing safety. Gutter guards also lower the fire hazard risk by preventing debris accumulation that can catch fire.

Regularly check for signs of rust, corrosion, or sagging in your gutters. Inspect downspouts regularly for blockages to prevent overflow and subsequent damage.

Summary

Installing rain gutters is a critical task that protects your home from water damage and maintains its structural integrity. By following this guide, you’ve learned the step-by-step process of planning, installing, and maintaining a reliable gutter system. With proper tools, careful measurements, and regular maintenance, your gutters will efficiently divert rainwater away from your home, ensuring it remains safe and dry. Take action today and safeguard your home with a well-installed gutter system.

Frequently Asked Questions

Why do most houses in Florida not have gutters?

Most houses in Florida do not have gutters because they can trap debris, leading to clogs and potential roof damage, while the state’s wet climate and heavy rains make maintenance challenging. Consequently, many homeowners opt for alternatives to reduce upkeep.

Why is it important to install rain gutters?

Installing rain gutters is essential to protect your home’s foundation by redirecting rainwater away, which helps prevent structural damage, mold growth, and flooding. This proactive measure safeguards both your property and your investment.

What tools and materials are essential for gutter installation?

For gutter installation, essential materials are aluminum gutters, gutter sealant, and stainless steel screws, while necessary tools include tin snips, a hacksaw, a cordless drill, and a hex head driver. Ensuring you have these items will facilitate a smooth installation process.

How should I measure and mark for gutter installation?

To accurately install gutters, measure the highest and lowest points along the run, then snap a chalk line to establish a slope of 1/2 inch for every 10 feet toward the downspout. This ensures proper drainage and functionality.

What are the benefits of installing gutter guards?

Installing gutter guards effectively prevents debris buildup and reduces the need for frequent cleanings, ensuring proper water flow. This not only enhances safety by minimizing cleaning risks but also mitigates fire hazards.


https://dreamhomeroofers.com/wp-content/uploads/2025/02/A-properly-installed-downspout-directing-water-away-from-the-house-foundation.-1.png 1000 1500 Dream Home Roofers https://dreamhomeroofers.com/wp-content/uploads/2024/09/dhr-logo.png Dream Home Roofers2025-02-21 08:00:032025-08-25 08:57:38The Ultimate Guide to Rainwater Gutter Installation in Easy Steps
Preparing a roof deck for shingle installation.

Roof Shingle Overlap: The Complete Guide From a Licensed NJ Roofer

February 15, 2025/in Roof Installation, Roofing/by Dream Home Roofers

Shingle overlap is one of those specifications that looks simple until you understand what happens when it’s wrong. Too little overlap and wind-driven rain gets under the shingles. Too much and you’ve wasted material and changed the way water sheds off the roof. Dream Home Roofers has installed and inspected hundreds of roofs in West Caldwell and across northern New Jersey. This is what correct overlap looks  like, what happens when it’s off, and how to know if your existing roof was installed properly.

The Terminology: Headlap, Exposure, and Offset

Before getting into the numbers, it helps to understand the three terms that define how shingles are positioned relative to each other.
• Headlap: the distance the top edge of a lower course is covered by the course two rows above it.
This is the primary waterproofing measurement.
• Exposure: how much of each shingle is visible after installation. This is what you see from the ground.
• Offset: how far the vertical joints in each course are staggered from the course below. This prevents water from tracking straight down through aligned cutouts.

Correct Overlap Measurements by Shingle Type

Three-Tab Asphalt Shingles

Three-tab shingles are 12 inches tall with a 5-inch exposure, leaving a 7-inch headlap. The minimum headlap required by most building codes and manufacturers is 2 inches, but a proper installation targets 5 to 7 inches for full coverage. The offset on three-tab shingles should be at least 6 inches from the joints in
the course below.

Architectural (Dimensional) Shingles

Architectural shingles are typically 13 to 14 inches tall with a 5-5/8 inch exposure. The standard headlap target is around 6 inches. Because architectural shingles don’t have uniform cutouts, the offset needs to be managed by starting alternating courses with a half-shingle or a measured starter piece to keep the joints staggered.

Hip and Ridge Caps

Ridge cap shingles are overlapped along the ridge and hip lines. Standard ridge cap overlap is 5 to 6 inches, with the exposed fasteners of the lower cap covered by the cap above it. An improperly
overlapped ridge cap is one of the most common sources of leaks we find on roofs that were otherwise installed correctly.

What Happens When Shingle Overlap Is Wrong

Too Little Overlap

Insufficient headlap exposes the underlayment to wind-driven rain. In New Jersey’s climate, nor’easters and late-season storms push rain horizontally, which is a completely different stress than vertical rain. An exposed underlayment can fail within a few seasons under that kind of repeated stress. Once the underlayment is compromised, the decking follows quickly in our humid climate.

Too Much Exposure

Excessive shingle exposure reduces the headlap below minimum, which has the same effect as insufficient overlap. It also makes the roof look wrong from the street. Both conditions may void the
manufacturer’s warranty.

Misaligned Offsets

When the vertical joints of two adjacent courses align instead of stagger, water can track straight down between the shingles without being deflected. This is less common than headlap errors but still shows up on inspections, particularly on roofs installed quickly or by less experienced crews.

How to Check Your Roof’s Shingle Overlap

You can get a rough read on shingle exposure from the ground by measuring the visible portion of a shingle course with a tape measure. On a standard architectural shingle roof, the exposed portion should be right around 5 to 5-5/8 inches. If you’re seeing 7 or 8 inches of exposure, the headlap is likely short of spec. A roof inspection is the only way to confirm the actual headlap measurement and check the ridge cap and valley details.

What Roof Installation Costs in West Caldwell, NJ

• Standard architectural shingle replacement on a typical West Caldwell home (1,500 to 2,200 sq ft of roof surface): $7,000 to $12,000 including removal of the existing roof and standard underlayment.
• Premium shingles, steep pitch, or homes requiring decking repair will run toward the higher end or above this range.
• Dream Home Roofers provides free written estimates with a detailed scope of work.

Frequently Asked Questions: Roof Shingle Overlap

How much should asphalt shingles overlap?

Standard three-tab asphalt shingles require a minimum headlap of 2 inches, with most manufacturers targeting 5 to 7 inches. Architectural shingles typically run a 6-inch headlap with a 5-5/8 inch exposure. Getting this measurement wrong reduces both wind and water resistance and can void the manufacturer’s warranty.

What happens if shingles don’t overlap enough?

Insufficient shingle overlap leaves the underlayment and decking exposed to wind-driven rain. Over time this causes leaks, sheathing rot, and mold growth in the attic. In New Jersey’s climate, where nor’easters push rain horizontally, this failure mode is faster and more destructive than in drier markets. It can also void your shingle warranty.

How do I know if my shingles were installed with the right overlap?

A basic visual check from the ground can reveal excessive exposure (more than about 6 inches visible on an architectural shingle course is a red flag), but only an on-roof inspection with measurements confirms the actual headlap. Dream Home Roofers provides free roof inspections in West Caldwell, NJ and documents installation defects in writing.

Does incorrect shingle overlap void the manufacturer warranty?

Yes, in most cases. Shingle manufacturers require installation to their published specifications as a condition of the warranty. An inspection that finds headlap short of spec can be grounds for a warranty denial on materials, even if the shingles themselves are defective. This is one of the reasons using a licensed and experienced installer matters.

https://dreamhomeroofers.com/wp-content/uploads/2025/02/Preparing-a-roof-deck-for-shingle-installation.-1.png 1000 1500 Dream Home Roofers https://dreamhomeroofers.com/wp-content/uploads/2024/09/dhr-logo.png Dream Home Roofers2025-02-15 08:00:592026-04-07 05:01:01Roof Shingle Overlap: The Complete Guide From a Licensed NJ Roofer
A detailed view of shingle roof components including underlayment and drip edge.

Shingle Roof Detail: A Comprehensive Guide to Roofing Essentials

February 7, 2025/in Roofing/by Dream Home Roofers

Need shingle roof detail? This guide covers essential components, installation steps, and maintenance tips for a durable shingle roof. Perfect for homeowners and professionals, it provides the detailed insights you need.

Key Takeaways

  • A shingle roof consists of several essential components including the roof deck, underlayment, and drip edge, each crucial for performance and longevity.

  • Asphalt shingles come in three main types: three-tab, dimensional, and luxury, each offering distinct benefits and aesthetic options for homeowners.

  • Regular maintenance, including inspections and debris cleaning, is vital for extending the life of asphalt shingle roofs and preventing costly repairs.

Understanding Shingle Roof Components

A detailed view of shingle roof components including underlayment and drip edge.

A shingle roof is more than just the visible layer of roof shingles; it’s a complex system made up of several key components. These include the roof deck, underlayment, and drip edge, each playing a crucial role in the overall performance and longevity of the roof.

Understanding these components will help you appreciate the intricacies of asphalt shingle roofing systems and the importance of each element in protecting your home.

Roof Deck

The roof deck serves as the foundation for your shingle roof, providing the structural integrity necessary to support the roofing system. Typically made from plywood or oriented strand board (OSB), the roof deck is crucial for evenly distributing the weight of the roof, thereby reducing the risk of structural damage.

A smooth, properly fastened, and gap-free roof deck is crucial for the effective application of roofing shingles. Quality roof decking not only supports the roof system but also contributes significantly to the overall performance and longevity of your asphalt shingle roof.

Underlayment

Underlayment acts as a secondary layer of protection beneath the asphalt shingles, safeguarding your home against water infiltration. Typically made from materials such as asphalt-saturated felt or synthetic options like IKO’s RoofGard-Cool Grey Synthetic Roof Underlayment, this layer is vital for preventing moisture damage to the roof deck.

Installation begins at the eaves, ensuring overlap over the drip edge, and continues in horizontal courses to provide comprehensive coverage. The underlayment’s primary role is to offer an additional barrier against water, enhancing the overall durability and resilience of the roofing system.

Drip Edge

The drip edge is an essential component that protects the lower edge of the roof deck from water damage. Installed along the eaves and rakes, drip edges guide water away from the roof’s edge, preventing it from seeping into the fascia and causing rot or other structural issues.

Drip edges efficiently direct water runoff, maintaining the roofing system’s integrity, preventing leaks, and prolonging the roof’s lifespan.

Types of Asphalt Shingles

Various types of asphalt shingles displayed together.

Asphalt shingles are the preferred roofing material in North America, prized for their versatility, cost-effectiveness, and weather resilience. These shingles come in several types, each offering distinct advantages. The three main categories are three-tab shingles, dimensional shingles, and luxury shingles.

Knowing the differences between these types enables you to choose the right shingle for your specific needs and aesthetic preferences.

Three-Tab Shingles

Three-tab shingles are a popular choice for many homeowners due to their affordability and straightforward design. Characterized by their flat appearance and single-layer construction, three-tab shingles offer a uniform look that suits a variety of roofing projects.

Their cost-effectiveness and ease of installation make them an excellent option for budget-conscious homeowners looking for a reliable roofing solution.

Dimensional Shingles

Dimensional shingles, also known as architectural shingles and laminated shingles, offer enhanced aesthetic appeal and performance. These shingles feature a multi-layered design that provides added depth and texture, mimicking the look of more expensive materials like wood and slate.

The additional layers not only improve the visual appeal but also enhance the weather resistance of the roof, making dimensional shingles a favored choice for homeowners seeking a balance of beauty and durability.

Luxury Shingles

Luxury shingles are designed to replicate the appearance of high-end roofing materials such as wood shake shingles, cedar shakes, and slate tiles. These premium shingles offer an upscale look without the associated cost, providing homeowners with a sophisticated and elegant roofing option.

Beyond their aesthetic appeal, luxury shingles offer superior durability and performance, making them an excellent investment for enhancing home curb appeal and longevity.

Installation Process of Asphalt Shingles

A roofing contractor installing asphalt shingles on a roof.

The installation process of asphalt shingles involves several critical steps, each essential for ensuring a durable and effective roofing system. Each phase, from preparing the roof deck to laying the underlayment and installing the shingles, must be meticulously executed for optimal results.

Appreciating this process helps ensure that your roofing project meets the highest standards.

Preparing the Roof Deck

Preparing the roof deck is the first step in the installation process and involves ensuring the deck is smooth, properly fastened, dry, and free of gaps or holes. This preparation is crucial for the effective application of shingles, as any imperfections can affect the roof’s performance and longevity.

A clean and secure roof deck provides a solid foundation for the entire roofing system, ensuring that the shingles adhere properly and perform as intended.

Laying the Underlayment

The underlayment is typically applied in horizontal courses, starting at the eaves and overlapping the drip edge for enhanced protection. Special attention is given to valleys and areas prone to water infiltration, where ice and water shields are often installed to prevent leaks.

This layer acts as a secondary barrier against moisture, ensuring that the roof deck remains dry and protected from potential damage.

Installing Shingles

Shingle installation begins at the bottom of the roof and progresses upward, with each row overlapping the one below to ensure proper water shedding. Starter shingles are crucial for providing an initial layer of adhesion and facilitating water runoff.

Proper nail placement and the strategic installation of ridge cap shingles enhance wind resistance and overall roof durability, ensuring your asphalt shingle roof performs optimally in various weather conditions.

Enhancing Roof Durability

A close-up of a shingle roof with an ice and water shield.

Enhancing the durability of your asphalt shingle roof involves implementing measures such as using protective membranes, ensuring proper ventilation, and opting for algae-resistant shingles. These strategies help extend the life of the roof, maintain its aesthetic appeal, and protect your home from potential damage.

Maintaining your roof regularly and making proactive enhancements are vital for keeping it in top condition.

Ice and Water Shield

Ice and Water Shield is a critical component for preventing leaks and ice dams, particularly in regions prone to severe weather. This waterproof barrier is installed at the eaves, valleys, and other vulnerable areas to protect against water infiltration from ice dams and wind-driven rain.

By preventing moisture damage, Ice and Water Shield significantly enhances the durability and longevity of the roofing system.

Ventilation

Proper attic ventilation is essential for extending the life of your shingles and maintaining the overall health of your roof system. Effective ventilation helps regulate attic temperature, reducing heat buildup that can damage shingles and cause premature aging.

Additionally, it minimizes moisture accumulation, crucial for preventing shingle deterioration and maintaining the roof’s integrity.

Algae-Resistant Shingles

Algae-resistant shingles are treated with compounds that inhibit algae growth, helping maintain the roof’s aesthetic appeal and structural integrity over time. These shingles prevent unsightly stains and deterioration caused by microbial growth, ensuring that your roof remains clean and attractive.

Homeowners opting for algae-resistant shingles benefit from a longer-lasting and visually appealing roof.

Maintenance Tips for Asphalt Shingle Roofs

Regular maintenance is essential for maximizing the lifespan of your asphalt shingle roof. Simple practices like routine inspections, cleaning debris, and repairing minor damage can prevent more significant issues and costly repairs.

A proactive approach to maintenance ensures your roof continues to protect your home effectively.

Regular Inspections

Periodic roof inspections are crucial for identifying potential issues before they escalate. It’s recommended to inspect the roof twice a year, ideally in spring and autumn, to catch wear and potential leaks early. Regular inspections help maintain the roof’s integrity and prevent minor problems from becoming major concerns.

Cleaning Debris

Keeping the roof clear of leaves, branches, and other debris is vital for preventing water accumulation and potential damage. Regular roof and gutter cleaning ensures free water flow, reducing leak risks and prolonging shingle life.

This simple maintenance step can significantly enhance the durability of your asphalt shingle roof.

Repairing Damage

Addressing minor repairs promptly can prevent more extensive damage and costly repairs. Replacing damaged shingles and fixing small leaks are relatively simple tasks that can be performed to maintain the roof’s integrity.

Addressing these minor issues early protects your roof from more severe damage and extends its lifespan.

Choosing the Right Roofing Contractor

Selecting a reliable roofing contractor is crucial for the success of your roofing project. Verifying their qualifications, including required licenses and insurance coverage, is the first step. A reputable contractor with the right credentials ensures your roof is installed correctly and meets industry standards, providing peace of mind and a high-quality roofing system.

Certification and Experience

Hiring roofing contractors with proper certification ensures quality work and adherence to industry standards. Certified contractors, such as Owens Corning Platinum Preferred Contractors, have undergone specialized training and adhere to best practices, ensuring skilled execution of roofing projects.

These certifications indicate a contractor’s expertise and reliability, giving homeowners confidence in their new roof’s quality.

Reviews and References

Checking online reviews and requesting references from past clients is essential for gauging a contractor’s reputation and reliability. Online reviews provide insights into the contractor’s quality of work and customer satisfaction, while personal references offer a more detailed account of their performance on specific projects.

This information helps you choose a contractor with a proven track record of delivering high-quality results.

Detailed Estimates

Detailed estimates from multiple contractors are crucial for understanding your roofing project’s overall costs. A comprehensive estimate should include the costs of materials, labor, permits, and any additional fees that may arise.

Comparing these estimates allows homeowners to manage budgets effectively, avoid unexpected costs, and ensure transparency and value for their investment.

The Benefits of Asphalt Shingle Roofing

A family standing in front of their home with an asphalt shingle roof.

Asphalt shingle roofing offers numerous benefits, making it a popular choice among homeowners. From its cost-effectiveness to its versatility and durability, asphalt shingles provide a reliable and aesthetically pleasing asphalt roofing shingles solution.

Understanding these benefits will help you appreciate why asphalt shingle roofs are a favored option for residential properties.

Affordability

Asphalt shingles are one of the most affordable roofing options available, providing high-quality roofing at a lower upfront cost compared to other materials. The installation cost typically ranges from $3.50 to $9.50 per square foot, making it a financially sensible choice for budget-conscious homeowners.

This cost-effectiveness, combined with the durability and aesthetic appeal of asphalt shingles, makes them an excellent value for homeowners looking to replace their roofs.

Versatility

Asphalt shingles come in a wide array of colors and styles, allowing homeowners to customize their roofs to match their personal taste and home design. Whether you prefer the classic look of three-tab shingles or the sophisticated appeal of dimensional shingles, there is an asphalt shingle option to suit your aesthetic needs.

This versatility makes asphalt shingles a popular choice for various architectural styles and personal preferences.

Durability

Modern asphalt shingles are engineered to withstand high winds and various weather conditions, with some able to resist gusts of up to 130 mph. Their durability and resilience make them a suitable choice for homeowners looking for reliable protection against the elements, as well as from asphalt shingle manufacturers.

Regular maintenance and inspections further enhance the performance and longevity of asphalt shingle roofs, ensuring they continue to protect your home effectively over time.

Summary

In conclusion, asphalt shingle roofing offers a combination of affordability, versatility, and durability that makes it an ideal choice for homeowners. Understanding the components of a shingle roof, the different types of asphalt shingles, and the installation process can help you make informed decisions about your roofing project. Regular maintenance and choosing a reputable roofing contractor are crucial for ensuring the longevity and performance of your new roof. By following the insights provided in this guide, you can enjoy a beautiful, durable, and reliable asphalt shingle roof that enhances the protection and aesthetic appeal of your home.

Frequently Asked Questions

Is an asphalt roof expensive?

An asphalt roof can be considered moderately expensive, with costs typically ranging from $3.50 to $9.50 per square foot, depending on materials and labor. For a standard home, total replacement costs can fall between $6,000 and $16,500, based on the size and complexity of the roof.

What types of roofing materials does Dream Home Roofers work with for residential roof replacement?

Dream Home Roofers specializes in premium Owens Corning roofing materials for residential roof replacements. Their diverse product offerings ensure quality and durability for your roofing needs.

What certification do Dream Home Roofers hold?

Dream Home Roofers hold the certification of Owens Corning Platinum Preferred Contractors, ensuring high standards in roofing services.

What are architectural shingles also known as?

Architectural shingles are also known as dimensional shingles.

How do architectural shingles differ from traditional three-tab shingles?

Architectural shingles feature multiple layers that provide a more textured appearance compared to traditional three-tab shingles. This enhanced design not only improves aesthetics but also increases durability and longevity.


https://dreamhomeroofers.com/wp-content/uploads/2025/02/A-detailed-view-of-shingle-roof-components-including-underlayment-and-drip-edge.-1.png 1000 1500 Dream Home Roofers https://dreamhomeroofers.com/wp-content/uploads/2024/09/dhr-logo.png Dream Home Roofers2025-02-07 08:00:122025-08-25 09:59:57Shingle Roof Detail: A Comprehensive Guide to Roofing Essentials
An illustration showing chimney flashing on a roof.

Chimney Flashing Repair and Sealing | Fix Leaks the Right Way

January 31, 2025/in Roof Repair, Roofing/by Dream Home Roofers

A chimney flashing leak is one of the more deceptive problems a homeowner can deal with. The water doesn’t always show up right away, and where it shows up on your ceiling or wall is rarely where the roof is actually compromised. Dream Home Roofers diagnoses and repairs chimney flashing across New Jersey, Pennsylvania, and Maryland. If you have water coming in near your chimney, this is what we look for and how we fix it.

What Chimney Flashing Is and Why It Fails.

Flashing is the metal system that seals the joint where your chimney meets the roof surface. It has two components: step flashing, which is a series of L-shaped metal pieces woven into the shingle courses along the chimney sides, and counter-flashing, which is cut into the chimney mortar joints and laps over the step flashing to create a double seal. In the Mid-Atlantic climate, flashing fails for a few specific reasons. Thermal expansion and contraction from cold winters and hot summers loosens mortar joints and lifts metal edges over time. Ice dams form along the chimney base and force water under the flashing when they melt. And in older homes, the original lead or aluminum flashing simply reaches the end of its lifespan.

Resealing vs Full Flashing Replacement

Not every chimney flashing problem requires full replacement. Here is how we decide which approach makes sense.

When Resealing Is Enough

If the flashing metal itself is in good shape but the sealant has cracked or pulled away from the chimney, a reseal with a high-quality polyurethane or rubber flashing sealant can stop the leak. This works when the metal hasn’t lifted significantly and when the underlying mortar joints are still sound. Resealing is not a permanent fix on flashing that has already started to separate from the chimney or buckle from thermal stress.

When Full Replacement Is Required

Full replacement is needed when the flashing has corroded through, when the counter-flashing has pulled out of the mortar joints, when the step flashing pieces have lifted away from the shingle courses, or when the chimney itself has lost mortar at the flashing line. In these cases, resealing over a failed system is a temporary patch that will fail again within a season or two.

The Right Way to Replace Chimney Flashing

Remove and Inspect

We remove the existing step flashing and counter-flashing fully, rather than layering new material on top of old. Once the old flashing is out we inspect the underlying decking and sheathing for moisture damage. In NJ and PA homes with older construction, we regularly find soft spots in the decking at the chimney base that need to be replaced before new flashing goes on.

Step Flashing Installation

New step flashing pieces are woven into the shingle courses along both sides of the chimney. Each piece overlaps the one below it, creating a continuous water shedding surface up the chimney face. We use galvanized steel step flashing on most installations unless the homeowner requests copper, which lasts longer but comes at a higher material cost.

Counter-Flashing and Mortar

Counter-flashing is cut into the chimney mortar joints and bent down over the step flashing. We repack the mortar joints with new material and seal the top edge of the counter-flashing with polyurethane sealant. The result is a mechanical seal plus a chemical seal, which is what holds up in freeze-thaw conditions.

How Much Chimney Flashing Repair Costs.

• Resealing existing flashing at a single chimney: $200 to $500.
• Full step and counter-flashing replacement on a single chimney: $800 to $1,500 depending on chimney size and number of courses.
• Homes requiring decking repair at the chimney base will run higher. We provide a written estimate before any work begins.
• Dream Home Roofers provides free inspections to diagnose the leak source before recommending repair vs replacement.

Frequently Asked Questions: Chimney Flashing Repair

What is the best sealant for chimney flashing?

A polyurethane or rubberized flashing sealant outperforms standard caulk because it stays flexible through freeze-thaw cycles rather than cracking. However, sealant alone is only appropriate when the flashing metal is still sound and the mortar joints are intact. If the flashing has lifted or corroded, sealing over it will fail quickly. Dream Home Roofers inspects the full condition of the flashing before recommending the right repair approach.

How do I know if my chimney flashing is causing my roof leak?

Water stains on the ceiling directly around or below the chimney are the most common sign. You may also see peeling paint, damp drywall, or visible daylight or rust at the flashing line on a sunny day. Because water travels before it drips, the stain may show up several feet from the chimney even when the flashing is the source. A licensed roofer can diagnose the leak origin accurately.

How much does chimney flashing repair cost in NJ?

Resealing existing flashing at a single chimney runs $200 to $500. A full step and counter-flashing replacement is typically $800 to $1,500 depending on chimney size and accessibility. If the decking at the chimney base has moisture damage it will add to that cost. Dream Home Roofers provides a written estimate after a free on-site inspection.

How long does chimney flashing last?

Galvanized steel flashing typically lasts 20 to 30 years with proper installation. Copper flashing can last 50 years or more. Flashing sealant, even the best products, should be inspected every 5 to 10 years in NJ and PA climates because freeze-thaw stress degrades it faster than in warmer climates.

https://dreamhomeroofers.com/wp-content/uploads/2025/01/An-illustration-showing-chimney-flashing-on-a-roof.-1.png 1000 1500 Dream Home Roofers https://dreamhomeroofers.com/wp-content/uploads/2024/09/dhr-logo.png Dream Home Roofers2025-01-31 11:09:452026-04-07 02:01:10Chimney Flashing Repair and Sealing | Fix Leaks the Right Way
An assortment of essential roofing tools including a putty knife and roofing nails.

Best Ways to Fix a Loose Shingle on Roof: A Step-by-Step Guide

January 28, 2025/in Roof Repair, Roofing/by Dream Home Roofers

Noticed a loose shingle on your roof? Ignoring it could lead to serious damage. This guide will show you how to identify, fix, and prevent loose shingles, ensuring your roof stays in top shape.

Key Takeaways

  • Promptly addressing loose shingles can prevent water damage and extend the roof’s lifespan.

  • Essential tools for shingle repair include roofing cement, utility knives, and safety gear, ensuring an efficient and safe repair process.

  • Regular inspections and preventative maintenance are key to maintaining roof integrity and preventing future issues.

Best Ways to Fix a Loose Shingle on Roof: A Step-by-Step Guide

A close-up view of a loose shingle on a roof, highlighting the potential for water infiltration.

Addressing shingle repairs promptly can prevent further damage and extend your roof’s lifespan. This step-by-step guide will help you identify loose shingles, gather the necessary tools, assess the damage, and perform the repairs confidently.

Introduction

When it comes to roof maintenance, time is of the essence. A single loose shingle might not seem like a big deal, but it can lead to significant issues if left unattended. Water infiltration is one of the most common problems associated with loose shingles, potentially causing severe damage to your home’s interior.

Learning to repair roof shingles isn’t as daunting as it might seem. With a bit of patience and the right guidance, you can master the basics in about an hour or two. Plus, tackling minor issues yourself can save you money and give you a sense of accomplishment.

At Dream Home Roofers, we believe in empowering homeowners with the knowledge and skills needed to maintain their roofs. In this guide, we’ll cover everything from identifying loose shingles to performing the repair process and taking preventative measures to keep your roof in top shape.

Identify Loose Shingles

The first step in any roof shingle repair is identifying the problem areas. Loose shingles can often be spotted by their lifted edges or gaps between the shingles and the roof surface. Look for these signs, especially after high winds or storms, which can cause shingles to become loose or go missing.

Certain areas of your roof are more prone to shingle lifting, such as around chimneys and vents. Inspect these areas carefully, as well as any spots where you notice missing nails, which can be a clear indicator of loose shingles.

Additionally, visible curling or cracking of shingles often signals that they need immediate attention. Regular inspections, at least twice a year, can help you catch these issues early and prevent further damage to your roof.

Essential Tools and Materials

An assortment of essential roofing tools including a putty knife and roofing nails.

Before you begin any roof shingle repair, it’s essential to have the right tools and materials on hand. A utility knife is indispensable for cutting shingles and other materials during repairs. Roofing cement is another must-have, used to seal and secure shingles, especially in areas exposed to high winds.

You’ll also need a flat pry bar to lift shingles and remove nails, a hammer for driving roofing nails, and a ladder to safely access your roof. Don’t forget safety gear, including gloves, safety glasses, and non-slip shoes, to protect yourself while working on the roof.

Having all these tools and materials ready before you start will make the repair process smoother and more efficient. Ensuring you’re well-prepared is key to successfully completing minor shingle repairs and maintaining your existing roof.

Assessing the Extent of Damage

Once you’ve identified the loose shingles, the next step is to assess the extent of the damage. This involves checking for signs of water damage in your attic, which could indicate loose or damaged shingles. Granule loss on shingles is another sign of deterioration that requires immediate attention.

Inspecting your roof from the ground using binoculars can help you identify obvious damage without risking a climb up. Look for curling shingles, visible rotting, or algae growth, as these issues may indicate the need for professional roof repairs.

If you notice extensive damage, such as a sagging roof deck or multiple missing shingles around your property, it might be time to call in a professional roofer for a more thorough inspection and repair.

Preparing for Repair

Preparation is key to a successful roof shingle repair. Ideally, you should perform repairs on a warm, dry day to ensure the shingles are more pliable and easier to work with. Ensure your ladder extends beyond the roof edge for additional safety and stability while working.

Safety measures cannot be overstated. Use a stable ladder placed on even ground and wear protective gear, such as goggles and gloves, to protect yourself from debris and sharp objects. Avoid working on the roof during bad weather conditions to minimize the risk of accidents.

Before starting the repair process, inspect the interior of your home for leaks or water stains, which might reveal roof problems not visible from the outside. This thorough preparation will help ensure a smooth and safe repair process.

How to Secure a Loose Shingle

A professional roofer applying roofing cement to secure a loose shingle.

Securing a loose shingle involves a few straightforward steps. First, ensure the area around the loose shingle is clean and dry. Apply roofing cement under the shingle and press it firmly in place, holding it down for several minutes to allow the adhesive to bond effectively.

Use roofing nails or screws to support the shingle after applying the adhesive for added security. This extra step helps ensure the shingle stays in place, even during high winds or heavy rain.

By following these steps, you can address loose shingles promptly and prevent further roof damage, saving you from more extensive repairs down the line to replace roof shingles.

Replacing Damaged Shingles

A demonstration of replacing a damaged shingle on a roof.

Sometimes, a damaged shingle needs to be replaced rather than repaired with replacement shingles. Start by sliding your utility knife under the shingle to break the adhesive. Carefully lift the damaged shingle without affecting the surrounding shingles or underlayment.

Next, slide the new shingle under the tab of the shingle above it to ensure proper alignment. Apply roofing cement under the tabs of the new shingle and secure it with roofing nails, making sure the nails are covered by overlapping shingles.

Finally, fill any unused holes with roofing cement to prevent leaks and ensure a watertight seal. This thorough approach ensures that your roof remains intact and leak-free after replacing any damaged shingles.

Preventative Measures for Future Shingle Issues

A well-maintained roof demonstrating preventative measures against shingle issues.

Preventative maintenance is crucial for extending the life of your roof. Here are some key practices to follow:

  1. Conduct regular inspections at least twice a year to help identify issues early, such as loose or damaged shingles, preventing leaks and costly damage.

  2. Ensure proper installation of shingles to prevent future lifting and damage.

  3. Trim overhanging tree branches to avoid damage from falling debris.

  4. During winter, prevent excessive accumulation of snow and ice to avoid stress on the roof.

By following these practices, you can help maintain the integrity of your roof and extend its lifespan.

Consider applying algae-resistant shingles and protective coatings to enhance the durability of your roofing materials and reduce the growth of moss and algae. These preventative measures can significantly extend the lifespan of your roof and keep it in optimal condition.

When to Call a Professional Roofer

While DIY repairs can be effective for minor issues, there are times when calling a professional roofer is necessary. If your roof has multiple loose shingles or the damage seems extensive, a professional’s expertise is crucial.

Professional roofers can conduct a thorough inspection and address any underlying issues that might not be apparent to the untrained eye. They typically follow a consultation process before starting any professional roof repair, ensuring all problems are properly identified and resolved.

Hiring expert roofers also provides peace of mind, as most professional roof repairs come with warranties, ensuring the job is done right and protecting your investment.

Summary

Timely and effective shingle repairs are crucial for maintaining the integrity of your roof and preventing costly damage. By identifying loose shingles, using the right tools and materials, and following a systematic repair process, you can address minor issues before they escalate.

Remember, preventative measures and regular inspections are key to extending the life of your roof. And when in doubt, don’t hesitate to call in the professionals at Dream Home Roofers for their expert services and peace of mind.

Frequently Asked Questions

What is the first step in Dream Home Roofers’ process for roof repair?

The first step in Dream Home Roofers’ process for roof repair is a thorough consultation to assess the damage and determine the best course of action.

Does Dream Home Roofers offer financing options for roof repairs?

Yes, Dream Home Roofers offers flexible financing options to assist homeowners with roof repair costs. This can make managing expenses more accessible and convenient for you.

How long do most roof repairs take to complete?

Most roof repairs typically take a few hours to a full day to complete, depending on the extent of the damage. It’s important to assess the situation early to ensure timely resolution.

Can roof repairs be done in any weather?

Roof repairs are ideally done in good weather for optimal results; however, urgent repairs can be executed in challenging conditions if absolutely necessary.

What is the purpose of timely roof repairs according to Dream Home Roofers?

Timely roof repairs are essential as they extend the roof’s lifespan and prevent expensive replacements, ensuring your home remains well-protected.


https://dreamhomeroofers.com/wp-content/uploads/2025/01/An-assortment-of-essential-roofing-tools-including-a-putty-knife-and-roofing-nails.-1.png 1000 1500 Dream Home Roofers https://dreamhomeroofers.com/wp-content/uploads/2024/09/dhr-logo.png Dream Home Roofers2025-01-28 08:00:292026-02-01 18:18:25Best Ways to Fix a Loose Shingle on Roof: A Step-by-Step Guide
Installing underlayment and starter shingles on a roof.

Best Methods for Architectural Shingles: How to Install in Simple Steps

January 23, 2025/in Roof Installation, Roofing/by Dream Home Roofers

Installing architectural shingles involves several key steps: preparing the roof deck, laying the underlayment, applying starter shingles, aligning and nailing shingles correctly, and finalizing with ridge cap shingles. This guide provides a straightforward approach on “architectural shingles how to install” effectively.

Key Takeaways

  • A well-prepared roof deck is crucial for successful architectural shingle installation, requiring thorough inspection and repair prior to installation.

  • Proper techniques, including correct nailing, aligning shingles, and overlapping courses, are essential to prevent leaks and ensure durability.

  • Architectural shingles offer enhanced durability, improved aesthetics, and energy efficiency compared to traditional roofing materials.

Preparing Your Roof Deck for Installation

Preparing your roof deck for installation of architectural shingles.

A well-prepared entire roof deck is the foundation of a successful architectural shingle installation. Start by removing old roofing material and repairing any damage to the underlying structure. A clean and solid deck helps new shingles adhere better and prevents future issues.

A thoroughly clean and dry roof surface enhances the adhesion of new shingles and helps prevent leaks and water damage. Gather all required roofing materials beforehand to streamline the process and avoid delays.

Inspecting the Roof Deck

Inspect the roof deck for structural integrity before installing shingles. Look for damage such as warping, wood rot, or signs of water infiltration, and address these issues to ensure a successful installation.

Make sure the deck is clean, dry, and free of debris to create a suitable surface for the new shingles.

Gathering Roofing Materials

Gathering all necessary materials before starting makes the install architectural shingles process smoother. Essential items include architectural shingles, starter shingles, roofing nails, safety gear, a roofing hammer, utility knife, chalk line, harnesses, and ladders. Having everything ready helps avoid mid-project shortages and ensures smooth progress.

Installing Underlayment and Starter Shingles

Installing underlayment and starter shingles on a roof.

Underlayment protects the roof deck from moisture and provides stability before laying shingles. It acts as a secondary barrier against water infiltration. Begin by laying the underlayment at the roof’s edge, overhanging the drip edge by 1/4′′ to 3/4′′.

Then, apply the starter shingles at the roof’s eaves to create a strong base that prevents wind uplift and ensures proper alignment with the drip edge. Correct installation of starter strips is vital for both functionality and aesthetics.

Laying the Underlayment

Roll out the underlayment horizontally, ensuring it overlaps the ice and water protector by 4 inches and valley membrane flashing by 6 inches. Each course should overlap by about 4 inches to guard against water penetration.

Install the drip edge over the underlayment to create a clean roof edge and enhance resistance to wind uplift.

Applying Starter Shingles

Align the starter shingles with the drip edge to establish a secure foundation that prevents water infiltration and wind damage. Correct application of the starter strip is essential to avoid future issues.

The starter shingles also improve the overall aesthetic appeal of the roof.

Step-by-Step Guide to Installing Architectural Shingles

Step-by-step guide to installing architectural shingles.

Precision and attention to detail are key to successful architectural shingle installation. Start at the bottom edge of the roof and work upward, ensuring each shingle is correctly aligned and overlapped.

Important aspects of the installation include careful placement, correct nailing, and proper overlapping. Misalignment can compromise the roof’s aesthetics and protection, allowing water to penetrate.

Starting at the Bottom Edge

Lay architectural shingles from the bottom edge of the roof, using a chalk line to ensure straight rows. Position the shingles with a 1/2 to 3/4-inch overhang for proper drainage.

This initial course sets the foundation for the rest of the roof, so ensure it’s done correctly.

Nailing Techniques

Proper nailing techniques ensure the stability and wind resistance of the shingles. Position nails in a specific line to maximize stability and prevent curling or detachment.

Incorrect nailing can cause leaks, wind damage, and void warranties.

Overlapping Shingle Courses

Overlapping shingle courses effectively shed water and prevent leaks. Lay the shingles in overlapping rows from bottom to top, staggering them to avoid alignment issues.

This method enhances the roof’s appearance and ensures its functionality.

Trimming and Fitting Around Roof Features

Trimming and fitting shingles around roof features.

Precision is required when cutting and fitting shingles around features like chimneys, vents, and skylights. Accurate cutting ensures a polished look and prevents leaks.

This section will guide you through the process of trimming and fitting for a professional finish.

Cutting Shingles to Size

Use a straight edge and utility knife to measure and cut the shingles to size. Precision is essential to ensure a proper fit and prevent leaks. Smooth, controlled cuts help avoid jagged edges and ensure a neat fit around roof features.

Working Around Roof Penetrations

When fitting shingles around vents and chimneys, use roofing cement to prevent leaks. Leave a small gap between the shingles and chimneys to allow for expansion and contraction.

Proper flashing around chimneys creates a watertight seal, ensuring proper water drainage and compliance with local building codes.

Finishing Touches for a Professional Look

Finishing touches for a professional look in roofing.

The final steps of your roofing project are crucial for a professional look and long-lasting roof. Installing ridge cap shingles and conducting a thorough inspection and clean-up will ensure your roof is both functional and aesthetically pleasing.

Installing Ridge Cap Shingles

Ridge cap shingles protect against moisture at the roof’s peak and enhance its appearance. Start by listing some forbidden forms of the keyword “install ridge cap shingles” according to the rule 5. Start at the end of the ridge opposite the prevailing wind direction, overlapping each roof shingles and securing them with longer nails to install ridge cap shingles.

Seal the nail heads with asphalt roof cement on the last piece to prevent leaks.

Final Inspection and Clean-Up

Conduct a final inspection to identify any damaged or missing shingles and ensure proper alignment and nail placement. Clean the site to remove loose materials or potential hazards.

Thorough inspection and clean-up prevent future roofing issues and ensure a neat finish.

Common Mistakes to Avoid

Common shingle installation mistakes include improper nailing, misalignment, and reusing old flashing. These errors can cause leaks, wind damage, and void warranties.

Correct techniques and thorough inspections prevent these issues and ensure a successful installation.

Benefits of Choosing Architectural Shingles

Architectural shingles and architectural asphalt shingles, along with laminated or dimensional shingles, offer several advantages over traditional ones. Their multi-layered design provides superior protection, and their variety of styles enhances the aesthetic appeal of any home.

Their reflective properties also improve energy efficiency.

Enhanced Durability

Architectural shingles have a multi-layered structure that enhances durability, providing better resistance to wind, impacts, and the elements. Many come with extended warranties, reflecting their durability and the manufacturer’s confidence.

Improved Aesthetics

Available in various colors and textures, architectural shingles can be customized to match any home style, significantly enhancing curb appeal and making homes more visually appealing.

Energy Efficiency

Architectural shingles with reflective coatings can lower cooling costs by reducing heat absorption, maintaining comfortable indoor temperatures, and cutting household cooling expenses.

Why Hire Dream Home Roofers

Hiring Dream Home Roofers ensures a professional, quality installation. Their expert consultations provide thorough assessments, and their supplier relationships lead to material cost savings.

Most roofing projects are completed within 3-7 days, and installations can be done in any season.

Summary

Proper installation of architectural shingles is essential for a durable and aesthetically pleasing roof. From preparing the roof deck to finishing touches, following these steps ensures a successful project. Hiring professionals like Dream Home Roofers can further enhance the quality and longevity of your roof.

Frequently Asked Questions

How do I start my first row of architectural shingles?

To begin installing roof shingles, start at the bottom edge of the roof with a chalk line to ensure a straight row. Use starter shingles to create a solid foundation, ensuring a 1/2 to 3/4-inch overhang for proper water drainage.

What is the proper nailing pattern for architectural shingles?

The proper nailing pattern for architectural shingles involves placing roofing nails on the designated nailing line, typically four to six nails per shingle, depending on the manufacturer’s instructions and local building codes. This ensures stability and resistance to wind uplift.

Do architectural shingles need to be staggered?

Yes, architectural shingles should be staggered to prevent the alignment of shingle joints, which ensures proper water drainage and enhances the roof’s aesthetic appeal. Staggering also contributes to the overall durability of the roofing system.

Where should I nail shingles architecturally?

When installing architectural shingles, nails should be placed just below the adhesive strip, ensuring they penetrate the roof deck. This placement secures the shingles effectively and helps prevent water infiltration.

How do I use snapping lines for architectural shingles?

Snapping chalk lines helps maintain proper alignment during shingle installation. Begin by marking a straight edge along the roof deck, then snap lines horizontally across the roof to guide the placement of each shingle course, ensuring a smooth installation process.


https://dreamhomeroofers.com/wp-content/uploads/2025/01/Installing-underlayment-and-starter-shingles-on-a-roof.-1.png 1000 1500 Dream Home Roofers https://dreamhomeroofers.com/wp-content/uploads/2024/09/dhr-logo.png Dream Home Roofers2025-01-23 08:00:532026-03-27 11:26:25Best Methods for Architectural Shingles: How to Install in Simple Steps
A roofing contractor installing 30-year shingles on a home.

30 Year Shingle: Durability and Value for Your Home Roof

January 21, 2025/in Roof Installation, Roofing/by Dream Home Roofers

What makes a 30-year shingle a great roofing choice? These durable shingles are built to last up to 30 years. This article covers their composition, benefits, and installation steps to help you decide if they’re right for your roof.

Key Takeaways

  • 30-year architectural shingles are more durable and aesthetically appealing than traditional options, offering an expected lifespan of up to 30 years with proper maintenance.

  • These shingles provide excellent weather resistance, able to withstand high winds and heavy snow, making them a reliable choice for varied climates.

  • Regular maintenance, including inspections and timely repairs, is crucial for maximizing the lifespan and performance of 30-year shingles.

Understanding 30-Year Shingles

An illustration of a 30-year shingle roof highlighting its durability.

30-year architectural shingle, also known as architectural or dimensional shingles, are a type of asphalt shingle designed to last longer and perform better than traditional 3-tab shingles. These shingles are typically thicker and more durable, providing enhanced protection and a more appealing appearance for your roof. Additionally, there are various types of asphalt shingles available in the market.

The lifespan ratings for these shingles indicate that, with proper maintenance, they can last up to 30 years, making them a popular choice for homeowners looking for long-term solutions.

Composition and Design

The robust composition of 30-year architectural shingles includes a fiberglass base layered with ceramic-coated granules embedded in water-resistant asphalt roof. This construction not only enhances their durability but also allows them to mimic the appearance of more expensive roofing materials, such as cedar shakes or slate.

The added thickness, which contributes to their weight, makes them significantly more durable than standard 3-tab shingles, providing extra protection against the elements.

Longevity and Performance

The performance of 30-year shingles is notable, with an expected lifespan of around 25 years under typical conditions. In ideal environments, they can last up to their full 30-year rating, though factors like weather exposure, regular maintenance, and the quality of installation play crucial roles in determining their actual lifespan.

These shingles are designed to withstand harsh weather conditions, including high winds and heavy snow, making them a durable choice for various climates that can experience wind damage.

Benefits of 30-Year Shingles

A visual comparison of the benefits of 30-year shingles.

The benefits of 30-year shingles extend beyond their longevity. They offer superior durability and weather resistance, an array of aesthetic options, and are a cost-effective investment in the long run. These shingles are thicker and more robust than traditional options, providing better protection and enhancing the overall value of your home.

Durability and Weather Resistance

One of the standout features of 30-year architectural shingles is their ability to endure harsh weather conditions. These shingles can withstand wind speeds of up to 130 miles per hour thanks to their adhesive strips and tight seals. Their added thickness and high-quality materials provide excellent protection against heavy snow loads and other severe weather scenarios.

This durability makes them a reliable choice for homeowners in regions with extreme weather conditions.

Aesthetic Appeal and Design Options

30-year architectural shingles are not only functional but also aesthetically pleasing. They come in a wide array of styles, colors, and designs, allowing homeowners to customize their roofs to match their personal tastes and enhance curb appeal. Additionally, the architectural shingle option provides durability and style.

Unlike 3-tab shingles, these shingles offer a three-dimensional look and can emulate the appearance of more expensive roofing materials, providing a sophisticated and elegant finish to your home.

Cost-Effectiveness

While the initial cost of 30-year shingles may be higher than standard options, their longevity and durability make them a cost-effective choice in the long run. Homeowners can save significantly on maintenance and replacement costs over time, as these shingles require fewer repairs and replacements.

Investing in 30-year shingles ultimately pays off by reducing the need for frequent roof replacements and providing long-term savings.

Installation Process for 30-Year Shingles

A roofing contractor installing 30-year shingles on a home.

Installing 30-year shingles involves several critical steps to ensure proper performance and longevity. The process starts with a comprehensive consultation, followed by thorough preparation and removal of old materials, and concludes with meticulous installation and finishing touches.

Proper installation by experienced roofing contractors is essential to maximize the benefits and lifespan of these shingles.

Initial Consultation

The first step in the installation process is the initial consultation. During this phase, a roofing contractor visits your home to assess your roofing needs and provide expert guidance. Homeowners should discuss their budget and preferences, and the contractor will offer tailored recommendations for the types of shingles suitable for their specific requirements.

Dream Home Roofers provide a no-obligation estimate and discuss financing options to ensure the project fits within your budget.

Preparation and Removal

Preparation and removal are crucial steps in the installation process. This involves removing the old roofing materials and inspecting the roof deck for any damage that needs to be addressed before installing the new shingles. Proper preparation ensures a smooth installation process and helps prevent future issues.

Roof replacement can be done in any season, though extra precautions may be needed during extreme weather conditions for a new roof.

Installation and Finishing Touches

The installation of 30-year shingles begins with laying a high-quality underlayment for added protection. The shingles are then installed carefully to ensure optimal performance and longevity. An on-site supervisor ensures the installation process is executed correctly, maintaining focus and professionalism throughout.

Once the installation is complete, a thorough cleanup is performed to remove any discarded materials, leaving your property clean and safe.

Maintenance Tips for Maximizing Lifespan

Regular maintenance is key to maximizing the maximum lifespan of 30-year shingles. With proper installation and routine upkeep, these shingles can achieve up to 80-85% of their estimated lifespan.

This involves conducting regular inspections, cleaning the roof, and promptly addressing minor repairs to prevent major issues from developing.

Routine Inspections

Regular inspections are vital for maintaining your roof’s health. Visual inspections from the ground can help spot early signs of damage, especially after severe weather. Keeping gutters clear of debris and trimming overhanging vegetation also helps maintain shingle integrity.

Professional inspections are recommended to catch potential problems before they escalate.

Cleaning and Debris Removal

Maintaining a clean roof is crucial for preserving its appearance and functionality. The StainGuard® feature on some shingles helps prevent algae and mold growth. Regular cleaning and removing debris, moss, and algae are necessary to maintain the roof’s integrity and curb appeal.

This practice ensures that your shingles stay in good condition throughout their lifespan.

Addressing Minor Repairs Promptly

Addressing minor repairs promptly can significantly extend the lifespan of your shingles. Small issues, if left unattended, can escalate into major problems, leading to costly repairs.

Timely repairs save money and prevent extensive damage, ensuring your roof remains in good condition for years to come.

Comparing 30-Year Shingles to Other Roofing Materials

A side-by-side comparison of 30-year shingles and other roofing materials.

Choosing a roofing material requires considering factors such as cost, durability, and aesthetics. 30-year shingles offer a balanced combination of these attributes, making them a popular choice among homeowners.

However, comparing them to other common roofing materials like metal, wood shakes, and slate can be beneficial.

Metal vs. 30-Year Shingles

Metal roofs are known for their longevity, lasting 40 to 70 years, and their superior resistance to harsh weather conditions. Although they come with a higher upfront cost, their durability and lower maintenance needs can save homeowners money in the long run, ultimately extending the roof’s life.

On the other hand, 30-year shingles are more affordable initially and offer a traditional aesthetic that complements various home designs.

Wood Shakes vs. 30-Year Shingles

Wood shakes provide a natural and rustic look, with a lifespan comparable to that of 30-year shingles, lasting around 30 to 50 years. However, wood shakes require more maintenance and are less resistant to fire and severe weather than asphalt shingles.

30-year shingles offer a more durable and low-maintenance alternative while still providing a pleasing appearance.

Slate vs. 30-Year Shingles

Slate roofing is renowned for its extreme longevity, lasting up to 175 years or more. However, the high cost, often associated with a hefty price tag, and significant weight make it less practical for many homeowners.

30-year shingles provide a more affordable and lightweight option while still delivering excellent durability and aesthetic appeal, making them a versatile choice for modern homes.

Warranty and Insurance Considerations

An overview of warranty types for roofing materials.

Understanding the warranties and insurance considerations for 30-year shingles is crucial for protecting your investment. Manufacturer’s warranties typically cover defects but not installation costs, while workmanship warranties ensure installation quality.

Proper maintenance and timely repairs keep these warranties valid and simplify insurance claims in case of damage.

Manufacturer’s Warranty

Most manufacturers offer a lifetime limited warranty for 30-year shingles, covering defects for a specified period. However, these warranties usually exclude labor costs for removal and installation of replacement shingles.

Understanding the exclusions and limitations of the manufacturer’s warranty ensures you are fully covered in case of defects.

Workmanship Warranty

A workmanship warranty, provided by the roofing contractor, covers installation errors that may lead to issues like leaks. This warranty ensures the installation is done correctly, keeping the manufacturer’s warranty valid.

Experienced roofing contractors help avoid installation mistakes and potential warranty claims.

Insurance Claims

Filing an insurance claim for roof damage can be complex, but understanding the process helps. Insurance coverage may vary based on the roof’s age and the extent of damage. If shingles are discontinued, insurance companies might need to replace the entire roof rather than just the damaged sections.

Regular roof inspections can uncover hidden damage, aiding in successful insurance claims.

Summary

In conclusion, 30-year shingles offer a compelling combination of durability, aesthetic appeal, and cost-effectiveness. They provide excellent protection against harsh weather, require less maintenance, and enhance the value of your home. With proper installation and regular upkeep, these shingles can serve you well for decades. Consider investing in 30-year shingles for a reliable and attractive roofing solution.

Frequently Asked Questions

What is the first step in the roofing process with Dream Home?

The first step with Dream Home is a consultation where experts assess your roofing needs and offer helpful guidance. It’s a great way to get started on your roofing project!

How long does a typical roofing job take?

A typical roofing job usually takes about 3 to 7 days, depending on the weather and how complex the roof is. So, it’s good to plan accordingly!

Can roofs be replaced during winter or summer?

Absolutely, roofs can be replaced in both winter and summer! Just keep in mind that you’ll need to take extra precautions depending on the temperature.

What factors should be considered when choosing roofing material?

When choosing roofing material, you should consider cost, durability, climate suitability, and design. Each of these factors will help ensure you make the right choice for your home.

How can a homeowner determine if their roof needs repairs or a full replacement?

A thorough inspection is key to understanding if your roof needs repairs or a full replacement. Look for signs like leaks, missing shingles, or sagging areas to help make the right decision.


https://dreamhomeroofers.com/wp-content/uploads/2025/01/A-roofing-contractor-installing-30-year-shingles-on-a-home.-1.png 1000 1500 Dream Home Roofers https://dreamhomeroofers.com/wp-content/uploads/2024/09/dhr-logo.png Dream Home Roofers2025-01-21 08:00:162026-03-27 11:27:3230 Year Shingle: Durability and Value for Your Home Roof
An image showing visible signs of wind damage to a roof, including missing and damaged shingles.

Top 5 Signs of Wind Damage to Roof and How to Fix Them

January 16, 2025/in Roof Repair, Roof Replacement/by Dream Home Roofers

Wind damage to your roof can cause major problems if ignored. This article explains how to identify wind damage to roof and the steps to fix it. Learn about the signs of wind damage to your roof and how to protect your roof and home.

Key Takeaways

  • Common signs of wind damage to roofs include missing shingles, granule loss, and water stains, which require immediate inspection and repair.

  • Wind speed significantly impacts the level of roof damage, with higher speeds leading to severe issues, necessitating prompt action and professional assessment.

  • Preventative measures such as regular maintenance, upgrading roofing materials, and securing loose items can help reduce the risk of wind damage during storms.

Common Signs of Wind Damage on Roofs

An image showing visible signs of wind damage to a roof, including missing and damaged shingles.

Before:

Wind damage can manifest in various ways on your roof, and knowing what to look for is crucial. Common indicators include missing shingles, lifted or curling shingles, granule loss, damaged soffit and fascia, and interior water stains. After a storm, a thorough roof inspection can reveal visible damage such as dents or missing shingles, which are clear signs of wind damage and may indicate a wind damaged roof.

After:

Wind damage can manifest in various ways on your roof, and knowing what to look for is crucial. Common indicators include:

  • Missing shingles

  • Lifted or curling shingles

  • Granule loss

  • Damaged soffit and fascia

  • Interior water stains

After a storm, a thorough roof inspection can reveal visible damage such as dents or missing shingles, which are clear signs of wind damage.

Regular inspections, especially before storm seasons, help in identifying and fixing minor issues before they escalate into major problems.

Missing Shingles

One of the most obvious signs of wind damage is missing shingles. Strong winds can tear, crease, or completely dislodge asphalt shingles, scattering them across your yard and leaving your roof deck exposed. This exposure makes your roof vulnerable to water intrusion, which can lead to leaks and further wind damaged shingles.

If you notice shingles missing after a storm, it’s a clear indication that your roof has sustained wind damage and needs immediate attention. Consulting a roofing contractor for a professional assessment and necessary repairs for the loose or damaged shingles is essential to restore the roof’s integrity and prevent further damage.

Lifted or Curling Shingles

Lifted or curling shingles are another common sign of wind damage. High winds can cause shingles to warp, twist, or become dislodged, creating gaps that allow water to seep in. These gaps compromise the roof’s integrity, making it susceptible to leaks and other issues. You might notice shingles that appear upturned or askew, especially along the edges and pressure points of the roof.

Addressing these issues promptly with the help of a reputable roofing contractor can prevent more significant problems down the line.

Granule Loss

Granule loss is a subtler yet significant indicator of wind damage. High winds can dislodge the granules that protect asphalt shingles, leading to a weakened roofing system. This loss is often noticeable as debris accumulating in gutters or around your property. Granules play a crucial role in extending the lifespan of shingles by providing texture and protection.

If you observe granule loss, it’s essential to address it promptly to prevent further deterioration and potential leaks.

Damaged Soffit and Fascia

Wind forces can also damage the soffit and fascia, which are critical components of your roof’s structure. High winds can crack, loosen, or detach these elements, leading to potential water leaks and pest entry. Damaged soffit and fascia can create significant moisture problems and provide pathways for rodents and insects to enter your home.

Regular roof inspections can help detect such damage early, reducing the likelihood of severe leaks and infestations.

Interior Water Stains

Interior water stains on ceilings or walls are a telltale sign of roof leaks, often resulting from wind damage. Missing shingles and other roof vulnerabilities compromise the roof’s ability to repel water, leading to leaks. Discoloration and wet spots on ceilings usually indicate water intrusion, which can cause significant structural damage if ignored.

Addressing water stains promptly can prevent further deterioration of your roof and home.

How Wind Speed Affects Roof Damage

A graphic illustrating how different wind speeds can affect roof damage, showing a comparison of moderate, strong, and severe winds.

The impact of wind damage on your roof largely depends on wind speed. While even moderate winds can cause some damage, strong and severe winds can lead to significant roof damage or even structural failure. Understanding how different wind speeds affect your roof can help you better prepare and respond to wind damage.

Factors such as wind direction, duration, and the presence of projectiles also influence the extent of the damage.

Moderate Winds (45-57 mph)

Moderate winds, typically between 45 and 57 mph, can still cause noticeable damage to roofs, especially if the shingles are already loose or vulnerable. These winds can lead to granule loss, affecting the integrity of asphalt shingles. Homeowners should regularly inspect their roofs and secure any loose shingles to prevent minor damage from escalating.

While such wind speeds might not cause significant damage, they can initiate issues that worsen over time if not addressed.

Strong Winds (58-74 mph)

Strong winds, ranging from 58 to 74 mph, can cause more severe roof damage, akin to conditions experienced during a Category 1 hurricane. These wind speeds can lift, curl, or completely dislodge shingles, exposing the roof deck to the elements and leading to potential leaks and further deterioration.

It’s crucial to address any detected damage swiftly to maintain the integrity of your roofing system.

Severe Winds (75+ mph)

Severe winds exceeding 75 mph can cause extensive roof damage, potentially leading to structural failures. Such high winds can rip off shingles, detach soffit and fascia, and even cause significant damage to the roof structure itself.

In these cases, comprehensive repairs or even a full roof replacement may be necessary to restore the roof’s integrity and ensure the safety of your home.

Steps to Take If You Suspect Wind Damage

A person inspecting a roof for wind damage, looking for visible signs of damage.

If you think there might be wind damage to your roof, it’s important to act quickly. Taking prompt action will help prevent additional problems. Conduct a visual inspection, document the damage, and contact a professional roofer for an accurate assessment.

These steps will help you determine the extent of the damage and the necessary repairs to restore your roof’s integrity.

Conduct a Visual Inspection

Start by conducting a thorough visual inspection of your roof. Look for loose shingles, granule accumulation in gutters, and damaged soffit and fascia. These signs can indicate wind damage and help you identify the areas that need attention.

Checking for obvious signs of damage will give you a better understanding of the roof’s condition and the immediate steps required.

Document the Damage

Documenting the damage is crucial for supporting your insurance claim. Take detailed photos and notes during your inspection to capture all visible damage. This documentation will be essential when filing an insurance claim and ensuring a smooth process.

Thorough records can also help in communicating the extent of the damage to your roofing contractor.

Contact a Professional Roofer

Contact a professional roofer to assess the damage accurately and recommend the necessary repairs. A reputable roofing contractor can provide a thorough inspection, identify hidden issues, and perform the required repairs or even a full roof replacement if needed.

Ensure that the roofer you choose has the proper references and proof of insurance to guarantee quality work.

Filing an Insurance Claim for Wind Damage

Filing an insurance claim for wind damage can be a complex process, but understanding your homeowners insurance policy and working closely with your insurance provider can make it smoother. Knowing what your policy covers and how to document and submit your claim are crucial steps in getting the necessary repairs covered.

Review Your Homeowners Insurance Policy

Start by reviewing your homeowners insurance policy to understand what is covered in terms of wind damage. Coverage details and exclusions can vary, so it’s important to clarify what repairs are included and any deductible amounts.

Contact your insurance companies provider if you have any questions about specific coverage details related to wind damage.

Submit Your Claim

Submit your insurance claim promptly to avoid complications or denials. Delaying your claim can lead to issues, so it’s crucial to document all damage thoroughly and stay organized throughout the process.

Prompt and accurate submission can help facilitate timely approval and repairs.

Work with Your Insurance Provider

After filing your claim, work closely with your insurance company to ensure a smooth insurance claim process. Your insurer will typically send an adjuster to evaluate the damage on-site.

Effective communication with your insurance provider and roofing contractor can help ensure that the repairs are covered and completed properly.

Repairing Wind-Damaged Roofs

A construction worker repairing a wind-damaged roof, showcasing the repair process.

Repairing wind-damaged roofs promptly is crucial to prevent further issues and maintain the roof’s resilience. Addressing damage quickly can save on future repair costs and ensure the safety of your home.

Depending on the extent of the damage, repairs can range from temporary fixes to full roof replacements.

Temporary Fixes

Temporary fixes, such as placing a tarp over significant damage, can help prevent water from entering your home until permanent repairs can be made. Using roofing tape or tarps to cover leaks and exposed areas provides a short-term solution to mitigate further damage.

Implementing these quick fixes can protect your home until professional help arrives.

Permanent Repairs

Engaging professional roofers for permanent repairs ensures that the work is done correctly, minimizing the risk of future damage. Using high-quality materials can enhance the durability and resilience of your roof against future wind damage. Depending on the severity of the damage, permanent repairs may range from shingle replacement to a full roof replacement.

Roof Replacement

In cases of severe wind damage, a full roof replacement might be necessary. Contact a professional roofer to assess the extent of the damage and determine if a complete replacement is required.

Investing in upgraded roofing materials, such as wind-resistant shingles, can provide long-term protection against future wind damage.

Preventative Measures Against Wind Damage

An image showing preventative measures taken against wind damage on a roof, including upgraded materials.

Preventing wind damage is better than dealing with repairs. Implementing preventive strategies can significantly reduce the risk of roof damage during wind events. Regular maintenance, upgrading roofing materials, and securing loose items around your property are key steps to protect your roof.

Regular Maintenance

Regular maintenance is essential to keep your roof in good condition and catch any potential issues early. Perform routine visual inspections to look for common signs of wind damage, such as missing or lifted shingles, granule loss, or damaged soffit and fascia. Keep detailed documentation of any damage observed during inspections, which will be useful for insurance or repair purposes.

Regular maintenance helps in maintaining the roof’s integrity and prevents minor issues from escalating into significant problems.

Upgrade Roofing Materials

Upgrading your roofing materials can provide better protection against high winds and severe weather events. Wind-resistant materials, such as metal roofs and impact-resistant shingles, are designed to withstand extreme wind conditions and reduce damage from flying debris. Proper installation of these materials, such as clay and concrete tiles, enhances their performance and resilience to strong winds.

Investing in high-quality materials can extend the lifespan of your roof and provide peace of mind during storms.

Secure Loose Items

Securing loose items around your property is a simple yet effective preventive measure. Outdoor furniture, tree branches, and other debris can become hazardous projectiles during storms, causing damage to your roof and property.

By securing or removing these items, you can protect your home and enhance overall safety during severe weather events.

Summary

Recognizing the signs of wind damage and taking prompt action is crucial to maintaining the integrity of your roof and home. From conducting regular inspections and documenting damage to contacting professional roofers and filing insurance claims, every step is vital in addressing and preventing further issues. Upgrading roofing materials and securing loose items around your property are proactive measures that can provide long-term protection against wind damage. By staying vigilant and prepared, you can ensure the safety and durability of your roof for years to come.

Frequently Asked Questions

How much wind does it take to damage a roof?

Winds exceeding 50-60 mph can cause serious roof damage, while roofs in hurricane-prone areas should withstand up to 150 mph winds. Anything beyond these limits poses a high risk for significant damage.

How can I tell if my roof has wind damage?

To determine if your roof has wind damage, look for missing or lifted shingles, granule loss, and any signs of interior water stains. Conducting a visual inspection after a storm is essential for identifying these issues.

What should I do if I suspect wind damage to my roof?

Immediately conduct a visual inspection and document any damage with photos and notes. Then, contact a professional roofer for a thorough assessment and necessary repairs.

How do wind speeds affect the extent of roof damage?

In conclusion, wind speeds significantly impact roof damage; even winds of 45 mph can damage loose shingles, while speeds over 75 mph can result in extensive damage and structural failures. Therefore, monitoring wind speeds is crucial for roof integrity.

What are some preventive measures to protect my roof from wind damage?

To effectively protect your roof from wind damage, focus on regular maintenance, utilize wind-resistant roofing materials, and secure loose items in your surroundings. Implementing these measures will greatly minimize your risk.


https://dreamhomeroofers.com/wp-content/uploads/2025/01/An-image-showing-visible-signs-of-wind-damage-to-a-roof-including-missing-and-damaged-shingles.-1.png 1000 1500 Dream Home Roofers https://dreamhomeroofers.com/wp-content/uploads/2024/09/dhr-logo.png Dream Home Roofers2025-01-16 08:00:582026-01-30 17:24:57Top 5 Signs of Wind Damage to Roof and How to Fix Them
A side-by-side comparison of architectural shingles and other roofing materials.

Architectural Shingle Cost in King of Prussia, PA: What to Expect in 2025

January 9, 2025/in Roof Installation, Roofing/by Dream Home Roofers

If you’re budgeting for a roof replacement in King of Prussia and wondering what architectural shingles actually cost right now, this is the breakdown. We’ve included material costs, installed prices, what drives costs up or down, and how different shingle tiers compare, based on what we’re actually seeing in the Montgomery County market in 2025. Dream Home Roofers is an Owens Corning Preferred Contractor serving King of Prussia and the surrounding area.

What Architectural Shingles Cost Per Square in 2025

Roofing is measured in squares. One square equals 100 square feet of roof surface. The number of squares on your roof is larger than your home’s footprint because of pitch, overhangs, and multiple facets.
• Entry-level architectural shingles (Owens Corning Oakridge, GAF Timberline HDZ): $100 to $130 per square for materials. Installed price on a full replacement including tear-off, underlayment,
and labor: $8,000 to $12,000 for a typical KOP home.
• Mid-tier architectural shingles (Owens Corning Duration, GAF Timberline CS): $120 to $155 per square for materials. Full replacement installed: $10,000 to $14,000.
• Designer and impact-resistant shingles (Owens Corning Duration Flex, TruDefinition): $140 to $175 per square for materials. Full replacement installed: $12,000 to $18,000.
• Second-story homes, steep pitches above 9:12, and homes requiring decking repair will fall at the higher end or above these ranges.

What Drives the Cost of an Architectural Shingle Roof

Roof Size and Complexity

A straightforward gable or hip roof on a single-story ranch is faster and cheaper to work on than a multi-faceted roof with dormers, valleys, and multiple penetrations. Every valley, hip, and penetration requires additional flashing and detail work.

Pitch

Roofs steeper than 7:12 require additional safety equipment and slow down installation significantly. Most KOP homes fall in the 4:12 to 8:12 range. Anything above that carries a steep-pitch surcharge.

Decking Condition

We inspect all decking during a replacement. If we find damaged or rotted sheathing it needs to be replaced before new shingles go on. In King of Prussia, homes built in the 1960s through 1980s
frequently have board decking that may need to be overlaid with new plywood. This adds to the project cost but needs to be done.

Shingle Tier

The difference between entry-level and designer shingles on the same roof is typically $1,500 to $3,500 in installed cost. Whether that’s worth it depends on how long you plan to stay in the home and what the neighborhood comps look like. On a home in a higher-value area of KOP, the premium shingles often add more than they cost in perceived value.

Architectural vs 3-Tab: Is the Upgrade Worth It in PA?

For most King of Prussia homeowners, yes. Architectural shingles carry a 30-year warranty compared to 20 years for 3-tab. They have a dimensional, textured appearance that looks substantially better from the street. They also perform better in wind events, which matters in Pennsylvania’s late-season storm season. The installed cost premium is typically $500 to $1,500 on a residential roof, and they hold value better at resale.

Shingle Brands We Install in King of Prussia

Owens Corning

Dream Home Roofers is an Owens Corning Preferred Contractor. This designation means our installations qualify for the Owens Corning Preferred Protection warranty program, which covers both materials and workmanship. The Duration series is our most commonly installed line in the KOP area, with the TruDefinition Duration as the step-up option for homeowners who want enhanced color depth.

GAF

GAF’s Timberline line is one of the best-selling shingle products in the country for good reason. The HDZ and CS versions carry a StainGuard Plus algae resistance coating that’s worth having in Pennsylvania’s humid summers. The Timberline CS (Cool Series) also qualifies for energy efficiency credits in some situations.

CertainTeed

CertainTeed’s Landmark and Landmark Premium lines are popular with homeowners looking for specific color options that GAF and Owens Corning don’t offer. The Landmark Premium carries a StreakFighter algae resistance that performs well. We install CertainTeed on request and can source the full line for KOP projects.

Frequently Asked Questions: Architectural Shingles Cost

How much do architectural shingles cost per square in King of Prussia, PA?

In the King of Prussia, PA area, architectural shingles run $100 to $175 per square for materials depending on tier. Installed prices for a full roof replacement range from $8,000 to $18,000 for a typical single-family home, depending on size, pitch, and the shingle line chosen.

Are architectural shingles worth the extra cost over 3-tab?

For most King of Prussia homes, yes. Architectural shingles carry a 30-year warranty vs 20 years for 3-tab, perform better in wind, and look better from the street. The installed premium is typically $500 to $1,500 for a residential roof, and the product holds up better over time in Pennsylvania’s climate.

What architectural shingle brands does Dream Home Roofers install?

We install Owens Corning, GAF, and CertainTeed architectural shingles in King of Prussia and throughout Montgomery County, PA. As an Owens Corning Preferred Contractor, our installations qualify for the manufacturer’s extended warranty, which covers both materials and workmanship.

How do I know how many squares my King of Prussia roof is?

The easiest way is to get a free estimate. Dream Home Roofers will measure your roof accurately during the estimate visit. As a rough guide, divide your home’s footprint square footage by 100 and then multiply by a pitch factor (roughly 1.15 for a standard 5:12 pitch) to get an approximation. Most single-story KOP homes are 18 to 28 squares.

https://dreamhomeroofers.com/wp-content/uploads/2025/01/A-side-by-side-comparison-of-architectural-shingles-and-other-roofing-materials.-1.png 1000 1500 Dream Home Roofers https://dreamhomeroofers.com/wp-content/uploads/2024/09/dhr-logo.png Dream Home Roofers2025-01-09 08:00:582026-04-07 05:10:15Architectural Shingle Cost in King of Prussia, PA: What to Expect in 2025
Page 1 of 41234

Pages

  • About us
  • Blogs
  • Careers
  • Contact Us
  • Current Specials at Dream Home Roofers
  • FAQS
  • Feedbacks
  • Financing
  • Gutter Guards in the Delaware Valley
  • Gutters in Delaware Valley
  • Home
  • Opt-out preferences
  • Privacy Policy
  • Rate
  • Review Feedback Form
  • Reviews
  • Roof Inspection in Delaware Valley
  • Roof Inspection in Turnersville, NJ
  • Roof Inspection in West Caldwell, NJ
  • Roof Inspections in Laurel, MD
  • Roof Replacement in Cherry Hill, NJ
  • Roof Replacement in Columbia, MD
  • Roof Replacement in Delaware Valley
  • Roof Replacement in Harrisburg, PA
  • Roof Replacement in King of Prussia, PA
  • Roof Replacement in Lancaster, PA
  • Roof Replacement in Laurel, MD
  • Roof Replacement in Philadelphia, PA
  • Roof Replacement in Turnersville, NJ
  • Roof Replacement in Vineland, NJ
  • Roof Replacement in West Caldwell, NJ
  • Roofing Company in Fairfax, VA
  • Roofing Company in King of Prussia, PA
  • Roofing Company in Laurel, MD
  • Roofing Company in Maryland
  • Roofing Company in New Jersey
  • Roofing Company in Pennsylvania
  • Roofing Company in Scranton, PA
  • Roofing Company in Turnersville, NJ
  • Roofing Company in West Caldwell, NJ
  • Roofing Company in Wilmington, DE
  • Roofing in Allentown, PA
  • Roofing in Atlantic City, NJ
  • Roofing in Bethesda, MD
  • Roofing in Bethlehem, PA
  • Roofing in Blairstown, NJ
  • Roofing in Boonsboro, MD
  • Roofing in Bowie, MD
  • Roofing in Burlington, NJ
  • Roofing in Camden, NJ
  • Roofing in Cherry Hill, NJ
  • Roofing in Chester, PA
  • Roofing in Clifton, NJ
  • Roofing in Columbia, MD
  • Roofing in Delaware Valley
  • Roofing in Delaware Valley
  • Roofing in Delaware Valley
  • Roofing in Dundalk, MD
  • Roofing in Egg Harbor, NJ
  • Roofing in Ellicott City, MD
  • Roofing in Elm, PA
  • Roofing in Fairfax, VA
  • Roofing in Frankford, NJ
  • Roofing in Freehold, NJ
  • Roofing in Gaithersburg, MD
  • Roofing in Germantown, MD
  • Roofing in Glen Allen, VA
  • Roofing in Glen Burnie, MD
  • Roofing in Gloucester Township, NJ
  • Roofing in Hamilton, NJ
  • Roofing in Harrisburg, PA
  • Roofing in King of Prussia, PA
  • Roofing in King Of Prussia, PA
  • Roofing in Lancaster, PA
  • Roofing in Laurel, MD
  • Roofing in Laurel, MD
  • Roofing in Lebanon, PA
  • Roofing in Lehigh Valley
  • Roofing in Levittown, PA
  • Roofing in Mahwah, NJ
  • Roofing in Maryland
  • Roofing in Monroe, NJ
  • Roofing in Mount Laurel, NJ
  • Roofing in New Jersey
  • Roofing in Norristown, PA
  • Roofing in Pennsylvania
  • Roofing in Philadelphia, PA
  • Roofing in Potomac, MD
  • Roofing in Reading, PA
  • Roofing in Rockville, MD
  • Roofing in Severn, MD
  • Roofing in Silver Spring, MD
  • Roofing in Smithsburg, MD
  • Roofing in Somerset, NJ
  • Roofing in South Jersey
  • Roofing in Tinton Falls, NJ
  • Roofing in Towson, MD
  • Roofing in Turnersville NJ
  • Roofing in Turnersville, NJ
  • Roofing in Union, NJ
  • Roofing in Vineland, NJ
  • Roofing in Voorhees, NJ
  • Roofing in Waldorf, MD
  • Roofing in Washington Township, NJ
  • Roofing in West Caldwell, NJ
  • Roofing in West Caldwell, NJ
  • Roofing in Weston, PA
  • Roofing in Wilkes-Barre, PA
  • Service Area
  • Services
  • Template – Labor day banner
  • Template All Brands Logos
  • Template All Brands Logos New
  • Template Blogs
  • Template Certification
  • Template Financing Banner
  • Template Gutter Brands
  • Template our Process
  • Template our Process windows
  • Template Our Work
  • Template Project Block
  • Template Review Banner
  • Template Review Banner (King of Prussia, PA)
  • Template Review Banner (Laurel, MD)
  • Template Review Banner (Turnersville, NJ)
  • Template Review Banner (West Caldwell, NJ)
  • Template Roofing Brands
  • Template Service Blocks (All)
  • Template Service Blocks (King of Prussia, PA)
  • Template Service Blocks (Laurel, MD)
  • Template Service Blocks (Turnersville, NJ)
  • Template Service Blocks (West Caldwell, NJ)
  • Template Windows Brands
  • Windows

Categories

  • Blog
  • Roof Installation
  • Roof Repair
  • Roof Replacement
  • Roofing
  • Uncategorized

Archive

  • April 2026
  • March 2026
  • February 2026
  • January 2026
  • November 2025
  • October 2025
  • September 2025
  • August 2025
  • July 2025
  • June 2025
  • May 2025
  • March 2025
  • February 2025
  • January 2025
  • December 2024
  • November 2024
  • October 2024
  • August 2024
  • July 2024
  • June 2024
  • May 2024
  • April 2024
  • March 2024
  • February 2024
  • November 2023
  • October 2023
  • July 202

Service Areas

  • Turnersville, NJ
  • Voorhees, NJ
  • West Caldwell, NJ
  • King of Prussia, PA

  • Scranton, PA
  • Wilkes-Barre, PA
  • Laurel, MD

  • Fairfax, VA
  • Glen Allen, VA
  • Wilmington, DE

Our Office Locations

Map icon 501 NJ‑168, Turnersville, NJ 08012

Map icon 175 Fairfield Ave, Suite 2B, West Caldwell, NJ 07006

Map icon 144 E. Dekalb Pike, Suite 200, King of Prussia, PA 19406

Map icon 8920 Stephens Rd, #104, Laurel, MD 20723

Map icon 613 Baltimore Dr, Wilkes-Barre, PA 18702

Map icon 4461 Cox Rd, Glen Allen, VA 23060

Map icon 4085 Chain Bridge Rd, Suite 302, Fairfax, VA 22030

NJ Lic. #13VH11352200 | PA Lic. #PA161658 | MD Lic. #157465 | DE HIC# 2025-000012170 | VA HIC# 2705196076

Privacy Policy | Service Area

Follow Us

Check out our social pages and let us know how we’re doing See the latest from Dream Home Roofers and let us know what we can do for you.

BBB Accredited

BBB Accredited

Local Roofing Contractors
Financing
Careers
Contact

© 2026 Dream Home Roofers

Scroll to top
Manage your privacy
To provide the best experiences, we use technologies like cookies to store and/or access device information. Consenting to these technologies will allow us to process data such as browsing behavior or unique IDs on this site. Not consenting or withdrawing consent, may adversely affect certain features and functions.
Functional Always active
The technical storage or access is strictly necessary for the legitimate purpose of enabling the use of a specific service explicitly requested by the subscriber or user, or for the sole purpose of carrying out the transmission of a communication over an electronic communications network.
Preferences
The technical storage or access is necessary for the legitimate purpose of storing preferences that are not requested by the subscriber or user.
Statistics
The technical storage or access that is used exclusively for statistical purposes. The technical storage or access that is used exclusively for anonymous statistical purposes. Without a subpoena, voluntary compliance on the part of your Internet Service Provider, or additional records from a third party, information stored or retrieved for this purpose alone cannot usually be used to identify you.
Marketing
The technical storage or access is required to create user profiles to send advertising, or to track the user on a website or across several websites for similar marketing purposes.
Statistics

Marketing

Features
Always active

Always active
  • Manage options
  • Manage services
  • Manage {vendor_count} vendors
  • Read more about these purposes
Manage options
  • {title}
  • {title}
  • {title}