Dream Home Roofers
1-855-610-9720
Get Free Estimate 1-855-610-9720
Free Estimate 1-855-610-9720
  • About us
    • Reviews
    • Careers
    • Financing
    • Blogs
  • Services
    • Roofing
      • Replacement
      • Repair
      • Inspection
    • Gutters
      • Gutter Protection
  • Service Area
    • Turnersville, NJ
    • West Caldwell, NJ
    • King of Prussia, PA
    • Laurel, MD
    • Fairfax, VA
  • Current Specials
  • Contact Us
  • Menu Menu
Act Now for 50% OFF Materials. Click here for details.

Tag Archive for: patching

Preparing a roof deck for shingle installation.

The Best Guide to Perfect Roof Shingle Overlap: Tips & Techniques

February 15, 2025/in Roof Installation, Roofing/by Dream Home Roofers

Ensuring the correct roof shingle overlap is key to a durable, leak-free roof. This guide will help you understand the right techniques, avoid common mistakes, and achieve the perfect overlap for lasting protection.

Key Takeaways

  • Proper shingle overlap is critical for preventing leaks and enhancing the durability of a roof, as it ensures effective water drainage and protects against weather elements.

  • Preparing the roof deck, including inspecting for damage and installing protective components like drip edges and ice shields, is essential for successful shingle installation.

  • Common mistakes, such as misalignment and inadequate nailing during shingle installation, should be avoided to ensure optimal roof performance; professional help is recommended for complex roofing issues.

Understanding Roof Shingle Overlap

An illustration showing the proper roof shingle overlap technique.

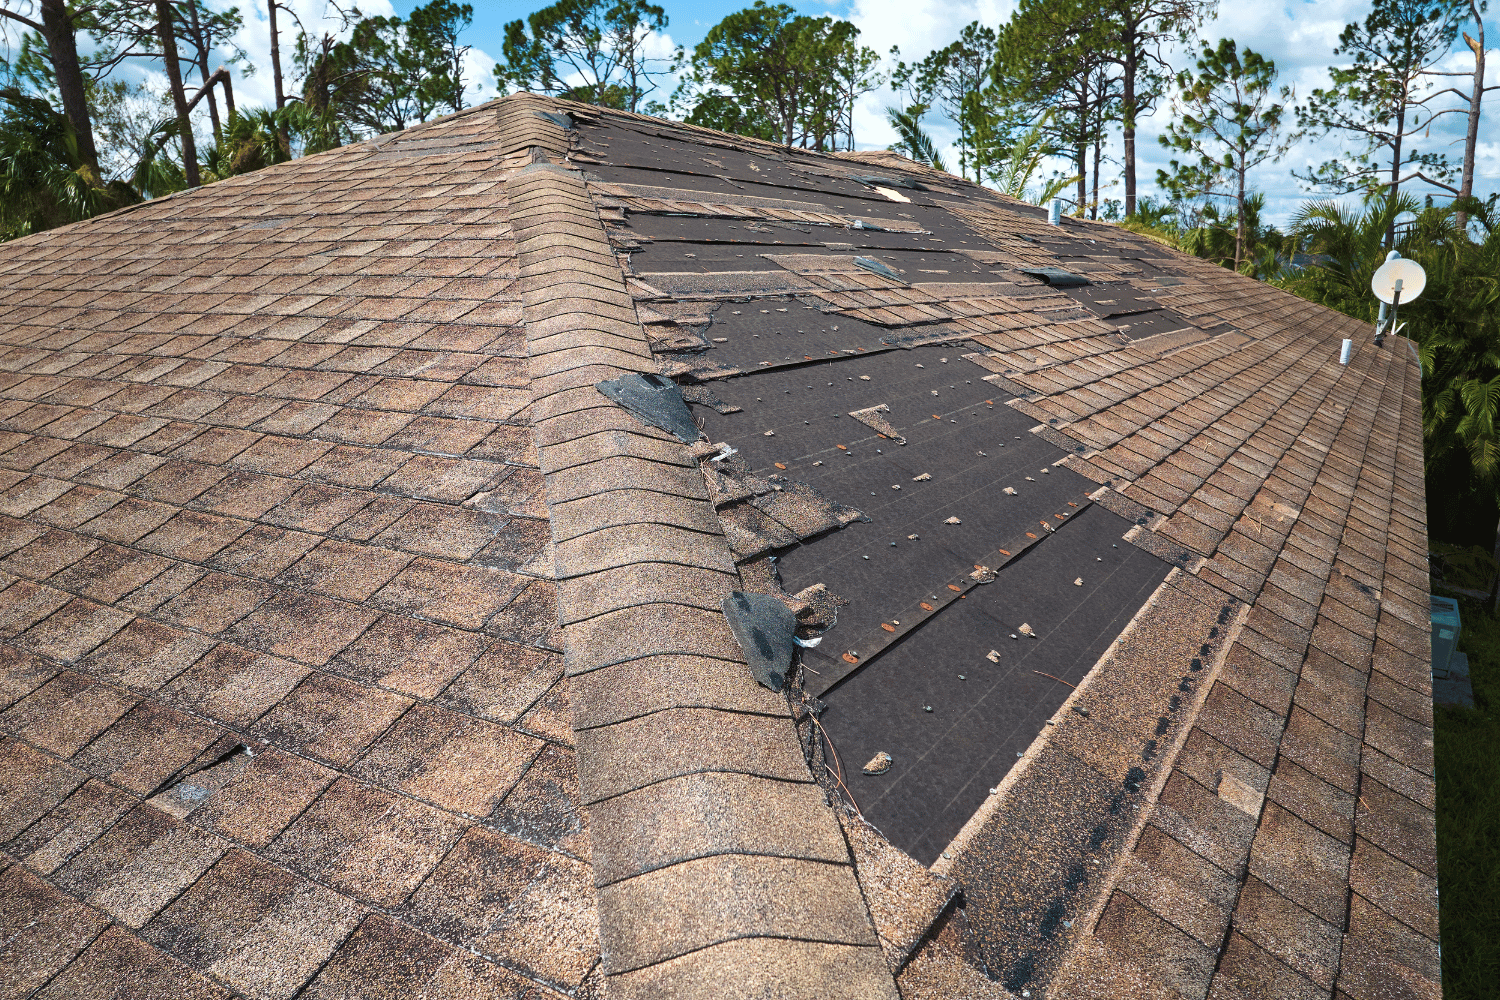
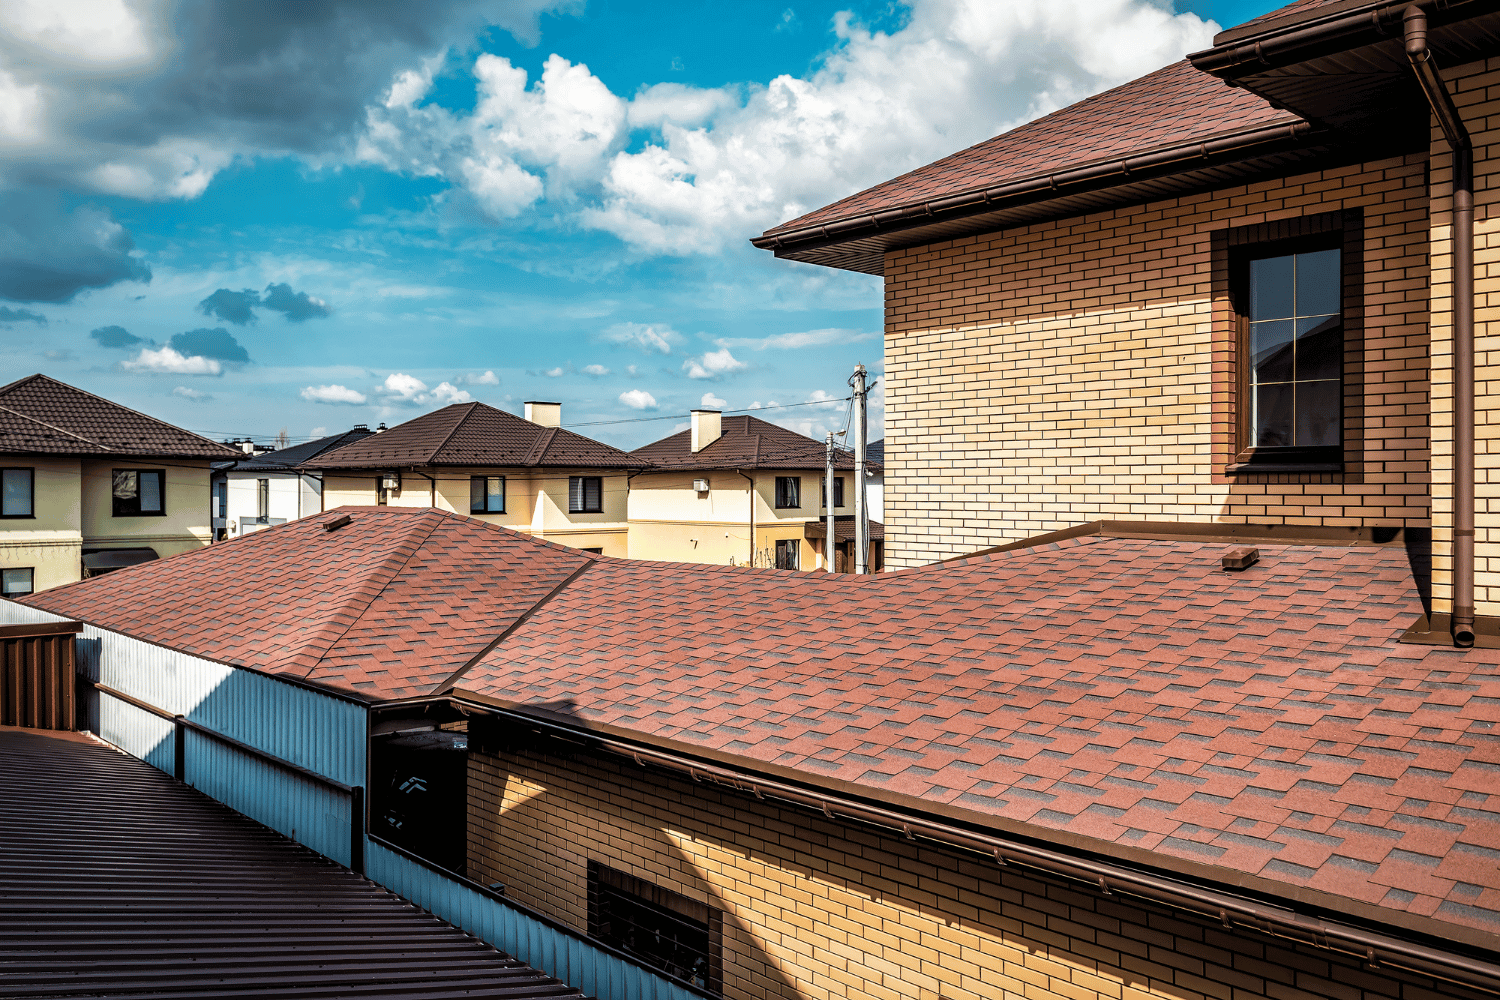
Proper shingle overlap maintains the integrity of a roof. Each course of shingles should maintain a consistent overlap to ensure effective drainage and prevent leaks. Optimal shingle overlap enhances the roof’s durability against weather elements, making it vital for any roofing project. Correctly installed shingles protect the roof deck from water infiltration, preventing significant damage.

However, many homeowners and even some roofing contractors make common mistakes during shingle installation that compromise the roof’s effectiveness. Recognizing the role of gravity in shingle overlap and avoiding common mistakes are vital for a long-lasting roof.

The Role of Gravity in Shingle Overlap

Gravity plays a crucial role in roof design, guiding water down the slope of the roof. With the force of gravity, water flows easily off the roof when shingles are properly installed. Proper overlap ensures water flows over the shingles, preventing potential water damage. Staggering the seams of the shingles prevents water leakage and creates a visually appealing pattern.

Imagine a steep roof where gravity draws water swiftly downwards; if the roof shingles aren’t overlapping correctly, water can seep into the shingle joints, leading to leaks and structural damage. Properly overlapping shingles protects your investment and ensures the longevity of your roofing project.

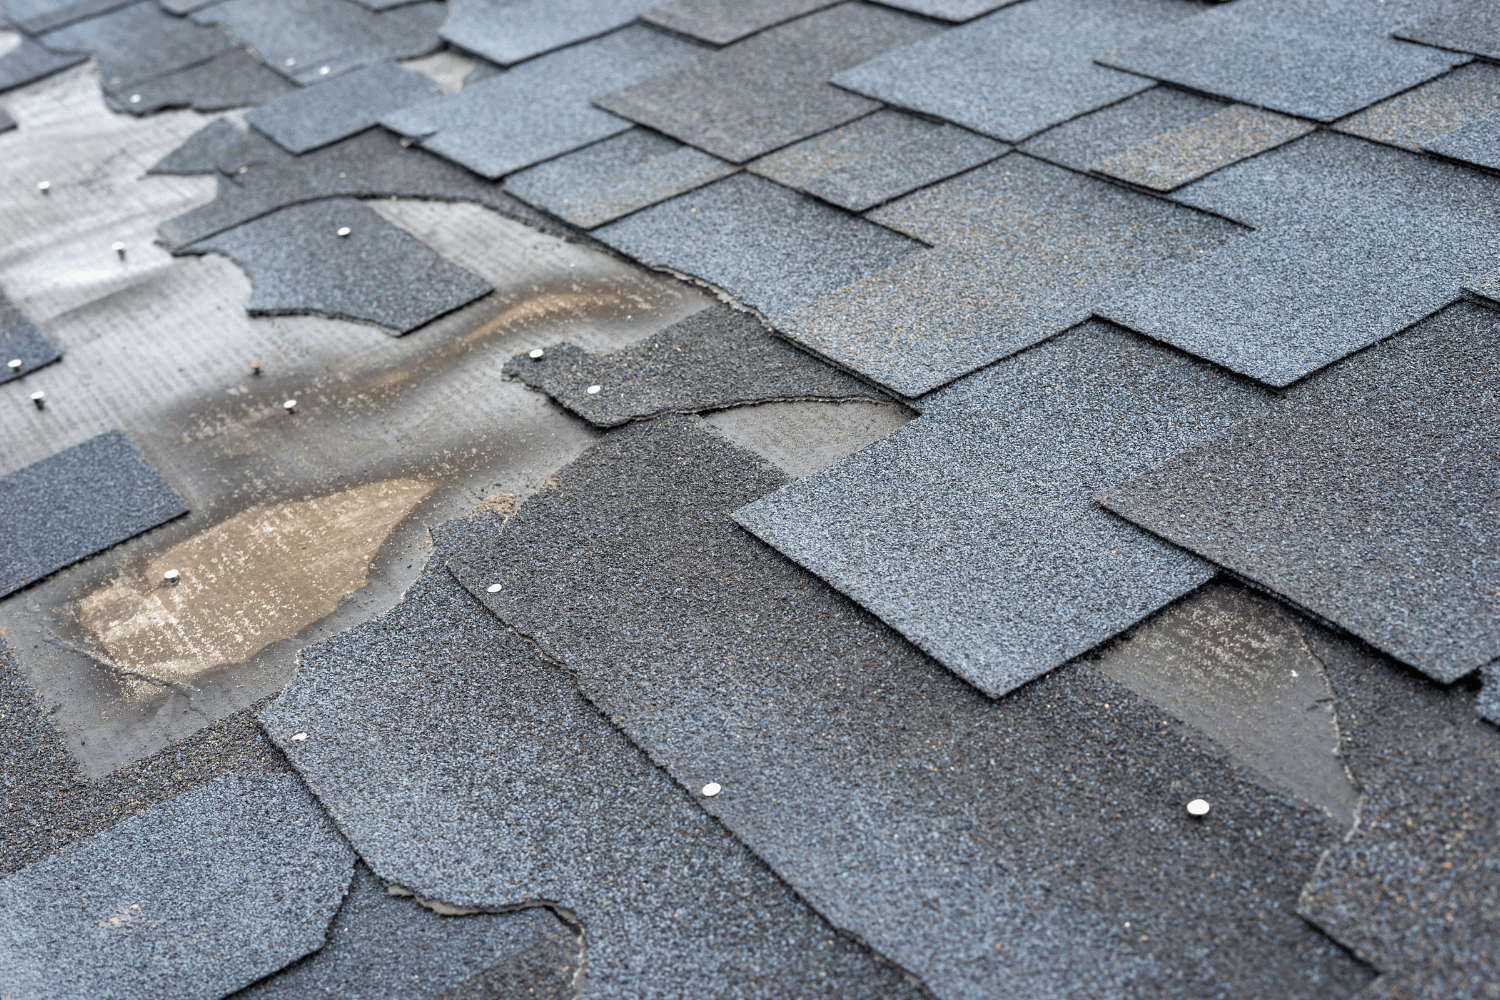
Common Mistakes in Shingle Overlap

Homeowners often encounter mistakes during shingle installation that compromise the roof’s effectiveness. One of the most frequent errors is failing to achieve proper overlap between asphalt shingles, which can lead to water infiltration and reduced longevity of the roof. Proper alignment of the first row of shingles is critical to achieving the desired aesthetic and functional outcome.

Addressing these mistakes ensures a durable and effective roofing system. Misaligned shingles, inadequate overlap, and improper nailing are pitfalls that can turn a simple roofing project into a costly repair job. Understanding and avoiding these mistakes ensures roofs look great and perform optimally.

Preparing Your Roof Deck for Shingle Installation

Preparing a roof deck for shingle installation.

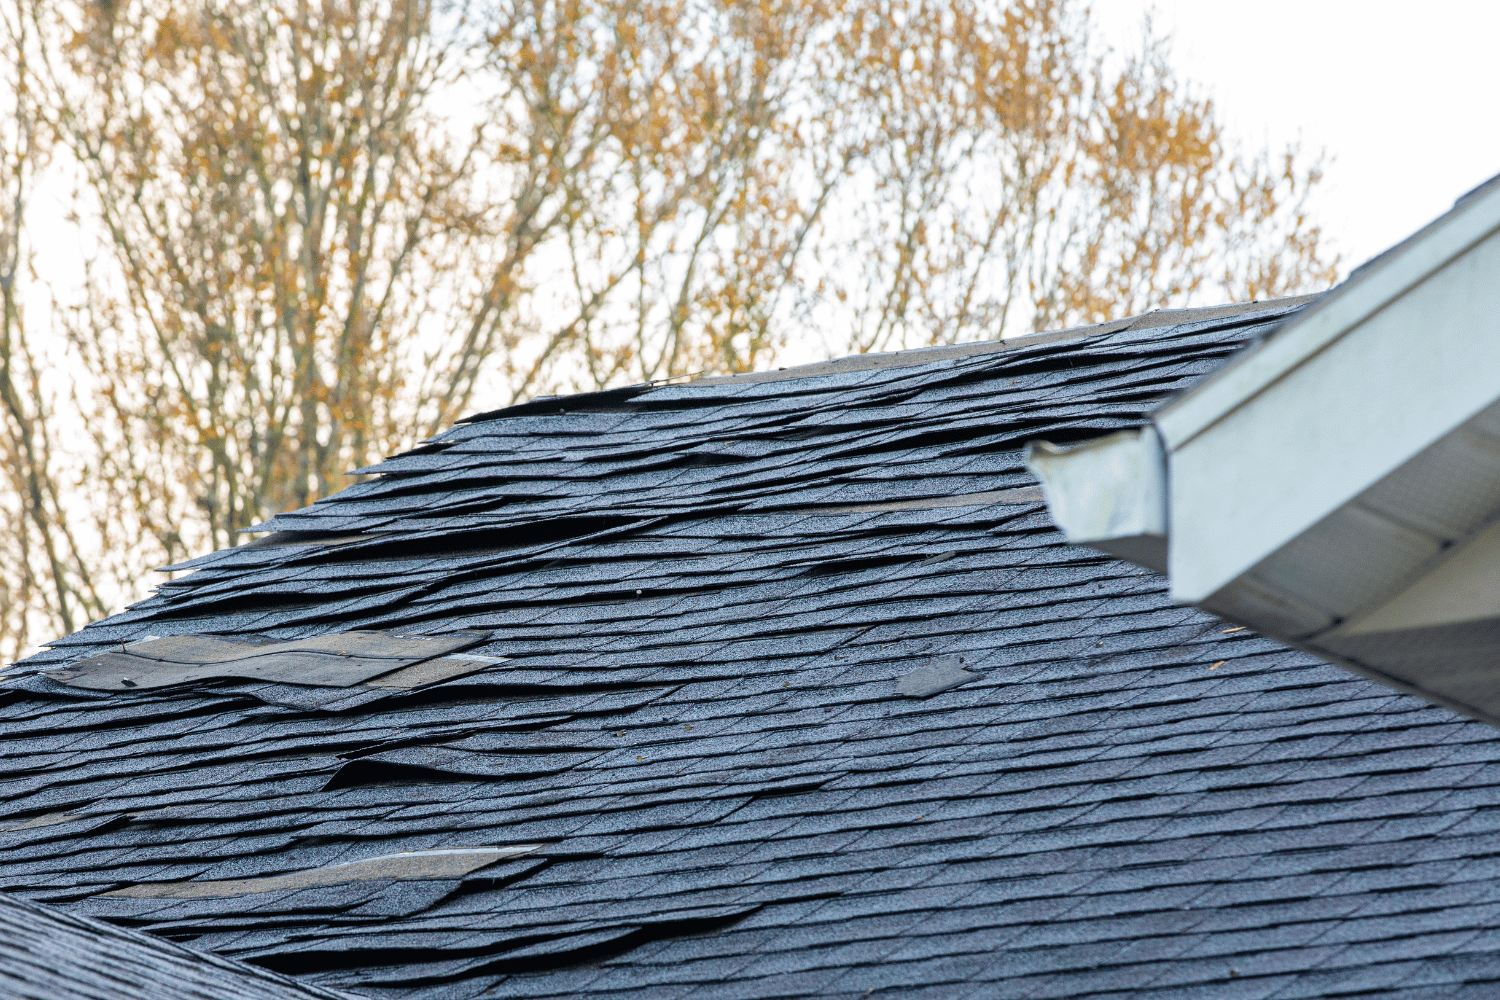
Before starting shingle installation, properly prepare your roof deck. Inspect the roof deck for any damaged or rotted areas and repair or replace them as needed. If your roof is over 20 years old, it’s advisable to consult a roofing expert to assess its condition. Visible shingle granules in gutters may indicate that your roof’s lifespan is nearing its end and requires professional evaluation.

A smooth and secure roof deck is vital for optimal shingle installation and longevity. A clean and flat deck surface ensures a smooth appearance of the finished roof. Installing a drip edge and ice and water shield enhances the roof’s durability against weather elements.

Ensuring a Smooth and Secure Roof Deck

A well-prepared roof deck is the foundation of a successful roofing project. Corrosion-resistant nails maintain the roof’s durability. Inspecting the roof deck beforehand identifies gaps and prevents future leaks during rain. A smooth and secure roof deck not only secures shingles but also enhances the overall protection of the home.

A smooth, securely fastened, dry roof deck free of gaps or holes is crucial. This preparation step achieves a seamless and aesthetically pleasing roof. A well-prepared deck ensures each component of the shingle installation performs effectively.

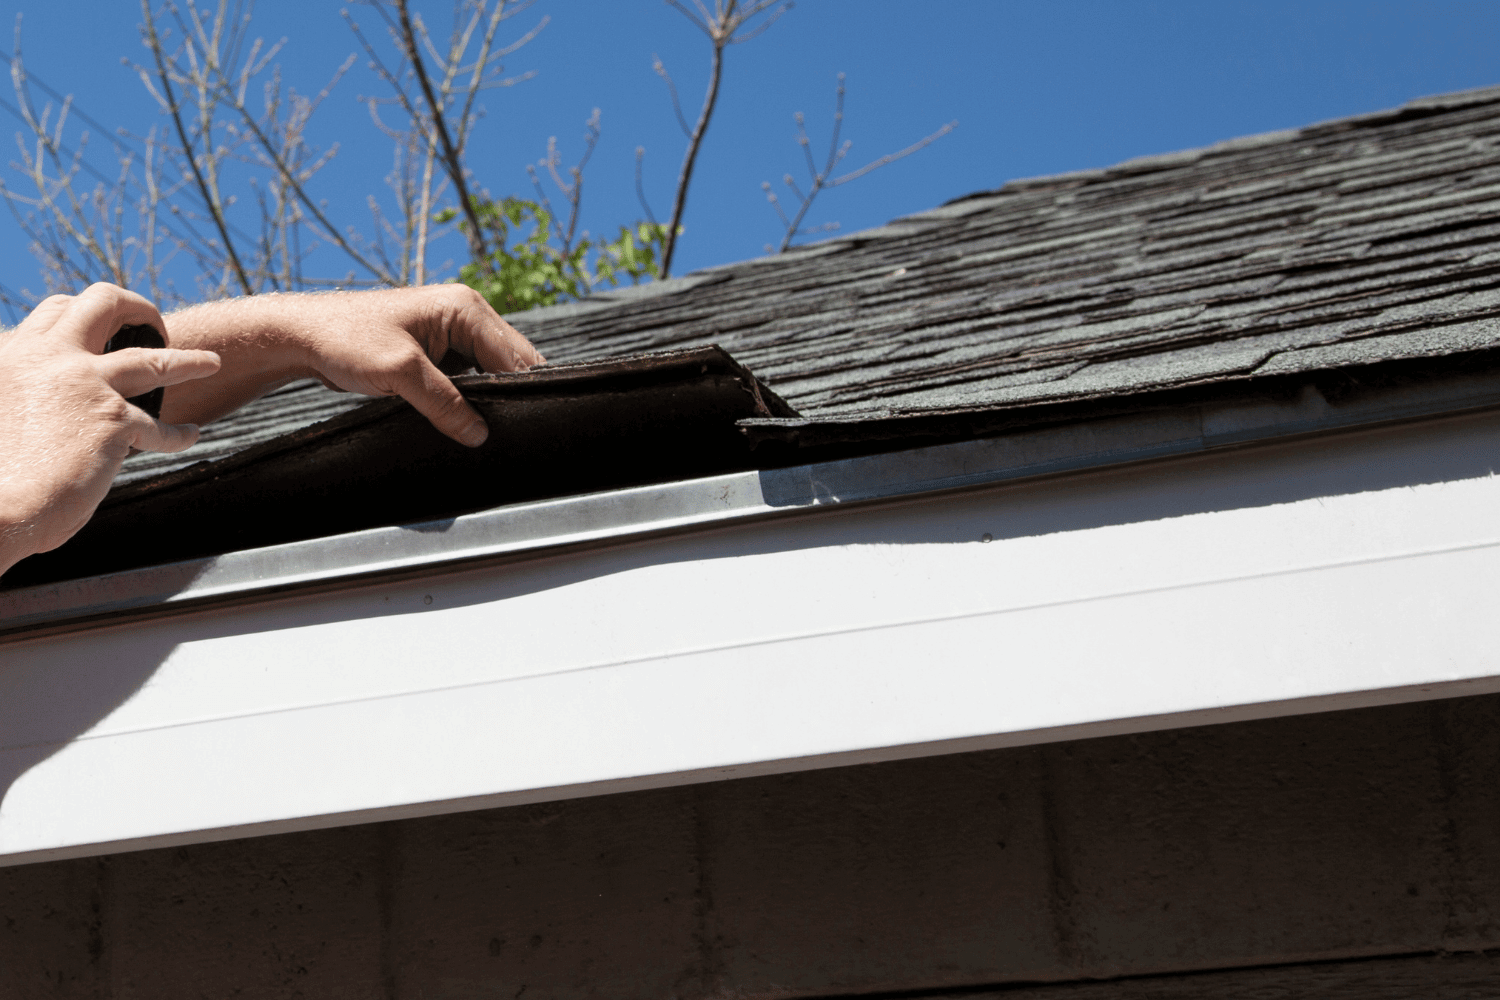
Applying Drip Edge and Ice and Water Shield

A drip edge is a metal flashing installed at the roof edges to prevent water damage and prolong the roof’s life by directing water away from the fascia into the gutter. The drip edge should be installed on top of the underlayment at the roof’s edges and rakes, creating a clean roof edge and providing increased resistance against wind uplift.

Applying an ice and water shield is another vital step. Felt underlayment should be laid out in horizontal courses, overlapping the ice and water protector by 4 inches. This creates a barrier against water infiltration, especially in cold climates where ice dams can form. Proper installation ensures a watertight seal and enhances the roof’s overall durability.

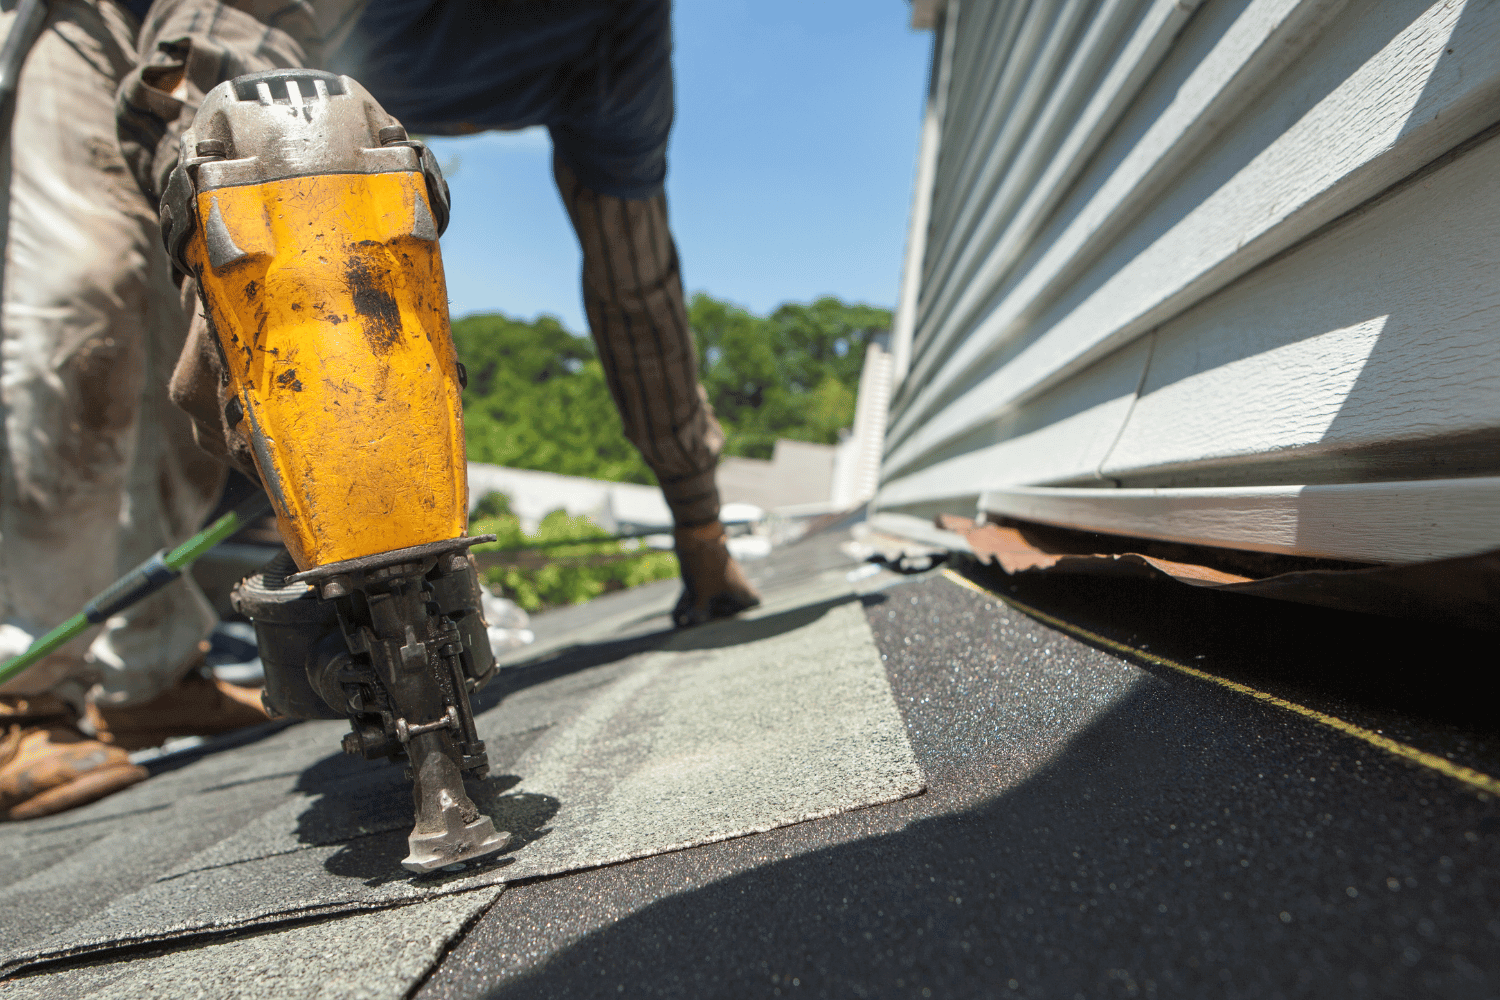
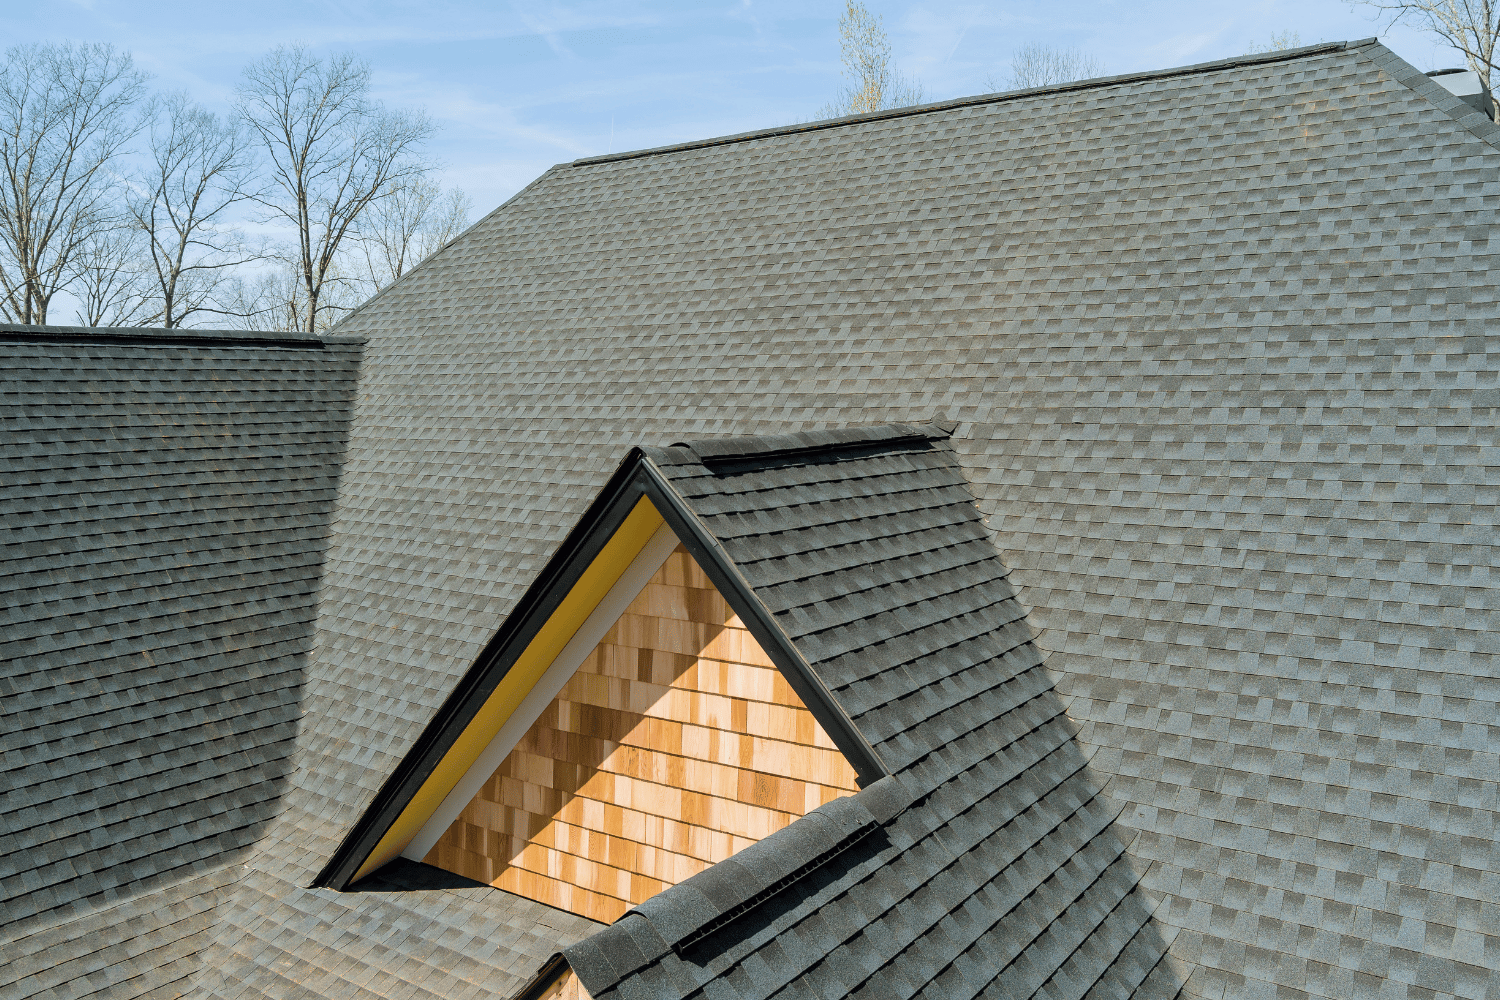
Step-by-Step Guide to Installing Shingles with Proper Overlap

Step-by-step process of installing shingles with proper overlap.

Installing shingles with the correct overlap requires meticulous attention to detail. Proper shingle overlap directs water away from the roof’s edges, reducing leak risk. Insufficient overlap during shingle installation can expose vulnerable areas to water damage.

A step-by-step approach is advisable for perfect shingle installation. This includes using starter shingles, laying the first row, and continuing shingle courses. Chalk lines ensure rows of shingles remain straight, enhancing the roof’s appearance.

Starting with Starter Shingles

Starter shingles enhance wind resistance and create a uniform appearance at the roof’s edge. Install starter strip shingles with the adhesive side facing up for a secure base. Starter shingles should overhang the roof edge by ¼ to ¾ inch for effective water management. Using six nails per shingle enhances wind resistance and provides better protection.

Nails should penetrate the wood deck at least ¾ inch to ensure effective holding power. Fastener placement is critical for maximizing wind-resistance performance. Good nailing technique significantly affects the longevity and performance of nail shingles.

Laying the First Row of Shingles

A clean, dry, debris-free roof deck is crucial for successful shingle installation. Cover the starter row with the first full row of shingles. Staggering shingles avoids a straight line vertically across the roof. This distributes the load and prevents water from infiltrating the shingle joints.

Proper alignment of the first row sets the stage for the rest of the shingle courses. Correct placement and secure fastening of the first row are vital for the roof’s integrity and appearance.

Continuing Shingle Courses

Lay shingles horizontally up the roof, ensuring each course overlaps the one below properly. Starter strips provide a straight edge for field courses and enhance wind resistance. This method ensures consistent overlap and uniform appearance.

Maintain a consistent pattern and proper nailing for secure shingle installation. Though repetitive, this process is crucial for a durable and aesthetically pleasing roof.

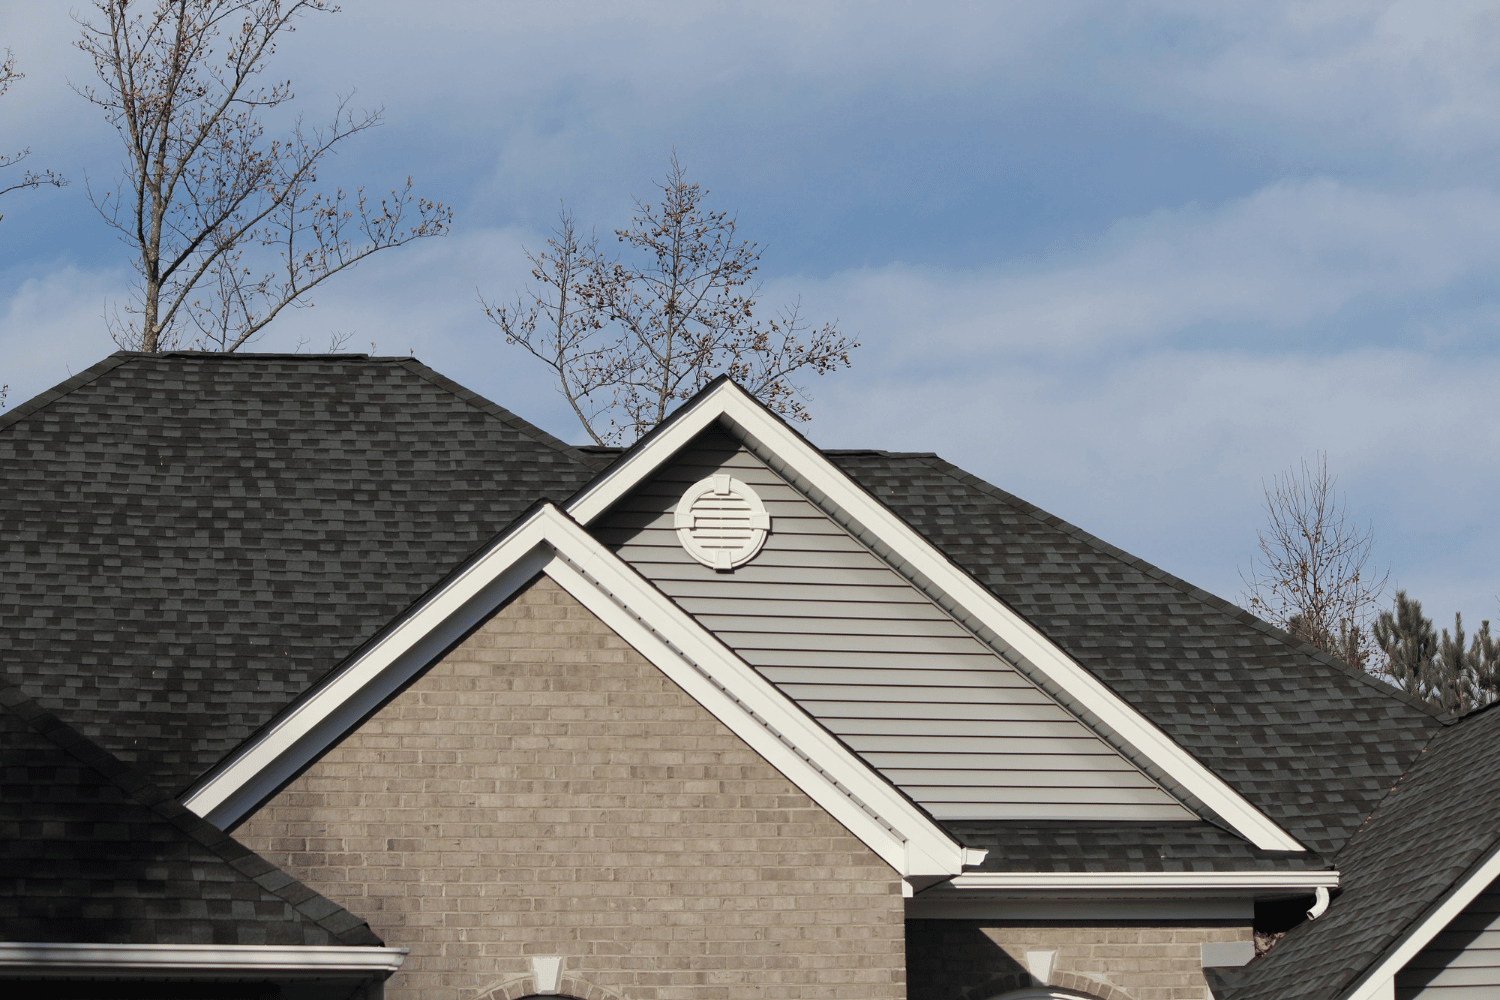
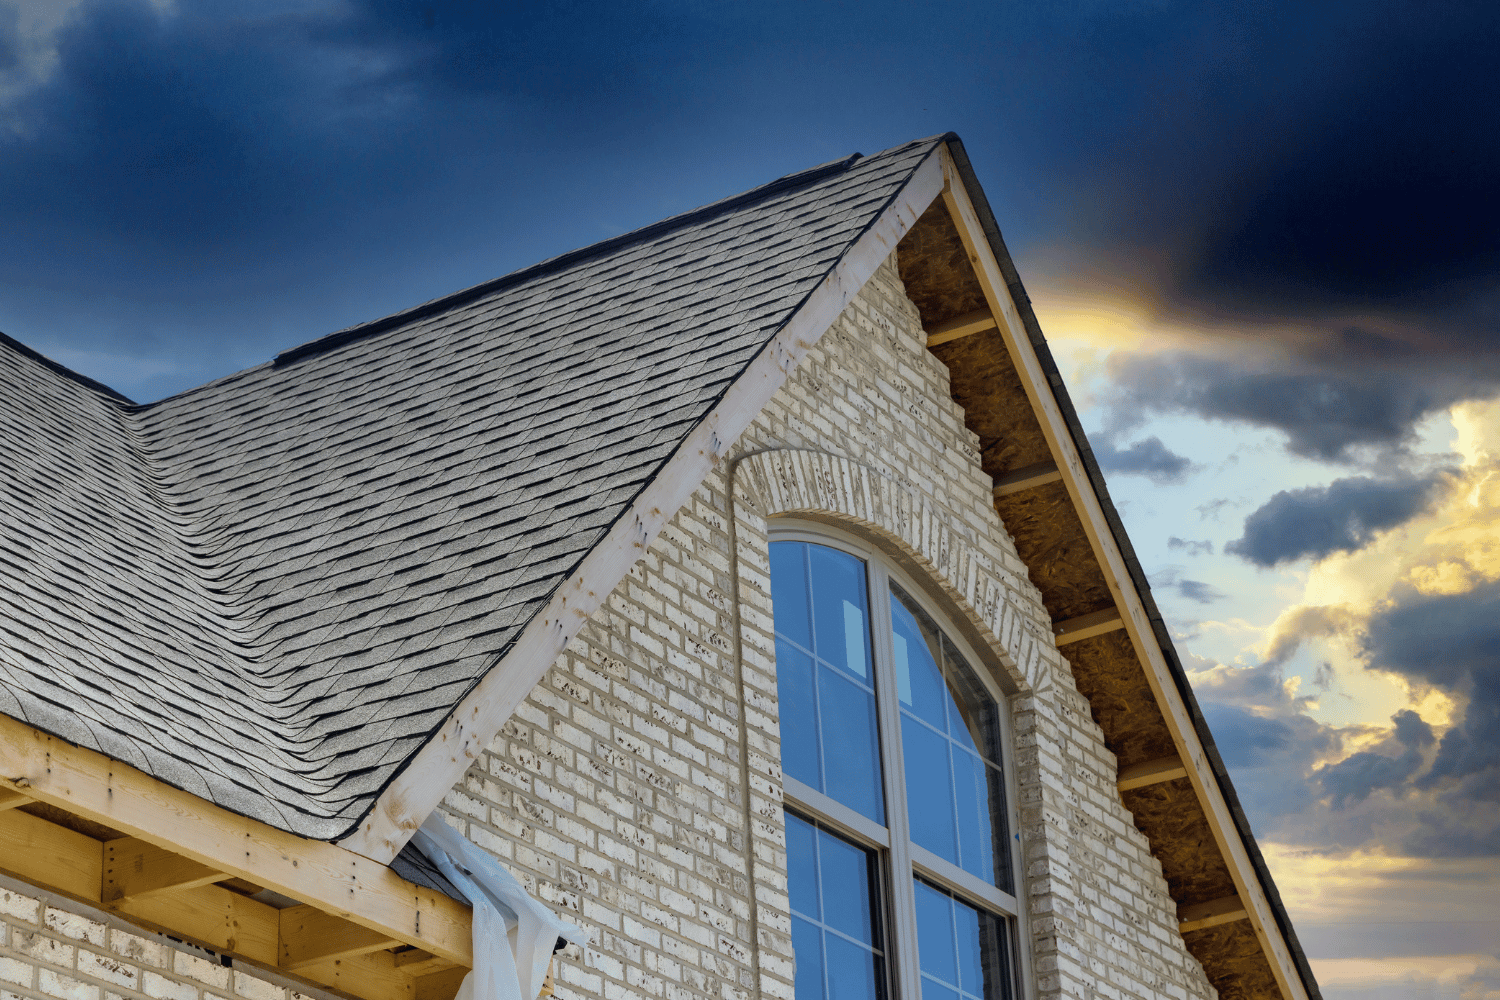
Special Techniques for Hip and Ridge Cap Shingles

Special techniques for installing hip and ridge cap shingles.

Hip and ridge cap shingles require special techniques for a watertight seal and wind resistance. Install hip shingles from the bottom up, ensuring each overlaps the one below to prevent water penetration. Install ridge cap shingles in a staggered pattern with securely fastened edges to resist wind uplift and provide a finished look.

These techniques are essential for the overall performance and appearance of the roof. Proper installation of hip and ridge cap shingles enhances the roof’s durability and visual appeal.

Installing Hip Shingles

Apply hip shingles starting from the bottom of the hip. Begin hip shingle installation at the bottom, ensuring corners do not extend into the gutter. This method ensures that each shingle overlaps the one below, creating a barrier against water infiltration.

Proper alignment and securing of hip shingles prevent leaks and ensure structural integrity. This approach ensures hip shingles perform effectively.

Installing Ridge Cap Shingles

Cut ridge cap shingles to fit the ridge line and install for a watertight seal. Use longer nails that penetrate deeper into the roof layers, ideally multiple nails per shingle for secure fastening. Seal nail heads and cover with asphalt roofing cement for a watertight seal.

Enhance wind resistance by installing ridge cap shingles from the end opposite the prevailing wind direction. This technique ensures ridge cap shingles provide maximum protection against wind uplift and water infiltration.

Pro Tips for Perfect Shingle Overlap

Professional tips for achieving perfect shingle overlap.

Perfect shingle overlap requires attention to detail and adherence to best practices. Architectural shingles typically require four nails—two at the top and two at the bottom. Use fasteners that penetrate at least 3/4 inches into the roof deck for ridge cap shingles.

Use chalk lines to guide the placement of ridge cap shingles for a tidy installation. These tips ensure shingles are securely fastened and properly aligned, enhancing the roof’s performance and appearance. Chalk lines and proper nailing techniques are essential for a successful roofing project.

Using Chalk Lines for Precision

Chalk lines are essential to maintain straight lines in roofing projects. Use a chalk line to mark straight lines for shingle rows. Maintaining straight lines ensures proper overlap, preventing leaks and ensuring roof longevity.

Chalk lines serve as a visual guide for consistent straightness across shingle rows. This simple tool significantly enhances the quality of your shingle installation.

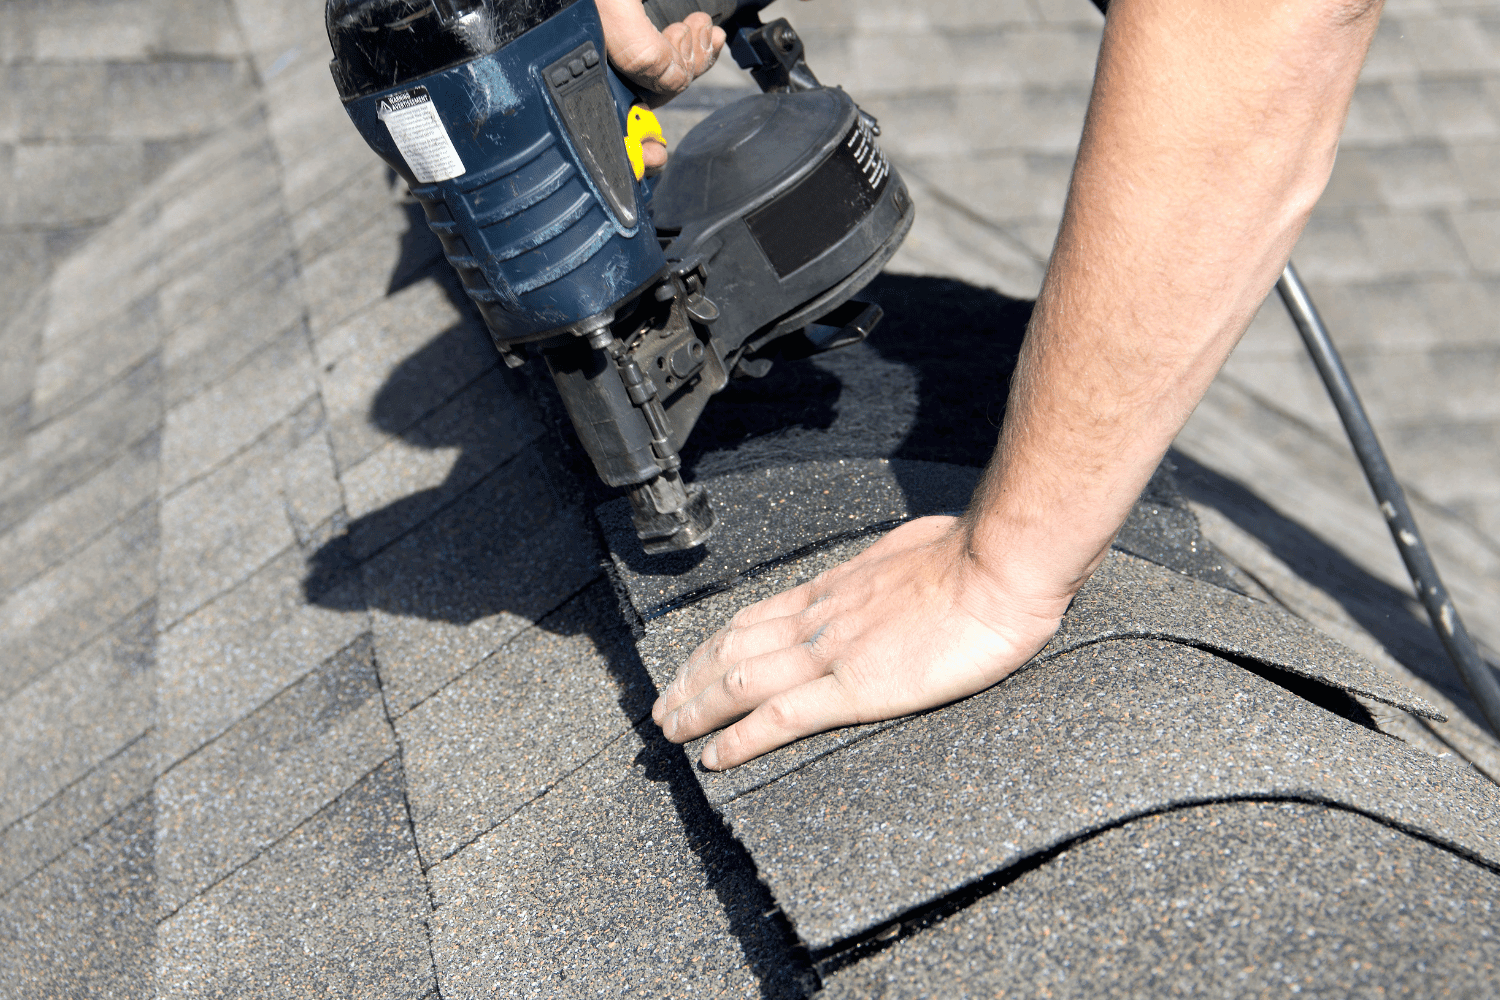
Nailing Techniques for Secure Shingles

Nailing placement is critical for wind resistance and warranty coverage. Use four nails per 3-tab shingle for secure fastening. Nail at the thickest part of the shingles for secure fastening. This technique prevents shingles from being lifted by strong winds and ensures they remain attached to the roof deck.

Proper nailing techniques involve using the right type and length of nails. Roofing nails should penetrate at least 3/4 inches into the roof deck for a strong hold. In high-wind areas, using six nails per shingle provides additional security and peace of mind.

When to Call a Roofing Professional

Even the most skilled DIY enthusiast should sometimes call a roofing professional. Recognizing signs that indicate the need for a roofing contractor can save time, money, and prevent safety hazards. Professional assistance is advisable for intricate tasks like installing flashing or working on steep roofs. If uncertain or uncomfortable working on a sloped roof, hire a professional.

In cases of doubt regarding roofing work, consulting a professional ensures safety and quality. Dream Home Roofers, as Owens Corning Platinum Preferred Contractors, offer expertise and commitment to quality, ensuring your roofing project is in capable hands.

Recognizing Complex Roofing Projects

A sagging roof often signifies serious structural issues needing immediate professional attention. Missing or broken shingles create vulnerability to water damage, indicating the need for professional repair. Use safety harnesses, straps, cables, and scaffolding on high-sloped roofs to ensure safety.

Complex roofing projects involving significant structural repairs or high-sloped roofs require specialized skills and equipment. Adhering to local building codes and safety regulations is crucial; a professional roofing contractor ensures compliance and quality workmanship.

Benefits of Hiring Owens Corning Platinum Preferred Contractors

Hiring certified contractors like Dream Home Roofers ensures quality workmanship and access to premium materials, leading to a durable roofing solution. Dream Home Roofers, as Owens Corning Platinum Preferred Contractors, bring a high level of expertise and commitment to quality in roofing service. They work with a variety of premium Owens Corning roofing materials, offering homeowners confidence in their roofing project.

Choosing a Platinum Preferred Contractor means you benefit from top-notch craftsmanship, reliable service, and a roof that not only looks great but also stands the test of time. With Dream Home Roofers, you can rest assured that your new roof will provide lasting protection and peace of mind.

Summary

In this comprehensive guide, we’ve explored the essential steps and techniques for achieving perfect roof shingle overlap. From understanding the role of gravity and common mistakes to preparing your roof deck and installing shingles, each step is crucial for ensuring a durable and effective roofing system. Proper shingle overlap not only enhances the visual appeal of your home but also provides critical protection against water infiltration and weather damage.

Whether you’re tackling a DIY roofing project or hiring a professional, following these guidelines will help you achieve a flawless and long-lasting roof. Remember, when in doubt, consulting a professional like Dream Home Roofers can ensure your roofing project is executed with expertise and precision. With the right approach and attention to detail, you can enjoy a beautiful, resilient roof for years to come.

Frequently Asked Questions

Should shingles overlap side to side?

Shingles should not overlap side to side; instead, they should be butted together to allow water to run down without entering the joints. This method ensures effective shedding of water by the preceding course of shingles.

Is overlaying a roof bad?

Overlaying a roof can compromise your home’s structural integrity due to the added weight and may mask underlying issues that could lead to higher long-term costs. Therefore, it is advisable to carefully consider this approach and weigh the potential risks.

How does gravity affect shingle overlap?

Proper shingle overlap is essential as gravity directs water down the roof slope, ensuring it flows over the shingles and preventing water from seeping underneath, which could lead to damage.

What are starter shingles, and why are they important?

Starter shingles are essential for improving wind resistance and ensuring proper water management by overhanging the roof edge, while also providing a uniform appearance. Their installation is crucial for maintaining the integrity and aesthetics of the roofing system.

When should I call a roofing professional?

You should call a roofing professional when facing complex issues, such as structural problems or high-sloped roofs, or if you feel uncertain about handling the project. This ensures safety and quality workmanship.


https://dreamhomeroofers.com/wp-content/uploads/2025/02/Preparing-a-roof-deck-for-shingle-installation.-1.png 1000 1500 Dream Home Roofers https://dreamhomeroofers.com/wp-content/uploads/2024/09/dhr-logo.png Dream Home Roofers2025-02-15 08:00:592025-02-08 23:43:37The Best Guide to Perfect Roof Shingle Overlap: Tips & Techniques
An image showing visible signs of wind damage to a roof, including missing and damaged shingles.

Top 5 Signs of Wind Damage to Roof and How to Fix Them

January 16, 2025/in Roof Repair, Roof Replacement/by Dream Home Roofers

Wind damage to your roof can cause major problems if ignored. This article explains how to identify wind damage to roof and the steps to fix it. Learn about the signs of wind damage to your roof and how to protect your roof and home.

Key Takeaways

  • Common signs of wind damage to roofs include missing shingles, granule loss, and water stains, which require immediate inspection and repair.

  • Wind speed significantly impacts the level of roof damage, with higher speeds leading to severe issues, necessitating prompt action and professional assessment.

  • Preventative measures such as regular maintenance, upgrading roofing materials, and securing loose items can help reduce the risk of wind damage during storms.

Common Signs of Wind Damage on Roofs

An image showing visible signs of wind damage to a roof, including missing and damaged shingles.

Before:

Wind damage can manifest in various ways on your roof, and knowing what to look for is crucial. Common indicators include missing shingles, lifted or curling shingles, granule loss, damaged soffit and fascia, and interior water stains. After a storm, a thorough roof inspection can reveal visible damage such as dents or missing shingles, which are clear signs of wind damage and may indicate a wind damaged roof.

After:

Wind damage can manifest in various ways on your roof, and knowing what to look for is crucial. Common indicators include:

  • Missing shingles

  • Lifted or curling shingles

  • Granule loss

  • Damaged soffit and fascia

  • Interior water stains

After a storm, a thorough roof inspection can reveal visible damage such as dents or missing shingles, which are clear signs of wind damage.

Regular inspections, especially before storm seasons, help in identifying and fixing minor issues before they escalate into major problems.

Missing Shingles

One of the most obvious signs of wind damage is missing shingles. Strong winds can tear, crease, or completely dislodge asphalt shingles, scattering them across your yard and leaving your roof deck exposed. This exposure makes your roof vulnerable to water intrusion, which can lead to leaks and further wind damaged shingles.

If you notice shingles missing after a storm, it’s a clear indication that your roof has sustained wind damage and needs immediate attention. Consulting a roofing contractor for a professional assessment and necessary repairs for the loose or damaged shingles is essential to restore the roof’s integrity and prevent further damage.

Lifted or Curling Shingles

Lifted or curling shingles are another common sign of wind damage. High winds can cause shingles to warp, twist, or become dislodged, creating gaps that allow water to seep in. These gaps compromise the roof’s integrity, making it susceptible to leaks and other issues. You might notice shingles that appear upturned or askew, especially along the edges and pressure points of the roof.

Addressing these issues promptly with the help of a reputable roofing contractor can prevent more significant problems down the line.

Granule Loss

Granule loss is a subtler yet significant indicator of wind damage. High winds can dislodge the granules that protect asphalt shingles, leading to a weakened roofing system. This loss is often noticeable as debris accumulating in gutters or around your property. Granules play a crucial role in extending the lifespan of shingles by providing texture and protection.

If you observe granule loss, it’s essential to address it promptly to prevent further deterioration and potential leaks.

Damaged Soffit and Fascia

Wind forces can also damage the soffit and fascia, which are critical components of your roof’s structure. High winds can crack, loosen, or detach these elements, leading to potential water leaks and pest entry. Damaged soffit and fascia can create significant moisture problems and provide pathways for rodents and insects to enter your home.

Regular roof inspections can help detect such damage early, reducing the likelihood of severe leaks and infestations.

Interior Water Stains

Interior water stains on ceilings or walls are a telltale sign of roof leaks, often resulting from wind damage. Missing shingles and other roof vulnerabilities compromise the roof’s ability to repel water, leading to leaks. Discoloration and wet spots on ceilings usually indicate water intrusion, which can cause significant structural damage if ignored.

Addressing water stains promptly can prevent further deterioration of your roof and home.

How Wind Speed Affects Roof Damage

A graphic illustrating how different wind speeds can affect roof damage, showing a comparison of moderate, strong, and severe winds.

The impact of wind damage on your roof largely depends on wind speed. While even moderate winds can cause some damage, strong and severe winds can lead to significant roof damage or even structural failure. Understanding how different wind speeds affect your roof can help you better prepare and respond to wind damage.

Factors such as wind direction, duration, and the presence of projectiles also influence the extent of the damage.

Moderate Winds (45-57 mph)

Moderate winds, typically between 45 and 57 mph, can still cause noticeable damage to roofs, especially if the shingles are already loose or vulnerable. These winds can lead to granule loss, affecting the integrity of asphalt shingles. Homeowners should regularly inspect their roofs and secure any loose shingles to prevent minor damage from escalating.

While such wind speeds might not cause significant damage, they can initiate issues that worsen over time if not addressed.

Strong Winds (58-74 mph)

Strong winds, ranging from 58 to 74 mph, can cause more severe roof damage, akin to conditions experienced during a Category 1 hurricane. These wind speeds can lift, curl, or completely dislodge shingles, exposing the roof deck to the elements and leading to potential leaks and further deterioration.

It’s crucial to address any detected damage swiftly to maintain the integrity of your roofing system.

Severe Winds (75+ mph)

Severe winds exceeding 75 mph can cause extensive roof damage, potentially leading to structural failures. Such high winds can rip off shingles, detach soffit and fascia, and even cause significant damage to the roof structure itself.

In these cases, comprehensive repairs or even a full roof replacement may be necessary to restore the roof’s integrity and ensure the safety of your home.

Steps to Take If You Suspect Wind Damage

A person inspecting a roof for wind damage, looking for visible signs of damage.

If you think there might be wind damage to your roof, it’s important to act quickly. Taking prompt action will help prevent additional problems. Conduct a visual inspection, document the damage, and contact a professional roofer for an accurate assessment.

These steps will help you determine the extent of the damage and the necessary repairs to restore your roof’s integrity.

Conduct a Visual Inspection

Start by conducting a thorough visual inspection of your roof. Look for loose shingles, granule accumulation in gutters, and damaged soffit and fascia. These signs can indicate wind damage and help you identify the areas that need attention.

Checking for obvious signs of damage will give you a better understanding of the roof’s condition and the immediate steps required.

Document the Damage

Documenting the damage is crucial for supporting your insurance claim. Take detailed photos and notes during your inspection to capture all visible damage. This documentation will be essential when filing an insurance claim and ensuring a smooth process.

Thorough records can also help in communicating the extent of the damage to your roofing contractor.

Contact a Professional Roofer

Contact a professional roofer to assess the damage accurately and recommend the necessary repairs. A reputable roofing contractor can provide a thorough inspection, identify hidden issues, and perform the required repairs or even a full roof replacement if needed.

Ensure that the roofer you choose has the proper references and proof of insurance to guarantee quality work.

Filing an Insurance Claim for Wind Damage

Filing an insurance claim for wind damage can be a complex process, but understanding your homeowners insurance policy and working closely with your insurance provider can make it smoother. Knowing what your policy covers and how to document and submit your claim are crucial steps in getting the necessary repairs covered.

Review Your Homeowners Insurance Policy

Start by reviewing your homeowners insurance policy to understand what is covered in terms of wind damage. Coverage details and exclusions can vary, so it’s important to clarify what repairs are included and any deductible amounts.

Contact your insurance companies provider if you have any questions about specific coverage details related to wind damage.

Submit Your Claim

Submit your insurance claim promptly to avoid complications or denials. Delaying your claim can lead to issues, so it’s crucial to document all damage thoroughly and stay organized throughout the process.

Prompt and accurate submission can help facilitate timely approval and repairs.

Work with Your Insurance Provider

After filing your claim, work closely with your insurance company to ensure a smooth insurance claim process. Your insurer will typically send an adjuster to evaluate the damage on-site.

Effective communication with your insurance provider and roofing contractor can help ensure that the repairs are covered and completed properly.

Repairing Wind-Damaged Roofs

A construction worker repairing a wind-damaged roof, showcasing the repair process.

Repairing wind-damaged roofs promptly is crucial to prevent further issues and maintain the roof’s resilience. Addressing damage quickly can save on future repair costs and ensure the safety of your home.

Depending on the extent of the damage, repairs can range from temporary fixes to full roof replacements.

Temporary Fixes

Temporary fixes, such as placing a tarp over significant damage, can help prevent water from entering your home until permanent repairs can be made. Using roofing tape or tarps to cover leaks and exposed areas provides a short-term solution to mitigate further damage.

Implementing these quick fixes can protect your home until professional help arrives.

Permanent Repairs

Engaging professional roofers for permanent repairs ensures that the work is done correctly, minimizing the risk of future damage. Using high-quality materials can enhance the durability and resilience of your roof against future wind damage. Depending on the severity of the damage, permanent repairs may range from shingle replacement to a full roof replacement.

Roof Replacement

In cases of severe wind damage, a full roof replacement might be necessary. Contact a professional roofer to assess the extent of the damage and determine if a complete replacement is required.

Investing in upgraded roofing materials, such as wind-resistant shingles, can provide long-term protection against future wind damage.

Preventative Measures Against Wind Damage

An image showing preventative measures taken against wind damage on a roof, including upgraded materials.

Preventing wind damage is better than dealing with repairs. Implementing preventive strategies can significantly reduce the risk of roof damage during wind events. Regular maintenance, upgrading roofing materials, and securing loose items around your property are key steps to protect your roof.

Regular Maintenance

Regular maintenance is essential to keep your roof in good condition and catch any potential issues early. Perform routine visual inspections to look for common signs of wind damage, such as missing or lifted shingles, granule loss, or damaged soffit and fascia. Keep detailed documentation of any damage observed during inspections, which will be useful for insurance or repair purposes.

Regular maintenance helps in maintaining the roof’s integrity and prevents minor issues from escalating into significant problems.

Upgrade Roofing Materials

Upgrading your roofing materials can provide better protection against high winds and severe weather events. Wind-resistant materials, such as metal roofs and impact-resistant shingles, are designed to withstand extreme wind conditions and reduce damage from flying debris. Proper installation of these materials, such as clay and concrete tiles, enhances their performance and resilience to strong winds.

Investing in high-quality materials can extend the lifespan of your roof and provide peace of mind during storms.

Secure Loose Items

Securing loose items around your property is a simple yet effective preventive measure. Outdoor furniture, tree branches, and other debris can become hazardous projectiles during storms, causing damage to your roof and property.

By securing or removing these items, you can protect your home and enhance overall safety during severe weather events.

Summary

Recognizing the signs of wind damage and taking prompt action is crucial to maintaining the integrity of your roof and home. From conducting regular inspections and documenting damage to contacting professional roofers and filing insurance claims, every step is vital in addressing and preventing further issues. Upgrading roofing materials and securing loose items around your property are proactive measures that can provide long-term protection against wind damage. By staying vigilant and prepared, you can ensure the safety and durability of your roof for years to come.

Frequently Asked Questions

How much wind does it take to damage a roof?

Winds exceeding 50-60 mph can cause serious roof damage, while roofs in hurricane-prone areas should withstand up to 150 mph winds. Anything beyond these limits poses a high risk for significant damage.

How can I tell if my roof has wind damage?

To determine if your roof has wind damage, look for missing or lifted shingles, granule loss, and any signs of interior water stains. Conducting a visual inspection after a storm is essential for identifying these issues.

What should I do if I suspect wind damage to my roof?

Immediately conduct a visual inspection and document any damage with photos and notes. Then, contact a professional roofer for a thorough assessment and necessary repairs.

How do wind speeds affect the extent of roof damage?

In conclusion, wind speeds significantly impact roof damage; even winds of 45 mph can damage loose shingles, while speeds over 75 mph can result in extensive damage and structural failures. Therefore, monitoring wind speeds is crucial for roof integrity.

What are some preventive measures to protect my roof from wind damage?

To effectively protect your roof from wind damage, focus on regular maintenance, utilize wind-resistant roofing materials, and secure loose items in your surroundings. Implementing these measures will greatly minimize your risk.


https://dreamhomeroofers.com/wp-content/uploads/2025/01/An-image-showing-visible-signs-of-wind-damage-to-a-roof-including-missing-and-damaged-shingles.-1.png 1000 1500 Dream Home Roofers https://dreamhomeroofers.com/wp-content/uploads/2024/09/dhr-logo.png Dream Home Roofers2025-01-16 08:00:582025-01-13 03:28:13Top 5 Signs of Wind Damage to Roof and How to Fix Them

Top Signs: When Should You Replace a Roof?

November 12, 2024/in Roof Repair, Roof Replacement, Roofing/by Dream Home Roofers

Wondering when should you replace a roof? Knowing the right time can save you from costly repairs and potential damage. This article breaks down the key signs to look for, such as the age of your roof, visible damages, and environmental factors that affect its lifespan. Stay tuned to learn about these indicators and make an informed decision.

Key Takeaways

  • Key signs that indicate you may need a new roof include aging, cracking or missing shingles, moss growth, and water stains in the attic.
  • Different roofing materials have varying lifespans, with asphalt shingles lasting around 20-30 years, while metal roofs can last up to 70 years or more.
  • Timely roof replacement not only enhances your home’s value and energy efficiency but also protects against environmental hazards, ensuring better safety for your family.

Key Indicators Your Roof Needs Replacement

A visual representation of key indicators for roof replacement, including various roofing materials and signs of wear.

Your roof serves as your home’s primary shield against the elements. How can you recognize when it’s time for a replacement? Several key indicators can signal the need for a new roof. Recognizing these signs early can help you tackle potential issues before they escalate into costly damage.

From the age of your roof to visible damage like cracking and missing shingles, identifying these warning signs early can save you from a complete replacement. Here are the specifics of each indicator and their impact on your roof’s health.

Roof’s Age

One of the most significant factors in deciding if you need a new roof is its age. The average lifespan of a roof is around 20 years, though this varies based on material and maintenance. Asphalt shingles typically last 20-30 years, while well-maintained slate roofing can last up to 100 years. If your roof is at least 20 years old, it might be nearing its end and should be inspected annually. Shedding shingle granules or visible wear and tear are signs of aging.

Various factors, including maintenance and environmental elements, can significantly affect a roof’s lifespan. Regular maintenance, such as clearing gutters, trimming tree limbs, and properly ventilating the attic, can help extend the life of your roof.

If your roof is 25 years old or more, replacing it could help avoid issues like heat absorption and cold infiltration, which affect your home’s energy efficiency.

Cracking Shingles

Cracked shingles clearly indicate that your roof may need replacement. These cracks can lead to leaks and further damage, so they should be addressed promptly. Curling or buckling shingles also suggest significant wear and must not be ignored.

Identifying cracking and curling shingles is essential to prevent water damage and extensive roof repairs. If many shingles show these issues, it might be time for a roof replacement.

Missing Shingles

Missing shingles indicate severe wear and potential leaks. Ignoring them can lead to worsening damage and increased repair costs. Address missing shingles promptly to prevent further damage and costly repairs.

If many shingles are missing or damaged, a roof replacement might be necessary to maintain your home’s integrity.

Moss Growth

Moss growth on a roof suggests possible significant damage and moisture issues. Cool, moist climates with limited sunlight favor moss growth, which can trap moisture against the roof surface and cause deterioration. Over time, moss can damage shingles by holding moisture against the roof surface.

Brushing off moss can damage shingles, so professional help may be needed to remove it and address any underlying issues.

Visible Damage Signs

Visible damage signs on a roof that indicate the need for inspection and potential replacement.

Visible damage is a clear indicator that your roof might need replacement. Buckled and curled shingles, water stains in the attic, and rusted flashing suggest that your roof is no longer offering adequate protection. Addressing these issues promptly can prevent costly damage and extend your roof’s longevity.

Here are these visible signs in more detail.

Buckled and Curled Shingles

Buckled and curled shingles commonly indicate roof wear and may suggest a need for replacement soon. Strong winds can displace or tear shingles, exposing the underlying structure to water damage. Ignoring these signs can increase leak risks and compromise the roof’s integrity.

If shingles have missing pieces or debris accumulates in your gutters, it might be time to consider a roof replacement.

Water Stains in Attic

Water stains in the attic often indicate underlying roof leaks that can lead to further issues. Ceiling discoloration can signify possible water penetration and internal leaks. Significant light coming through the attic may suggest a need for a new roof. Ignoring water damage can lead to rot, mold growth, or even collapse.

Regular inspections can detect these issues early and prevent extensive damage.

Rusted Flashing

Rusted flashing poses a significant concern for roof health. A roof valley is a V-shaped metal channel, and if the flashing in these valleys rusts, water can leak into the house, leading to severe damage.

Proper maintenance and timely replacement of rusted flashing are crucial to maintain the roof’s integrity and prevent water damage.

Environmental Factors

Environmental factors can significantly wear down roofs over time, often necessitating replacement. Many roofs reach the end of their lifespan without major storms, showing wear over time. High winds, extreme temperatures, and ice dams can negatively impact your roof’s condition.

Here are these factors and their effects on your roof.

High Winds and Storm Damage

High winds pose a significant threat to roof integrity and can cause major damage. Strong winds can displace shingles and components, creating vulnerabilities that may necessitate a complete roof replacement.

After a storm, inspect your roof for signs of damage, as extensive issues may warrant a complete replacement. Timely roof inspections can help detect and address these issues before they escalate.

Extreme Temperatures

Extreme temperatures can dry out roofing materials, making them more susceptible to damage. UV rays dry out asphalt shingles, making them brittle and prone to cracking. UV exposure and extreme temperatures can significantly degrade roofing materials over time.

Regular roof inspection can help identify and address damage caused by extreme temperatures and UV exposure before it necessitates roof replacement.

Ice Dams

Ice dams occur when snow and water cannot runoff effectively, leading to buildup. This can lead to water infiltration and damage to roof structures. If ice dams prevent runoff, call a professional to address the issue and prevent further damage.

Proper insulation and ventilation can help prevent ice dams and protect your roof from damage.

Roof Materials and Lifespan

An overview of different roofing materials and their lifespan, showcasing options for homeowners considering a new roof.

Understanding different roofing materials and their lifespans is crucial for making informed roof replacement decisions. Asphalt materials can last about 10 to 30 years, while metal roofs are known for their durability, typically lasting around 50 years or more with proper maintenance.

Slate roofing is among the most durable roofing material, often requiring only minor repairs and lasting up to 100 years. Here are the characteristics and lifespans of various roofing materials in more detail.

Asphalt Shingles

Asphalt shingles are commonly used in roofing and typically last 15-20 years. While the recommended lifespan for asphalt roofs is 15 to 20 years, they may last up to 30 years with proper maintenance.

There are two main types of asphalt shingles: traditional three-tab shingles and architectural shingles. Dimensional shingles, also known as architectural or laminated shingles, have a multi-layered construction that provides depth and texture to the roof.

Metal Roof

Metal roofing typically lasts between 40-70 years with proper maintenance. Roofs made from materials like zinc and copper can last up to a century. Known for their impressive durability, metal roofs can withstand extreme weather conditions, making them a popular choice for longevity.

Tile Roof

Tile roofs typically last 50-100 years or more. Clay roofing tiles can last up to 50 years.

If you notice cracked or missing tiles, replace individual tiles to maintain the roof’s integrity and prevent further damage.

Slate Roofing

Manufacturers typically offer warranties for slate roofing ranging from 50 years to a lifetime. Known for its exceptional durability, slate roofing is a popular choice for long-lasting residential roofs. Slate roofs can last between 50 to 100 years, providing reliable protection for decades.

Financial Considerations for Roof Replacement

Financial considerations for roof replacement, including costs and potential financing options for homeowners.

Replacing a roof is a significant investment, and considering the financial aspects carefully is essential. The typical cost range for a full roof replacement is between $6,700 and $80,000, with an average expenditure around $11,500.

Beyond the initial cost, homeowners should explore various financing options and take advantage of promotions and discounts to manage expenses better. Here are the costs, financing options, and available promotions to help you make an informed decision.

Cost of Roof Replacement

The cost of roof replacement can vary widely depending on factors like the size of your roof, the materials used, and the complexity of the installation. On average, homeowners spend around $11,500 on a complete roof replacement, but costs can range from $6,700 to $80,000.

Budget for additional expenses, such as labor and unexpected repairs, by setting aside an extra 10% beyond the estimated costs. Evaluating these costs beforehand can help you prepare financially and avoid surprises.

Financing Options

Many roofing companies offer flexible financing plans to help homeowners manage the upfront costs of roof replacement. Options like home equity lines of credit (HELOCs) and cash-out refinancing can provide the necessary funds for roof repairs by leveraging your home’s equity.

Additionally, some companies partner with lenders to offer low or no interest financing plans, making it easier to afford a new roof.

Promotions and Discounts

Taking advantage of promotions and discounts can significantly reduce the overall cost of roof replacement. For example, some roofing contractors might offer substantial discounts on materials and financing options.

Seasonal discounts and promotional offers, such as zero percent financing, can help manage upfront costs and make roof replacement more affordable. Inquire about available promotions when planning your roof replacement.

Benefits of Timely Roof Replacement

Benefits of timely roof replacement, illustrating increased home value and energy efficiency.

Replacing your roof at the right time can prevent larger and more costly problems in the future. Investing in a new roof can lead to savings by preventing future damage, potentially lowering insurance costs, and enhancing your home’s aesthetic appeal.

Timely roof replacement can also improve energy efficiency and enhance safety. Let’s explore these benefits in more detail to understand why replacing your roof sooner rather than later is a wise decision.

Increased Home Value

A well-maintained roof enhances a property’s aesthetic appeal, signaling care to potential buyers. Improved curb appeal from a new roof can significantly increase the property’s market value. Many homeowners find that investing in a new roof results in a higher resale value, making it a worthwhile investment.

Most homeowners appreciate the security and attractiveness that a new roof brings to their house, making it more appealing to potential buyers.

Improved Energy Efficiency

Modern roofing materials can minimize heat transfer, contributing to a more energy-efficient home and lower utility expenses. Energy-efficient roofs can reduce cooling costs by 10-20%. An intact roof reduces air leaks, decreasing the load on heating and cooling systems, which leads to significant savings on energy bills.

New roofs often incorporate advanced materials that better insulate the house, maintaining a comfortable indoor temperature year-round.

Enhanced Safety

A new roof provides better protection against environmental hazards. It can also provide better protection against potential structural failures due to weather extremes, enhancing the overall safety of your home. By replacing your roof on time, you ensure that your home is well-protected against various environmental elements, reducing the risk of leaks, mold growth, and other issues that could compromise your family’s safety.

Making informed decisions about roof replacement can lead to a more secure and durable home.

Summary

Recognizing the signs that indicate your roof needs replacement is crucial for maintaining the safety and value of your home. From understanding the impact of your roof’s age and visible damage signs to considering environmental factors and the lifespan of various roofing materials, timely roof replacement can prevent costly damage and enhance your home’s efficiency and safety. Financial considerations, including costs, financing options, and promotions, play a significant role in planning a roof replacement. By acting promptly and making informed decisions, you can ensure your home remains protected and valuable for years to come. Don’t wait until it’s too late—get your roof inspected today and take the necessary steps to secure your home’s future.

Frequently Asked Questions

How often should roofs be replaced?

The frequency for roof replacement largely depends on the material, condition, and environmental factors. Generally, an annual roof inspection is essential, especially after severe weather, to ensure your roof remains in good condition and to catch any issues before a full replacement becomes necessary.

What type of roofing materials does Dream Home Roofers work with?

Dream Home Roofers uses a range of premium Owens Corning roofing materials, ensuring your home gets top-notch protection and style.

What are architectural shingles?

Architectural shingles are a type of asphalt shingle that features multiple layers, giving them a more textured and dimensional look compared to standard three-tab shingles. This added depth not only enhances curb appeal but often increases durability as well.

What financing options does Dream Home Roofers offer?

Dream Home Roofers provides flexible financing options, making it easier for homeowners to upgrade their roofs without any upfront costs. This approach can really help you achieve your home improvement goals comfortably.

What are the main reasons to consider roof replacement according to Dream Home Roofers?

If your roof is over 20 years old, has suffered storm damage, or the materials are failing early, it’s time to consider a roof replacement. Staying proactive can save you from more costly repairs down the line.

https://dreamhomeroofers.com/wp-content/uploads/2024/09/dhr-logo.png 0 0 Dream Home Roofers https://dreamhomeroofers.com/wp-content/uploads/2024/09/dhr-logo.png Dream Home Roofers2024-11-12 08:00:142025-01-03 19:45:01Top Signs: When Should You Replace a Roof?

How to Patch a Hole in a Roof

February 14, 2024/in Roof Repair/by Dream Home Roofers

Stop Leaks from Roof Damage

Your roof might require repair if a strong gust of wind causes a tree branch to penetrate it. Removing an old satellite dish or vent might also create a hole that needs fixing. Regardless of the reason for your roof’s damage, it’s crucial to complete the task before rain sets in. The process of repairing a hole in the roof is manageable if you have basic carpentry skills. In this guide, the professionals at Dream Home Roofers walk you through the steps of how to patch a hole in a roof.

Necessary Tools & Materials

  • Extension ladder
  • Pry bar
  • Hammer
  • Utility knife
  • Measuring tape
  • Reciprocating saw
  • Liquid nails
  • 2 x 4 lumber
  • Roof decking of the same thickness as existing deck
  • Tar paper
  • New shingles

How to Repair a Hole in the Roof

  1. Position the ladder securely, climb onto the roof, and locate the hole.
  2. Utilize a pry bar to lift the shingles off the damaged area, starting with those above the hole and working downward.
  3. Extract all nails with a claw hammer.
  4. Use a utility knife to cut the tar paper in the damaged region.
  5. Employ a reciprocating saw to cut a square or rectangle around the hole, avoiding roof rafters. Ensure all damaged decking is removed. If the damage spans a rafter, you may need to cut out two squares.
  6. With the deck edges exposed, measure the board thickness to determine the size of the replacement decking.
  7. Measure the opening and cut a piece of new decking to fit.
  8. Measure and cut 2 x 4 lumber to construct braces across and around the gap. Attach the braces to rafters around the edges of the gap using 10-penny nails. Leave the edges of each brace exposed around the opening for the patch.
  9. Dry-fit the patch and adjust its size if needed.
  10. Apply liquid nails to the patch and press it into place.
  11. Nail the patch to the braces with 8-penny nails.
  12. Spread roofing tar over the patch seams.
  13. Cut tar paper to fit over the area. Slide the upper edge beneath the existing tar paper or shingles and overlap the bottom edge by 2 inches.
  14. Nail the tar paper with roofing nails.
  15. Begin nailing on new shingles from the bottom of the exposed area.
  16. Apply roofing tar over shingle nails.

Get Assistance With Roof Repairs Today

A roof with significant damage or rotted decking requires more than just a patch. The roofing specialists at Dream Home Roofers are ready to assist and can efficiently and affordably repair or replace your roof. If you live in the Delaware Valley, contact us today to discuss your roofing needs, or if you’re still wondering how to patch a hole in a roof.

0 0 Dream Home Roofers https://dreamhomeroofers.com/wp-content/uploads/2024/09/dhr-logo.png Dream Home Roofers2024-02-14 14:38:032024-02-14 14:38:03How to Patch a Hole in a Roof

Pages

  • About us
  • Blogs
  • Careers
  • Contact Us
  • Current Specials at Dream Home Roofers
  • Financing
  • Gutter Guards in the Delaware Valley
  • Gutters in Delaware Valley
  • Home
  • No Office Location
  • Privacy Policy
  • Reliable Roof Repair Services in Allentown, PA
  • Reliable Roof Repair Services in Atlantic City, NJ
  • Reliable Roof Repair Services in Bethesda, MD
  • Reliable Roof Repair Services in Bethlehem, PA
  • Reliable Roof Repair Services in Blairstown, NJ
  • Reliable Roof Repair Services in Boonsboro, MD
  • Reliable Roof Repair Services in Bowie, MD
  • Reliable Roof Repair Services in Burlington, NJ
  • Reliable Roof Repair Services in Camden, NJ
  • Reliable Roof Repair Services in Cherry Hill, NJ
  • Reliable Roof Repair Services in Chester, PA
  • Reliable Roof Repair Services in Clifton, NJ
  • Reliable Roof Repair Services in Columbia, MD
  • Reliable Roof Repair Services in Dundalk, MD
  • Reliable Roof Repair Services in Egg Harbor, NJ
  • Reliable Roof Repair Services in Ellicott City, MD
  • Reliable Roof Repair Services in Elm, PA
  • Reliable Roof Repair Services in Frankford, NJ
  • Reliable Roof Repair Services in Freehold, NJ
  • Reliable Roof Repair Services in Gaithersburg, MD
  • Reliable Roof Repair Services in Germantown, MD
  • Reliable Roof Repair Services in Glen Burnie, MD
  • Reliable Roof Repair Services in Gloucester Township, NJ
  • Reliable Roof Repair Services in Hamilton, NJ
  • Reliable Roof Repair Services in Harrisburg, PA
  • Reliable Roof Repair Services in Lancaster, PA
  • Reliable Roof Repair Services in Laurel, MD
  • Reliable Roof Repair Services in Lebanon, PA
  • Reliable Roof Repair Services in Levittown, PA
  • Reliable Roof Repair Services in Mahwah, NJ
  • Reliable Roof Repair Services in Monroe, NJ
  • Reliable Roof Repair Services in Mount Laurel, NJ
  • Reliable Roof Repair Services in Norristown, PA
  • Reliable Roof Repair Services in Philadelphia, PA
  • Reliable Roof Repair Services in Potomac, MD
  • Reliable Roof Repair Services in Reading, PA
  • Reliable Roof Repair Services in Rockville, MD
  • Reliable Roof Repair Services in Severn, MD
  • Reliable Roof Repair Services in Silver Spring, MD
  • Reliable Roof Repair Services in Smithsburg, MD
  • Reliable Roof Repair Services in Somerset, NJ
  • Reliable Roof Repair Services in Tinton Falls, NJ
  • Reliable Roof Repair Services in Towson, MD
  • Reliable Roof Repair Services in Union, NJ
  • Reliable Roof Repair Services in Vineland, NJ
  • Reliable Roof Repair Services in Voorhees, NJ
  • Reliable Roof Repair Services in Waldorf, MD
  • Reliable Roof Repair Services in Washington Township, NJ
  • Reliable Roof Repair Services in Weston, PA
  • Reviews
  • Roof Inspection in Delaware Valley
  • Roof Inspection in Turnersville, NJ
  • Roof Inspection in West Caldwell, NJ
  • Roof Inspections in Laurel, MD
  • Roof Repair
  • Roof Repair in Cherry Hill, NJ
  • Roof Repair in Columbia, MD
  • Roof Repair in Delaware Valley
  • Roof Repair in Harrisburg, PA
  • Roof Repair in Lancaster, PA
  • Roof Repair in Philadelphia, PA
  • Roof Repair in Turnersville, NJ
  • Roof Repair in Vineland, NJ
  • Roof Repair in West Caldwell, NJ
  • Roof Repair Services in Bethlehem, King of Prussia, PA
  • Roof Repair Services in King of Prussia, PA
  • Roof Repair Services in Norristown, King of Prussia, PA
  • Roof Replacement in Cherry Hill, NJ
  • Roof Replacement in Columbia, MD
  • Roof Replacement in Delaware Valley
  • Roof Replacement in Harrisburg, PA
  • Roof Replacement in King of Prussia, PA
  • Roof Replacement in Lancaster, PA
  • Roof Replacement in Laurel, MD
  • Roof Replacement in Philadelphia, PA
  • Roof Replacement in Turnersville, NJ
  • Roof Replacement in Vineland, NJ
  • Roof Replacement in West Caldwell, NJ
  • Roofing Company in Fairfax, VA
  • Roofing Company in King of Prussia, PA
  • Roofing Company in Laurel, MD
  • Roofing Company in Maryland
  • Roofing Company in New Jersey
  • Roofing Company in Pennsylvania
  • Roofing Company in Turnersville, NJ
  • Roofing Company in West Caldwell, NJ
  • Roofing in Allentown, PA
  • Roofing in Atlantic City, NJ
  • Roofing in Bethesda, MD
  • Roofing in Bethlehem, PA
  • Roofing in Blairstown, NJ
  • Roofing in Boonsboro, MD
  • Roofing in Bowie, MD
  • Roofing in Burlington, NJ
  • Roofing in Camden, NJ
  • Roofing in Cherry Hill, NJ
  • Roofing in Chester, PA
  • Roofing in Clifton, NJ
  • Roofing in Columbia, MD
  • Roofing in Delaware Valley
  • Roofing in Delaware Valley
  • Roofing in Delaware Valley
  • Roofing in Dundalk, MD
  • Roofing in Egg Harbor, NJ
  • Roofing in Ellicott City, MD
  • Roofing in Elm, PA
  • Roofing in Frankford, NJ
  • Roofing in Freehold, NJ
  • Roofing in Gaithersburg, MD
  • Roofing in Germantown, MD
  • Roofing in Glen Burnie, MD
  • Roofing in Gloucester Township, NJ
  • Roofing in Hamilton, NJ
  • Roofing in Harrisburg, PA
  • Roofing in King of Prussia, PA
  • Roofing in Lancaster, PA
  • Roofing in Laurel, MD
  • Roofing in Lebanon, PA
  • Roofing in Lehigh Valley
  • Roofing in Levittown, PA
  • Roofing in Mahwah, NJ
  • Roofing in Maryland
  • Roofing in Monroe, NJ
  • Roofing in Mount Laurel, NJ
  • Roofing in New Jersey
  • Roofing in Norristown, PA
  • Roofing in Pennsylvania
  • Roofing in Philadelphia, PA
  • Roofing in Potomac, MD
  • Roofing in Reading, PA
  • Roofing in Rockville, MD
  • Roofing in Severn, MD
  • Roofing in Silver Spring, MD
  • Roofing in Smithsburg, MD
  • Roofing in Somerset, NJ
  • Roofing in South Jersey
  • Roofing in Tinton Falls, NJ
  • Roofing in Towson, MD
  • Roofing in Turnersville, NJ
  • Roofing in Union, NJ
  • Roofing in Vineland, NJ
  • Roofing in Voorhees, NJ
  • Roofing in Waldorf, MD
  • Roofing in Washington Township, NJ
  • Roofing in West Caldwell, NJ
  • Roofing in Weston, PA
  • Service Area
  • Services
  • Template About Our Team
  • Template All Brands Logos
  • Template All Brands Logos New
  • Template Blogs
  • Template Certification
  • Template Financing Banner
  • Template Gutter Brands
  • Template our Process
  • Template Our Work
  • Template Project Block
  • Template Review Banner
  • Template Review Banner (King of Prussia, PA)
  • Template Review Banner (Laurel, MD)
  • Template Review Banner (Turnersville, NJ)
  • Template Review Banner (West Caldwell, NJ)
  • Template Roofing Brands
  • Template Service Blocks (All)
  • Template Service Blocks (King of Prussia, PA)
  • Template Service Blocks (Laurel, MD)
  • Template Service Blocks (Turnersville, NJ)
  • Template Service Blocks (West Caldwell, NJ)

Categories

  • Blog
  • Roof Installation
  • Roof Repair
  • Roof Replacement
  • Roofing
  • Uncategorized

Archive

  • March 2025
  • February 2025
  • January 2025
  • December 2024
  • November 2024
  • October 2024
  • August 2024
  • July 2024
  • June 2024
  • May 2024
  • April 2024
  • March 2024
  • February 2024
  • November 2023
  • October 2023

Our Office Locations

Map icon 501 NJ‑168, Turnersville, NJ 08012

Map icon 175 Fairfield Ave, Suite 2B, West Caldwell, NJ 07006

Map icon 144 E. Dekalb Pike, Suite 200, King of Prussia, PA 19406

Map icon 8920 Stephens Rd, #104, Laurel, MD 20723

Map icon 4085 Chain Bridge Rd, Suite 302, Fairfax, VA 22030

NJ Lic. #13VH11352200 | PA Lic. #PA161658 | MD Lic. #157465

Privacy Policy | Service Area

Follow Us

Check out our social pages and let us know how we’re doing See the latest from Dream Home Roofers and let us know what we can do for you.

BBB Accredited

BBB Accredited

Local Roofing Contractors
Financing
Careers
Contact

© 2025 Dream Home Roofers Roofing Contractor Marketing Provided by Robben Media

Scroll to top