Why Manufacturer-Certified Roofers Matter for West Caldwell Homeowners
Homeowners in West Caldwell, NJ, benefit from working with manufacturer-certified roofing contractors who follow proven installation standards. Certified installation supports stronger roof performance, warranty protection, and long-term durability in New Jersey’s changing weather conditions.
Key Takeaways
- Manufacturer-certified roofers follow approved installation methods that support long-term roof durability and system performance.
- Certified contractors follow roofing installation standards in NJ, helping homeowners protect their investment and maintain warranty eligibility.
- Roofing warranty requirements in New Jersey often depend on certified installation and proper documentation.
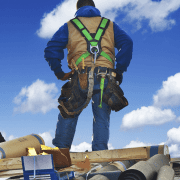
- Licensed and certified roofers in West Caldwell provide trained workmanship designed to perform better in local weather conditions.
How Certified Roofers Help Protect West Caldwell Homes
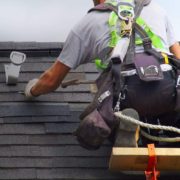
Manufacturer-certified roofing professionals receive training designed to improve installation accuracy and long-term system performance. This matters in regions where snow, rain, and changing temperatures place constant stress on roofing materials. Consistent workmanship helps homeowners protect both roof durability and warranty coverage.
Proper Adherence to Roofing Installation Standards in NJ
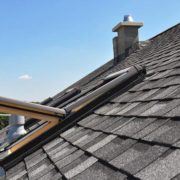
Certified contractors follow the roofing installation standards that NJ requires to ensure reliable, long-term performance. Proper shingle placement, ventilation alignment, and flashing installation each contribute to a stronger roofing system, especially during a roof replacement process where installation quality directly affects durability. These standards help roofs perform better during heavy rain and winter weather.
Access to Owens Corning Certified Roofer NJ Systems
An Owens Corning certified roofer NJ designation reflects manufacturer-backed training and system knowledge. Certified installers understand how asphalt shingles, ventilation, and underlayment work together to improve performance. This training supports stronger durability, more consistent installation quality, and longer-lasting protection.
Protection Through Roofing Warranty Requirements New Jersey
Roofing warranty requirements in New Jersey often depend on certified installation and approved workmanship standards. Trained professionals follow manufacturer specifications throughout the installation process. This helps homeowners maintain valid warranty coverage while improving long-term roof reliability.
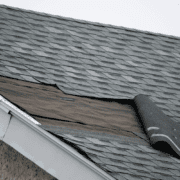
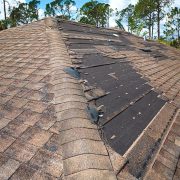
Reliable Installation Methods That Help Prevent Roof Leaks
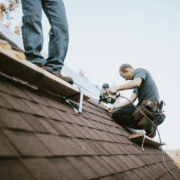
Certified contractors use proven installation methods that help prevent roof leaks and moisture-related damage. Valleys, chimneys, and roof edges require precise sealing, often identified during a detailed roof inspection that highlights vulnerable areas. Careful installation improves protection against freeze-thaw cycles and heavy seasonal rainfall.
What to Check Before Choosing a Roofing Contractor
Before committing to a roofing project, homeowners should review a contractor’s qualifications, certifications, and installation experience. Careful evaluation supports better workmanship quality and long-term roof performance. It also helps confirm compliance with standards outlined by the New Jersey Division of Consumer Affairs.
Verification of Licensed and Certified Roofers in West Caldwell
Homeowners should confirm that contractors meet licensing requirements and hold recognized manufacturer certifications. Licensed and certified roofers in West Caldwell follow building codes and often recommend additional protection, such as gutter guard systems, to ensure proper drainage. Verified credentials also reflect accountability and professional training.
Understanding Signs of a Qualified Roofing Contractor’s Credentials
Qualified roofing contractors demonstrate consistent standards, documented training, and manufacturer-approved installation knowledge. Certifications show experience with roofing systems designed for snow loads and freeze-thaw conditions common in New Jersey. These qualifications help homeowners identify contractors who understand long-term roofing performance.
Review of Roofing Certifications, West Caldwell Documentation
Roofing certifications that West Caldwell contractors provide should remain current and verifiable. Documentation confirms training in specific roofing systems and approved installation methods. This helps homeowners feel more confident about the quality of workmanship and long-term durability.
Evaluation of Past Work and Installation Consistency
Reviewing completed projects helps homeowners evaluate installation consistency and attention to detail. Reliable contractors demonstrate uniform workmanship across homes exposed to snow, ice, and wind-driven rain. Consistent installation practices support stronger roof performance in New Jersey climates.
Protect Your Home Investment With Certified Roofing That Holds Up Over Time
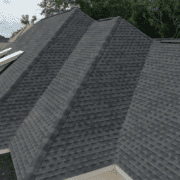
Dream Home Roofers helps homeowners protect long-term roof performance with certified installation and proven materials. Choosing a contractor with verified credentials supports durability, installation consistency, and valid warranty coverage. Strong workmanship standards help homeowners feel more confident about long-term results. Support is available when you are ready to contact us.
Frequently Asked Questions
Why do manufacturer certifications matter for roofing projects?
Manufacturer certifications confirm that contractors receive training on approved roofing systems and installation methods. This helps improve workmanship quality, long-term roof performance, and warranty protection. Certified installation also supports better durability in changing weather conditions.
Do roofing warranties require certified installation in New Jersey?
Many roofing warranty requirements in New Jersey depend on certified installation and approved workmanship standards. Manufacturers require trained contractors to follow specific installation methods. This helps homeowners maintain warranty coverage and long-term roofing protection.
How can homeowners identify a qualified roofing contractor?
Qualified roofing contractors provide proper licensing, manufacturer certifications, and documented installation experience. These qualifications demonstrate adherence to industry standards and approved roofing practices. Homeowners should also review completed projects and current certification documentation.
Why is certified installation important for preventing roof leaks?
Certified contractors use proven installation techniques that help prevent roof leaks and moisture intrusion. Proper flashing, ventilation, and sealing improve long-term roof protection. These methods are especially important in climates with snow, ice, and heavy rainfall.