Dream Home Roofers
1-855-610-9720
Get Free Estimate 1-855-610-9720
Free Estimate 1-855-610-9720
  • About us
    • Reviews
    • Careers
    • Financing
    • Blogs
  • Services
    • Roofing
      • Replacement
      • Inspection
    • Gutters
      • Gutter Protection
  • Service Area
    • Turnersville, NJ
    • West Caldwell, NJ
    • King of Prussia, PA
    • Laurel, MD
    • Fairfax, VA
  • Current Specials
  • Contact Us
  • Menu Menu
Act Now for 50% OFF Materials. Click here for details.

Common Causes and Fixes for Shingle Buckling

November 5, 2024/in Roof Repair, Roof Replacement, Roofing/by Dream Home Roofers

Shingle buckling occurs when your roof shingles lift and deform due to moisture, improper installation, or aging materials. Ignoring this issue can lead to serious roof damage. This article will cover the main causes, preventive measures, and solutions for shingle buckling to help you maintain a healthy roof.

Key Takeaways

  • Shingle buckling is primarily caused by moisture accumulation, improper installation, and aging roofs, which can compromise roofing integrity.
  • Preventive measures, including proper attic ventilation, quality materials, and adherence to installation guidelines, are crucial in avoiding shingle buckling.
  • Timely inspection and professional repair are essential to address buckled shingles, as costs can vary significantly based on the extent of the damage.

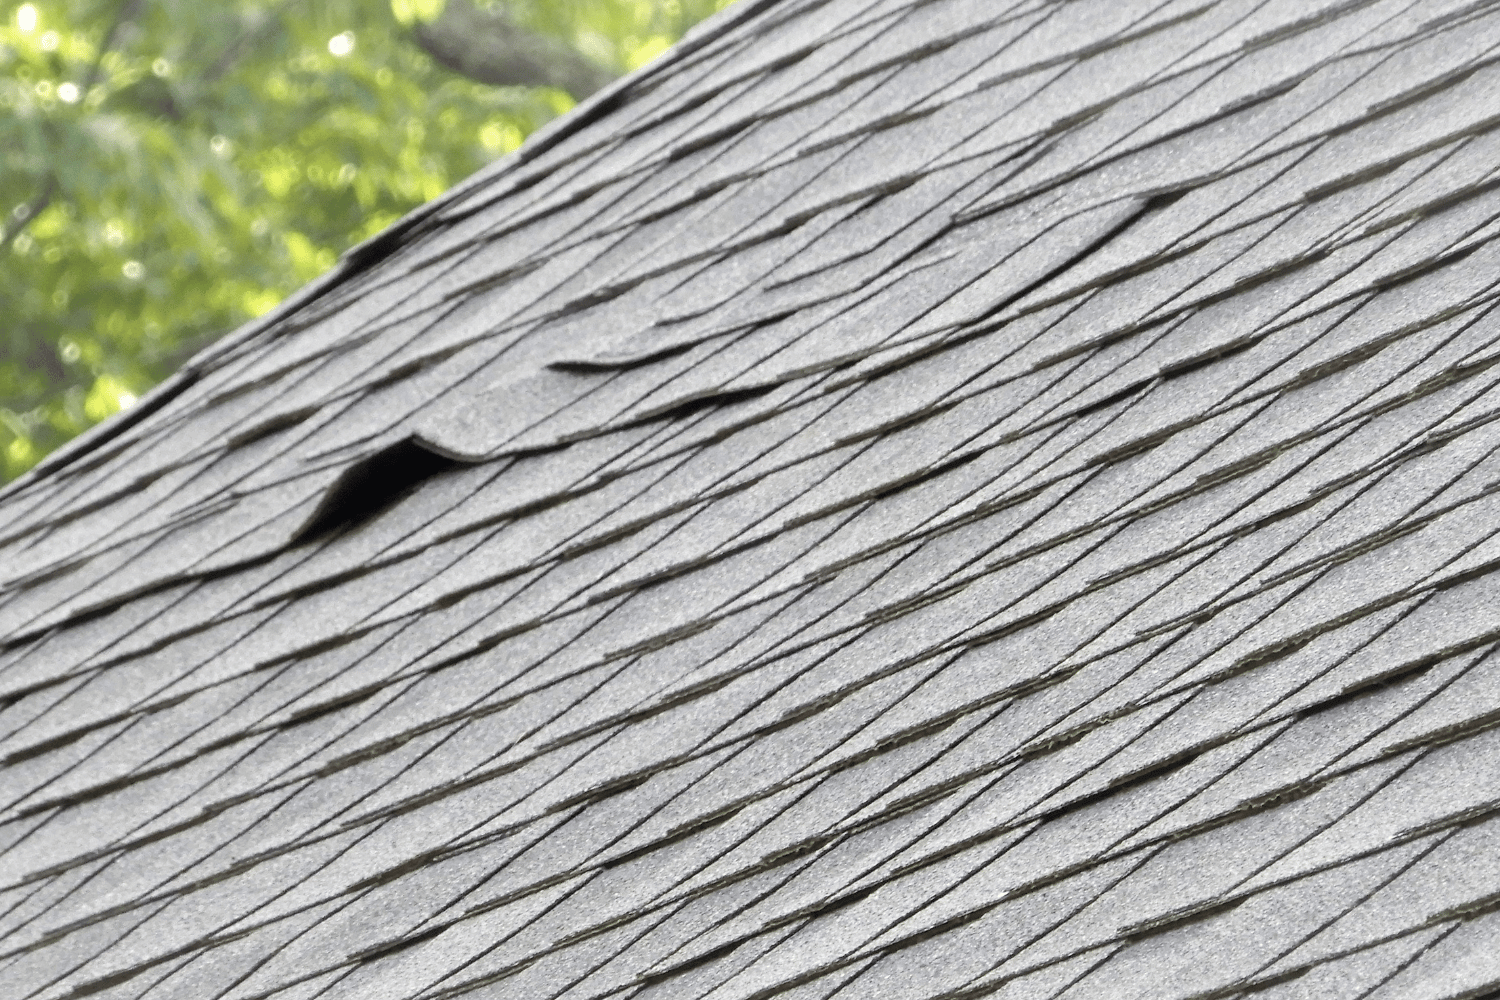
Understanding Shingle Buckling

An example of shingle buckling on a roof.

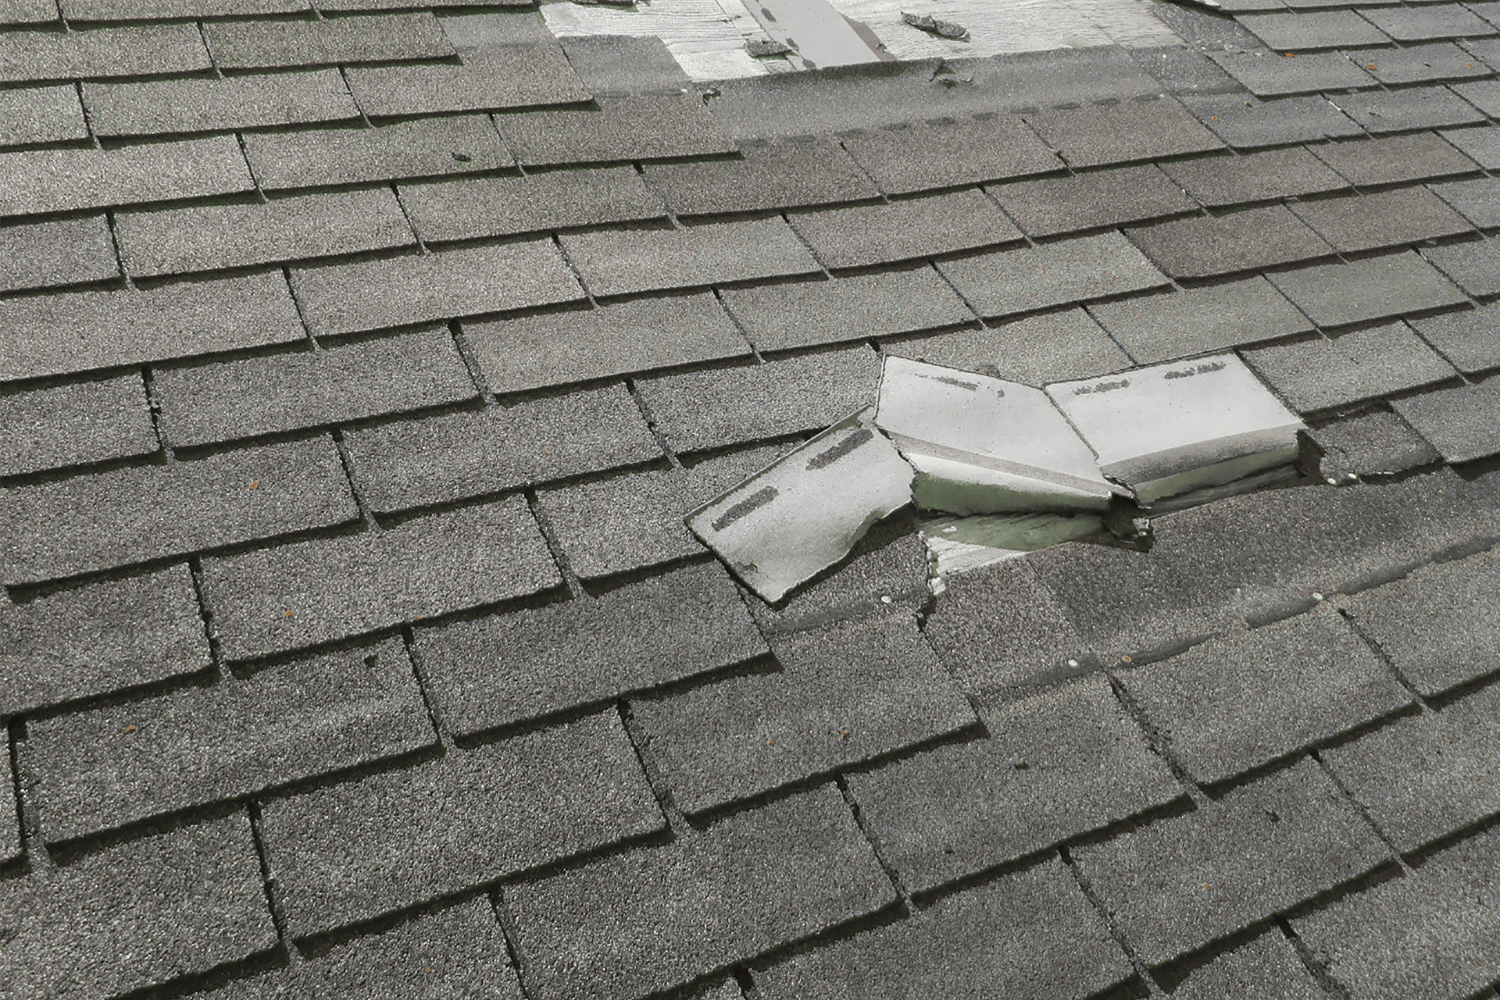
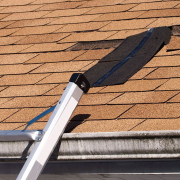
Shingle buckling is a telltale sign that something is amiss with your roofing system. Essentially, it happens when the wood roofing deck shifts or the underlayment wrinkles, pushing the shingles upwards. This can be due to structural issues or moisture accumulation, both of which can compromise the integrity of your roof.

The primary culprits behind curling shingles to buckle include moisture issues, improper installation practices, and the natural aging of the materials. Recognizing these factors enables timely action to avoid extensive damage.
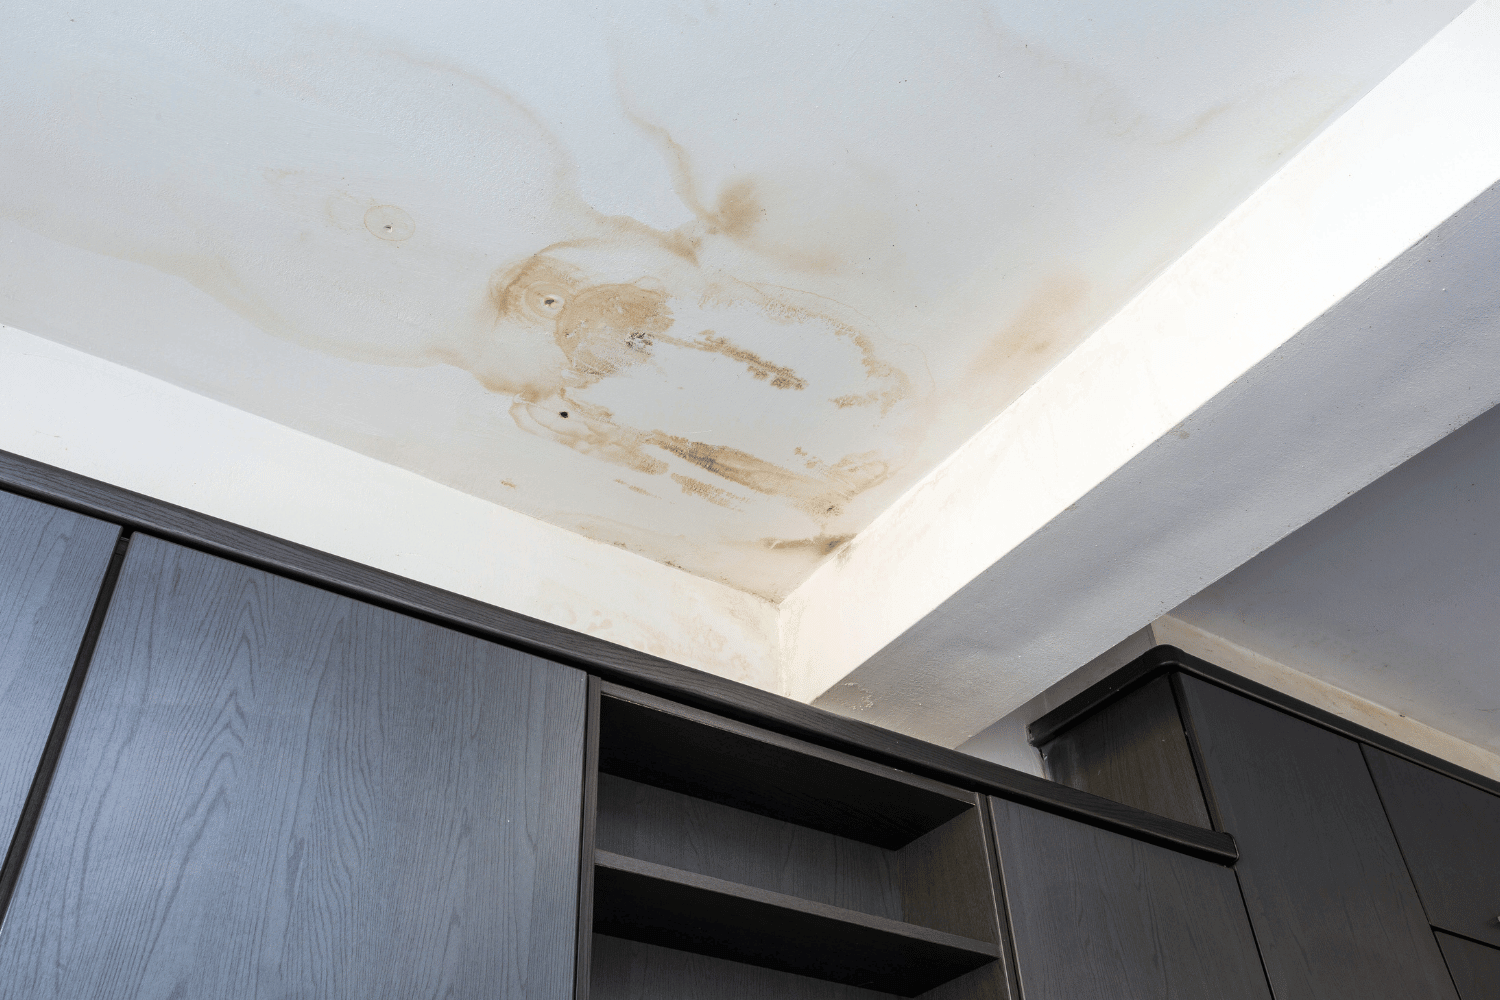
Moisture Issues

Moisture is often the unseen enemy lurking beneath your roof shingles. When too much moisture accumulates, it can warp and wrinkle the roofing underlayment, causing the shingles to push upwards and buckle. This issue is especially common in older homes. These homes often have decks that are not adequately sealed. Additionally, using unconditioned roof deck materials or those not suited to local moisture conditions can exacerbate the issue.

Maintaining proper ventilation prevents excessive moisture from damaging your roof.

Improper Installation

Improper installation is another common cause of shingle buckling. When roof installers fail to follow the manufacturer’s guidelines, it creates vulnerabilities that can lead to significant problems. Techniques such as incorrect nailing, inadequate overlap, and neglecting to ensure proper ventilation can all contribute to this issue.

Following the manufacturer’s guidelines ensures the long-term health of your roof.

Aging Roofs

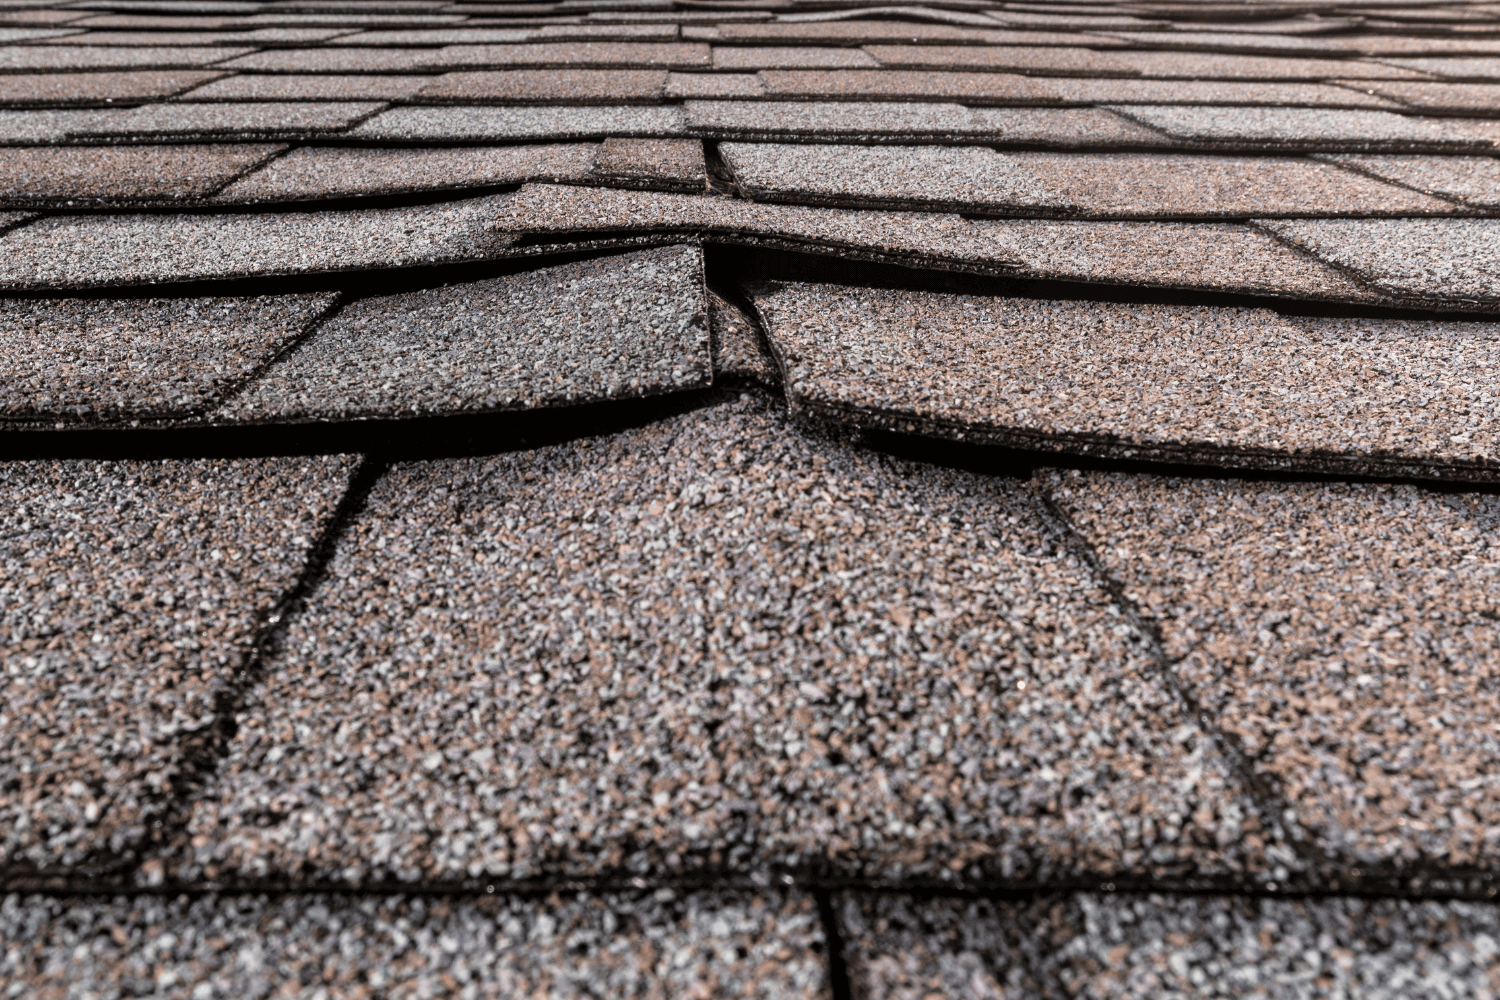
As roofs age, they become more susceptible to roof buckling due to the natural wear and tear from exposure to extreme weather conditions, UV rays, and temperature fluctuations. Older roofs that have not been maintained properly often suffer from degraded materials that lose their flexibility and coherence, leading to buckled shingles.

The repeated expansion and contraction of the roofing materials can also cause stress fractures, making the shingles brittle and prone to buckling if not replaced in a timely manner.

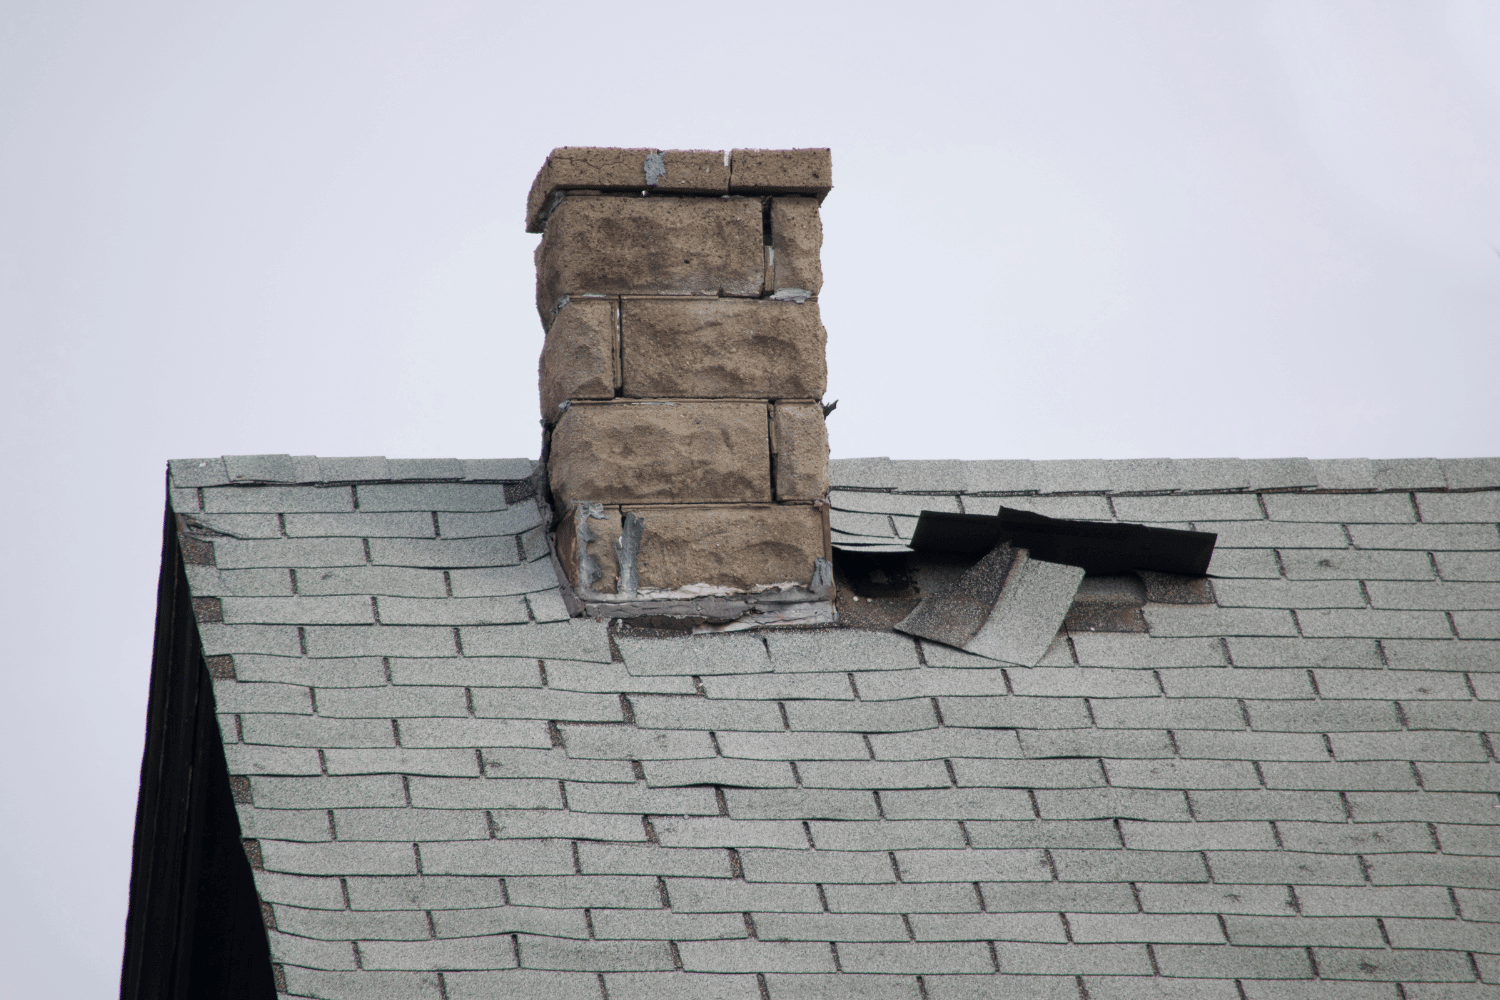
Common Causes of Shingle Buckling

Common causes of shingle buckling illustrated on a roof.

Shingle buckling can be attributed to several common causes, each of which compromises the integrity of your roof. Excess moisture in the air, resulting in the wood deck absorbing humidity, is a primary factor. Improper nailing and inadequate overlap during installation can also lead to shingle buckling. Additionally, poor ventilation and insufficient spacing between roof deck panels play significant roles in this issue.

Recognizing these causes allows for effective prevention and timely remediation.

Wet Roofing Underlayment

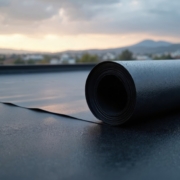
Wet roofing underlayment is a major culprit behind shingle buckling. When the underlayment absorbs moisture, it tends to wrinkle, leading to deformation of the shingles. Properly sealing and keeping the underlayment dry before and during installation prevents this issue.

This highlights the importance of using appropriate materials and maintaining dry conditions during the roofing process.

Poor Attic Ventilation

Poor attic ventilation can lead to a buildup of heat and moisture, which in turn causes shingle buckling. Proper attic ventilation helps in maintaining a moisture equilibrium, preventing the underlayment from wrinkling and affecting the shingles.

Effective ventilation also helps in preventing ice dams and maintaining the overall integrity of the roof. It’s recommended to have at least 960 square inches of ventilation area for every 1,000 square feet of ceiling area.

Inadequate Roof Deck Spacing

Inadequate spacing between roof deck panels can restrict wood movement, leading to expansion-related shingle buckling. Proper spacing, such as maintaining at least 1/8 inch between panels, allows for the natural movement of wood and helps prevent buckling in roof decking.

This spacing is crucial for the overall health of your roofing system, as it accommodates the expansion and contraction of the materials.

Preventing Shingle Buckling

Preventive measures against shingle buckling.

Preventing shingle roof buckling involves a combination of proper attic ventilation, the use of quality roofing materials, and correct installation practices. By ensuring these elements are in place, homeowners can significantly reduce the risk of buckled shingles and extend the life of their roof.

This section will delve into each of these preventive measures in detail.

Proper Attic Ventilation

Proper attic ventilation is essential in preventing shingle buckling in the attic space. Restricted airflow can lead to heat and moisture buildup, which in turn causes the underlayment to wrinkle and affect the shingles.

Installing ridge or gable vents improves attic ventilation, enhancing the roof’s longevity and maintaining moisture balance. Proper attic ventilation is one of the most effective ways to prevent shingle buckling.

Quality Roofing Materials

High-quality roofing materials suited to the local climate help prevent shingle buckling. Keeping materials dry before and after installation enhances their performance and longevity. Additionally, using a compatible underlayment during installation can help avoid future issues related to moisture absorption.

Professional roofing work extends the lifespan of materials and reduces the need for frequent repairs.

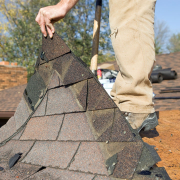
Correct Installation Practices

Adhering to the manufacturer’s instructions during installation prevents future roofing issues. Neglecting these guidelines can lead to buckling and other problems. It’s also important to avoid installing new shingles over old ones, as this can exacerbate the issue.

Correct installation practices ensure the longevity and performance of the roofing system.

Addressing Buckled Shingles

Addressing buckled shingles on a roof.

Addressing buckled shingles requires regular inspections, professional repairs, and sometimes full roof replacements. These methods help in identifying problems early, providing effective solutions, and ensuring the longevity of your roofing system.

This section will explore each of these strategies in detail.
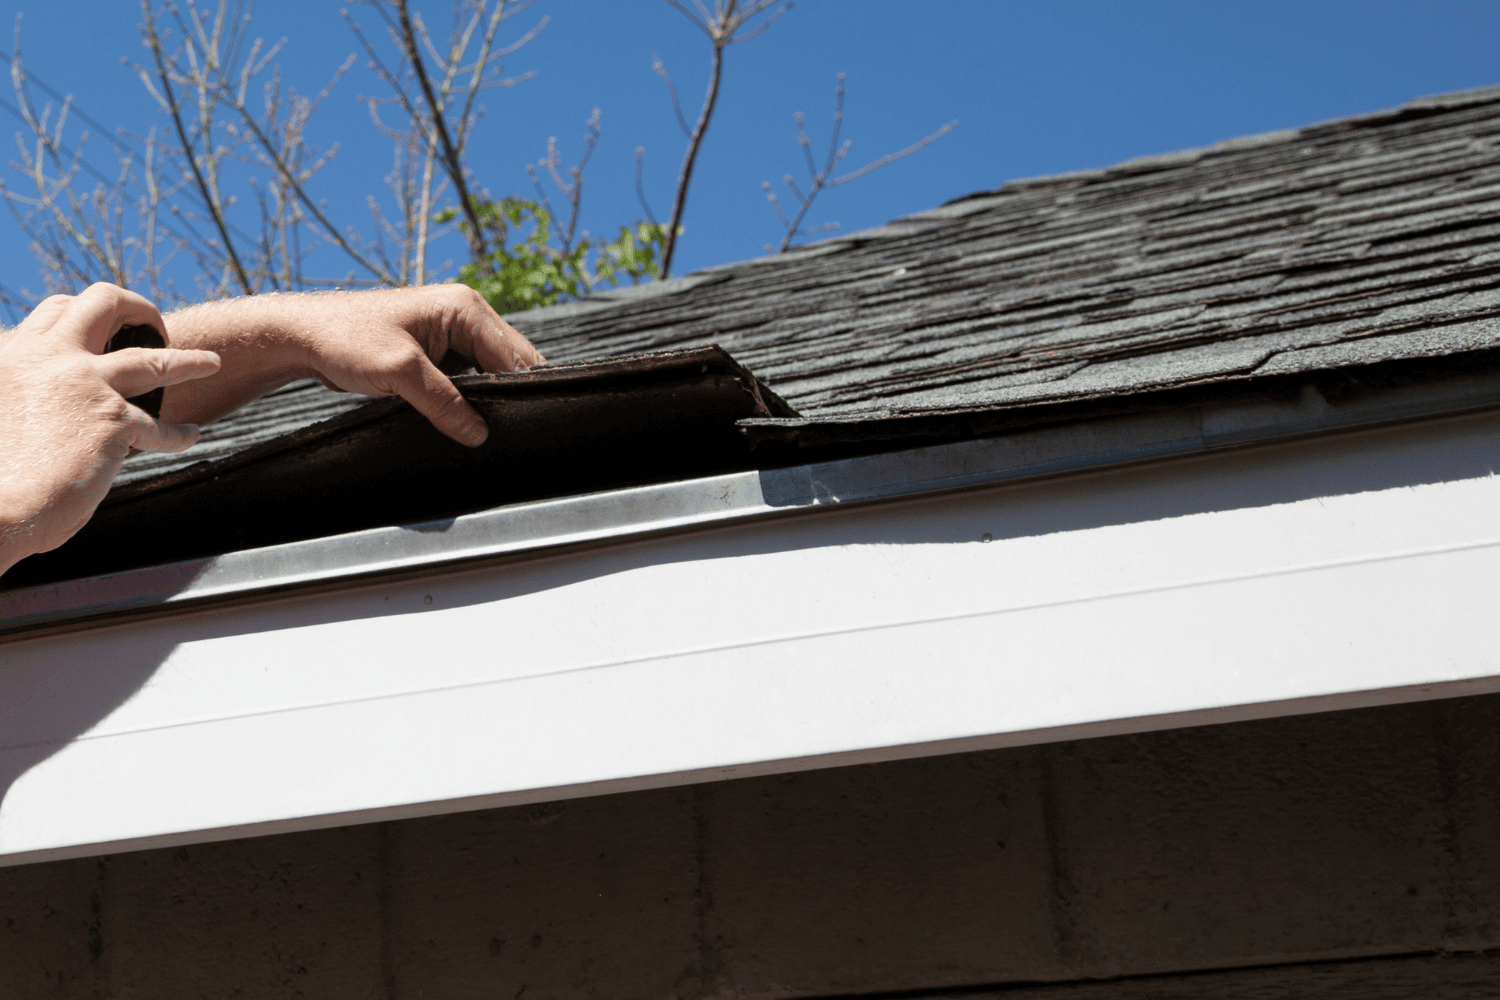
Regular Inspections

Regular inspections maintain the integrity of your roof. Scheduling bi-annual inspections allows homeowners to catch early signs of buckling or other damage, preventing more severe problems later on. These inspections can identify excess moisture in the roofing underlayment and inadequate ventilation in the attic, both of which can lead to serious roof damage.

Consistent inspections extend the roof’s lifespan and prevent costly repairs.

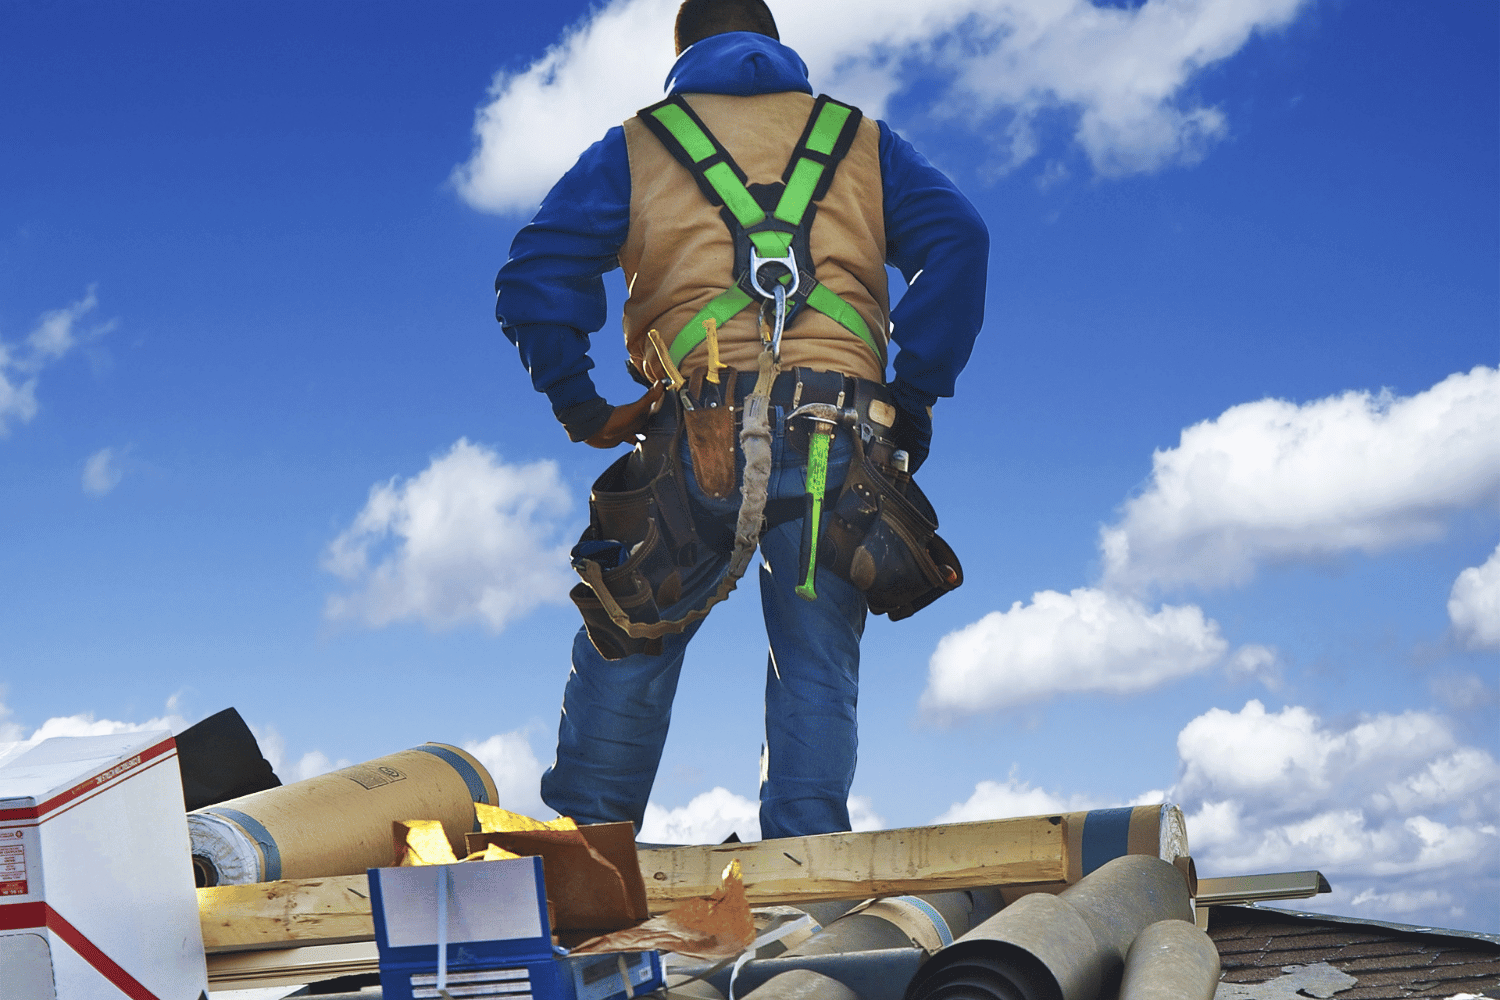
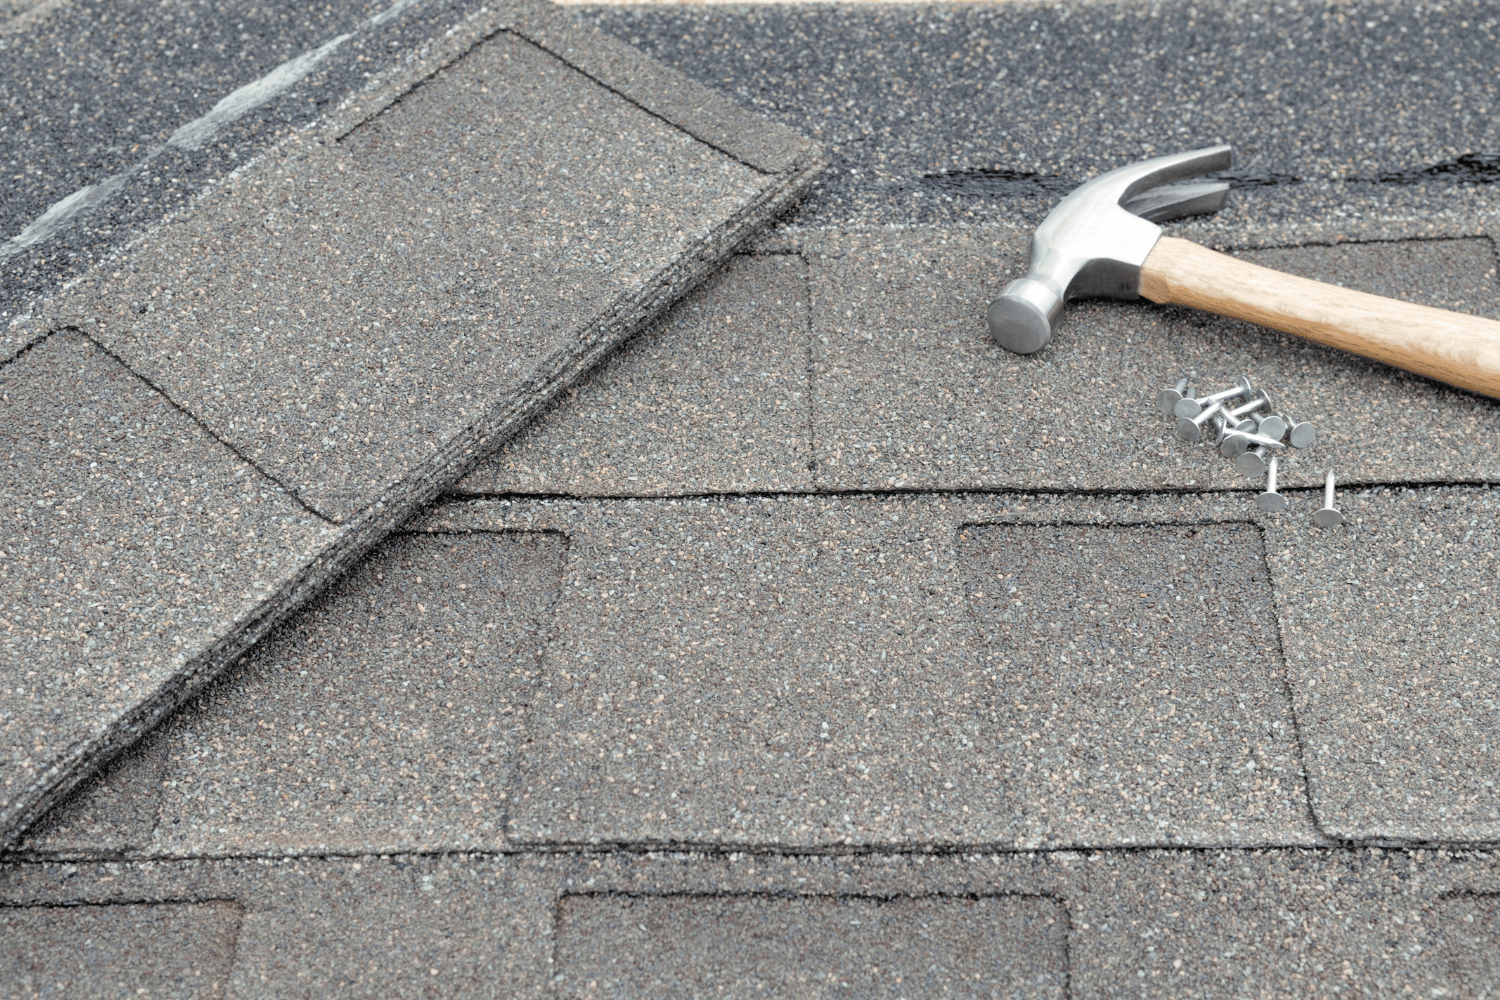
Professional Repairs

Professional repairs are often the best solution for buckled shingles. Attempting repairs without adequate knowledge can lead to increased damage and significant financial implications.

Contractors offer thorough assessments to determine the best repair or replacement strategy. Professional roofers ensure safety, long-term solutions, and often provide warranties for their work.

Full Roof Replacement

In cases of extensive damage, a full roof replacement may be necessary. This option is often more beneficial than multiple repairs, especially if the buckling indicates widespread damage or poor installation.

A complete roof replacement offers enhanced durability and resistance to environmental factors, ensuring long-term home protection.

Cost Considerations for Repairing Buckled Shingles

Cost considerations for repairing buckled shingles.

Repairing buckled shingles involves various expenses, affecting home maintenance budgets. The cost for these repairs can fluctuate significantly, typically ranging from $150 to $8,000, influenced by the nature of the damage and the type of repair needed. Ignoring buckled shingles can escalate roof damage and lead to even costlier repairs, making timely intervention crucial.

Minor Repairs

Minor repairs usually involve tasks such as re-nailing or re-adhering affected shingles, with estimated costs ranging from $150 to $300. These repairs typically address small sections of the roof and are relatively quick to fix.

Handling minor buckling promptly prevents further damage.

Moderate to Major Damage

For more extensive damage, repair costs can range from $1,000 to $3,000 for moderate issues and $3,000 to $6,000 or more for major repairs. Extensive buckling requires a comprehensive approach, often involving significant roof replacement.

This approach ensures roof stability and longevity.

DIY vs. Professional Repair: Making the Right Choice

Choosing between DIY and professional repair for buckling shingles involves weighing the pros and cons. DIY repairs may be cost-effective for minor issues but carry significant risks for complex problems.

Hiring professional roofers ensures safe and effective repairs, reducing further damage and ensuring long-term effectiveness.

Safety Concerns

Safety is a major concern when attempting DIY roof repairs. Attempting complicated repairs without proper knowledge can worsen the issue. This may also result in expensive mistakes. Additionally, falls from roofs are a leading cause of serious injuries, particularly among untrained individuals.

It’s crucial to consider these risks before deciding on a DIY approach.

Long-Term Effectiveness

Experienced roofing contractors install shingles correctly, minimizing future buckling. Professional repairs not only address the immediate issue but also provide long-term solutions that enhance the overall health of the roofing system.

This long-term effectiveness makes professional repairs a worthwhile investment.

Dream Home Roofers’ Expertise

Dream Home Roofers bring decades of experience and a commitment to customer satisfaction to every project. Using premium Owens Corning materials from a trusted roofing manufacturer, they ensure the highest quality and durability for all roofing solutions.

Their expertise covers a wide range of roofing issues, including shingle buckling, ensuring homeowners receive reliable and professional services.

High-Quality Materials

Dream Home Roofers use high-quality materials like Owens Corning products in all their projects. These premium materials prevent issues like shingle buckling and ensure roof durability. Their commitment to using only the best materials underscores their dedication to customer satisfaction.

Satisfaction Guaranteed

Dream Home Roofers stand by their work with a strong commitment to customer satisfaction. With decades of experience, they have built a reputation for excellent craftsmanship and reliable solutions. They use premium Owens Corning materials to ensure the highest quality and durability.

Currently, they offer a 50% discount on materials and 0% financing options for full roof replacements, making it an ideal time for homeowners to invest in their roofing needs.

Summary

Shingle buckling is a critical issue that can compromise the integrity and aesthetic of your home. By understanding the causes, such as moisture issues, improper installation, and aging roofs, homeowners can take proactive steps to prevent this problem. Regular inspections, professional repairs, and using quality materials are key strategies to address and prevent buckling shingles. Dream Home Roofers’ expertise provides homeowners with reliable, cost-effective solutions to maintain their roofs. Investing in your roof today ensures the longevity and safety of your home for years to come.

Frequently Asked Questions

What promotion is currently being offered by Dream Home Roofers?

Dream Home Roofers is currently offering 50% off materials along with 0% financing on full roof replacements. This is a great opportunity to invest in your home’s roofing needs.

What type of roofing materials does Dream Home Roofers work with?

Dream Home Roofers utilizes a range of premium Owens Corning roofing materials, ensuring quality and durability in their projects.

What are architectural shingles?

Architectural shingles are a layered asphalt product that offers enhanced depth and texture compared to traditional three-tab shingles, making them a popular choice for improved aesthetic appeal and durability.

What are dimensional shingles?

Dimensional shingles, or architectural shingles, are premium asphalt shingles known for their multi-layered design that adds depth and texture to roofs. They offer enhanced durability and aesthetic appeal compared to traditional shingles.

What financing options does Dream Home Roofers provide?

Dream Home Roofers offers flexible financing options that allow homeowners to upgrade their homes without upfront costs, making renovations more accessible.

https://dreamhomeroofers.com/wp-content/uploads/2024/09/dhr-logo.png 0 0 Dream Home Roofers https://dreamhomeroofers.com/wp-content/uploads/2024/09/dhr-logo.png Dream Home Roofers2024-11-05 08:00:262025-01-02 20:14:57Common Causes and Fixes for Shingle Buckling

Top Signs to Answer: How Do I Know If I Need a New Roof?

October 22, 2024/in Roof Repair, Roof Replacement, Roofing/by Dream Home Roofers

How do I know if I need a new roof? Figuring this out early can prevent significant damage to your home. In this guide, we will walk you through the signs that indicate a roof replacement may be necessary.

Key Takeaways

  • If your asphalt roof is over 20 years old, it’s time to consider a replacement, even if it looks fine.
  • Signs of leaks, water damage, or missing shingles are major red flags that indicate your roof may need replacing.
  • Watch for granules in your gutters and moss or algae growth on your roof, as these signal deterioration and potential roof issues.

Signs Your Roof’s Age Indicates Replacement

A visual representation of common signs indicating a roof's age, such as cracked shingles and dark streaks. This can help homeowners understand how do I know if I need a new roof.


The age of your asphalt roof is a clear indicator of whether it might need replacing. Asphalt shingle roofs usually last between 15 to 25 years. If your roof is over 20 years old, considering a replacement is wise. Even if it seems in good condition, years of wear and tear can take their toll.

Older roofs require more frequent inspections. A roofing professional can evaluate your roof’s condition and spot issues not visible from the ground. If neighbors with similarly aged homes are getting new roofs, it might be time for yours too.

Avoid waiting for leaks or visible damage before taking action. Replacing an old roof proactively can prevent severe issues later. If your roof shows signs of aging, consult a roofing contractor.

Identifying Leaks and Water Damage

An image depicting water damage on a ceiling, illustrating the effects of a leaky roof.


A roof leak can cause significant problems. Ceiling, walls, or attic stains, streaks, or water spots indicate water damage and need immediate attention. Persistent or multiple leaks often signal that your roof may need replacement.

Water intrusion can result in mold growth, structural damage, and ruined personal property. Upon detecting a leak, schedule a roof inspection immediately. Promptly addressing leaks can prevent extensive damage to your home’s interior and structural integrity.

Internal signs of water damage should never be ignored, even if your roof looks fine externally. Older roofs can deteriorate over time, so considering replacement before severe damage happens is wise.

Cracked, Curling, or Missing Shingles

Shingles protect your roof from the elements. Damage to them is a clear sign your roof may need replacing. Cracked shingles, curled shingles, or cupped tabs indicate deterioration. Visible cracks often mean shingles are at the end of their lifespan.

Missing shingles expose underlying materials to water damage and other elements. If you notice missing shingles, especially after a storm, act quickly. This damage affects both the appearance and functionality of your roof.

Regular inspections can help catch these issues early. If your roof is losing shingles or showing significant wear, consult a roofing contractor to discuss replacement options.

Granules in Gutters and Around Your Home

An illustration showing granules from asphalt shingles collected in gutters, indicating potential roofing issues.


Granules on shingles protect your roof from sun damage. Finding granules in gutters or around your home indicates shingle deterioration. This loss can expose underlying materials to harmful UV rays, causing further damage.

Severe weather, especially hail storms, can detach granules from shingles. Bald spots or a significant amount of granules in gutters signal that your roof may need replacing. Aging shingles losing granules indicate they’ve reached the end of their lifespan.

High-quality shingles are less prone to granule loss, but all shingles wear down over time. Regular maintenance and inspections can help catch this early, allowing you to plan for a replacement before serious issues arise.

Moss, Algae, and Vegetation Growth

Moss and algae growth on your roof are more than just eyesores. Moss growth can trap moisture, damaging roofing material. If untreated, moss can penetrate shingles, causing water infiltration and compromising roof integrity.

Algae growth, though not immediately damaging, can shorten your roof’s lifespan. Dark streaks caused by algae are often mistaken for dirt or aging but signal that your roof needs attention.

Regular maintenance and installing zinc or copper strips can prevent moss and algae growth.

Structural Damage: Sagging Roofline

A photo showing a sagging roofline, which can indicate structural damage.


A sagging roofline is a red flag indicating serious structural problems requiring immediate inspection. A wavy or sagging roof suggests a compromised roof deck, negatively impacting your home’s overall stability.

Ignoring a sagging roof can lead to extensive damage and costly repairs. Factors like heavy snow, improper installation, or poor drainage contribute to a sagging roofline. Contact a roofing professional if you notice any irregularities.

Rust and corrosion on gutters signal poor drainage and potential roof damage. Regular inspections and prompt action can prevent significant issues and maintain your roof’s health.

Neighborhood Trends: New Roofs Nearby

If many homes in your neighborhood are getting a new roof, it might indicate that yours is nearing the end of its lifespan. Shared weather conditions and similar construction dates can mean your roof may need a new roof around the same time.

Checking your roof is especially important if neighbors are replacing theirs after a storm, as your home could have similar storm damage. Observing neighborhood trends can provide insights into when it might be time to replace your roof.

Preparing for a Roof Replacement

An image of a construction worker inspecting a roof, preparing for a roof replacement.


Preparing for a roof replacement involves more than selecting new shingles. Most roofing materials, like asphalt shingles, last between 20 to 25 years. Considering financing options in advance can ease the financial burden when replacing your roof.

Check if your home warranty covers roof replacements, potentially saving you significant money. The timing of your roof replacement can influence costs, with off-peak seasons often offering better rates.

Regular maintenance and inspections can extend your roof’s life and help plan for a replacement before it becomes urgent. Consulting a roofing contractor can provide a clear plan and peace of mind as you prepare for this important re roof project.

Summary

In summary, knowing when to replace your roof is crucial for maintaining the safety and integrity of your home. Key signs include the roof’s age, visible water damage, cracked or missing shingles, granule loss, vegetation growth, and structural damage like a sagging roofline. Taking note of neighborhood trends can also provide insights into when your roof might need replacement.

Proactively addressing these signs and scheduling regular inspections with a roofing professional can help you avoid costly repairs and ensure that your home remains protected from the elements. Remember, a well-maintained roof is not only a safeguard for your home but also adds to its overall value and curb appeal.

Don’t wait until a minor issue turns into a major problem. If your roof is showing signs of wear or damage, it might be time to replace your roof. Contact Dream Home Roofers today for a comprehensive roof inspection and personalized advice on your roofing needs.

Frequently Asked Questions

How do I know if my roof needs to be replaced?

If you notice signs like an aging roof, water damage, cracked or missing shingles, granule loss, vegetation growth, or a sagging roofline, it might be time for a replacement. Keeping an eye on these indicators can help you avoid more serious issues down the line.

What financing options are available for roof replacement?

You can explore flexible financing options from companies like Dream Home Roofers, making it easier to manage the costs of your roof replacement. It’s a great way to ensure your home stays protected without breaking the bank!

What types of roofing materials do you use?

We use a range of premium Owens Corning roofing materials, like asphalt shingles and tile roofs, to ensure quality and durability for your home.

Are there any discounts available for roof replacements?

Absolutely! You can get 50% off materials for roof replacements right now.

How often should I have my roof checked?

It’s a good idea to have your roof checked at least once a year, and definitely after any severe weather. Staying proactive can help you catch issues early and save money in the long run!

https://dreamhomeroofers.com/wp-content/uploads/2024/09/dhr-logo.png 0 0 Dream Home Roofers https://dreamhomeroofers.com/wp-content/uploads/2024/09/dhr-logo.png Dream Home Roofers2024-10-22 08:00:362025-01-03 18:29:11Top Signs to Answer: How Do I Know If I Need a New Roof?

Are Designer Shingles Worth It?

August 6, 2024/in Roof Replacement/by Dream Home Roofers

When it comes to roofing, the options are vast and varied, but one choice that often catches homeowners’ eyes is designer shingles. These premium shingles are known for their enhanced aesthetics and superior performance, but the big question remains, are designer shingles worth it? Our experts at Dream Home Roofers are here to break it down.

The Appeal of Designer Shingles

• Aesthetics

Designer shingles come in a wide range of styles, colors, and textures, mimicking high-end materials like slate or wood shakes. This allows homeowners to achieve a luxurious look without the hefty price tag of natural materials.

• Durability

These shingles are designed to withstand harsh weather conditions, offering better protection against wind, rain, and hail. Many come with extended warranties, providing peace of mind for years to come.

• Home Value

Installing designer shingles can significantly boost your home’s curb appeal, potentially increasing its market value. A beautiful roof is one of the first things prospective buyers notice, making it a worthwhile consideration if you plan to sell your home in the future.

• Energy Efficiency

Some designer shingles are designed to reflect more sunlight, helping to keep your home cooler in the summer. This can reduce energy costs and make your home more comfortable year-round.

Considerations Before Investing

• Cost

Designer shingles are more expensive than traditional asphalt shingles. It’s essential to weigh the initial investment against the long-term benefits, such as increased home value and durability.

• Installation

Premium shingles require skilled installation to ensure they perform as expected. Choosing an experienced roofing contractor is crucial to getting the most out of your investment.

• Maintenance

While designer shingles are generally low-maintenance, they still require periodic inspections and upkeep to maintain their appearance and functionality.

Making the Decision

Ultimately, the decision to invest in designer shingles depends on your budget, aesthetic preferences, and long-term goals for your home. If you’re looking for a roof replacement that offers enhanced beauty, durability, and potential energy savings, designer shingles are definitely worth considering.

Reach Out to Dream Home Roofers Today

Ready to elevate your home with stunning designer shingles? Dream Home Roofers is here to help. Our team can guide you through the selection process, ensuring you choose the perfect shingles to complement your home’s style. Plus, with our professional installation services, you can rest assured your new roof will stand the test of time. Contact Dream Home Roofers today to learn more about our roofing services and schedule a consultation, or if you’re still asking yourself, “Are designer shingles worth it?”.

https://dreamhomeroofers.com/wp-content/uploads/2024/09/dhr-logo.png 0 0 Dream Home Roofers https://dreamhomeroofers.com/wp-content/uploads/2024/09/dhr-logo.png Dream Home Roofers2024-08-06 14:24:122025-01-03 20:19:36Are Designer Shingles Worth It?

Can Bird Droppings Damage Your Roof?

August 6, 2024/in Roof Replacement/by Dream Home Roofers

Birds might be beautiful to look at, but their droppings can be a real menace to your roof. Those small, seemingly harmless splatters can actually cause significant damage to your roof over time. Let’s dive into the common question, “Can bird droppings damage your roof?”, and what you can do about it.

How Bird Droppings Damage Your Roof

1. Acidic Nature

Bird droppings are highly acidic. This acidity can eat away at roofing materials, especially if left uncleaned. Over time, the acid can degrade shingles, tiles, and even metal roofing. This can lead to leaks, structural damage, and a shorter lifespan for your roof.

2. Moisture Retention

Bird droppings can hold moisture against your roof. When this moisture is trapped, it creates the perfect environment for mold and mildew to thrive. Mold not only looks bad but can also weaken the structural integrity of your roof.

3. Blocked Gutters

Bird droppings, along with feathers and nesting materials, can clog your gutters and downspouts. Blocked gutters can cause water to back up, leading to water damage on your roof and even inside your home.

4. Attracting Other Pests

Bird droppings can attract insects and other pests. These pests can cause further damage by burrowing into roofing materials and creating nests.

Preventing Damage from Bird Droppings

1. Regular Cleaning

Regularly cleaning your roof and gutters can prevent the build-up of bird droppings. Use a hose or pressure washer to gently remove droppings. Be careful not to damage the roofing material during cleaning.

2. Bird Deterrents

Consider installing bird deterrents such as spikes, nets, or decoys to keep birds away from your roof. These deterrents can help reduce the number of droppings on your roof.

3. Routine Inspections

Regular roof inspections can help catch any damage early. If you notice any signs of damage, it’s essential to address them promptly to prevent further issues.

When to Call in the Professionals

If bird droppings have already caused significant damage to your roof, it might be time to consider a replacement. This is where the roofing professionals at Dream Home Roofers come in. We specialize in roof replacement and can help restore your roof to its former glory. With our roofing expertise, you can ensure your home is protected from the elements and looks great too.

Contact Dream Home Roofers for All Your Roofing Needs

Don’t let bird droppings ruin your roof. Contact Dream Home Roofers today to schedule an inspection and get a quote for your roof replacement. Your home deserves the best, and Dream Home Roofers are here to provide just that. Reach out today for any roofing questions, or if you need more clarification regarding the question, “Can bird droppings damage your roof?”.

https://dreamhomeroofers.com/wp-content/uploads/2024/09/dhr-logo.png 0 0 Dream Home Roofers https://dreamhomeroofers.com/wp-content/uploads/2024/09/dhr-logo.png Dream Home Roofers2024-08-06 14:18:172025-01-03 20:26:19Can Bird Droppings Damage Your Roof?

How to Install a Roof Drip Edge

May 7, 2024/in Roof Replacement/by Dream Home Roofers

If you find yourself wondering how to install a roof drip edge to protect your roof against water damage, our professionals at Dream Home Roofers are here to help. If your current drip edge is damaged or missing, replacing it is crucial. You can also consider upgrading from your current drip edge to a low-maintenance option for enhanced durability. Our experts at Dream Home are here to provide steps you can follow for installing a roof drip edge to ensure effective water shedding and protection of the roof deck and fascia boards from water infiltration.

Steps for Installing a Roof Drip Edge

  1. Begin by removing any old drip edges. Gently lift the shingles to expose the drip edge underneath.
  2. Locate and remove the nails securing the old drip edge using a pry bar or hammer.
  3. Once the old drip edge is removed, install the new drip edges along the eaves first.
  4. Slide the drip edges beneath the felt underlayment and shingles, ensuring each piece overlaps the next by at least 1 inch.
  5. The drip edges should extend beyond the roof decking by 3/4 of an inch. Secure them in place with roofing nails.
  6. Trim off any excess material so the ends are flush with the roof.
  7. Apply roofing cement on top of the drip edge and press the shingles and underlayment onto the adhesive.
  8. After completing the eave edges, move on to the gable edges.
  9. Install the gable drip edges over the felt underlayment but beneath the shingles, overlapping each piece by at least 1 inch.
  10. Nail the gable drip edges in place, ensuring the overlapping edges align with the water flow direction.
  11. At the peak of the gable, cut one drip edge to be even with the roof, while extending the top piece on the other side by 1 inch or more beyond the roof and bending it over the first piece.
  12. At the bottom of the gable, position the gable drip edges over the eave drip edges for a seamless finish.

Why You Should Leave Roof Drip Edge Installation to the Pros

Roof maintenance is crucial for protecting your home from the elements, and one often overlooked but essential aspect is the installation of a roof drip edge. This small, often unseen component plays a big role in directing water away from your roof’s edges, preventing damage to the underlying structure and your home’s foundation. While it may seem like a simple task, learning how to install a roof drip edge requires precision and expertise that only professional local roofers like Dream Home Roofers can provide. Our experts provide trusted installation of roof drip edges using only quality materials, prioritizing safety, efficiency, and offering the best warranties for complete peace of mind.

Contact the Roofing Experts at Dream Home Today

Dream Home Roofers is a trusted name in the roofing industry, known for our expertise, professionalism, and commitment to customer satisfaction. When wondering how to install a roof drip edge, don’t take chances with DIY roof projects. Contact us online today for a free consultation and let our experts handle your roof drip edge installation needs.

https://dreamhomeroofers.com/wp-content/uploads/2024/09/dhr-logo.png 0 0 Dream Home Roofers https://dreamhomeroofers.com/wp-content/uploads/2024/09/dhr-logo.png Dream Home Roofers2024-05-07 22:16:302025-01-03 19:53:02How to Install a Roof Drip Edge
Ladder leading to missing shingles on roof

How to Replace Missing Shingles

May 6, 2024/in Roof Replacement/by Dream Home Roofers

Have you noticed some missing shingles on your roof? It’s a common issue that can lead to leaks and other problems if not addressed promptly. Fortunately, replacing missing shingles is a task that many homeowners can tackle themselves with the right knowledge and tools. In this guide, we’ll walk you through the steps of how to replace missing shingles and also introduce you to Dream Home Roofers, your go-to professionals for high-quality asphalt roofing solutions.

Step-by-Step Guide to Shingle Replacement

1. Assess the Damage

The first step is to carefully inspect your roof for missing or damaged shingles. Look for areas where shingles are curled, cracked, or completely gone. It’s essential to address these issues quickly to prevent water from seeping into your home.

2. Gather Your Materials

  • Replacement shingles (matching the color and type of your existing shingles)
  • Roofing cement or adhesive
  • Roofing nails
  • Hammer
  • Utility knife
  • Pry bar or shingle remover tool

3. Replacing Your Missing Shingles

To replace damaged shingles, start by using a pry bar or shingle remover tool to lift the edges and carefully remove any nails holding them in place, taking care to avoid causing further damage to surrounding shingles. Slide the new shingle into position once the damaged ones are removed, ensuring it overlaps adjacent shingles to prevent leaks. Secure the new shingle with roofing nails and apply roofing cement under the edges for added protection against water infiltration. After replacing all missing shingles, inspect the entire roof for any loose or damaged areas, sealing any gaps or seams with roofing cement to ensure a watertight seal.

Leave the Job to the Roofing Professionals

Taking on roof repairs or replacements by yourself can be extremely dangerous. Working at heights, handling heavy materials, and navigating uneven surfaces without proper training and safety gear increases the risk of falls and injuries. Improper installation may lead to structural damage, leaks, and voided warranties on roofing materials. To avoid these dangers and ensure a safe and successful outcome, it’s best to rely on experienced professionals like Dream Home Roofers who have the expertise and safety measures in place to handle roofing tasks effectively. With our years of experience, our team understands the nuances of all types of roofing and ensures every asphalt roof replacement is done right the first time.

Let Dream Home Roofers Handle Your Roofing Needs

When wondering how to replace missing shingles, don’t take unnecessary risks or compromise the integrity of your roof with DIY attempts. Dream Home Roofers offers professional shingle replacement services that guarantee quality, safety, and peace of mind. Contact us online today to discuss your roof issues and let our experts ensure your roof remains strong and secure for many years to come.

https://dreamhomeroofers.com/wp-content/uploads/2024/05/how-to-replace-missing-shingles-blog-image.jpg 720 1280 Dream Home Roofers https://dreamhomeroofers.com/wp-content/uploads/2024/09/dhr-logo.png Dream Home Roofers2024-05-06 21:39:562025-01-03 20:44:01How to Replace Missing Shingles

How to Install Roll Roofing

May 1, 2024/in Roof Replacement/by Dream Home Roofers

Roll roofing is an excellent choice for small or low-pitch roofing projects or as a temporary roofing solution. It’s a quick and cost-effective way to protect your shed, garage, or low-slope roof. With the right tools and a bit of know-how, installing roll roofing can be a straightforward DIY project. In this guide, we’ll walk you through the process of how to install roll roofing step by step. For a traditional asphalt roof installation in the Delaware Valley and surrounding areas, Dream Home Roofers can help.

Gather Your Roll Roofing Materials and Tools

Before you begin, make sure you have all the necessary materials and tools:

  • Roll roofing material
  • Roofing nails
  • Roofing cement
  • Utility knife
  • Hammer
  • Tape measure
  • Chalk line
  • Roofing adhesive (if needed)
  • Roofing primer (if recommended by the manufacturer)

Steps to Installing Roll Roofing

1. Prepare the Roofing Surface

Ensure that the surface you’ll be applying the roll roofing to is clean, dry, and smooth. Remove any debris, dirt, or old roofing material. If necessary, repair any damaged areas and apply a primer as recommended by the manufacturer.

2. Measure and Cut the Roll Roofing

Measure the length of the roof and add a few extra inches for overhang on each side. Roll out the roofing material on a flat surface and use a tape measure and chalk line to mark the desired length. Use a utility knife to cut the roll to size.

3. Apply Adhesive if the Material Requires

Some roll roofing materials require the application of roofing adhesive to ensure proper adhesion to the surface. Follow the manufacturer’s instructions for applying the adhesive evenly to the backside of the roll roofing material.

4. Position and Secure the Roll Roofing

Carefully lift the roll roofing onto the roof, ensuring it’s positioned correctly with an equal overhang on all sides. Use roofing nails to secure the roofing material in place along the edges and at regular intervals across the surface. Be sure to drive the nails flush with the surface to prevent water from seeping underneath.

5. Seal the Seams and Edges

Apply roofing cement along the seams and edges of the roll roofing to create a watertight seal. Use a putty knife or trowel to spread the cement evenly and ensure all seams are fully covered.

6. Finish the Installation

Once the roll roofing is securely in place and all seams are sealed, trim any excess material from the edges using a utility knife. Inspect the entire roof to ensure there are no loose edges or areas that may need additional sealing.

Contact a Skilled Roofer if You Need Help

By following these steps, you can successfully install roll roofing on your shed, garage, or low-slope roof. Remember to always prioritize safety when working on your roof, and if you’re unsure about any step of the process, don’t hesitate to seek professional assistance. If you find that your roof might be better suited for asphalt shingle roofing or if you prefer a professional touch, consider reaching out to Dream Home Roofers for a quote. Their expertise can ensure your roof gets the attention it deserves, providing reliable protection for years to come.

0 0 Dream Home Roofers https://dreamhomeroofers.com/wp-content/uploads/2024/09/dhr-logo.png Dream Home Roofers2024-05-01 18:32:472025-01-03 20:40:17How to Install Roll Roofing

How to Shingle a Hip Roof

April 5, 2024/in Roof Replacement/by Dream Home Roofers

Shingling a hip roof can be a manageable project for the handy homeowner. A hip roof has a unique structure, with four sloping sides that meet at the top to form a ridge. While this design is architecturally appealing and stable, it presents roofing challenges. However, with the right tools, materials, and techniques, you can successfully shingle a hip roof while improving the aesthetics and durability of your home.

Mastering the Art of Shingling a Hip Roof

While the task is generally simple, there are important steps in the process that must be taken to ensure your shingles are properly installed on your hip roof. The last thing you want to do is cause more problems than you originally had with your roof so we do encourage New Jersey, Pennsylvania, and Maryland residents to contact our professional roofers to handle your roof replacement.

  1. Preparation is Key

Before beginning any roofing project, thorough preparation is required. Begin by checking the existing roof for damage or signs of wear. Before you begin shingling, make sure there are no underlying issues like leaks or rot. Next, gather all of the tools and materials you’ll need, such as roofing shingles, underlayment, nails, a hammer, a utility knife, a chalk line, and safety goggles and gloves.

  1. Start with the Underlayment and Vapor Barrier

The underlayment is a crucial layer that provides an additional barrier against moisture and ensures the longevity of your roof. Begin by laying down the underlayment, starting from the bottom edge of the roof and working your way up towards the ridge. Overlap each row of underlayment to prevent water infiltration and secure it in place using roofing nails or staples.

  1. Install the Drip Edge and Starter Shingles

Install the drip edge along the eaves of the roof to keep water from seeping under the shingles. Nail the drip edge in place, making sure it slightly overhangs the roof’s edge. Then, apply starter shingles to the eaves and rakes of the roof. These starter shingles serve as a solid foundation for subsequent rows of shingles, reducing wind uplift.

  1. Lay the Asphalt Shingles

Now comes the important task of laying your asphalt shingles. Begin at the bottom corner of one hip and work your way up to the ridge, following the slope of the roof. Use a chalk line to keep straight rows and ensure uniform alignment. Secure each shingle with nails, driving them just below the tar line to avoid damaging them.

  1. Cut and Fit the Shingles for Edges and Angles

As you approach the roof’s hips and ridges, you will need to cut the shingles to fit the structure’s angles and contours. Measure each shingle carefully and cut with a utility knife to ensure precision. For the hips and ridges, consider using specially designed ridge cap shingles or cutting regular shingles to size and overlapping them for extra protection.

  1. Finish with Ridge Caps

Once all of the main shingles have been installed, add ridge cap shingles to the roof’s hips and ridges. These specially shaped shingles provide a finished look while also protecting these vulnerable areas from water infiltration and wind damage. Use nails or roofing adhesive to secure the ridge cap shingles, following the manufacturer’s guidelines.

Overwhelmed? Leave Your Hip Roof Replacement to the Experts

While shingling a hip roof can be a rewarding DIY project, it requires time, skill, and attention to detail. One mistake could jeopardize the integrity of your roof and result in costly repairs down the road. Those who want to avoid the hassle and get professional results should hire experienced roofers. Contact the professionals at Dream Home for an asphalt roof replacement quote and rest easy knowing your home is in good hands. Investing in professional roofing services not only saves time and effort but also guarantees a sturdy and reliable roof that will protect your home for years to come.

0 0 Dream Home Roofers https://dreamhomeroofers.com/wp-content/uploads/2024/09/dhr-logo.png Dream Home Roofers2024-04-05 20:17:512025-01-03 16:03:24How to Shingle a Hip Roof

Who Replaces Old Roofs?

April 2, 2024/in Roof Replacement/by Dream Home Roofers

Trust the Experts at Dream Home to Replace Your Old Roof

Is your roof showing signs of wear and tear? Are you considering replacing your old roof with a new, durable asphalt one? If so, you’re probably wondering who replaces old roofs, and who can you trust to handle such an important home improvement project. The experts at Dream Home are ready to handle all your asphalt roof replacement needs. Replacing an old roof is not just about aesthetics, as it’s also about protecting your home from the elements and ensuring its structural integrity for years to come.

• Experience and Expertise

Dream Home brings years of experience and expertise to every roofing project. Our team consists of skilled professionals who understand the nuances of roof replacement, especially when it comes to asphalt roofs. We know the best materials, techniques, and practices to ensure a flawless installation that meets or exceeds industry standards.

• Quality Materials

When it comes to roof replacement, the quality of materials matters significantly. At Dream Home, we use only the finest quality asphalt shingles that are durable, weather-resistant, and long-lasting. Our commitment to using top-notch materials ensures that your new roof not only looks great but also provides superior protection for your home. We handle all shingle types as well.

• Professionalism and Reliability

We pride ourselves on our professionalism and reliability. From the initial consultation to the final installation, our team is dedicated to providing excellent customer service and keeping you informed every step of the way. You can trust us to complete your asphalt roof replacement project efficiently, on time, and within budget.

• Enhanced Curb Appeal and Value

A new asphalt roof from Dream Home can transform the appearance of your home, enhancing its curb appeal and increasing its overall value. Whether you’re looking to refresh the look of your property or preparing to sell, a new roof can make a significant difference.

• Peace of Mind

With Dream Home handling your asphalt roof replacement, you can enjoy peace of mind knowing that your home is in good hands. Our workmanship is backed by warranties, giving you added protection and assurance long after the installation is complete.

Contact Dream Home Today for Trusted Asphalt Roof Replacement

Don’t wait until your old roof starts causing problems. Contact the experts at Dream Home today for a consultation and discover why we’re the trusted choice for asphalt roof replacement. When you find yourself wondering who replaces old roofs, let us help you protect your home and invest in its future with a beautiful, durable new roof. Contact us online today for more information on how we can enhance your home.

0 0 Dream Home Roofers https://dreamhomeroofers.com/wp-content/uploads/2024/09/dhr-logo.png Dream Home Roofers2024-04-02 20:40:552025-01-03 16:10:07Who Replaces Old Roofs?

How to Shingle a Gambrel Roof

March 1, 2024/in Roof Replacement/by Dream Home Roofers

Understanding How to Shingle a Gambrel Roof

Are you considering shingling a gambrel roof? Gambrel roofs, with their distinctive double-sloped design, have a sense of traditional charm and elegance. However, the unique shape of a gambrel roof can present a challenge when it comes to shingling. With the right knowledge and guidance, it is possible to tackle this project yourself and achieve stunning results, however, it is best to let a roofing professional such as Dream Home complete the task correctly and put your mind at ease.

Understanding Gambrel Roofs

Before diving into the process of how to shingle a gambrel roof, it’s essential to grasp the fundamentals of a gambrel roof. Unlike conventional roofs with single slopes, gambrel roofs feature two slopes on each side. The lower slope is steeper than the upper slope, creating a distinctive barn-like appearance. This design maximizes interior space, making gambrel roofs popular for both residential and commercial buildings.

Preparing for the Project

Preparation is key to a successful shingling project. Here’s what you’ll need:

  1. Materials: Gather high-quality asphalt roofing shingles, roofing felt, nails, flashing, and other necessary supplies.
  2. Safety Gear: Invest in safety gear such as gloves, goggles, and sturdy footwear to protect yourself during the project.
  3. Tools: Equip yourself with essential tools like a hammer, roofing nails, utility knife, ladder, and chalk line.

Steps to Shingle a Gambrel Roof

Now, let’s walk through the steps to shingle your gambrel roof:

  1. Prepare the Surface: Ensure the roof deck is clean, dry, and free of debris. Install roofing felt as an underlayment, starting from the bottom and working your way up.
  2. Install Starter Shingles: Begin at the eaves and install starter shingles along the lower edge of the roof. These provide a secure base for the first row of shingles and help prevent water penetration.
  3. Lay the Shingles: Working from the bottom up, lay the first row of shingles along the eaves, following the manufacturer’s instructions for proper alignment and spacing. Use chalk lines to maintain straight rows.
  4. Overlap and Nail: As you work your way up the roof, overlap each row of shingles to ensure proper water runoff. Nail the shingles in place, driving nails just below the tar strip to avoid damaging the shingles.
  5. Cutting Shingles: Use a utility knife to cut shingles as needed to fit around vents, chimneys, and other roof protrusions. Take care to maintain proper alignment and ensure a tight seal.
  6. Install Flashing: Install flashing around roof penetrations and in valleys to prevent water leakage. Secure the flashing in place using roofing cement or nails, ensuring a watertight seal.
  7. Complete Ridge and Hip Lines: Finish the project by installing ridge caps along the ridges and hips of the roof. These specialized shingles provide extra protection and a finished look.

Leave the Job to The Roofing Experts

While shingling a gambrel roof can be a rewarding DIY project, it’s essential to recognize when to call in the experts. Dream Home offers professional roofing services backed by years of experience and expertise. Leave the job to the pros at Dream Home, as we understand the complexities of gambrel roofs and all other architectural styles.

Contact the Gambrel Roof Professionals at Dream Home Today

Learning how to shingle a gambrel roof requires careful planning, precision, and attention to detail. By following the steps outlined above and trusting the experts at Dream Home, you can achieve a beautiful and long-lasting roof that enhances the beauty and functionality of your home. Contact us online today to learn more about our roofing services and how we can help bring your dream roof to life.

0 0 Dream Home Roofers https://dreamhomeroofers.com/wp-content/uploads/2024/09/dhr-logo.png Dream Home Roofers2024-03-01 22:56:282025-01-01 19:24:19How to Shingle a Gambrel Roof
Page 2 of 3123

Pages

  • About us
  • Blogs
  • Careers
  • Contact Us
  • Current Specials at Dream Home Roofers
  • Feedbacks
  • Financing
  • Gutter Guards in the Delaware Valley
  • Gutters in Delaware Valley
  • Home
  • No Office Location
  • Privacy Policy
  • Rate
  • Review Feedback Form
  • Reviews
  • Roof Inspection in Delaware Valley
  • Roof Inspection in Turnersville, NJ
  • Roof Inspection in West Caldwell, NJ
  • Roof Inspections in Laurel, MD
  • Roof Replacement in Cherry Hill, NJ
  • Roof Replacement in Columbia, MD
  • Roof Replacement in Delaware Valley
  • Roof Replacement in Harrisburg, PA
  • Roof Replacement in King of Prussia, PA
  • Roof Replacement in Lancaster, PA
  • Roof Replacement in Laurel, MD
  • Roof Replacement in Philadelphia, PA
  • Roof Replacement in Turnersville, NJ
  • Roof Replacement in Vineland, NJ
  • Roof Replacement in West Caldwell, NJ
  • Roofing Company in Fairfax, VA
  • Roofing Company in King of Prussia, PA
  • Roofing Company in Laurel, MD
  • Roofing Company in Maryland
  • Roofing Company in New Jersey
  • Roofing Company in Pennsylvania
  • Roofing Company in Turnersville, NJ
  • Roofing Company in West Caldwell, NJ
  • Roofing in Allentown, PA
  • Roofing in Atlantic City, NJ
  • Roofing in Bethesda, MD
  • Roofing in Bethlehem, PA
  • Roofing in Blairstown, NJ
  • Roofing in Boonsboro, MD
  • Roofing in Bowie, MD
  • Roofing in Burlington, NJ
  • Roofing in Camden, NJ
  • Roofing in Cherry Hill, NJ
  • Roofing in Cherry Hill, NJ
  • Roofing in Chester, PA
  • Roofing in Clifton, NJ
  • Roofing in Columbia, MD
  • Roofing in Delaware Valley
  • Roofing in Delaware Valley
  • Roofing in Delaware Valley
  • Roofing in Dundalk, MD
  • Roofing in Egg Harbor, NJ
  • Roofing in Ellicott City, MD
  • Roofing in Elm, PA
  • Roofing in Fairfax, VA
  • Roofing in Frankford, NJ
  • Roofing in Freehold, NJ
  • Roofing in Gaithersburg, MD
  • Roofing in Germantown, MD
  • Roofing in Glen Burnie, MD
  • Roofing in Gloucester Township, NJ
  • Roofing in Hamilton, NJ
  • Roofing in Harrisburg, PA
  • Roofing in King of Prussia, PA
  • Roofing in King Of Prussia, PA
  • Roofing in Lancaster, PA
  • Roofing in Laurel, MD
  • Roofing in Laurel, MD
  • Roofing in Lebanon, PA
  • Roofing in Lehigh Valley
  • Roofing in Levittown, PA
  • Roofing in Mahwah, NJ
  • Roofing in Maryland
  • Roofing in Monroe, NJ
  • Roofing in Mount Laurel, NJ
  • Roofing in New Jersey
  • Roofing in Norristown, PA
  • Roofing in Pennsylvania
  • Roofing in Philadelphia, PA
  • Roofing in Potomac, MD
  • Roofing in Reading, PA
  • Roofing in Rockville, MD
  • Roofing in Severn, MD
  • Roofing in Silver Spring, MD
  • Roofing in Smithsburg, MD
  • Roofing in Somerset, NJ
  • Roofing in South Jersey
  • Roofing in Tinton Falls, NJ
  • Roofing in Towson, MD
  • Roofing in Turnersville NJ
  • Roofing in Turnersville, NJ
  • Roofing in Union, NJ
  • Roofing in Vineland, NJ
  • Roofing in Voorhees, NJ
  • Roofing in Waldorf, MD
  • Roofing in Washington Township, NJ
  • Roofing in West Caldwell, NJ
  • Roofing in West Caldwell, NJ
  • Roofing in Weston, PA
  • Service Area
  • Services
  • Template About Our Team
  • Template All Brands Logos
  • Template All Brands Logos New
  • Template Blogs
  • Template Certification
  • Template Financing Banner
  • Template Gutter Brands
  • Template our Process
  • Template Our Work
  • Template Project Block
  • Template Review Banner
  • Template Review Banner (King of Prussia, PA)
  • Template Review Banner (Laurel, MD)
  • Template Review Banner (Turnersville, NJ)
  • Template Review Banner (West Caldwell, NJ)
  • Template Roofing Brands
  • Template Service Blocks (All)
  • Template Service Blocks (King of Prussia, PA)
  • Template Service Blocks (Laurel, MD)
  • Template Service Blocks (Turnersville, NJ)
  • Template Service Blocks (West Caldwell, NJ)

Categories

  • Blog
  • Roof Installation
  • Roof Repair
  • Roof Replacement
  • Roofing
  • Uncategorized

Archive

  • July 2025
  • June 2025
  • May 2025
  • March 2025
  • February 2025
  • January 2025
  • December 2024
  • November 2024
  • October 2024
  • August 2024
  • July 2024
  • June 2024
  • May 2024
  • April 2024
  • March 2024
  • February 2024
  • November 2023
  • October 2023
  • July 202

Our Office Locations

Map icon 501 NJ‑168, Turnersville, NJ 08012

Map icon 175 Fairfield Ave, Suite 2B, West Caldwell, NJ 07006

Map icon 144 E. Dekalb Pike, Suite 200, King of Prussia, PA 19406

Map icon 8920 Stephens Rd, #104, Laurel, MD 20723

Map icon 4085 Chain Bridge Rd, Suite 302, Fairfax, VA 22030

NJ Lic. #13VH11352200 | PA Lic. #PA161658 | MD Lic. #157465 | DE HIC# 2025-000012170 | VA HIC# 2705196076

Privacy Policy | Service Area

Follow Us

Check out our social pages and let us know how we’re doing See the latest from Dream Home Roofers and let us know what we can do for you.

BBB Accredited

BBB Accredited

Local Roofing Contractors
Financing
Careers
Contact

© 2025 Dream Home Roofers Roofing Contractor Marketing Provided by Robben Media

Scroll to top