Dream Home Roofers
1-855-610-9720
Get Free Estimate 1-855-610-9720
Free Estimate 1-855-610-9720
  • About us
    • Reviews
    • Careers
    • Financing
    • Blogs
  • Services
    • Roofing
      • Replacement
      • Repair
      • Inspection
    • Gutters
      • Gutter Protection
  • Service Area
    • Turnersville, NJ
    • West Caldwell, NJ
    • King of Prussia, PA
    • Laurel, MD
    • Fairfax, VA
  • Current Specials
  • Contact Us
  • Menu Menu
Act Now for 50% OFF Materials. Click here for details.

Tag Archive for: roof leak

An illustration showing chimney flashing on a roof.

Top Techniques for Sealing Chimney Flashing: Fix Leaks Fast

January 31, 2025/in Roof Repair, Roofing/by Dream Home Roofers

Experiencing leaks around your chimney? Sealing chimney flashing is vital to prevent water damage. This guide will show you how to inspect, repair, and maintain your chimney flashing to keep your home safe.

Key Takeaways

  • Chimney flashing acts as a vital barrier to prevent water intrusion, with proper installation and maintenance crucial for avoiding structural damage.

  • Common causes of chimney flashing leaks include harsh weather exposure, improper installation, and water accumulation, which can lead to significant property damage.

  • Sealing chimney flashing involves several steps, including inspection, cleaning, applying roofing cement, securing with sheet metal, and regular preventative maintenance to ensure long-lasting effectiveness.

Understanding Chimney Flashing
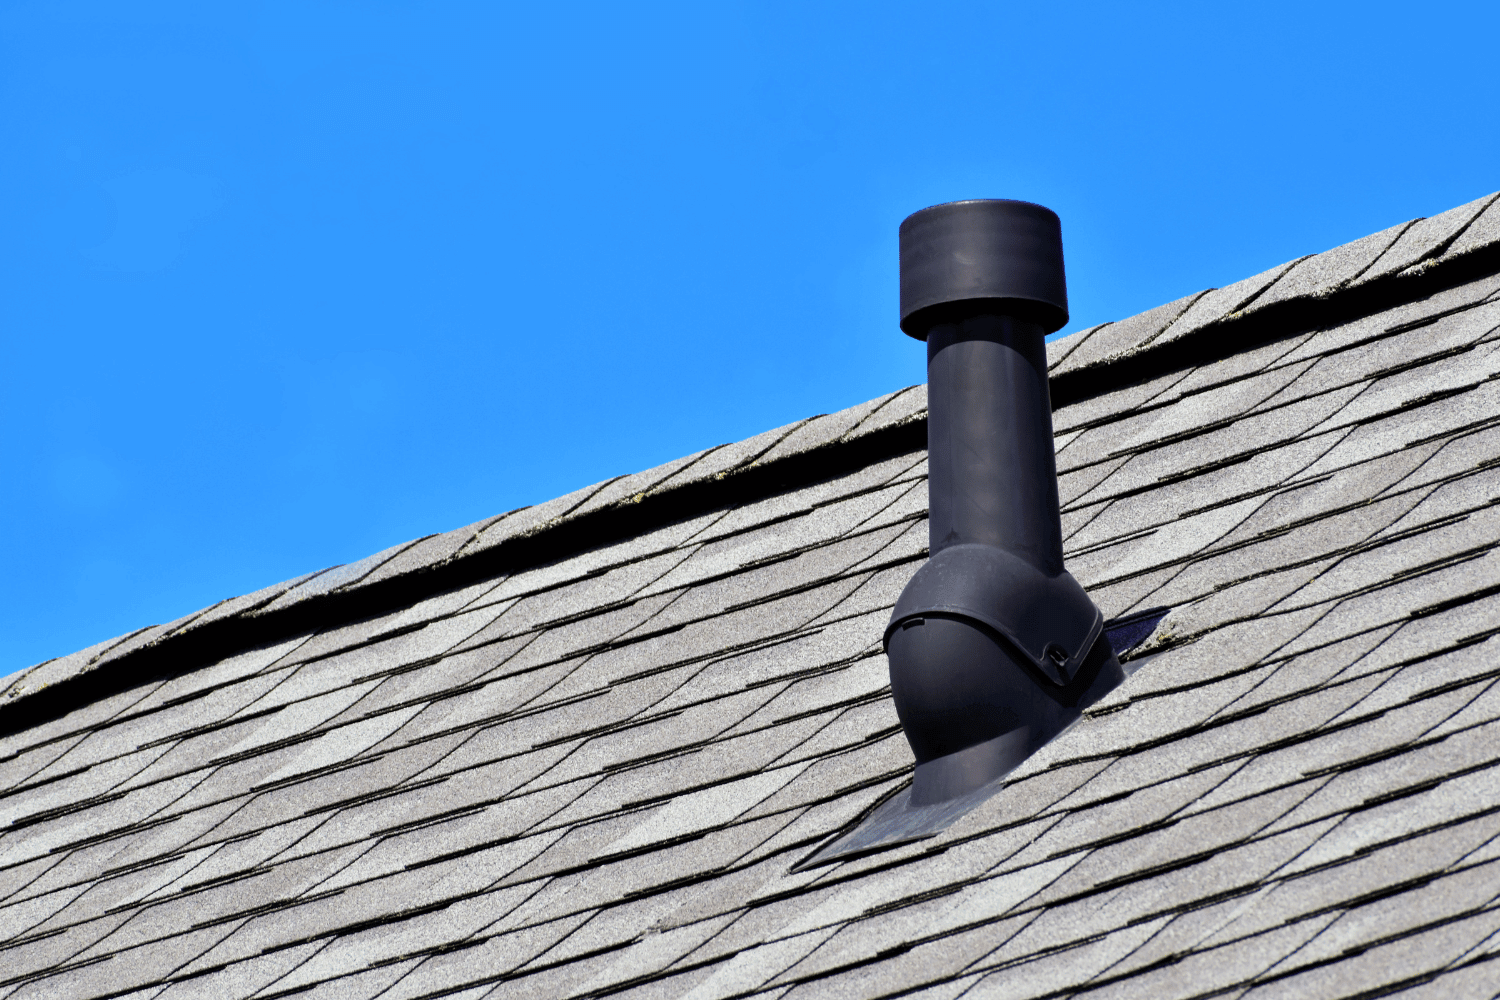
An illustration showing chimney flashing on a roof.

Chimney flashing serves as a critical barrier, sealing the gap between the chimney and the roof. Its main role is to stop rainwater from entering your home, avoiding significant long-term damage. Proper installation and maintenance of the chimney crown are crucial to prevent moisture stains, mold growth, and damage to the roof and attic.

Neglected leaking chimney flashing can cause structural problems and significant property damage. Rusting, warping, or missing components can cause flashing issues, highlighting the need for timely repairs. Materials for chimney flashing should be waterproof to effectively prevent leaks from rainwater and moisture.

Sealing chimney flashing requires multiple steps to ensure a proper seal and prevent leaks. Knowing these steps and the materials used can help maintain your chimney and roof’s integrity, keeping your home safe and dry.

Common Causes of Leaky Chimney Flashing

Exposure to harsh weather conditions makes chimney flashing susceptible to wear and tear. Ongoing exposure to the elements can degrade certain flashing materials. Consequently, these materials may lose effectiveness. This natural deterioration is often a primary cause of leaking chimney flashing.

Another common issue is improper installation. Gaps or misalignment during installation heighten the risk of leaks. Errors by inexperienced installers can lead to cracks or the flashing pulling away from the chimney, compromising its effectiveness.

Water accumulation in a damaged chimney chase top pan can cause rust and chimney leaks. Recognizing these common causes helps identify and address potential issues early, keeping your chimney leak-free.

Materials Needed for Sealing Chimney Flashing
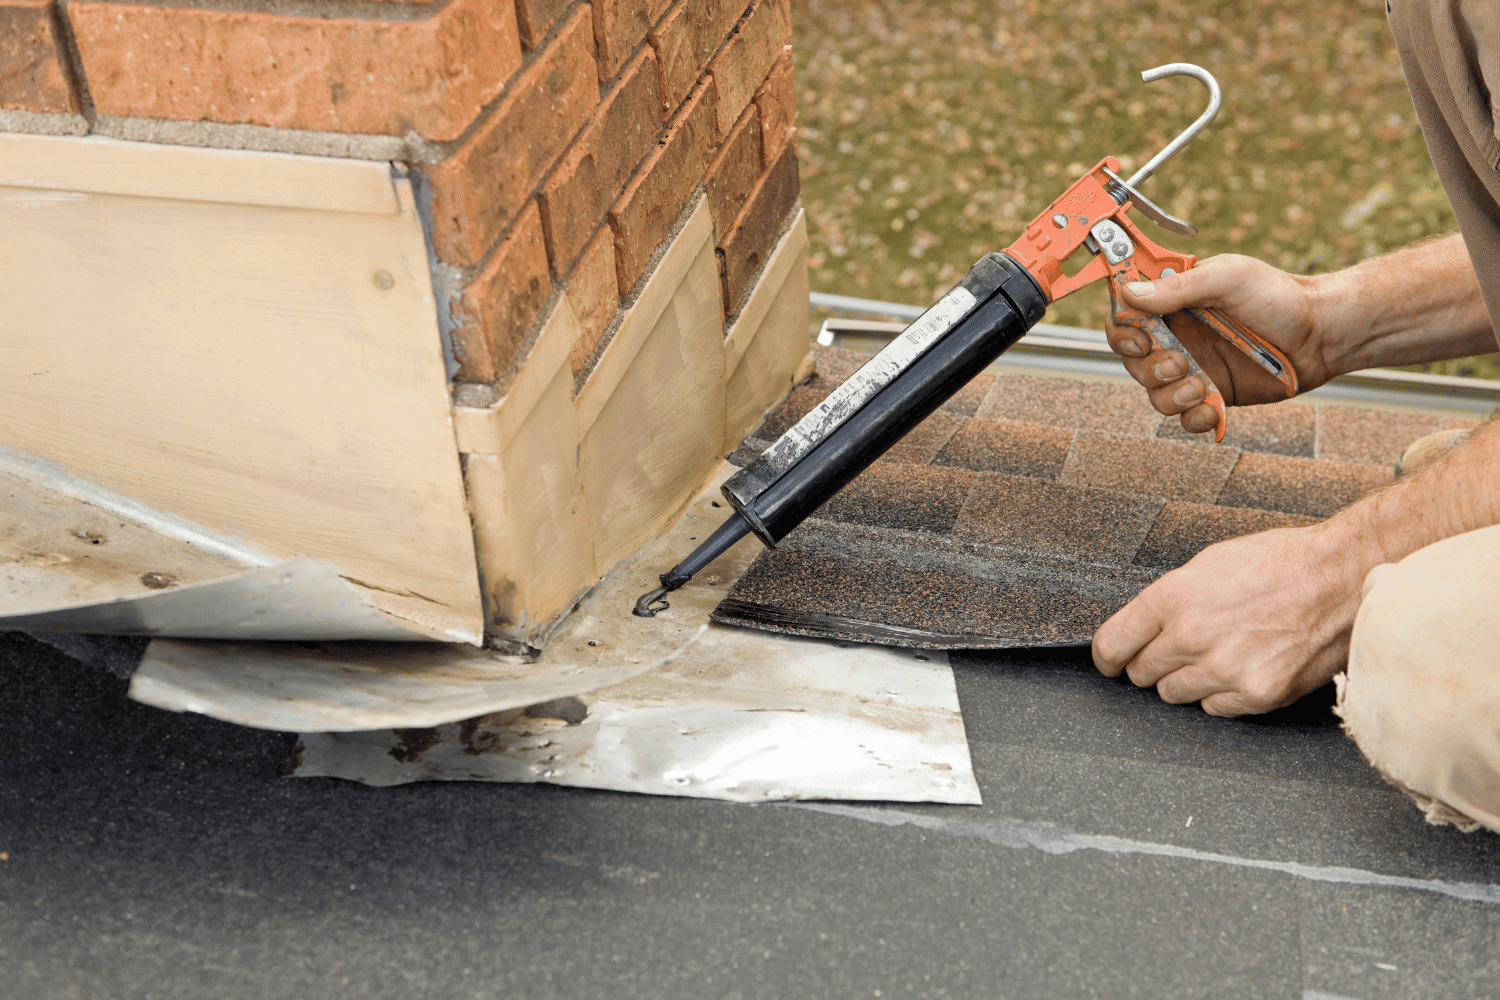
Various materials needed for sealing chimney flashing.

Specific materials are necessary for a long-lasting and effective chimney flashing repair. Key items include roofing cement, a caulking gun, sheet metal, and a waterproof membrane. Roofing cement fills small gaps and cracks in the flashing, offering a temporary seal until permanent repairs are made.

Sealants are vital in chimney flashing repairs. Butyl sealant is a cost-effective option, while polyurethane sealants are favored by professionals for their longevity. Modified polyether sealants are also versatile and can be used in various temperatures and conditions. High-quality materials ensure your repairs withstand time and weather.

Step-by-Step Guide to Sealing Chimney Flashing
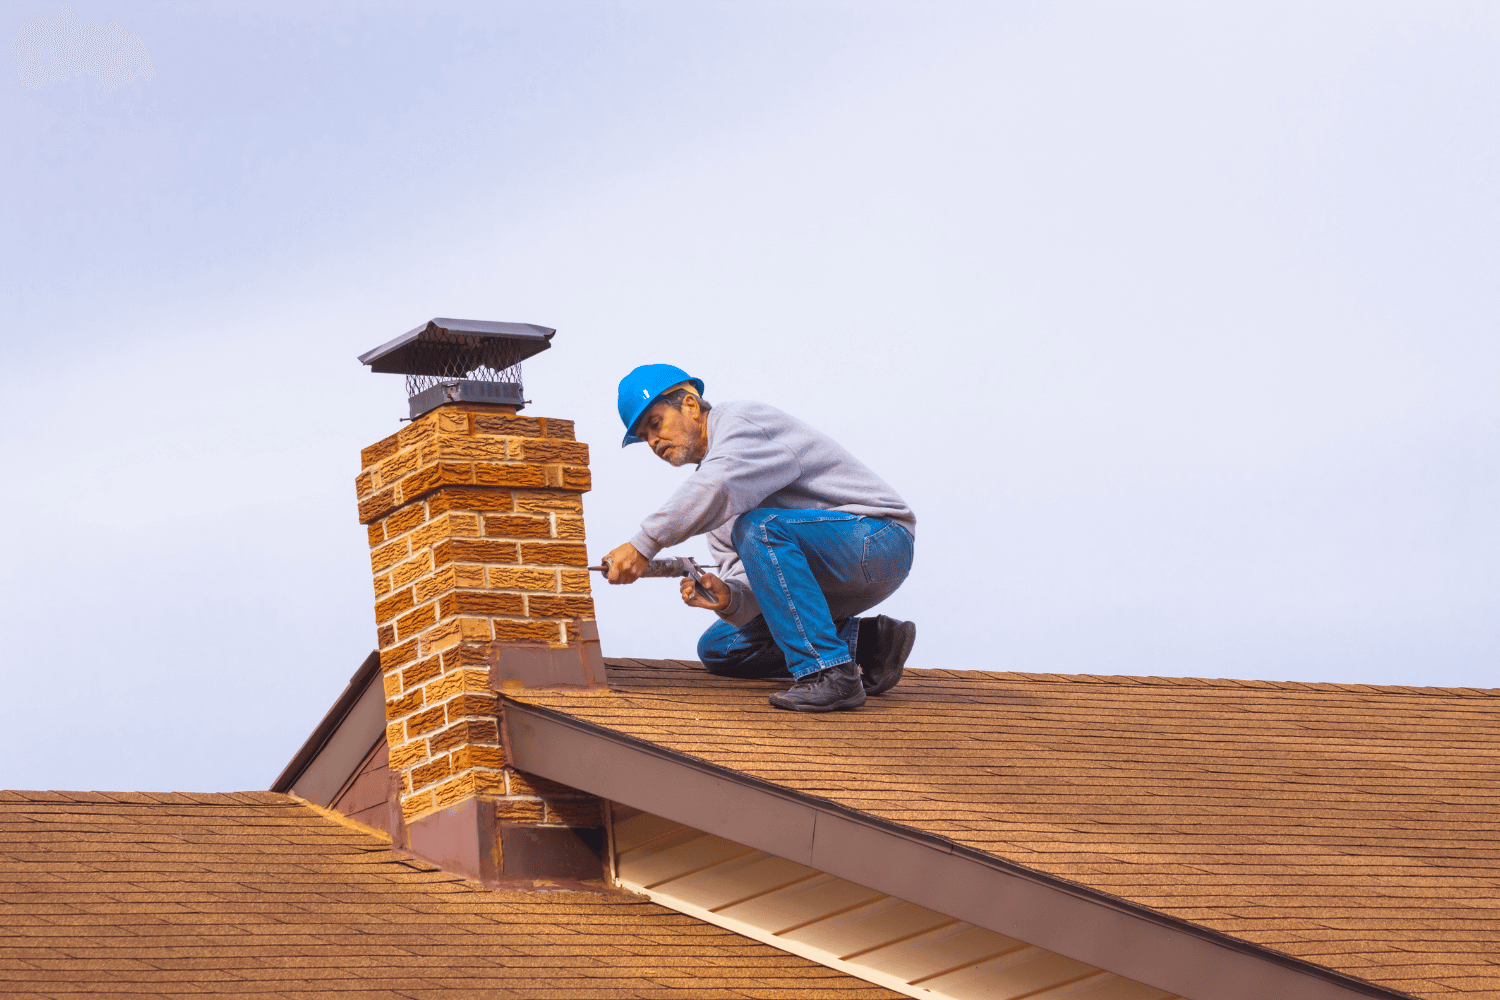
A step-by-step guide to sealing chimney flashing.

Several steps are essential in repairing chimney flashing to achieve a good seal and prevent future leaks. This guide covers inspecting the flashing, cleaning the area, applying roofing cement, securing with sheet metal, and performing a final inspection and testing.

Prioritize safety at all times. Employ an extension ladder, have someone hold it, and wear heavy-duty gloves, protective eyewear, and gripping boots. If repairs appear extensive or complex, hire a professional roofer.

Inspect the Chimney Flashing

Begin by checking the chimney flashing for visible wear, gaps, or rust stains. Check for water damage around the chimney, indicating flashing issues. Assess and repair any spalling or missing bricks before waterproofing to ensure a solid foundation for the flashing.

Regular inspections help maintain the integrity of your chimney flashing. Checking for rust, cracks, and other damage enables early problem detection, preventing more severe issues later.

Clean the Area

Cleaning around the chimney flashing removes materials that could hinder a proper seal. Clean the exterior of masonry chimneys with a low-pressure garden sprayer and mild detergent. Make sure the area is debris-free for a good seal.

Apply fresh roofing cement after cleaning to prepare the area for the next sealing steps. This preparation ensures effective and long-lasting repairs.

Apply Roofing Cement

Roofing cement fills small gaps and cracks in the flashing, including those that may occur in a roofing membrane. Clean and dry the surface before application for optimal adhesion. Apply roofing cement evenly with a caulking gun, avoiding overfilling the gaps.

This step creates a temporary seal to prevent leaks until permanent repairs are made. It’s a crucial part of ensuring the flashing remains effective.

Secure with Sheet Metal

Securing the chimney flashing with sheet metal prevents leaks and ensures roofing integrity. Reattach the flashing to the chimney with screws or masonry nails for a secure hold. Ensure proper alignment of the sheet metal, driving all screws or nails firmly to create a watertight seal.

This step reinforces the flashing, providing structural support and ensuring durable, effective repairs.

Final Inspection and Testing

Conduct a final inspection to verify all repairs are done correctly. Soak sections of the chimney with water to check for leaks. A successful water test confirms the chimney flashing repair was effective in preventing leaks.

Regular inspections and testing help maintain the integrity of your chimney flashing and prevent future leaks.

Waterproofing the Brick Chimney

Waterproofing a brick chimney to prevent leaks.

Waterproofing your brick chimney protects it from water damage. Prolonged moisture exposure accelerates masonry deterioration, making waterproofing essential. Fix any brick damage, such as spalling, before applying a waterproof sealer.

Apply the waterproof sealant with a brush, roller, or sprayer according to the manufacturer’s instructions. Allow the sealant to dry and cure as directed after application. Conduct a thorough visual check to ensure effective sealing. Reapply the waterproof sealer every five years to maintain effectiveness.

When to Call a Professional Roofing Contractor

Severe damage to the flashing or surrounding areas necessitates hiring a professional for reliable repair. If you’re short on time or lack roofing repair experience, hiring a professional can be faster and safer. Professionals are trained to work safely on roofs, minimizing accident risks.

Corrosion-resistant screws are recommended when reattaching flashing to prevent future leaks. If you suspect a leak in your chimney flashing, contact a roofing contractor immediately. Address this issue as soon as possible.

Preventative Maintenance Tips
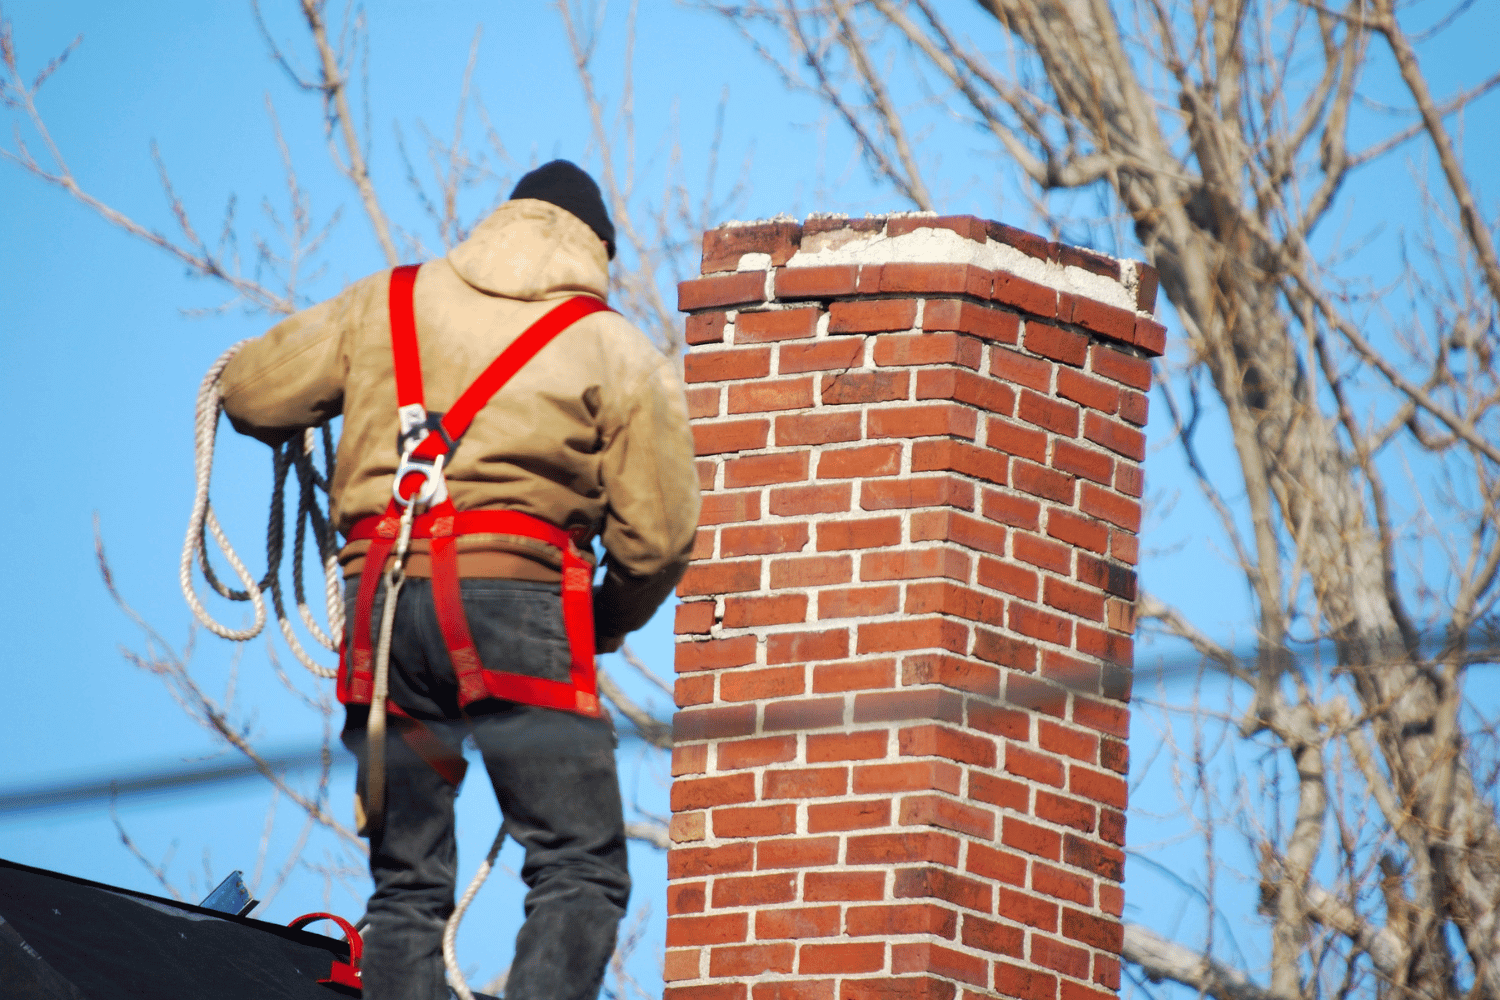
Preventative maintenance is crucial to solving leaks and keeping your chimney flashing in good condition.

Preventative maintenance is crucial to solving leaks and keeping your chimney flashing in good condition. Inspect the flashing and masonry every other year to identify and address potential leaks early. Regularly clean debris around the chimney to prevent moisture buildup that can damage the flashing.

Start by listing some forbidden forms of the keyword “loose flashing” according to the rule 5. Trim overhanging branches to prevent debris from damaging the loose flashing. Check the sealant around the flashing for cracks and reapply as needed to maintain a watertight seal. Regular maintenance can prevent costly repairs later.

Summary

Proper maintenance and timely repairs of chimney flashing are crucial to prevent leaks and protect your home. By following the steps outlined in this guide, you can effectively seal and maintain your chimney flashing, ensuring your home remains safe and dry.

Taking proactive measures, such as regular inspections and maintenance, can help you avoid significant problems and costly repairs in the future. Invest time in caring for your chimney flashing, and enjoy the peace of mind that comes with a well-maintained home.

Frequently Asked Questions

What are the common signs of leaking chimney flashing?

Common signs of leaking chimney flashing include visible wear, gaps, rust stains, and water damage around the chimney. Addressing these issues promptly can prevent more significant damage.

How often should chimney flashing be inspected?

Chimney flashing should be inspected every two years to promptly identify and address potential leaks. Regular checks help ensure the integrity of your roofing system.

Can I use any sealant for chimney flashing repairs?

For chimney flashing repairs, it’s best to use polyurethane or modified polyether sealants, as they offer durability and versatility for various conditions. These options ensure a long-lasting seal.

What should I do if I find extensive damage to my chimney flashing?

You should contact a professional roofing contractor to address the extensive damage to your chimney flashing for safe and effective repairs. Ignoring the issue may lead to further complications.

How often should I reapply waterproof sealant to my brick chimney?

You should reapply waterproof sealant to your brick chimney every five years to ensure optimal protection against water damage. Regular maintenance will extend the lifespan of your chimney.

 

https://dreamhomeroofers.com/wp-content/uploads/2025/01/An-illustration-showing-chimney-flashing-on-a-roof.-1.png 1000 1500 Dream Home Roofers https://dreamhomeroofers.com/wp-content/uploads/2024/09/dhr-logo.png Dream Home Roofers2025-01-31 11:09:452025-01-31 11:09:45Top Techniques for Sealing Chimney Flashing: Fix Leaks Fast
Roof leak around chimney

How to Fix a Roof Leak Around a Chimney

February 27, 2024/in Roof Repair/by Dream Home Roofers

Fixing a Roof Leak Around a Chimney

Repairing a roof leak around a chimney demands immediate attention to prevent further damage. If water is coming in near your chimney, inadequate chimney flashing could be the cause. While a DIY solution might suffice, it is best to contact roofing experts for this issue. To address chimney flashing issues, follow these steps outlined for how to fix a roof leak around a chimney. Dream Home Roofers always recommends that you hire a licensed roofer so that you and your home remain safe.

Tools & Materials Needed to Fix Your Roof

Ensure your extension ladder extends at least 3 feet past the roof edge for safety. Opt for polyurethane flashing sealant for its ability to expand and contract with temperature changes. If your roof has a steep pitch, employ a roof safety harness for protection.

  • Extension ladder
  • Roof safety harness
  • Work gloves
  • Wire brush
  • Chisel
  • Hammer drill
  • Masonry screws
  • Caulking gun
  • Polyurethane flashing sealant
  • Utility knife
  • Garden hose

Step by Step Instructions to Fix the Leak:

  1. Position the extension ladder securely and ascend to the roof.
  2. Examine the chimney flashing, ensuring no debris obstructs your view. Thoroughly check all edges for gaps allowing water ingress.
  3. Eliminate any loose or deteriorated sealant using a chisel and wire brush.
  4. Apply fresh flashing sealant along all flashing edges. Modify the tube tip with a utility knife to produce a 1/4-inch sealant bead.
  5. If any flashing is loose, apply sealant beneath the loose sections.
  6. Use a hammer drill to affix additional masonry screws to secure loose flashing.
  7. Seal exposed screw heads with sealant.
  8. Once the sealant sets, test the repair by running water around the chimney with a garden hose for 5 minutes.
  9. If leakage persists, search for overlooked gaps and apply additional sealant.

Consider Professional Roof Inspection

If you find that the flashing is absent altogether or if the leak stubbornly persists despite your best efforts, it may be time to turn to the expertise of a professional roofing contractor. Dream Home Roofers, known for our excellence in asphalt roof replacements, is here to offer tailored solutions to address all your roofing concerns. With our extensive experience and commitment to quality craftsmanship, we specialize in providing top-notch services that ensure the longevity and structural integrity of your home. Don’t let unresolved roofing issues compromise your comfort and security. Contact us today for a roofing estimate you can trust.

https://dreamhomeroofers.com/wp-content/uploads/2024/02/how-to-fix-a-roof-leak-around-a-chimney-blog-image.jpg 720 1280 Dream Home Roofers https://dreamhomeroofers.com/wp-content/uploads/2024/09/dhr-logo.png Dream Home Roofers2024-02-27 00:17:362025-01-03 20:36:14How to Fix a Roof Leak Around a Chimney

Pages

  • About us
  • Blogs
  • Careers
  • Contact Us
  • Current Specials at Dream Home Roofers
  • Financing
  • Gutter Guards in the Delaware Valley
  • Gutters in Delaware Valley
  • Home
  • No Office Location
  • Privacy Policy
  • Reliable Roof Repair Services in Allentown, PA
  • Reliable Roof Repair Services in Atlantic City, NJ
  • Reliable Roof Repair Services in Bethesda, MD
  • Reliable Roof Repair Services in Bethlehem, PA
  • Reliable Roof Repair Services in Blairstown, NJ
  • Reliable Roof Repair Services in Boonsboro, MD
  • Reliable Roof Repair Services in Bowie, MD
  • Reliable Roof Repair Services in Burlington, NJ
  • Reliable Roof Repair Services in Camden, NJ
  • Reliable Roof Repair Services in Cherry Hill, NJ
  • Reliable Roof Repair Services in Chester, PA
  • Reliable Roof Repair Services in Clifton, NJ
  • Reliable Roof Repair Services in Columbia, MD
  • Reliable Roof Repair Services in Dundalk, MD
  • Reliable Roof Repair Services in Egg Harbor, NJ
  • Reliable Roof Repair Services in Ellicott City, MD
  • Reliable Roof Repair Services in Elm, PA
  • Reliable Roof Repair Services in Frankford, NJ
  • Reliable Roof Repair Services in Freehold, NJ
  • Reliable Roof Repair Services in Gaithersburg, MD
  • Reliable Roof Repair Services in Germantown, MD
  • Reliable Roof Repair Services in Glen Burnie, MD
  • Reliable Roof Repair Services in Gloucester Township, NJ
  • Reliable Roof Repair Services in Hamilton, NJ
  • Reliable Roof Repair Services in Harrisburg, PA
  • Reliable Roof Repair Services in Lancaster, PA
  • Reliable Roof Repair Services in Laurel, MD
  • Reliable Roof Repair Services in Lebanon, PA
  • Reliable Roof Repair Services in Levittown, PA
  • Reliable Roof Repair Services in Mahwah, NJ
  • Reliable Roof Repair Services in Monroe, NJ
  • Reliable Roof Repair Services in Mount Laurel, NJ
  • Reliable Roof Repair Services in Norristown, PA
  • Reliable Roof Repair Services in Philadelphia, PA
  • Reliable Roof Repair Services in Potomac, MD
  • Reliable Roof Repair Services in Reading, PA
  • Reliable Roof Repair Services in Rockville, MD
  • Reliable Roof Repair Services in Severn, MD
  • Reliable Roof Repair Services in Silver Spring, MD
  • Reliable Roof Repair Services in Smithsburg, MD
  • Reliable Roof Repair Services in Somerset, NJ
  • Reliable Roof Repair Services in Tinton Falls, NJ
  • Reliable Roof Repair Services in Towson, MD
  • Reliable Roof Repair Services in Union, NJ
  • Reliable Roof Repair Services in Vineland, NJ
  • Reliable Roof Repair Services in Voorhees, NJ
  • Reliable Roof Repair Services in Waldorf, MD
  • Reliable Roof Repair Services in Washington Township, NJ
  • Reliable Roof Repair Services in Weston, PA
  • Reviews
  • Roof Inspection in Delaware Valley
  • Roof Inspection in Turnersville, NJ
  • Roof Inspection in West Caldwell, NJ
  • Roof Inspections in Laurel, MD
  • Roof Repair
  • Roof Repair in Cherry Hill, NJ
  • Roof Repair in Columbia, MD
  • Roof Repair in Delaware Valley
  • Roof Repair in Harrisburg, PA
  • Roof Repair in Lancaster, PA
  • Roof Repair in Philadelphia, PA
  • Roof Repair in Turnersville, NJ
  • Roof Repair in Vineland, NJ
  • Roof Repair in West Caldwell, NJ
  • Roof Repair Services in Bethlehem, King of Prussia, PA
  • Roof Repair Services in King of Prussia, PA
  • Roof Repair Services in Norristown, King of Prussia, PA
  • Roof Replacement in Cherry Hill, NJ
  • Roof Replacement in Columbia, MD
  • Roof Replacement in Delaware Valley
  • Roof Replacement in Harrisburg, PA
  • Roof Replacement in King of Prussia, PA
  • Roof Replacement in Lancaster, PA
  • Roof Replacement in Laurel, MD
  • Roof Replacement in Philadelphia, PA
  • Roof Replacement in Turnersville, NJ
  • Roof Replacement in Vineland, NJ
  • Roof Replacement in West Caldwell, NJ
  • Roofing Company in Fairfax, VA
  • Roofing Company in King of Prussia, PA
  • Roofing Company in Laurel, MD
  • Roofing Company in Maryland
  • Roofing Company in New Jersey
  • Roofing Company in Pennsylvania
  • Roofing Company in Turnersville, NJ
  • Roofing Company in West Caldwell, NJ
  • Roofing in Allentown, PA
  • Roofing in Atlantic City, NJ
  • Roofing in Bethesda, MD
  • Roofing in Bethlehem, PA
  • Roofing in Blairstown, NJ
  • Roofing in Boonsboro, MD
  • Roofing in Bowie, MD
  • Roofing in Burlington, NJ
  • Roofing in Camden, NJ
  • Roofing in Cherry Hill, NJ
  • Roofing in Chester, PA
  • Roofing in Clifton, NJ
  • Roofing in Columbia, MD
  • Roofing in Delaware Valley
  • Roofing in Delaware Valley
  • Roofing in Delaware Valley
  • Roofing in Dundalk, MD
  • Roofing in Egg Harbor, NJ
  • Roofing in Ellicott City, MD
  • Roofing in Elm, PA
  • Roofing in Frankford, NJ
  • Roofing in Freehold, NJ
  • Roofing in Gaithersburg, MD
  • Roofing in Germantown, MD
  • Roofing in Glen Burnie, MD
  • Roofing in Gloucester Township, NJ
  • Roofing in Hamilton, NJ
  • Roofing in Harrisburg, PA
  • Roofing in King of Prussia, PA
  • Roofing in Lancaster, PA
  • Roofing in Laurel, MD
  • Roofing in Lebanon, PA
  • Roofing in Lehigh Valley
  • Roofing in Levittown, PA
  • Roofing in Mahwah, NJ
  • Roofing in Maryland
  • Roofing in Monroe, NJ
  • Roofing in Mount Laurel, NJ
  • Roofing in New Jersey
  • Roofing in Norristown, PA
  • Roofing in Pennsylvania
  • Roofing in Philadelphia, PA
  • Roofing in Potomac, MD
  • Roofing in Reading, PA
  • Roofing in Rockville, MD
  • Roofing in Severn, MD
  • Roofing in Silver Spring, MD
  • Roofing in Smithsburg, MD
  • Roofing in Somerset, NJ
  • Roofing in South Jersey
  • Roofing in Tinton Falls, NJ
  • Roofing in Towson, MD
  • Roofing in Turnersville, NJ
  • Roofing in Union, NJ
  • Roofing in Vineland, NJ
  • Roofing in Voorhees, NJ
  • Roofing in Waldorf, MD
  • Roofing in Washington Township, NJ
  • Roofing in West Caldwell, NJ
  • Roofing in Weston, PA
  • Service Area
  • Services
  • Template About Our Team
  • Template All Brands Logos
  • Template All Brands Logos New
  • Template Blogs
  • Template Certification
  • Template Financing Banner
  • Template Gutter Brands
  • Template our Process
  • Template Our Work
  • Template Project Block
  • Template Review Banner
  • Template Review Banner (King of Prussia, PA)
  • Template Review Banner (Laurel, MD)
  • Template Review Banner (Turnersville, NJ)
  • Template Review Banner (West Caldwell, NJ)
  • Template Roofing Brands
  • Template Service Blocks (All)
  • Template Service Blocks (King of Prussia, PA)
  • Template Service Blocks (Laurel, MD)
  • Template Service Blocks (Turnersville, NJ)
  • Template Service Blocks (West Caldwell, NJ)

Categories

  • Blog
  • Roof Installation
  • Roof Repair
  • Roof Replacement
  • Roofing
  • Uncategorized

Archive

  • March 2025
  • February 2025
  • January 2025
  • December 2024
  • November 2024
  • October 2024
  • August 2024
  • July 2024
  • June 2024
  • May 2024
  • April 2024
  • March 2024
  • February 2024
  • November 2023
  • October 2023

Our Office Locations

Map icon 501 NJ‑168, Turnersville, NJ 08012

Map icon 175 Fairfield Ave, Suite 2B, West Caldwell, NJ 07006

Map icon 144 E. Dekalb Pike, Suite 200, King of Prussia, PA 19406

Map icon 8920 Stephens Rd, #104, Laurel, MD 20723

Map icon 4085 Chain Bridge Rd, Suite 302, Fairfax, VA 22030

NJ Lic. #13VH11352200 | PA Lic. #PA161658 | MD Lic. #157465

Privacy Policy | Service Area

Follow Us

Check out our social pages and let us know how we’re doing See the latest from Dream Home Roofers and let us know what we can do for you.

BBB Accredited

BBB Accredited

Local Roofing Contractors
Financing
Careers
Contact

© 2025 Dream Home Roofers Roofing Contractor Marketing Provided by Robben Media

Scroll to top