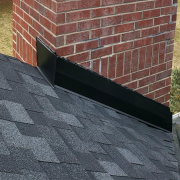
How to Shingle a Hip Roof
Shingling a hip roof can be a manageable project for the handy homeowner. A hip roof has a unique structure, with four sloping sides that meet at the top to form a ridge. While this design is architecturally appealing and stable, it presents roofing challenges. However, with the right tools, materials, and techniques, you can successfully shingle a hip roof while improving the aesthetics and durability of your home.
Mastering the Art of Shingling a Hip Roof
While the task is generally simple, there are important steps in the process that must be taken to ensure your shingles are properly installed on your hip roof. The last thing you want to do is cause more problems than you originally had with your roof so we do encourage New Jersey, Pennsylvania, and Maryland residents to contact our professional roofers to handle your roof replacement.
-
Preparation is Key
Before beginning any roofing project, thorough preparation is required. Begin by checking the existing roof for damage or signs of wear. Before you begin shingling, make sure there are no underlying issues like leaks or rot. Next, gather all of the tools and materials you’ll need, such as roofing shingles, underlayment, nails, a hammer, a utility knife, a chalk line, and safety goggles and gloves.
-
Start with the Underlayment and Vapor Barrier
The underlayment is a crucial layer that provides an additional barrier against moisture and ensures the longevity of your roof. Begin by laying down the underlayment, starting from the bottom edge of the roof and working your way up towards the ridge. Overlap each row of underlayment to prevent water infiltration and secure it in place using roofing nails or staples.
-
Install the Drip Edge and Starter Shingles
Install the drip edge along the eaves of the roof to keep water from seeping under the shingles. Nail the drip edge in place, making sure it slightly overhangs the roof’s edge. Then, apply starter shingles to the eaves and rakes of the roof. These starter shingles serve as a solid foundation for subsequent rows of shingles, reducing wind uplift.
-
Lay the Asphalt Shingles
Now comes the important task of laying your asphalt shingles. Begin at the bottom corner of one hip and work your way up to the ridge, following the slope of the roof. Use a chalk line to keep straight rows and ensure uniform alignment. Secure each shingle with nails, driving them just below the tar line to avoid damaging them.
-
Cut and Fit the Shingles for Edges and Angles
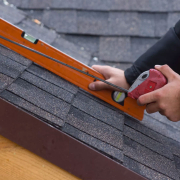
As you approach the roof’s hips and ridges, you will need to cut the shingles to fit the structure’s angles and contours. Measure each shingle carefully and cut with a utility knife to ensure precision. For the hips and ridges, consider using specially designed ridge cap shingles or cutting regular shingles to size and overlapping them for extra protection.
-
Finish with Ridge Caps
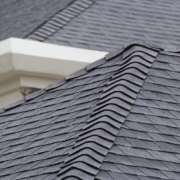
Once all of the main shingles have been installed, add ridge cap shingles to the roof’s hips and ridges. These specially shaped shingles provide a finished look while also protecting these vulnerable areas from water infiltration and wind damage. Use nails or roofing adhesive to secure the ridge cap shingles, following the manufacturer’s guidelines.
Overwhelmed? Leave Your Hip Roof Replacement to the Experts
While shingling a hip roof can be a rewarding DIY project, it requires time, skill, and attention to detail. One mistake could jeopardize the integrity of your roof and result in costly repairs down the road. Those who want to avoid the hassle and get professional results should hire experienced roofers. Contact the professionals at Dream Home for an asphalt roof replacement quote and rest easy knowing your home is in good hands. Investing in professional roofing services not only saves time and effort but also guarantees a sturdy and reliable roof that will protect your home for years to come.

