Dream Home Roofers
1-855-610-9720
Get Free Estimate 1-855-610-9720
Free Estimate 1-855-610-9720
  • About us
    • Reviews
    • Careers
    • Financing
    • Blogs
  • Services
    • Roofing
      • Replacement
      • Repair
      • Inspection
    • Gutters
      • Gutter Protection
  • Service Area
    • Turnersville, NJ
    • West Caldwell, NJ
    • King of Prussia, PA
    • Laurel, MD
    • Fairfax, VA
  • Current Specials
  • Contact Us
  • Menu Menu
Act Now for 50% OFF Materials. Click here for details.

How to Fix Loose Shingles

April 3, 2024/in Roof Repair/by Dream Home Roofers

Restore the Protection of Your Asphalt Roof

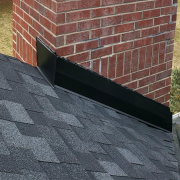
If your property has withstood a severe storm and some shingles have been misplaced, it is important to promptly address any lifted or damaged shingles to prevent further issues. A properly installed and secure roof can withstand extreme temperatures, strong winds, and moisture. If you have a small roofing issue, learning how to fix loose shingles is a relatively simple task. It is important to exercise caution when working at heights and always use a stable ladder that extends beyond the roof edge. Instead of tackling this yourself, we strongly recommend contacting a professional roofer such as Dream Home, so that you know the problem will be resolved properly.

Tools You Need to Fix Loose Shingles

Ensure you have the necessary tools and materials on hand before starting the repair process. Ideally, you’ll have some spare shingles from previous replacements. If not, you’ll need to purchase a package that closely matches your existing roof. You’ll also need a ladder, hammer, pry bar, utility knife, trowel, rag, roofing cement, replacement shingles, and 1-3/4 inch galvanized roofing nails. These items are essential for completing the job efficiently and effectively.

Directions for Fixing Loose Shingles

  1. Carefully lift the shingle tabs covering the nails.
  2. Insert the pry bar beneath the damaged shingle, lifting each nail slightly.
  3. Position the pry bar on top of the loose shingle and remove each nail completely.
  4. Repeat this process for each affected shingle.
  5. Ensure that the nails securing the lower row of shingles are also securing the row above.
  6. Lift undamaged shingles to access the lower row, and remove the nails holding it in place.
  7. Remove or trim damaged shingles with a utility knife.
  8. Seal any cracks or tears in the roofing paper with roofing cement.
  9. Apply roofing cement to secure the new shingles in place.
  10. Nail the new shingles using the original nail holes.
  11. Secure any loosened undamaged shingles and seal each nail head with roofing cement.

Contact the Expert Roofers at Dream Home

For a lasting solution to ensure the longevity and protection of your home, reach out to the professional roofers at Dream Home. With our expertise in replacing asphalt shingle roofs, NJ, PA, and MD residents can trust their homes will be protected against the elements for years to come. When you’re wondering how to fix loose shingles, don’t hesitate to contact Dream Home to schedule a consultation and explore how we can enhance the durability and resilience of your roof.

0 0 Dream Home Roofers https://dreamhomeroofers.com/wp-content/uploads/2024/09/dhr-logo.png Dream Home Roofers2024-04-03 22:49:072025-01-03 20:59:35How to Fix Loose Shingles

How to Shingle a Valley

April 3, 2024/in Roof Repair/by Dream Home Roofers

A Step-by-Step Guide to Properly Shingling Your Roof’s Valleys

A roof valley is a critical area on your roof where two slopes intersect. Properly shingling a roof valley is critical for water runoff and protecting your home from leaks and water damage. While it appears to be a daunting task, with the right tools and techniques, you can learn how to shingle a valley. However, we strongly recommend getting a quote from a professional such as Dream Home to install your roof, but in this guide, we’ll walk you through the steps one by one.

Tools Needed to Complete the Job

You’ll need a set of essential tools to effectively shingle a roof valley. Gather shingles, roofing nails, and a hammer or nail gun for secure attachment. A utility knife comes in handy for the precise cutting of materials. Ensure you have roofing cement and roofing adhesive to seal edges and seams effectively. Also, have roofing felt on hand to provide an additional layer of protection against water infiltration. Having these tools readily available will streamline the shingling process and help achieve a professional result.

Step 1: Prepare the Roof Valley

Before you begin shingling, make sure the roof valley is clean and free of debris. Remove old shingles, nails, and any other impediments. Inspect the valley for signs of damage or decay, and make any needed repairs.

Step 2: Install Roofing Felt

Start by applying roofing felt along the length of the roof valley. Cut the felt to size with a utility knife and secure it with roofing nails or adhesive. This adds an extra layer of protection against water penetration.

Step 3: Start Adding the Shingles

Begin shingling at the bottom of the roof valley and work your way up. Position the first shingle so that it overhangs the valley’s edge by about 1 inch. Secure it in place with roofing nails, making sure the nails are flush with the shingles.

Step 4: Apply Roofing Cement

Apply a thin layer of roofing cement along the edge of the first shingle to seal the seam between the shingle and the valley. This helps prevent water from seeping underneath the shingles and causing leaks.

Step 5: Overlap Your Asphalt Shingles

Continue shingling, overlapping each row of shingles by at least 4 inches. Ensure that each shingle is securely fastened and that the edges are aligned neatly. Trim any excess shingle material as needed with a utility knife.

Step 6: Finish the Valley

Once you reach the top of the roof valley, trim the final shingle to fit and secure it in place with roofing nails or adhesive. Apply roofing cement along the edges to seal any gaps and ensure a watertight seal.

Step 7: Inspect and Clean Up

After completing the shingling process, thoroughly inspect the roof valley for any missed nails, loose shingles, or other imperfections. Clean up any debris or leftover materials from the work area to prevent accidents and maintain a tidy workspace.

Get a Quote from a Local Roofer to Do the Job Right

For professional assistance with roof replacement in New Jersey, Southeastern PA, and Eastern Maryland, contact the expert roofers at Dream Home. With our experience and expertise, we can provide you with an honest and reliable quote and ensure that your roof is in excellent condition for years to come. Protect your investment and home with quality roofing services from Dream Home, and reach out to us if you’re wondering how to shingle a valley.

0 0 Dream Home Roofers https://dreamhomeroofers.com/wp-content/uploads/2024/09/dhr-logo.png Dream Home Roofers2024-04-03 22:44:572025-01-03 20:55:32How to Shingle a Valley
Fix a leaking roof

How to Fix a Leaking Roof From the Inside

March 1, 2024/in Roof Repair/by Dream Home Roofers

Your Temporary Solution Before Calling the Dream Home Professionals

A leaking roof is more than just an inconvenience; it’s a signal that your home’s protective barrier has been compromised. Ignoring it can lead to significant damage, including mold, structural issues, and damaged insulation. While a permanent fix often requires professional intervention, there are steps you can take to mitigate damage from the inside until you can get the experts in. That said, when it comes to a lasting solution for how to fix a leaking roof from the inside, the professionals at Dream Home Roofers are your go-to for a roof replacement. Here’s what you can do in the meantime.

1. Contain the Water

Place a bucket or a container under the leak to catch the water. If the water splashes onto your floors, consider placing an old t-shirt or towel at the bottom of the bucket to absorb the impact. Remember, this is a temporary fix to prevent water damage to your home’s interiors.

2. Locate the Source

Finding the exact point of entry can be challenging, especially during heavy rain. Start by looking for any visible signs on the ceiling such as dark spots, mold, or moisture. If accessible, venture into the attic with a flashlight. Often, the entry point of water is away from the leak, so look for any wet surfaces, mold, or damaged roofing materials.

3. Make a Temporary Patch

Once you’ve located the source of the leak, you can make a temporary patch. One method involves using roofing tar. Using a putty knife, spread the tar over the leaking area on the inside. Then, place a piece of plywood or shingle on top of the tar and apply another layer of tar over the patch. Remember, this is a temporary solution and might not withstand long-term exposure to water.

4. Seal Around Fixtures

If the leak is coming through a fixture, such as a vent or chimney, you might be able to stop the leak by applying caulk around the fixture’s base. Use a high-quality, waterproof caulk suitable for exterior use. Be generous but precise, ensuring you cover any potential entry points for water.

5. Considerations and Precautions

While these steps can provide a temporary fix, it’s crucial to understand their limitations. Working on a roof, even from the inside, poses risks, and some leaks may be symptomatic of more significant, structural issues. Always prioritize safety and don’t hesitate to seek professional advice if you’re unsure.

Why Dream Home for Your Roof Replacement?

When temporary fixes no longer cut it, it’s time to call in the professionals. Dream Home has been providing top-tier roof replacement services for years, ensuring homes are protected and beautified. Our team of experts is equipped with the knowledge, skills, and tools to diagnose your roofing issues accurately and provide a lasting solution. Here’s why Dream Home stands out:

  • Expertise and Experience: Our team has extensive experience in dealing with all types of roofing materials and problems.
  • Quality Materials: We use only the best materials to ensure your new roof is durable, weather-resistant, and aesthetically pleasing.
  • Customer Satisfaction: Our goal is to ensure you are fully satisfied with our work, from the initial consultation to the final inspection.
  • Warranty and Support: We offer comprehensive warranties and stand by our work, giving you peace of mind.

Contact Dream Home Roofers Today

A leaking roof can quickly escalate into a larger problem. While the steps outlined above can provide a temporary solution, it’s essential to address the issue at its root. The professionals at Dream Home are here to help you every step of the way, from diagnosis to a beautifully replaced roof that stands the test of time. Don’t wait for the problem to worsen. Contact us online today for a consultation and take the first step towards a secure, leak-free home, or if you still are questioning how to fix a leaking roof from the inside.

https://dreamhomeroofers.com/wp-content/uploads/2024/03/how-to-fix-a-leaking-roof-from-the-inside-blog-img.jpg 720 1280 Dream Home Roofers https://dreamhomeroofers.com/wp-content/uploads/2024/09/dhr-logo.png Dream Home Roofers2024-03-01 22:52:092025-01-03 16:17:16How to Fix a Leaking Roof From the Inside
Roof leak around chimney

How to Fix a Roof Leak Around a Chimney

February 27, 2024/in Roof Repair/by Dream Home Roofers

Fixing a Roof Leak Around a Chimney

Repairing a roof leak around a chimney demands immediate attention to prevent further damage. If water is coming in near your chimney, inadequate chimney flashing could be the cause. While a DIY solution might suffice, it is best to contact roofing experts for this issue. To address chimney flashing issues, follow these steps outlined for how to fix a roof leak around a chimney. Dream Home Roofers always recommends that you hire a licensed roofer so that you and your home remain safe.

Tools & Materials Needed to Fix Your Roof

Ensure your extension ladder extends at least 3 feet past the roof edge for safety. Opt for polyurethane flashing sealant for its ability to expand and contract with temperature changes. If your roof has a steep pitch, employ a roof safety harness for protection.

  • Extension ladder
  • Roof safety harness
  • Work gloves
  • Wire brush
  • Chisel
  • Hammer drill
  • Masonry screws
  • Caulking gun
  • Polyurethane flashing sealant
  • Utility knife
  • Garden hose

Step by Step Instructions to Fix the Leak:

  1. Position the extension ladder securely and ascend to the roof.
  2. Examine the chimney flashing, ensuring no debris obstructs your view. Thoroughly check all edges for gaps allowing water ingress.
  3. Eliminate any loose or deteriorated sealant using a chisel and wire brush.
  4. Apply fresh flashing sealant along all flashing edges. Modify the tube tip with a utility knife to produce a 1/4-inch sealant bead.
  5. If any flashing is loose, apply sealant beneath the loose sections.
  6. Use a hammer drill to affix additional masonry screws to secure loose flashing.
  7. Seal exposed screw heads with sealant.
  8. Once the sealant sets, test the repair by running water around the chimney with a garden hose for 5 minutes.
  9. If leakage persists, search for overlooked gaps and apply additional sealant.

Consider Professional Roof Inspection

If you find that the flashing is absent altogether or if the leak stubbornly persists despite your best efforts, it may be time to turn to the expertise of a professional roofing contractor. Dream Home Roofers, known for our excellence in asphalt roof replacements, is here to offer tailored solutions to address all your roofing concerns. With our extensive experience and commitment to quality craftsmanship, we specialize in providing top-notch services that ensure the longevity and structural integrity of your home. Don’t let unresolved roofing issues compromise your comfort and security. Contact us today for a roofing estimate you can trust.

https://dreamhomeroofers.com/wp-content/uploads/2024/02/how-to-fix-a-roof-leak-around-a-chimney-blog-image.jpg 720 1280 Dream Home Roofers https://dreamhomeroofers.com/wp-content/uploads/2024/09/dhr-logo.png Dream Home Roofers2024-02-27 00:17:362025-01-03 20:36:14How to Fix a Roof Leak Around a Chimney

How to Patch a Hole in a Roof

February 14, 2024/in Roof Repair/by Dream Home Roofers

Stop Leaks from Roof Damage

Your roof might require repair if a strong gust of wind causes a tree branch to penetrate it. Removing an old satellite dish or vent might also create a hole that needs fixing. Regardless of the reason for your roof’s damage, it’s crucial to complete the task before rain sets in. The process of repairing a hole in the roof is manageable if you have basic carpentry skills. In this guide, the professionals at Dream Home Roofers walk you through the steps of how to patch a hole in a roof.

Necessary Tools & Materials

  • Extension ladder
  • Pry bar
  • Hammer
  • Utility knife
  • Measuring tape
  • Reciprocating saw
  • Liquid nails
  • 2 x 4 lumber
  • Roof decking of the same thickness as existing deck
  • Tar paper
  • New shingles

How to Repair a Hole in the Roof

  1. Position the ladder securely, climb onto the roof, and locate the hole.
  2. Utilize a pry bar to lift the shingles off the damaged area, starting with those above the hole and working downward.
  3. Extract all nails with a claw hammer.
  4. Use a utility knife to cut the tar paper in the damaged region.
  5. Employ a reciprocating saw to cut a square or rectangle around the hole, avoiding roof rafters. Ensure all damaged decking is removed. If the damage spans a rafter, you may need to cut out two squares.
  6. With the deck edges exposed, measure the board thickness to determine the size of the replacement decking.
  7. Measure the opening and cut a piece of new decking to fit.
  8. Measure and cut 2 x 4 lumber to construct braces across and around the gap. Attach the braces to rafters around the edges of the gap using 10-penny nails. Leave the edges of each brace exposed around the opening for the patch.
  9. Dry-fit the patch and adjust its size if needed.
  10. Apply liquid nails to the patch and press it into place.
  11. Nail the patch to the braces with 8-penny nails.
  12. Spread roofing tar over the patch seams.
  13. Cut tar paper to fit over the area. Slide the upper edge beneath the existing tar paper or shingles and overlap the bottom edge by 2 inches.
  14. Nail the tar paper with roofing nails.
  15. Begin nailing on new shingles from the bottom of the exposed area.
  16. Apply roofing tar over shingle nails.

Get Assistance With Roof Repairs Today

A roof with significant damage or rotted decking requires more than just a patch. The roofing specialists at Dream Home Roofers are ready to assist and can efficiently and affordably repair or replace your roof. If you live in the Delaware Valley, contact us today to discuss your roofing needs, or if you’re still wondering how to patch a hole in a roof.

0 0 Dream Home Roofers https://dreamhomeroofers.com/wp-content/uploads/2024/09/dhr-logo.png Dream Home Roofers2024-02-14 14:38:032024-02-14 14:38:03How to Patch a Hole in a Roof
Page 2 of 212

Pages

  • About us
  • Blogs
  • Careers
  • Contact Us
  • Current Specials at Dream Home Roofers
  • Financing
  • Gutter Guards in the Delaware Valley
  • Gutters in Delaware Valley
  • Home
  • No Office Location
  • Privacy Policy
  • Reliable Roof Repair Services in Allentown, PA
  • Reliable Roof Repair Services in Atlantic City, NJ
  • Reliable Roof Repair Services in Bethesda, MD
  • Reliable Roof Repair Services in Bethlehem, PA
  • Reliable Roof Repair Services in Blairstown, NJ
  • Reliable Roof Repair Services in Boonsboro, MD
  • Reliable Roof Repair Services in Bowie, MD
  • Reliable Roof Repair Services in Burlington, NJ
  • Reliable Roof Repair Services in Camden, NJ
  • Reliable Roof Repair Services in Cherry Hill, NJ
  • Reliable Roof Repair Services in Chester, PA
  • Reliable Roof Repair Services in Clifton, NJ
  • Reliable Roof Repair Services in Columbia, MD
  • Reliable Roof Repair Services in Dundalk, MD
  • Reliable Roof Repair Services in Egg Harbor, NJ
  • Reliable Roof Repair Services in Ellicott City, MD
  • Reliable Roof Repair Services in Elm, PA
  • Reliable Roof Repair Services in Frankford, NJ
  • Reliable Roof Repair Services in Freehold, NJ
  • Reliable Roof Repair Services in Gaithersburg, MD
  • Reliable Roof Repair Services in Germantown, MD
  • Reliable Roof Repair Services in Glen Burnie, MD
  • Reliable Roof Repair Services in Gloucester Township, NJ
  • Reliable Roof Repair Services in Hamilton, NJ
  • Reliable Roof Repair Services in Harrisburg, PA
  • Reliable Roof Repair Services in Lancaster, PA
  • Reliable Roof Repair Services in Laurel, MD
  • Reliable Roof Repair Services in Lebanon, PA
  • Reliable Roof Repair Services in Levittown, PA
  • Reliable Roof Repair Services in Mahwah, NJ
  • Reliable Roof Repair Services in Monroe, NJ
  • Reliable Roof Repair Services in Mount Laurel, NJ
  • Reliable Roof Repair Services in Norristown, PA
  • Reliable Roof Repair Services in Philadelphia, PA
  • Reliable Roof Repair Services in Potomac, MD
  • Reliable Roof Repair Services in Reading, PA
  • Reliable Roof Repair Services in Rockville, MD
  • Reliable Roof Repair Services in Severn, MD
  • Reliable Roof Repair Services in Silver Spring, MD
  • Reliable Roof Repair Services in Smithsburg, MD
  • Reliable Roof Repair Services in Somerset, NJ
  • Reliable Roof Repair Services in Tinton Falls, NJ
  • Reliable Roof Repair Services in Towson, MD
  • Reliable Roof Repair Services in Union, NJ
  • Reliable Roof Repair Services in Vineland, NJ
  • Reliable Roof Repair Services in Voorhees, NJ
  • Reliable Roof Repair Services in Waldorf, MD
  • Reliable Roof Repair Services in Washington Township, NJ
  • Reliable Roof Repair Services in Weston, PA
  • Reviews
  • Roof Inspection in Delaware Valley
  • Roof Inspection in Turnersville, NJ
  • Roof Inspection in West Caldwell, NJ
  • Roof Inspections in Laurel, MD
  • Roof Repair
  • Roof Repair in Cherry Hill, NJ
  • Roof Repair in Columbia, MD
  • Roof Repair in Delaware Valley
  • Roof Repair in Harrisburg, PA
  • Roof Repair in Lancaster, PA
  • Roof Repair in Philadelphia, PA
  • Roof Repair in Turnersville, NJ
  • Roof Repair in Vineland, NJ
  • Roof Repair in West Caldwell, NJ
  • Roof Repair Services in Bethlehem, King of Prussia, PA
  • Roof Repair Services in King of Prussia, PA
  • Roof Repair Services in Norristown, King of Prussia, PA
  • Roof Replacement in Cherry Hill, NJ
  • Roof Replacement in Columbia, MD
  • Roof Replacement in Delaware Valley
  • Roof Replacement in Harrisburg, PA
  • Roof Replacement in King of Prussia, PA
  • Roof Replacement in Lancaster, PA
  • Roof Replacement in Laurel, MD
  • Roof Replacement in Philadelphia, PA
  • Roof Replacement in Turnersville, NJ
  • Roof Replacement in Vineland, NJ
  • Roof Replacement in West Caldwell, NJ
  • Roofing Company in Fairfax, VA
  • Roofing Company in King of Prussia, PA
  • Roofing Company in Laurel, MD
  • Roofing Company in Maryland
  • Roofing Company in New Jersey
  • Roofing Company in Pennsylvania
  • Roofing Company in Turnersville, NJ
  • Roofing Company in West Caldwell, NJ
  • Roofing in Allentown, PA
  • Roofing in Atlantic City, NJ
  • Roofing in Bethesda, MD
  • Roofing in Bethlehem, PA
  • Roofing in Blairstown, NJ
  • Roofing in Boonsboro, MD
  • Roofing in Bowie, MD
  • Roofing in Burlington, NJ
  • Roofing in Camden, NJ
  • Roofing in Cherry Hill, NJ
  • Roofing in Chester, PA
  • Roofing in Clifton, NJ
  • Roofing in Columbia, MD
  • Roofing in Delaware Valley
  • Roofing in Delaware Valley
  • Roofing in Delaware Valley
  • Roofing in Dundalk, MD
  • Roofing in Egg Harbor, NJ
  • Roofing in Ellicott City, MD
  • Roofing in Elm, PA
  • Roofing in Frankford, NJ
  • Roofing in Freehold, NJ
  • Roofing in Gaithersburg, MD
  • Roofing in Germantown, MD
  • Roofing in Glen Burnie, MD
  • Roofing in Gloucester Township, NJ
  • Roofing in Hamilton, NJ
  • Roofing in Harrisburg, PA
  • Roofing in King of Prussia, PA
  • Roofing in Lancaster, PA
  • Roofing in Laurel, MD
  • Roofing in Lebanon, PA
  • Roofing in Lehigh Valley
  • Roofing in Levittown, PA
  • Roofing in Mahwah, NJ
  • Roofing in Maryland
  • Roofing in Monroe, NJ
  • Roofing in Mount Laurel, NJ
  • Roofing in New Jersey
  • Roofing in Norristown, PA
  • Roofing in Pennsylvania
  • Roofing in Philadelphia, PA
  • Roofing in Potomac, MD
  • Roofing in Reading, PA
  • Roofing in Rockville, MD
  • Roofing in Severn, MD
  • Roofing in Silver Spring, MD
  • Roofing in Smithsburg, MD
  • Roofing in Somerset, NJ
  • Roofing in South Jersey
  • Roofing in Tinton Falls, NJ
  • Roofing in Towson, MD
  • Roofing in Turnersville, NJ
  • Roofing in Union, NJ
  • Roofing in Vineland, NJ
  • Roofing in Voorhees, NJ
  • Roofing in Waldorf, MD
  • Roofing in Washington Township, NJ
  • Roofing in West Caldwell, NJ
  • Roofing in Weston, PA
  • Service Area
  • Services
  • Template About Our Team
  • Template All Brands Logos
  • Template All Brands Logos New
  • Template Blogs
  • Template Certification
  • Template Financing Banner
  • Template Gutter Brands
  • Template our Process
  • Template Our Work
  • Template Project Block
  • Template Review Banner
  • Template Review Banner (King of Prussia, PA)
  • Template Review Banner (Laurel, MD)
  • Template Review Banner (Turnersville, NJ)
  • Template Review Banner (West Caldwell, NJ)
  • Template Roofing Brands
  • Template Service Blocks (All)
  • Template Service Blocks (King of Prussia, PA)
  • Template Service Blocks (Laurel, MD)
  • Template Service Blocks (Turnersville, NJ)
  • Template Service Blocks (West Caldwell, NJ)

Categories

  • Blog
  • Roof Installation
  • Roof Repair
  • Roof Replacement
  • Roofing
  • Uncategorized

Archive

  • March 2025
  • February 2025
  • January 2025
  • December 2024
  • November 2024
  • October 2024
  • August 2024
  • July 2024
  • June 2024
  • May 2024
  • April 2024
  • March 2024
  • February 2024
  • November 2023
  • October 2023

Our Office Locations

Map icon 501 NJ‑168, Turnersville, NJ 08012

Map icon 175 Fairfield Ave, Suite 2B, West Caldwell, NJ 07006

Map icon 144 E. Dekalb Pike, Suite 200, King of Prussia, PA 19406

Map icon 8920 Stephens Rd, #104, Laurel, MD 20723

Map icon 4085 Chain Bridge Rd, Suite 302, Fairfax, VA 22030

NJ Lic. #13VH11352200 | PA Lic. #PA161658 | MD Lic. #157465

Privacy Policy | Service Area

Follow Us

Check out our social pages and let us know how we’re doing See the latest from Dream Home Roofers and let us know what we can do for you.

BBB Accredited

BBB Accredited

Local Roofing Contractors
Financing
Careers
Contact

© 2025 Dream Home Roofers Roofing Contractor Marketing Provided by Robben Media

Scroll to top