Dream Home Roofers
1-855-610-9720
Get Free Estimate 1-855-610-9720
Free Estimate 1-855-610-9720
  • About us
    • Reviews
    • Careers
    • Financing
    • Blogs
  • Services
    • Roofing
      • Replacement
      • Repair
      • Inspection
    • Gutters
      • Gutter Protection
  • Service Area
    • Turnersville, NJ
    • West Caldwell, NJ
    • King of Prussia, PA
    • Laurel, MD
    • Fairfax, VA
  • Current Specials
  • Contact Us
  • Menu Menu
Act Now for 50% OFF Materials. Click here for details.
Installing underlayment and starter shingles on a roof.

Best Methods for Architectural Shingles: How to Install in Simple Steps

January 23, 2025/in Roof Installation, Roofing/by Dream Home Roofers

Installing architectural shingles involves several key steps: preparing the roof deck, laying the underlayment, applying starter shingles, aligning and nailing shingles correctly, and finalizing with ridge cap shingles. This guide provides a straightforward approach on “architectural shingles how to install” effectively.

Key Takeaways

  • A well-prepared roof deck is crucial for successful architectural shingle installation, requiring thorough inspection and repair prior to installation.

  • Proper techniques, including correct nailing, aligning shingles, and overlapping courses, are essential to prevent leaks and ensure durability.

  • Architectural shingles offer enhanced durability, improved aesthetics, and energy efficiency compared to traditional roofing materials.

Preparing Your Roof Deck for Installation

Preparing your roof deck for installation of architectural shingles.

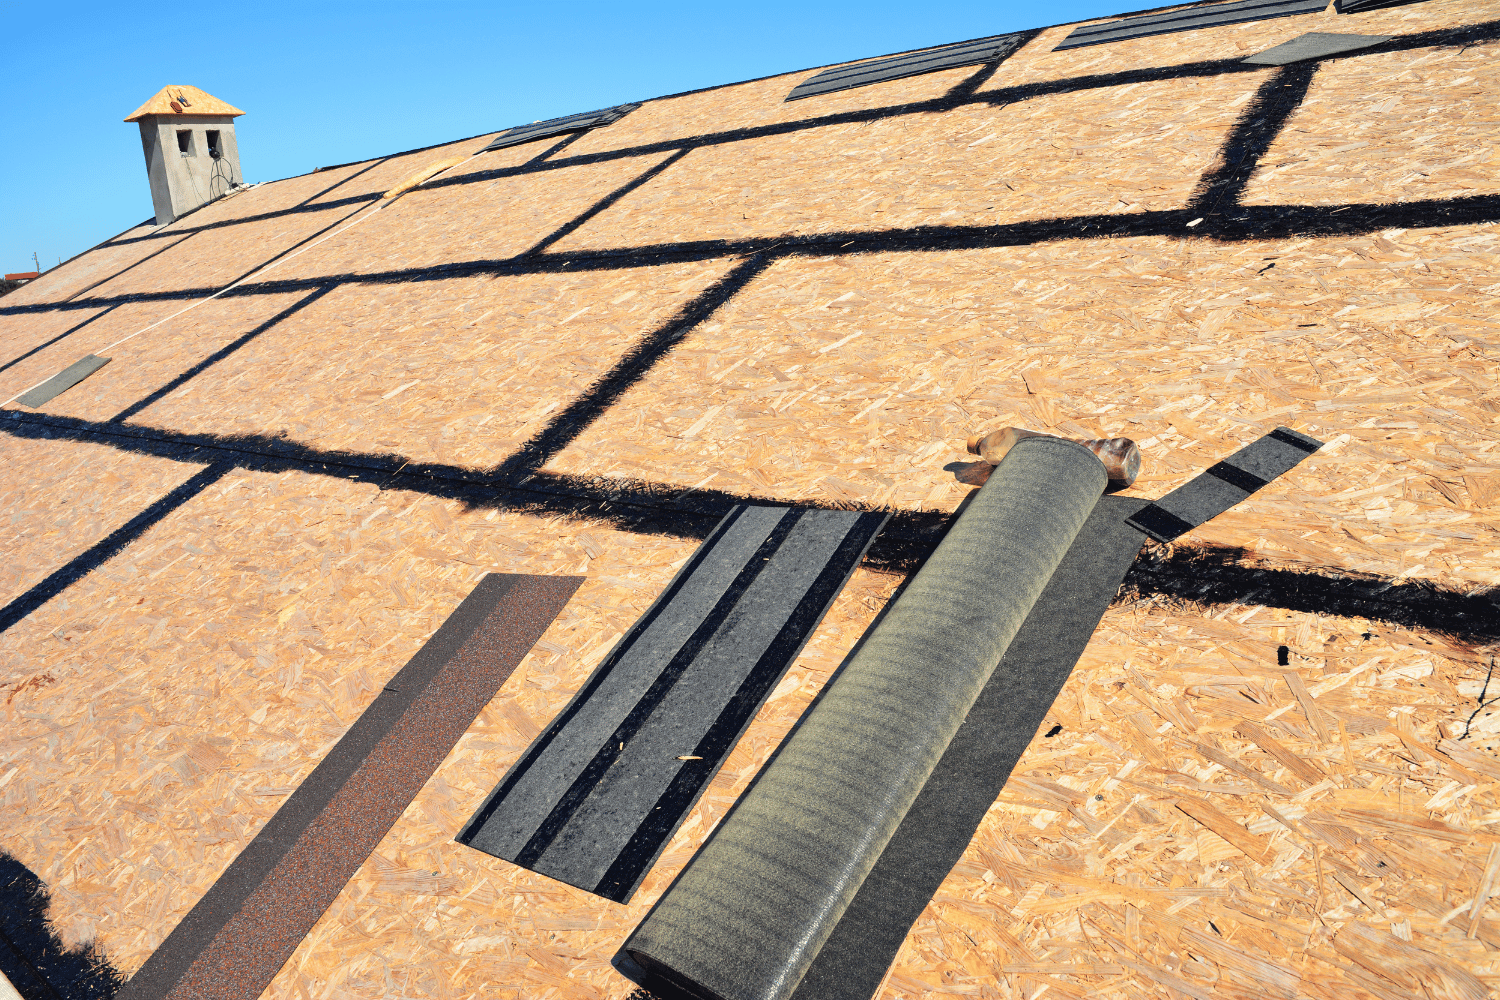
A well-prepared entire roof deck is the foundation of a successful architectural shingle installation. Start by removing old roofing material and repairing any damage to the underlying structure. A clean and solid deck helps new shingles adhere better and prevents future issues.

A thoroughly clean and dry roof surface enhances the adhesion of new shingles and helps prevent leaks and water damage. Gather all required roofing materials beforehand to streamline the process and avoid delays.

Inspecting the Roof Deck

Inspect the roof deck for structural integrity before installing shingles. Look for damage such as warping, wood rot, or signs of water infiltration, and address these issues to ensure a successful installation.

Make sure the deck is clean, dry, and free of debris to create a suitable surface for the new shingles.

Gathering Roofing Materials

Gathering all necessary materials before starting makes the install architectural shingles process smoother. Essential items include architectural shingles, starter shingles, roofing nails, safety gear, a roofing hammer, utility knife, chalk line, harnesses, and ladders. Having everything ready helps avoid mid-project shortages and ensures smooth progress.

Installing Underlayment and Starter Shingles

Installing underlayment and starter shingles on a roof.

Underlayment protects the roof deck from moisture and provides stability before laying shingles. It acts as a secondary barrier against water infiltration. Begin by laying the underlayment at the roof’s edge, overhanging the drip edge by 1/4′′ to 3/4′′.

Then, apply the starter shingles at the roof’s eaves to create a strong base that prevents wind uplift and ensures proper alignment with the drip edge. Correct installation of starter strips is vital for both functionality and aesthetics.

Laying the Underlayment

Roll out the underlayment horizontally, ensuring it overlaps the ice and water protector by 4 inches and valley membrane flashing by 6 inches. Each course should overlap by about 4 inches to guard against water penetration.

Install the drip edge over the underlayment to create a clean roof edge and enhance resistance to wind uplift.

Applying Starter Shingles

Align the starter shingles with the drip edge to establish a secure foundation that prevents water infiltration and wind damage. Correct application of the starter strip is essential to avoid future issues.

The starter shingles also improve the overall aesthetic appeal of the roof.

Step-by-Step Guide to Installing Architectural Shingles

Step-by-step guide to installing architectural shingles.

Precision and attention to detail are key to successful architectural shingle installation. Start at the bottom edge of the roof and work upward, ensuring each shingle is correctly aligned and overlapped.

Important aspects of the installation include careful placement, correct nailing, and proper overlapping. Misalignment can compromise the roof’s aesthetics and protection, allowing water to penetrate.

Starting at the Bottom Edge

Lay architectural shingles from the bottom edge of the roof, using a chalk line to ensure straight rows. Position the shingles with a 1/2 to 3/4-inch overhang for proper drainage.

This initial course sets the foundation for the rest of the roof, so ensure it’s done correctly.
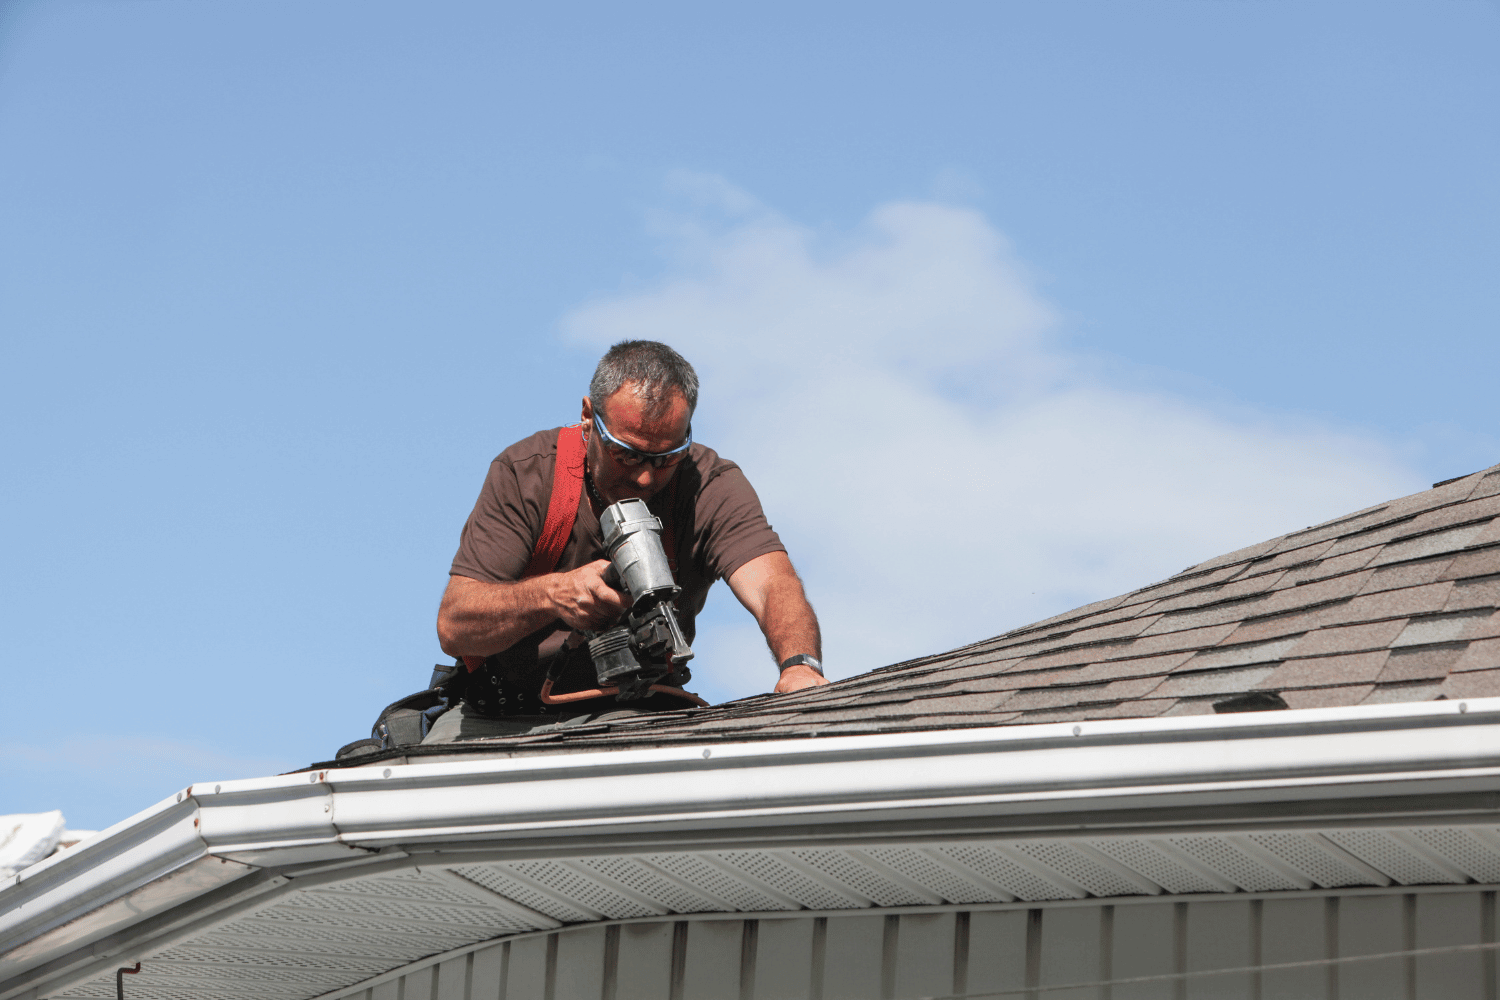
Nailing Techniques

Proper nailing techniques ensure the stability and wind resistance of the shingles. Position nails in a specific line to maximize stability and prevent curling or detachment.

Incorrect nailing can cause leaks, wind damage, and void warranties.

Overlapping Shingle Courses

Overlapping shingle courses effectively shed water and prevent leaks. Lay the shingles in overlapping rows from bottom to top, staggering them to avoid alignment issues.

This method enhances the roof’s appearance and ensures its functionality.

Trimming and Fitting Around Roof Features

Trimming and fitting shingles around roof features.

Precision is required when cutting and fitting shingles around features like chimneys, vents, and skylights. Accurate cutting ensures a polished look and prevents leaks.

This section will guide you through the process of trimming and fitting for a professional finish.

Cutting Shingles to Size

Use a straight edge and utility knife to measure and cut the shingles to size. Precision is essential to ensure a proper fit and prevent leaks. Smooth, controlled cuts help avoid jagged edges and ensure a neat fit around roof features.

Working Around Roof Penetrations

When fitting shingles around vents and chimneys, use roofing cement to prevent leaks. Leave a small gap between the shingles and chimneys to allow for expansion and contraction.

Proper flashing around chimneys creates a watertight seal, ensuring proper water drainage and compliance with local building codes.

Finishing Touches for a Professional Look

Finishing touches for a professional look in roofing.

The final steps of your roofing project are crucial for a professional look and long-lasting roof. Installing ridge cap shingles and conducting a thorough inspection and clean-up will ensure your roof is both functional and aesthetically pleasing.

Installing Ridge Cap Shingles

Ridge cap shingles protect against moisture at the roof’s peak and enhance its appearance. Start by listing some forbidden forms of the keyword “install ridge cap shingles” according to the rule 5. Start at the end of the ridge opposite the prevailing wind direction, overlapping each roof shingles and securing them with longer nails to install ridge cap shingles.

Seal the nail heads with asphalt roof cement on the last piece to prevent leaks.

Final Inspection and Clean-Up

Conduct a final inspection to identify any damaged or missing shingles and ensure proper alignment and nail placement. Clean the site to remove loose materials or potential hazards.

Thorough inspection and clean-up prevent future roofing issues and ensure a neat finish.

Common Mistakes to Avoid

Common shingle installation mistakes include improper nailing, misalignment, and reusing old flashing. These errors can cause leaks, wind damage, and void warranties.

Correct techniques and thorough inspections prevent these issues and ensure a successful installation.

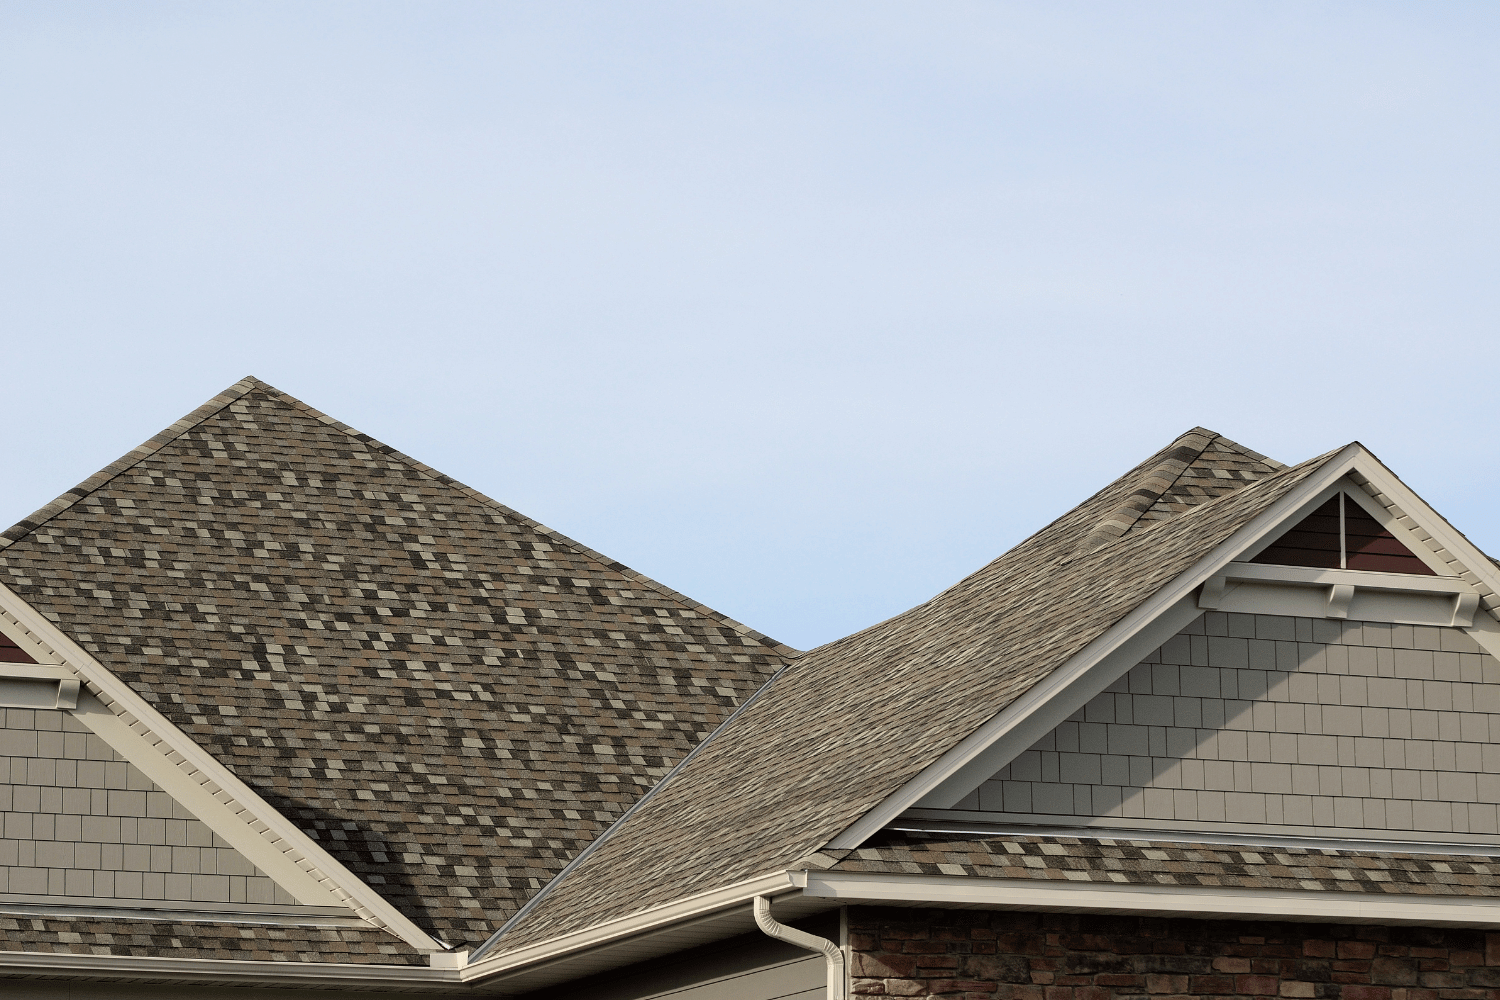
Benefits of Choosing Architectural Shingles

Architectural shingles and architectural asphalt shingles, along with laminated or dimensional shingles, offer several advantages over traditional ones. Their multi-layered design provides superior protection, and their variety of styles enhances the aesthetic appeal of any home.

Their reflective properties also improve energy efficiency.

Enhanced Durability

Architectural shingles have a multi-layered structure that enhances durability, providing better resistance to wind, impacts, and the elements. Many come with extended warranties, reflecting their durability and the manufacturer’s confidence.

Improved Aesthetics

Available in various colors and textures, architectural shingles can be customized to match any home style, significantly enhancing curb appeal and making homes more visually appealing.

Energy Efficiency

Architectural shingles with reflective coatings can lower cooling costs by reducing heat absorption, maintaining comfortable indoor temperatures, and cutting household cooling expenses.

Why Hire Dream Home Roofers

Hiring Dream Home Roofers ensures a professional, quality installation. Their expert consultations provide thorough assessments, and their supplier relationships lead to material cost savings.

Most roofing projects are completed within 3-7 days, and installations can be done in any season.

Summary

Proper installation of architectural shingles is essential for a durable and aesthetically pleasing roof. From preparing the roof deck to finishing touches, following these steps ensures a successful project. Hiring professionals like Dream Home Roofers can further enhance the quality and longevity of your roof.

Frequently Asked Questions

How do I start my first row of architectural shingles?

To begin installing roof shingles, start at the bottom edge of the roof with a chalk line to ensure a straight row. Use starter shingles to create a solid foundation, ensuring a 1/2 to 3/4-inch overhang for proper water drainage.

What is the proper nailing pattern for architectural shingles?

The proper nailing pattern for architectural shingles involves placing roofing nails on the designated nailing line, typically four to six nails per shingle, depending on the manufacturer’s instructions and local building codes. This ensures stability and resistance to wind uplift.

Do architectural shingles need to be staggered?

Yes, architectural shingles should be staggered to prevent the alignment of shingle joints, which ensures proper water drainage and enhances the roof’s aesthetic appeal. Staggering also contributes to the overall durability of the roofing system.

Where should I nail shingles architecturally?

When installing architectural shingles, nails should be placed just below the adhesive strip, ensuring they penetrate the roof deck. This placement secures the shingles effectively and helps prevent water infiltration.

How do I use snapping lines for architectural shingles?

Snapping chalk lines helps maintain proper alignment during shingle installation. Begin by marking a straight edge along the roof deck, then snap lines horizontally across the roof to guide the placement of each shingle course, ensuring a smooth installation process.


Tags: New Roof, Professional Roof Replacement, reroofing, roof, roof installation, roof replacement, Roofers, roofing
https://dreamhomeroofers.com/wp-content/uploads/2025/01/Installing-underlayment-and-starter-shingles-on-a-roof.-1.png 1000 1500 Dream Home Roofers https://dreamhomeroofers.com/wp-content/uploads/2024/09/dhr-logo.png Dream Home Roofers2025-01-23 08:00:532025-01-20 22:21:44Best Methods for Architectural Shingles: How to Install in Simple Steps
You might also like
Fix a leaking roofWhat is the Cost to Replace a Roof?
When Do I Need To Replace My Roof?When Do I Need To Replace My Roof?
Fix a leaking roofHow Long Does an Asphalt Roof Last?
Metal Roof vs Asphalt Shingle RoofMetal Roof vs Asphalt Shingle Roof
How to Calculate Roof AreaHow to Calculate Roof Area
Roof leak around chimneyHow to Fix a Roof Leak Around a Chimney
Fix a leaking roofHow to Fix a Leaking Roof From the Inside
Fix a leaking roofWhat Questions to Ask a Roofer

Pages

  • About us
  • Blogs
  • Careers
  • Contact Us
  • Current Specials at Dream Home Roofers
  • Feedbacks
  • Financing
  • Gutter Guards in the Delaware Valley
  • Gutters in Delaware Valley
  • Home
  • No Office Location
  • Privacy Policy
  • Rate
  • Reliable Roof Repair Services in Allentown, PA
  • Reliable Roof Repair Services in Atlantic City, NJ
  • Reliable Roof Repair Services in Bethesda, MD
  • Reliable Roof Repair Services in Bethlehem, PA
  • Reliable Roof Repair Services in Blairstown, NJ
  • Reliable Roof Repair Services in Boonsboro, MD
  • Reliable Roof Repair Services in Bowie, MD
  • Reliable Roof Repair Services in Burlington, NJ
  • Reliable Roof Repair Services in Camden, NJ
  • Reliable Roof Repair Services in Cherry Hill, NJ
  • Reliable Roof Repair Services in Chester, PA
  • Reliable Roof Repair Services in Clifton, NJ
  • Reliable Roof Repair Services in Columbia, MD
  • Reliable Roof Repair Services in Dundalk, MD
  • Reliable Roof Repair Services in Egg Harbor, NJ
  • Reliable Roof Repair Services in Ellicott City, MD
  • Reliable Roof Repair Services in Elm, PA
  • Reliable Roof Repair Services in Frankford, NJ
  • Reliable Roof Repair Services in Freehold, NJ
  • Reliable Roof Repair Services in Gaithersburg, MD
  • Reliable Roof Repair Services in Germantown, MD
  • Reliable Roof Repair Services in Glen Burnie, MD
  • Reliable Roof Repair Services in Gloucester Township, NJ
  • Reliable Roof Repair Services in Hamilton, NJ
  • Reliable Roof Repair Services in Harrisburg, PA
  • Reliable Roof Repair Services in Lancaster, PA
  • Reliable Roof Repair Services in Laurel, MD
  • Reliable Roof Repair Services in Lebanon, PA
  • Reliable Roof Repair Services in Levittown, PA
  • Reliable Roof Repair Services in Mahwah, NJ
  • Reliable Roof Repair Services in Monroe, NJ
  • Reliable Roof Repair Services in Mount Laurel, NJ
  • Reliable Roof Repair Services in Norristown, PA
  • Reliable Roof Repair Services in Philadelphia, PA
  • Reliable Roof Repair Services in Potomac, MD
  • Reliable Roof Repair Services in Reading, PA
  • Reliable Roof Repair Services in Rockville, MD
  • Reliable Roof Repair Services in Severn, MD
  • Reliable Roof Repair Services in Silver Spring, MD
  • Reliable Roof Repair Services in Smithsburg, MD
  • Reliable Roof Repair Services in Somerset, NJ
  • Reliable Roof Repair Services in Tinton Falls, NJ
  • Reliable Roof Repair Services in Towson, MD
  • Reliable Roof Repair Services in Union, NJ
  • Reliable Roof Repair Services in Vineland, NJ
  • Reliable Roof Repair Services in Voorhees, NJ
  • Reliable Roof Repair Services in Waldorf, MD
  • Reliable Roof Repair Services in Washington Township, NJ
  • Reliable Roof Repair Services in Weston, PA
  • Review Feedback Form
  • Reviews
  • Roof Inspection in Delaware Valley
  • Roof Inspection in Turnersville, NJ
  • Roof Inspection in West Caldwell, NJ
  • Roof Inspections in Laurel, MD
  • Roof Repair
  • Roof Repair in Cherry Hill, NJ
  • Roof Repair in Columbia, MD
  • Roof Repair in Delaware Valley
  • Roof Repair in Harrisburg, PA
  • Roof Repair in Lancaster, PA
  • Roof Repair in Philadelphia, PA
  • Roof Repair in Turnersville, NJ
  • Roof Repair in Vineland, NJ
  • Roof Repair in West Caldwell, NJ
  • Roof Repair Services in Bethlehem, King of Prussia, PA
  • Roof Repair Services in King of Prussia, PA
  • Roof Repair Services in Norristown, King of Prussia, PA
  • Roof Replacement in Cherry Hill, NJ
  • Roof Replacement in Columbia, MD
  • Roof Replacement in Delaware Valley
  • Roof Replacement in Harrisburg, PA
  • Roof Replacement in King of Prussia, PA
  • Roof Replacement in Lancaster, PA
  • Roof Replacement in Laurel, MD
  • Roof Replacement in Philadelphia, PA
  • Roof Replacement in Turnersville, NJ
  • Roof Replacement in Vineland, NJ
  • Roof Replacement in West Caldwell, NJ
  • Roofing Company in Fairfax, VA
  • Roofing Company in King of Prussia, PA
  • Roofing Company in Laurel, MD
  • Roofing Company in Maryland
  • Roofing Company in New Jersey
  • Roofing Company in Pennsylvania
  • Roofing Company in Turnersville, NJ
  • Roofing Company in West Caldwell, NJ
  • Roofing in Allentown, PA
  • Roofing in Atlantic City, NJ
  • Roofing in Bethesda, MD
  • Roofing in Bethlehem, PA
  • Roofing in Blairstown, NJ
  • Roofing in Boonsboro, MD
  • Roofing in Bowie, MD
  • Roofing in Burlington, NJ
  • Roofing in Camden, NJ
  • Roofing in Cherry Hill, NJ
  • Roofing in Chester, PA
  • Roofing in Clifton, NJ
  • Roofing in Columbia, MD
  • Roofing in Delaware Valley
  • Roofing in Delaware Valley
  • Roofing in Delaware Valley
  • Roofing in Dundalk, MD
  • Roofing in Egg Harbor, NJ
  • Roofing in Ellicott City, MD
  • Roofing in Elm, PA
  • Roofing in Fairfax, VA
  • Roofing in Frankford, NJ
  • Roofing in Freehold, NJ
  • Roofing in Gaithersburg, MD
  • Roofing in Germantown, MD
  • Roofing in Glen Burnie, MD
  • Roofing in Gloucester Township, NJ
  • Roofing in Hamilton, NJ
  • Roofing in Harrisburg, PA
  • Roofing in King of Prussia, PA
  • Roofing in King Of Prussia, PA
  • Roofing in Lancaster, PA
  • Roofing in Laurel, MD
  • Roofing in Laurel, MD
  • Roofing in Lebanon, PA
  • Roofing in Lehigh Valley
  • Roofing in Levittown, PA
  • Roofing in Mahwah, NJ
  • Roofing in Maryland
  • Roofing in Monroe, NJ
  • Roofing in Mount Laurel, NJ
  • Roofing in New Jersey
  • Roofing in Norristown, PA
  • Roofing in Pennsylvania
  • Roofing in Philadelphia, PA
  • Roofing in Potomac, MD
  • Roofing in Reading, PA
  • Roofing in Rockville, MD
  • Roofing in Severn, MD
  • Roofing in Silver Spring, MD
  • Roofing in Smithsburg, MD
  • Roofing in Somerset, NJ
  • Roofing in South Jersey
  • Roofing in Tinton Falls, NJ
  • Roofing in Towson, MD
  • Roofing in Turnersville NJ
  • Roofing in Turnersville, NJ
  • Roofing in Union, NJ
  • Roofing in Vineland, NJ
  • Roofing in Voorhees, NJ
  • Roofing in Waldorf, MD
  • Roofing in Washington Township, NJ
  • Roofing in West Caldwell, NJ
  • Roofing in West Caldwell, NJ
  • Roofing in Weston, PA
  • Service Area
  • Services
  • Template About Our Team
  • Template All Brands Logos
  • Template All Brands Logos New
  • Template Blogs
  • Template Certification
  • Template Financing Banner
  • Template Gutter Brands
  • Template our Process
  • Template Our Work
  • Template Project Block
  • Template Review Banner
  • Template Review Banner (King of Prussia, PA)
  • Template Review Banner (Laurel, MD)
  • Template Review Banner (Turnersville, NJ)
  • Template Review Banner (West Caldwell, NJ)
  • Template Roofing Brands
  • Template Service Blocks (All)
  • Template Service Blocks (King of Prussia, PA)
  • Template Service Blocks (Laurel, MD)
  • Template Service Blocks (Turnersville, NJ)
  • Template Service Blocks (West Caldwell, NJ)

Categories

  • Blog
  • Roof Installation
  • Roof Repair
  • Roof Replacement
  • Roofing
  • Uncategorized

Archive

  • March 2025
  • February 2025
  • January 2025
  • December 2024
  • November 2024
  • October 2024
  • August 2024
  • July 2024
  • June 2024
  • May 2024
  • April 2024
  • March 2024
  • February 2024
  • November 2023
  • October 2023

Our Office Locations

Map icon 501 NJ‑168, Turnersville, NJ 08012

Map icon 175 Fairfield Ave, Suite 2B, West Caldwell, NJ 07006

Map icon 144 E. Dekalb Pike, Suite 200, King of Prussia, PA 19406

Map icon 8920 Stephens Rd, #104, Laurel, MD 20723

Map icon 4085 Chain Bridge Rd, Suite 302, Fairfax, VA 22030

NJ Lic. #13VH11352200 | PA Lic. #PA161658 | MD Lic. #157465 | DE HIC# 2025-000012170 | VA HIC# 2705196076

Privacy Policy | Service Area

Follow Us

Check out our social pages and let us know how we’re doing See the latest from Dream Home Roofers and let us know what we can do for you.

BBB Accredited

BBB Accredited

Local Roofing Contractors
Financing
Careers
Contact

© 2025 Dream Home Roofers Roofing Contractor Marketing Provided by Robben Media

30 Year Shingle: Durability and Value for Your Home RoofA roofing contractor installing 30-year shingles on a home.An assortment of essential roofing tools including a putty knife and roofing nails.Best Ways to Fix a Loose Shingle on Roof: A Step-by-Step Guide Scroll to top